1988 PONTIAC FIERO engine oil
[x] Cancel search: engine oilPage 1732 of 1825

DOORS - F STYLE 5H-99
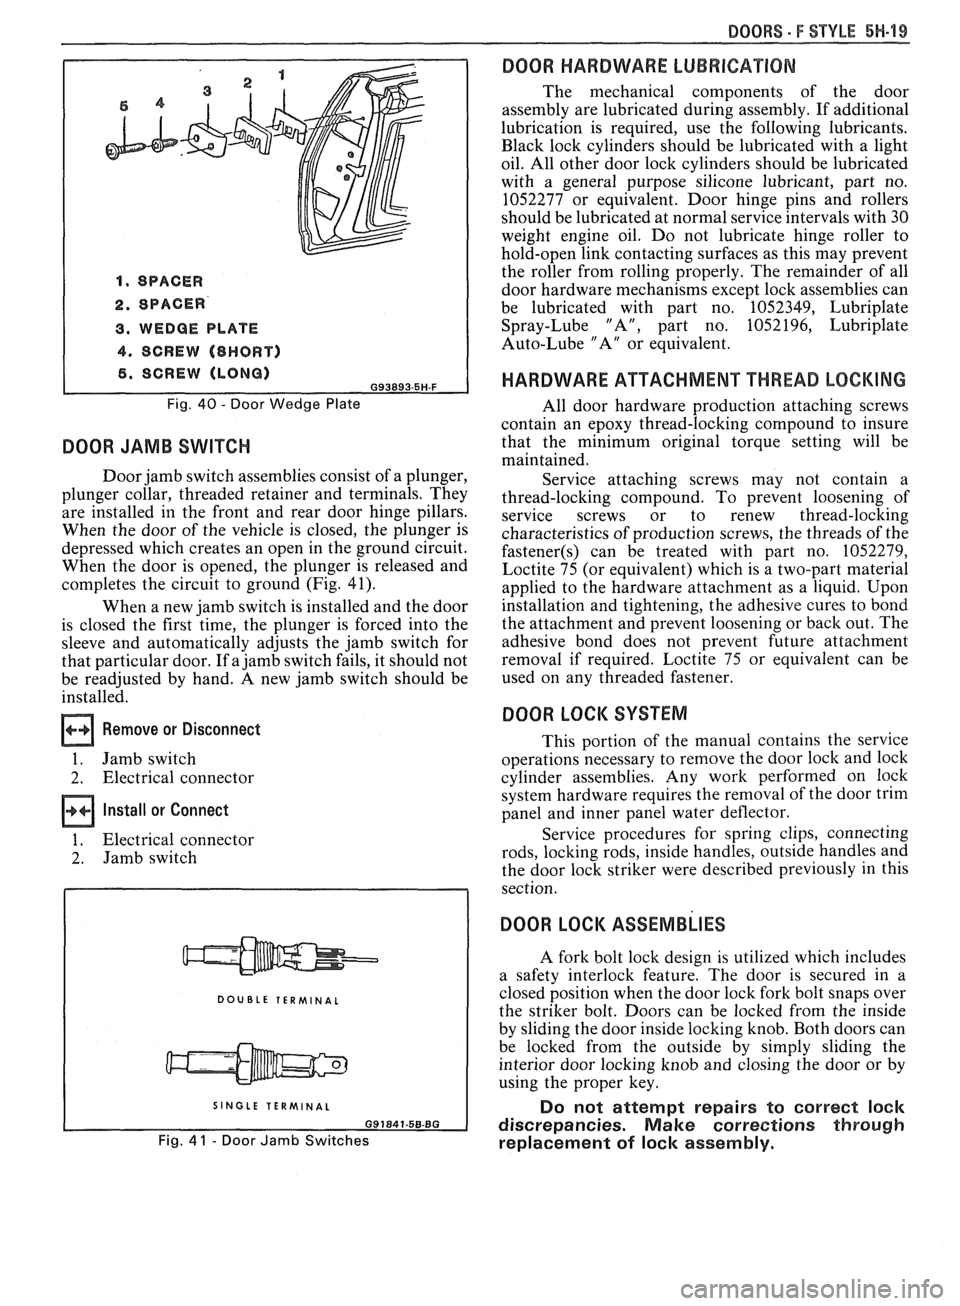
1. SPACER
2. SPACER
3. WEDGE PLATE
4. SCREW (8HORT)
6. SCREW (LONG) G93893.5H-F
Fig. 40 - Door Wedge Plate
DOOR JAMB SWITCH
Door jamb switch assemblies consist of a plunger,
plunger collar, threaded retainer and terminals. They
are installed in the front and rear door hinge pillars.
When the door of the vehicle is closed, the plunger is
depressed which creates an open in the ground circuit.
When the door is opened, the plunger is released and
completes the circuit to ground (Fig. 41).
When a new jamb switch is installed and the door
is closed the first time, the plunger is forced into the
sleeve and automatically adjusts the jamb switch for
that particular door. If a jamb switch fails, it should not
be readjusted by hand. A new jamb switch should be
installed.
Remove or Disconnect
1. Jamb switch
2. Electrical connector
Install or Connect
1. Electrical connector
2. Jamb switch
DOUBLE TERMINAL
I SINGLE TERMINAL I
Fig. 4 1 - Door Jamb Switches
DOOR HARDWARE LUBRICATION
The mechanical components of the door
assembly are lubricated during assembly. If additional
lubrication is required, use the following lubricants.
Black lock cylinders should be lubricated with a light
oil. All other door lock cylinders should be lubricated
with a general purpose silicone lubricant, part no.
1052277 or equivalent. Door hinge pins and rollers
should be lubricated at normal service intervals with 30
weight engine oil. Do not lubricate hinge roller to
hold-open link contacting surfaces as this may prevent
the roller from rolling properly. The remainder of all
door hardware mechanisms except lock assemblies can
be lubricated with part no. 1052349, Lubriplate
Spray-Lube "A", part no. 1052196, Lubriplate
Auto-Lube "A" or equivalent.
HARDWARE ATTACHMENT THREAD LOCKING
All door hardware production attaching screws
contain an epoxy thread-locking compound to insure
that the minimum original torque setting will be
maintained.
Service attaching screws may not contain a
thread-locking compound. To prevent loosening of
service screws or to renew thread-locking
characteristics of production screws, the threads of the
fastener(s) can be treated with part no. 1052279,
Loctite 75 (or equivalent) which is a two-part material
applied to the hardware attachment as a liquid. Upon
installation and tightening, the adhesive cures to bond
the attachment and prevent loosening or back out. The
adhesive bond does not prevent future attachment
removal if required. Loctite 75 or equivalent can be
used on any threaded fastener.
DOOR LOCK SYSTEM
This portion of the manual contains the service
operations necessary to remove the door lock and lock
cylinder assemblies. Any work performed on lock
system hardware requires the removal of the door trim
panel and inner panel water deflector.
Service procedures for spring clips, connecting
rods, locking rods, inside handles, outside handles and
the door lock striker were described previously in this
section.
DOOR LOCK ASSEMBLIES
A fork bolt lock design is utilized which includes
a safety interlock feature. The door is secured in a
closed position when the door lock fork bolt snaps over
the striker bolt. Doors can be locked from the inside
by sliding the door inside locking knob. Both doors can
be locked from the outside by simply sliding the
interior door locking knob and closing the door or by
using the proper key.
Do not attempt repairs to correct lock
discrepancies. Make corrections through
replacement of lock assembly.
Page 1736 of 1825

REAR QUARTERS - F STYLE 8H-1
SECTION 6H
REAR QUARTERS
NOTICE: The anti-theft label found on some major sheet metal, engines, and transmissions must be masked
prior to painting, rustproofing, undercoating, etc. The mask
must be removed following the above operations.
Failure to keep the label clean and readable may result in liability for violation of Federal Vehicle Theft Prevention
Standard, and subject the vehicle owner to possible suspicion that the part was stolen.
CONTENTS
Quarter Trim .................................................... 6H- 1
Lower Trim Finishing Panel ....................... 6H- 1
Body Lock Pillar Trim Finishing
Panel
., ....................................................... 6H- 1
Upper Trim Finishing Panel Insert ............. 6H- 1
....................................................... Speakers 6H- 1
Lift Window Upper Finishing
Molding
..................................................... 6H-2
....................... Upper Trim Finishing Panel 6H-2
QUARTER TRlM
QUARTER LOWER TRlM FINISHING PANEL
Removal and Installation (Fig. 1)
Remove body lock pillar finishing panel (Fig. 3).
Remove rear
seatback lock striker.
Remove retaining screw in rearward area of
quarter lower trim panel.
Remove rear screws from sill plate and carpet
retainer (Fig.
2).
Grasp quarter lower trim panel with hand; then
pull forward and down to disengage from
pinchweld flange at weatherstrip and quarter
upper trim finishing panel.
Remove seat belt through slot in trim panel.
Remove quarter lower trim finishing panel from
car by lifting up on rear portion of sill plate and
carpet retainer; then pull quarter trim rearward.
To install, place panel retaining slots under
quarter upper trim panel and apply upward
pressure to secure.
Position panel assembly to body. Thread lap and
shoulder belt through respective slots in panel.
Install attaching screws to secure panel to body.
Replace all previously removed components.
BODY LOCK PILLAR TRlM FINISHING PANEL
Removal and lnstallation (Fig. 3)
1. Remove trim panel attaching screws.
2. Using trim removing tool J-24595B, BT-7323A
or equivalent, carefully disengage nylon fasteners
that retain body lock pillar panel to quarter upper
trim finishing panel.
3. To install, reverse removal procedures. Spare
Tire Cover Trim Finishing
Panel
........................................................ 6H-3
Rear Stowage Compartment Box
Assembly
................................................... 6H-4
Luggage Shade Cover Assembly
................. 6H-4
Exterior Moldings
........................................... 6H-6
Fuel Tank Filler Door and Pocket
Assembly
....................................................... 6H-7
Spoiler Extension
............................ .. ........... 6H-7
QUARTER UPPER TRlM FINISHING PANEL
INSERT
Removal and Installation (Fig. 4)
1. Remove coat hook.
2. Grasp panel insert with hand and pull upward to
disengage retainers from cutout slots in quarter
upper trim finishing panel (Fig. 4).
3. To install, reverse removal procedures.
REAR QUARTER SPEAKERS
The rear quarter speakers are installed to a
speaker retainer. The retainer and speaker are then
attached to the quarter inner panel by screws.
Standard Speakers
Remove or Disconnect
1. Quarter upper trim finishing panel insert
2. Screws securing speaker retainer
3. Disconnect electrical
connector from speaker
4. Speaker
Install or Connect
1. Speaker to body
2. Electrical connector
3. Screws securing speaker to retainer
4. Quarter upper trim finishing panel insert
Subwoofer Speakers (2FS/FW/FX Styles)
Remove or Disconnect (Fig. 5)
1.
Quarter upper trim finishing panel insert (Fig. 4)
2. Body lock pillar trim finishing panel (Fig. 3)
3. Two rear screws from carpet retainer (Fig.
2)
4.
Quarter lower trim finishing panel
Page 1744 of 1825

REAR END - F STYLE 7H-1
SECTION 7H
REAR END
NOTICE: The anti-theft label found on some major sheet metal, engines, and transmissions must be masked
prior to painting, rustproofing, undercoating, etc. The mask
must be removed following the above operations.
Failure to keep the label clean and readable may result in liability for violation of Federal Vehicle Theft Prevention
Standard, and subject the vehicle owner to possible suspicion that the part was stolen.
CONTENTS
Moldings, Emblems and Name Plates ............ 7H- 1
Compartment Lift Window
.......................... ... 7H-2
Adjustments ........................... .. ................ 7H-2
Removal and Installation ............................. 7H-3
Removal of Lift Window Panel from
Glass
....................................................... 7H-3
Glass Replacement and Adjustment ........... 7H-5
Gas Support Assembly ............................. 7H-7
Lock Cylinder ....................... .. .............. 7H-8
REAR COMPARTMENT
The service operations for the removal,
installation, adjustment and sealing of the
compartment lift window assembly, individual
hardware components, moldings, emblems and name
plates attached to the compartment lift window or rear
end panel are contained in this section.
MOLDINGS, EMBLEMS AND NAME PLAES
The moldings, emblems and name plates used on
the rear compartment and rear end panels are adhesive
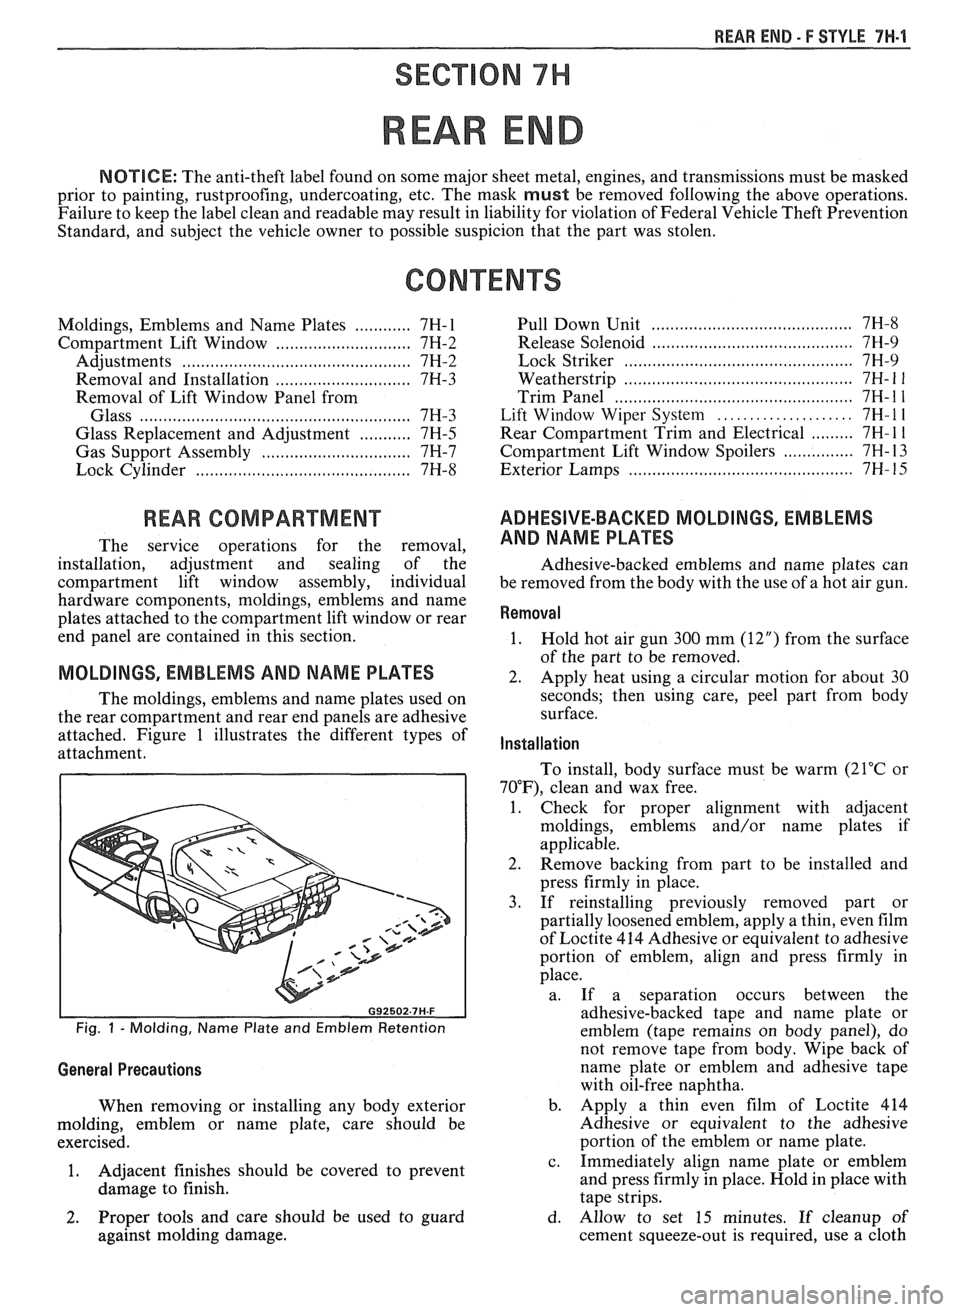
attached. Figure 1 illustrates the different types of
attachment.
Fig. 1 - Molding, Name Plate and Emblem Retention
General Precautions
When removing or installing any body exterior
molding, emblem or name plate, care should be
exercised.
1. Adjacent
finishes should be covered to prevent
damage to finish.
...................................... Pull Down Unit 7H-8
.......................................... Release Solenoid 7H-9
......... ..................................... Lock Striker ... 7H-9
................... ....................... Weatherstrip .. 7H- 1 1
.................................................. Trim Panel 7H- 1 1
..................... Lift Window Wiper System 7H- l l
......... Rear Compartment Trim and Electrical 7H- 1 1
............... Compartment Lift Window Spoilers 7H- 13
.......................................... Exterior Lamps 7H- 15
ADHESIVE-BACKED MOLDINGS, EMBLEMS
AND NAME PLATES
Adhesive-backed emblems and name plates can
be removed from the body with the use of a hot air gun.
Removal
1.
Hold hot air gun 300 mm (12") from the surface
of the part to be removed.
2. Apply heat using a circular motion for about 30
seconds; then using care, peel part from body
surface.
Installation
To install, body surface must be warm (21°C or
70"F), clean and wax free.
1. Check for proper alignment with adjacent
moldings, emblems and/or name plates if
applicable.
2. Remove backing from part to be installed and
press firmly in place.
3. If reinstalling previously removed part or
partially loosened emblem, apply a thin, even film
of Loctite 414 Adhesive or equivalent to adhesive
portion of emblem, align and press firmly in
place.
a. If a separation occurs between the
adhesive-backed tape and name plate or
emblem (tape remains on body panel), do
not remove tape from body. Wipe back of
name plate or emblem and adhesive tape
with oil-free naphtha.
b. Apply a thin even film of Loctite 414
Adhesive or equivalent to the adhesive
portion of the emblem or name plate.
c. Immediately align name plate or emblem
and press firmly in place. Hold in place with
tape strips.
2. Proper tools and care should be used to guard d. Allow to set 15 minutes. If cleanup of
against molding damage. cement squeeze-out is required, use a cloth
Page 1819 of 1825

4 . CHASSIS INDEX
Fitting Pistons ......................................... .6A 2.24
Front (Cover) Crankshaft Oil
Seal
V-6
......................................................... 6A2- 15
V-8
................................................... 6A3- 16
Gear or Sprocket
V-6
......................................................... .6A 2.26
V-8
........................................................ 6A2-28
Honing and Reboring Cylinders ................ 6A2-23
Intake Manifold and Gasket
V-6
......................................................... .6A 2.9
V-8
............................................................ 6A3-6
Main Bearings
V-6
......................................................... .6A 2. 19
V-8
.......................................................... 6A3-20
Oil Filter and Bypass Valve
...................... 6A3-27
Oil Pan and Pump Assembly
V-6
................................................. 6A2.17, 18
V-8
......................................................... 6A3- 18
Oil Seal (Front Cover)
V-6
......................................................... 6A2- 15
V-8 .......................................................... 6A3-16
Piston and Connecting Rod
V-6
......................................................... .6A 2.2 1
V-8
....................................................... .6A 3.23
Piston Rings V-6
......................................................... .6A 2.24
V-8
........................................................ .6A 3.23
Power Train Mounts
V-6
........................................................... .6A 2.7
V-8
.......................................................... 6A3-5
Rear Main Oil Seal
V-6
......................................................... .6A 2.2 1
V-8 ......................................................... .6A 3.22
Rocker Arm Assembly
V-6
............................................................ 6A2-8
V-8 ............................................................ 6A3-8
Rocker Arm and Push Rod
V-6
........................................................... .6A 2.8
V-8
........................................................ 6A3-8
Rocker Arm Studs 6A2- 13
V-6
......................................................... .6A 2. 13
V-8
.......................................................... 6A3-28
Sprocket or Gear Replacement
V-6
......................................................... .6A 2.26
V-8 .......................................................... 6A3-28
Timing Chain and Sprockets
6A2- 15
Torsional Damper
V-6
.......................................................... 6A2- 14
V-8
.......................................................... 6A3- 15
Valves V-6
........................................ .. ............... .6A 2. 14
V-8
......................................................... .6A 2. 15
Valve Guides
V-6
......................................................... .6A 2. 13
V-8
.......................................................... 6A3-14
Valve Lifters
V-6
......................................................... .6A 2. 1 1
V-8
.......................................................... 6A3-10
Valve Mechanism .................................... 6A 10
Valve Seats
V-6
....................................................... .6A 2. 14
V-8
.......................................................... 6A3-14
Valve Spring
.......................................................... V-6 A- 16
............................................................ V-8 6A3-9
................................. Valve Stem Oil Seal .6A 2. 10 Engine Cooling
........................................... Section
6B
Aluminum Radiator Service
............................ 6B-8
Diagnosis
........................................................ 6B-3. 8
Coolant System .............................................. 6B-4
Leak Testing
.................................................. 6B-8
On-Vehicle Pressure Testing
.......................... 6B-9
Repair Methods
........................................... 6B- 10
Special Tools
.............................................. 6B-14
General Description ......................................... .6 B- 1
Coolant Recovery System
.............................. 6B-3
Coolant Temperature Fan Switch
................ 6B-2
Fans
.............................................................. 6B-2
Radiator
...................................................... 6B-1
Radiator Cap
.................................................. 6B-1
Recovery Bottle
.............................................. 6B-2
Temperature Switch
...................................... 6B-2
Thermostat
.................................................... 6B-3
On-Vehicle Service
......................................... 6B- 14
Coolznt Recovery Bottle
............................. .6 B- 16
Electric Cooling Fan
................................... .6 B- 15
Radiator
....................................................... 6B1'
Thermostat ................................................ 5B-, .
Water Pump ................................... .... ......... 6B-15
Service Procedures
............................................ 6B-3
Cooling System Cure
................................. ... 6B-3
Draining and Refilling the
Cooling System
......................................... 6B-7
Drive Belt
................................................... 6B-7
Engine Electrical ...................................... Section 6D
Battery
............................................................. 6D1
Diagnosis
................................................... 6D 1-2
General Description
.................................. 6D 1-1
On-Car Service
.......................................... 6D 1-5
Charging System
............................................... 6D3
Diagnosis
.................................................... 6D3- 1
General Description
.............................. 6D3- 1
On-Vehicle Service
.................................... 6D3-2
Service Procedures
................................. 6D3- 1
Cranking System .......................... ........ ............ 6D2-
Diagnosis .................................................... 6D2- 1 I
General Description .................................. 6D2- 1
On-Car Service
......................................... 6D2J
................ . Engine Wiring .............................. ... 6D
General Description .................................. 6D5- 1
Ignition System
................................................. 6D4
Diagnosis
................................................... 6D4- 1
General Description
............................... 6D4- 1
On-Car Service
.......................................... 6D4-5
Service Procedures
.................................... 6D4-3
Engine Exhaust Systems
...................................... 6F
Engine
- General Information .............................. 6-1
Compression Test
................................................ 6-5
Engine Knock Diagnosis
................................. 6-4
Engine Mechanical
.............................................. 6-3
Engine Performance Diagnosis
.......................... 6-3
Engine Oil Pressure Light
.................................... 8C-3
Engine Performance Specifications
Chart
........................................................ 6E3-C13-3
Evaporator Core
.............................................. 1B 1-24
Exhaust Systems
.......................................... Section 6F
Catalytic Converters
........................................ 6F- 1
Clamp
................................................................ 6F- 1
Component Replacement
.................................. 6F-2
Hangers
......................................................... 6F- 1
Muffler ............................................................. 6F- 1
Removing and Installing Parts ........................ 6F-2
Resonator .......................................................... 6F- 1