1987 SUZUKI GRAND VITARA fuel filter
[x] Cancel search: fuel filterPage 2 of 962

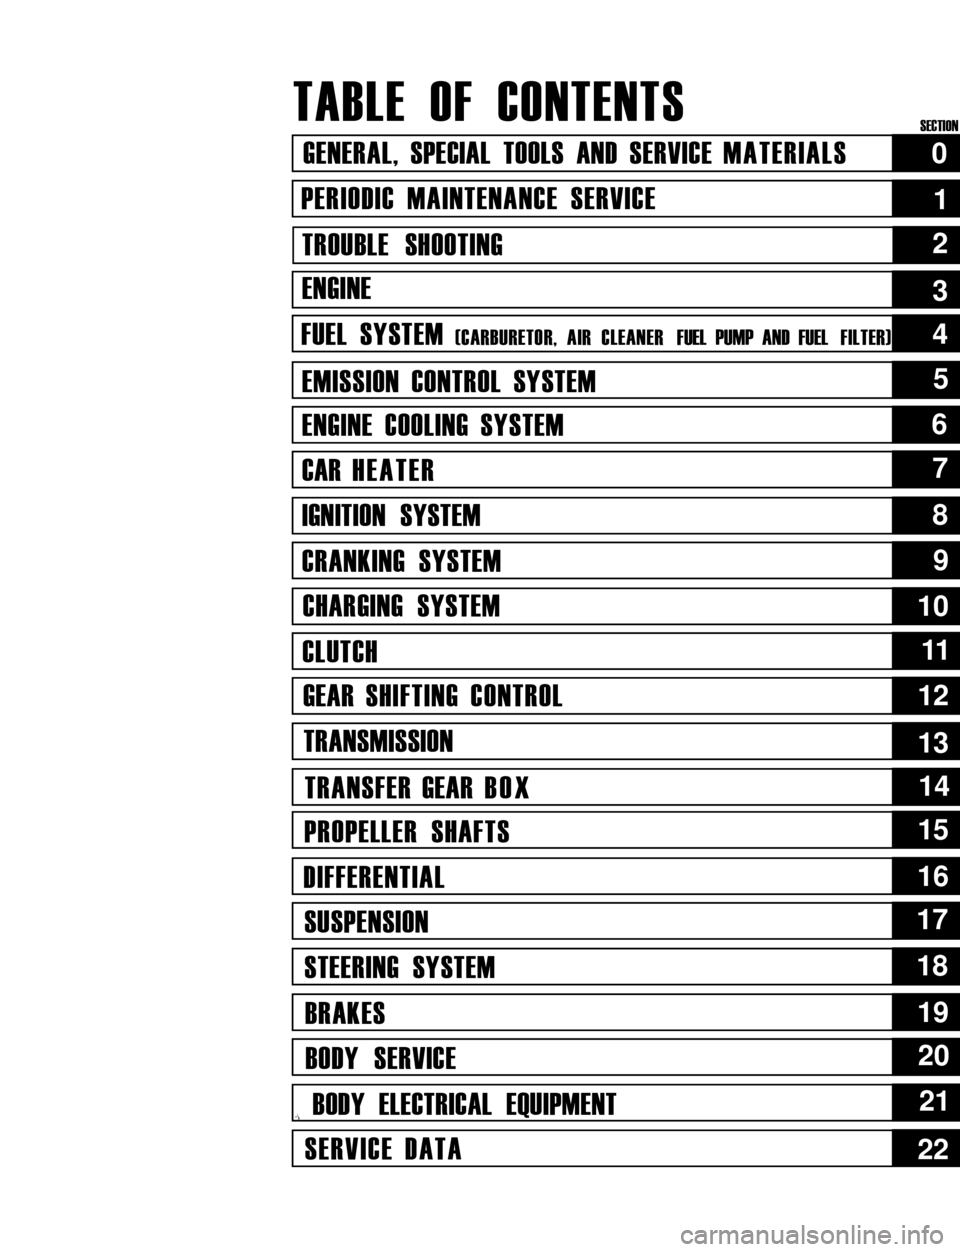
TABLE OF CONTENTS
GENERAL, SPECIAL TOOLS AND SERVICE MATERIALS
PERIODIC MAINTENANCE SERVICE
TROUBLE SHOOTING
ENGINE
FUEL SYSTEM (CARBURETOR, AIR CLEANER FUEL PUMP AND FUEL FILTER)
EMISSION CONTROL SYSTEM
ENGINE COOLING SYSTEM
CAR HEATER
IGNITION SYSTEM
CRANKING SYSTEM
CHARGING SYSTEM
CLUTCH
GEAR SHIFTING CONTROL
TRANSMISSION
TRANSFER GEAR BOX
PROPELLER SHAFTS
DIFFERENTIAL
SUSPENSION
STEERING SYSTEM
BRAKES
BODY SERVICE
,i BODY ELECTRICAL EQUIPMENT
SERVICE DATA
0
1
2
5
6
7
8
9
10
1111
12
13
14
15
16
17
18
19
20
21
22
4
3
SECTION
Page 30 of 962

21. FUEL TANK CAP GASKET INSPECTION
AND REPLACEMENT
Visually inspect gasket of fuel tank cap. If it is
damaged or deteriorated, replace it with new
one.
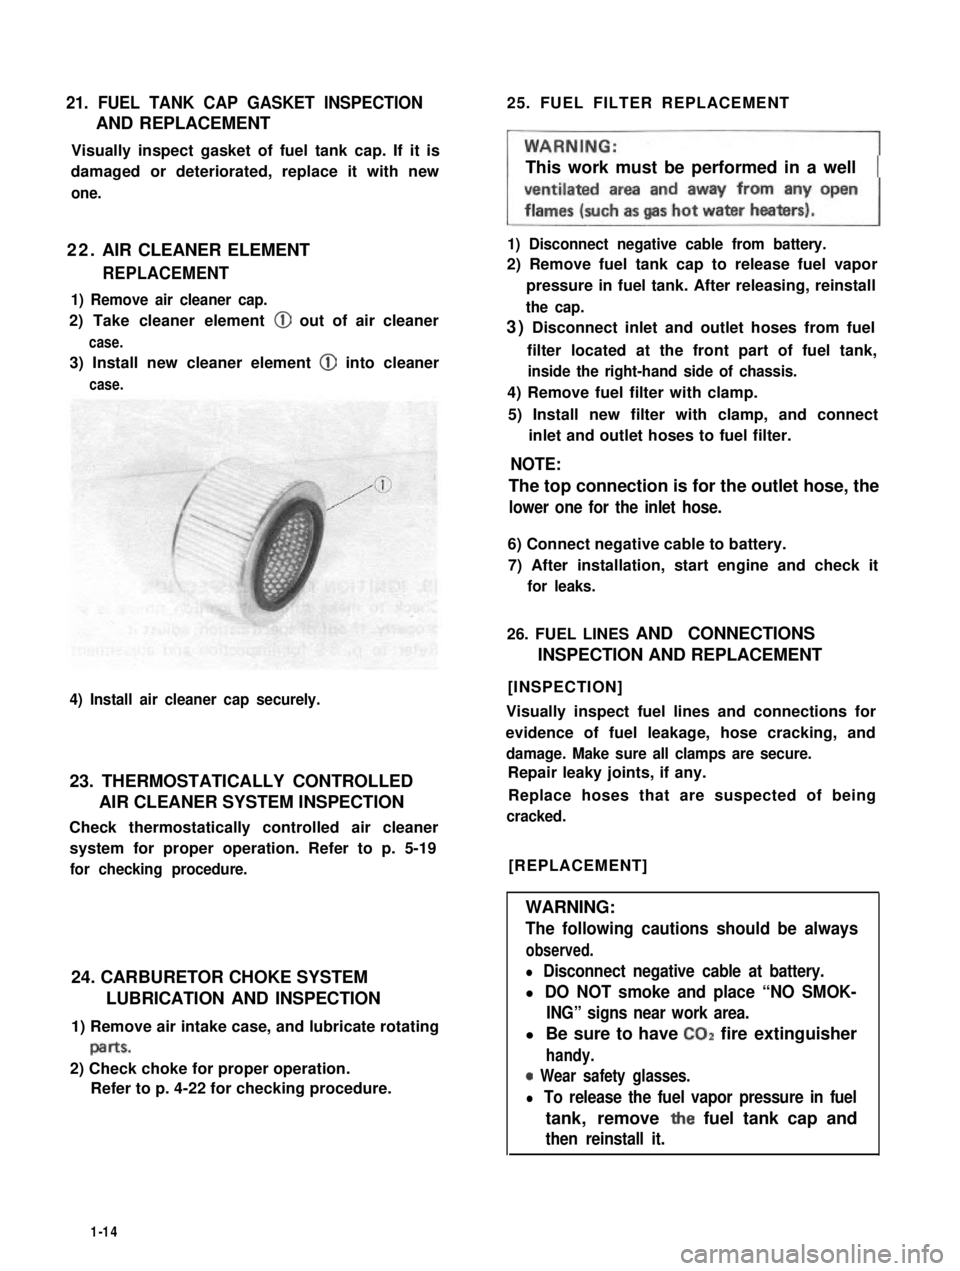
22. AIR CLEANER ELEMENT
REPLACEMENT
1) Remove air cleaner cap.
2) Take cleaner element @ out of air cleaner
case.
3) Install new cleaner element @ into cleaner
case.
4) Install air cleaner cap securely.
23. THERMOSTATICALLY CONTROLLED
AIR CLEANER SYSTEM INSPECTION
Check thermostatically controlled air cleaner
system for proper operation. Refer to p. 5-19
for checking procedure.
24. CARBURETOR CHOKE SYSTEM
LUBRICATION AND INSPECTION
1) Remove air intake case, and lubricate rotating
paItS.
2) Check choke for proper operation.
Refer to p. 4-22 for checking procedure.
25. FUEL FILTER REPLACEMENT
This work must be performed in a well
1) Disconnect negative cable from battery.
2) Remove fuel tank cap to release fuel vapor
pressure in fuel tank. After releasing, reinstall
the cap.
3) Disconnect inlet and outlet hoses from fuel
filter located at the front part of fuel tank,
inside the right-hand side of chassis.
4) Remove fuel filter with clamp.
5) Install new filter with clamp, and connect
inlet and outlet hoses to fuel filter.
NOTE:
The top connection is for the outlet hose, the
lower one for the inlet hose.
6) Connect negative cable to battery.
7) After installation, start engine and check it
for leaks.
26. FUEL LINES AND CONNECTIONS
INSPECTION AND REPLACEMENT
[INSPECTION]
Visually inspect fuel lines and connections for
evidence of fuel leakage, hose cracking, and
damage. Make sure all clamps are secure.
Repair leaky joints, if any.
Replace hoses that are suspected of being
cracked.
[REPLACEMENT]
WARNING:
The following cautions should be always
observed.
l Disconnect negative cable at battery.
l DO NOT smoke and place “NO SMOK-
ING” signs near work area.
l Be sure to have CO2 fire extinguisher
handy.
0 Wear safety glasses.
l To release the fuel vapor pressure in fuel
tank, remove the fuel tank cap and
then reinstall it.
1-14
Page 31 of 962

1) Replace fuel hoses (pipe to fuel pump, pipe to
fuel filter and breather hose) in fuel feed and
return lines with new ones.
2) Remove fuel tank.
3) Replace return hose (tank to return pipe)
with new one.
4) Clamp hoses securely.
5) Install fuel tank referring to p. 4-35.
6) After installation, start engine and check it
for leaks.
27. IDLE SPEED INSPECTION
NOTE:
Before starting engine, place transmission gear
shift lever in “Neutral”, and set parking brake
and block drive wheels.
1) Warm up engine to normal operating tempe-
rature.
2) Check to ensure that idle speed is within
750 - 850 r/min (rpm).
3) If idle speed is not within specified range,
adjust idle speed. Refer to MAINTENANCE
SERVICE (p. 4-26) for procedures to check
and adjust idle speed.
28. IDLE MIXTURE INSPECTION
1) Warm up engine to normal operating tem-
perature.
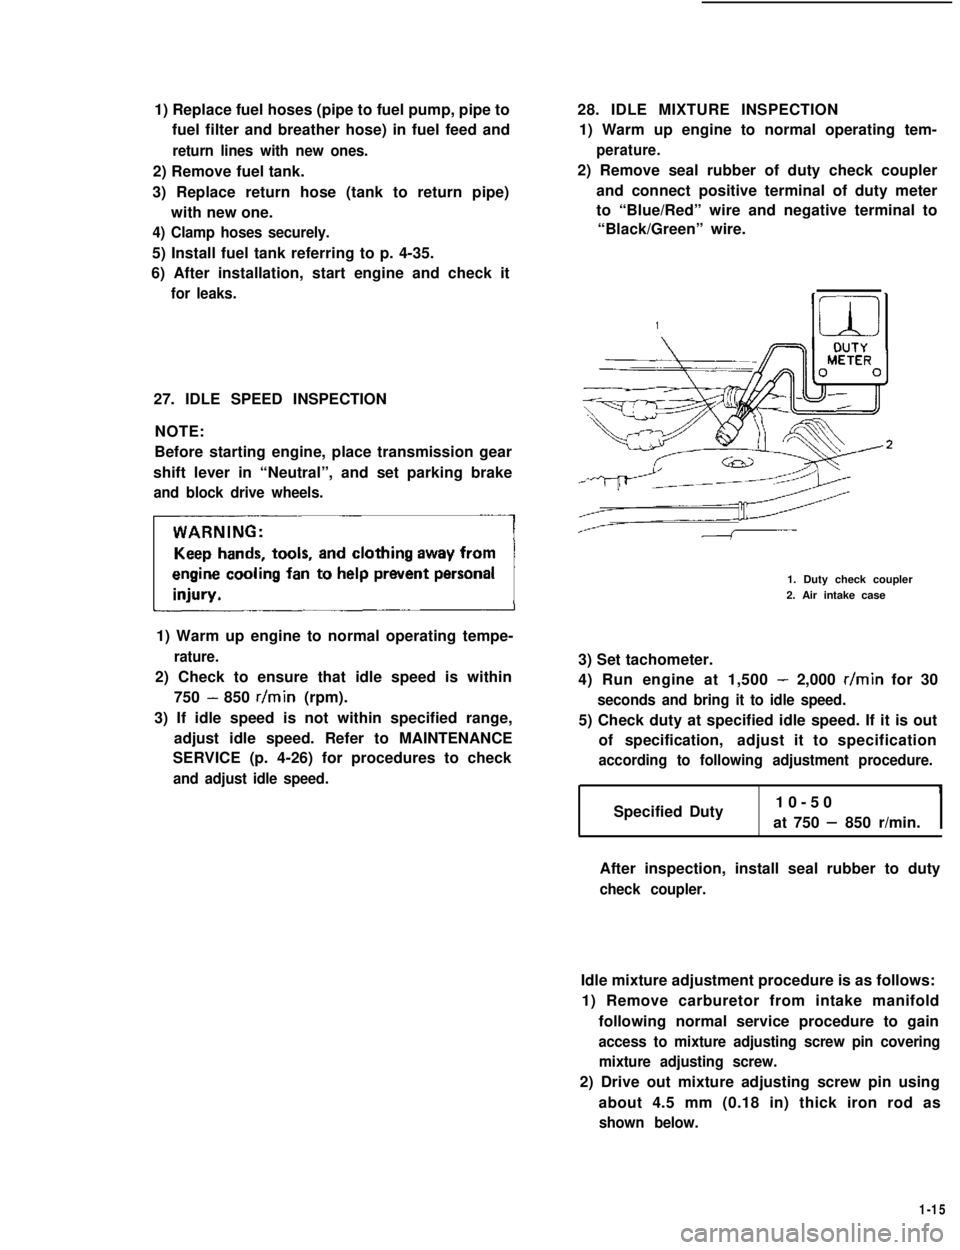
2) Remove seal rubber of duty check coupler
and connect positive terminal of duty meter
to “Blue/Red” wire and negative terminal to
“Black/Green” wire.
1
1. Duty check coupler
2. Air intake case
3) Set tachometer.
4) Run engine at 1,500 - 2,000 r/min for 30
seconds and bring it to idle speed.
5) Check duty at specified idle speed. If it is out
of specification,adjust it to specification
according to following adjustment procedure.
Specified Duty10-50
at 750 - 850 r/min.I
After inspection, install seal rubber to duty
check coupler.
Idle mixture adjustment procedure is as follows:
1) Remove carburetor from intake manifold
following normal service procedure to gain
access to mixture adjusting screw pin covering
mixture adjusting screw.
2) Drive out mixture adjusting screw pin using
about 4.5 mm (0.18 in) thick iron rod as
shown below.
1-15
Page 40 of 962

2-1. ENGINE
Cond it ion
Poor starting
(Hard starting)
Possible cause
Starter will not run
1. Main fuse blown off
2. Contact not closing in main switch, or this
switch open-circuited
3. Run-down battery
4. Defective magnetic switch of starter
5. Loose battery terminal connection
6. Defective brushes in starter
7. Loose battery cord connection
8. Open in field or armature circuit of starter.
Correction
Replace
Repair or replace
Recharge
Replace
Clean and retighten
Replace
Retighten
Repair or replace
No sparking
1. Defective spark plugAdjust gap, or replace
2. High tension cord short-circuited (grounded)Repair or replace
3. Cracked rotor or cap in distributorReplace
4. Defective signal generator or ignitorReplace
5. Maladjusted signal rotor air gap.Adjust
6. Contact not closing positively in main switch,Replace
or this switch open-circuited
7. Loose or blown fuseSet right or replace
8. Improper ignition timingAdjust
9. Defective ignition coil.Replace
Faulty intake and exhaust systems
1. Carburetor out of adjustment
2. Fuel pump not discharging adequately
3. Clogged fuel filter
4. Defective choke mechanism
5. Loose intake manifold
6. Dirty and clogged carburetor
7. Float level out of adjustment
8. Clogged fuel hose or pipe
9. Not enough fuel in the tank
10. Malfunctioning fuel cut solenoid valve
Adjust
Replace
Clean, or replace
Repair or replace
Retighten
Disassemble and clean
Adjust
Clean or replace
Refill
Check solenoid valve for
proper operation and
replace if necessary
Abnormal engine internal condition
1. Ruptured cylinder head gasket
2. Improper valve clearance
3. Weakened or broken valve spring
4. Loose manifold, permitting air to be
drawn in
5. Worn pistons, rings or cylinders
Replace
Adjust
Replace
Retighten and, as neces-
sary, replace gasket
Replace worn rings and
pistons and rebore as
necessary
2-2
Page 41 of 962

Condition
Poor starting
(Hard starting)
Possible cause
6. Broken valve timing belt
7. Poor valve seating
8. Wrong kind of engine oil
9. Burnt valves
10. Sticky valve stem
Correction
Replace
Repair or replace
Replace
Replace
Correct or replace valve
and guide
Emission control
1. Malfunctioning PCV valve
2. Loose connection or disconnection of
vacuum hoses
Replace.
Connect securely.
3. ECM is poorly grounded.Ground ECM securely
Not enough powerInadequate compression
1. Improper valve clearance
2. Valves not seating tight
3. Valve stems tending to seize
4. Broken or weakened valve spring
5. Piston rings seized in grooves, or broken
6. Worn pistons, rings or cylinders
Adjust
Repair
Replace
Replace
Replace
Replace worn parts and
rebore as necessary
7. Leaky cylinder head gasketReplace
Improperly timed ignition
1. Improper ignition timing
2. Defective spark plug
3. Worn distributor terminals
4. Leaks, loose connection or disconnection of
high tension cord
5. Malfunctioning ignition timing advancers
Adjust
Adjust gap or replace
Dress or replace
Connect or replace as
necessary
Replace
Fuel system out of order
1. Clogged carburetor jets
2. Defective fuel pump
3. Clogged fuel filter
4. Malfunctioning choke system
5. Float level out of adjustment
6. Clogged fuel pipe
7. Clogged fuel tank outlet
8. Loose joint in fuel system
Disassemble and clean
Repair or replace
Replace
Adjust or replace
Adjust
Clean or replace
Clean
Retighten
Abnormal condition in air intake system
1. Air cleaner dirty and clogged
2. Poor returning motion of choke valve
Clean or replace
Repair, adjust or replace
Overheating tendency of engine
1. (Refer to the section entitled “over-
heating.“)
2-3
Page 43 of 962

ConditionPossible causeCorrection
SurgesFuel system out of order
(Engine power varia- 1. Clogged fuel filterReplace
tion under steady2. Kinky, leaky or damaged fuel hoses and linesCheck and replace as
throttle or cruise.necessary
Feels like the car3. Malfunctioning fuel pumpCheck and replace as
speeds up and downnecessary
with no change in the4. Leaky manifold and carburetor gasketsReplace
accelerator pedal.)5. Improper float levelAdjust
Ignition system out of order
1. Improper ignition timing
2. Malfunctioning ignition timing advancers
(mechanical and vacuum)
Adjust
Check or replace
3. Leaky or loosely connected high tension cordCheck and repair or
replace
4. Defective spark plug (excess carbon deposits,Check and clean, adjust
improper gap, burned electrodes, etc..)or replace
5. Cracked rotor or cap in distributorReplace
Emission control
1. Malfunctioning bowl vent solenoid valve
2. Malfunctioning throttle position switch
(wide open switch)
3. Malfunctioning high altitude switch
4. Malfunctioning EGR valve
5. Malfunctioning thermostatically controlled
air cleaner
Check and replace as
necessary
Check and replace as
necessary
Check and replace as
necessary
Check and replace as
necessary
Check and replace as
necessary.
Dieseling
(Engine continues to
run after ignition
switch is turned off.
it runs unevenly and
may make knocking
noise. )
Malfunctioning fuel cut solenoid valve in
carburetor
Check solenoid valve for
proper operation and
replace as necessary
Erratic idling
(Improper engine
idling)
Abnormal condition in ignition system
1. Defective spark plug
2. Leaky or disconnected high tension cord
3. Worn distributor terminals
4. Improper ignition timing
5. Cracked cap in distributor, leakage inside
Adjust or replace
Connect or replace
Replace
Adjust
Replace
2-5
Page 44 of 962

ConditionPossible causeCorrection
Erratic idling
(Improper engine
idling)
Abnormal condition in fuel system
1. Clogged carburetor jets
2. Incorrect idle adjustment
3. Clogged air cleaner element
4. Leaky manifold, carburetor or cylinder
head gaskets
5. Improper float level
6. Malfunctioning choke system
7. Malfunctioning fuel cut solenoid valve
Clean
Adjust
Clean or replace
Replace
Adjust
Adjust or replace
Replace
Others
1. Loose connection or disconnection. of
vacuum hoses
Connect
2. Malfunctioning PCV valve
3. Low compression
4. Loose carburetor and intake manifold bolts
and nuts
Check and replace as
necessary
Previously outlined
Tighten bolts and nuts
5. Leaky carburetor and intake manifold
gaskets
Replace
Abnormal detonationAbnormal condition in ignition system
1. Spark plugs tending to overheatChange plug heat value
2. Improper ignition timingAdjust
3. Loose connection in high-tension or low-Retighten
tension circuit.
Abnormal condition in fuel system
1. Clogged fuel filter and fuel lines
2. Clogged carburetor jets
3. Improper adjustment of float level
4. Malfunctioning fuel pump
5. Air inhaling from intake manifold and
carburetor gaskets
Replace or clean
Clean
Adjust
Replace
Replace
Abnormal condition in engine
1. Excessive carbon deposit on piston crowns
or cylinder head
Clean
2. Blown cylinder head gasket, resulting in
low compression pressure
3. Improper valve clearance
4. Valves tending to seize
5. Weakened valve springs
Replace
Adjust
Replace
Replace
Others
Malfunctioning EGR valveReplace
2-6
Page 45 of 962

9
Cond it ionPossible causeCorrection
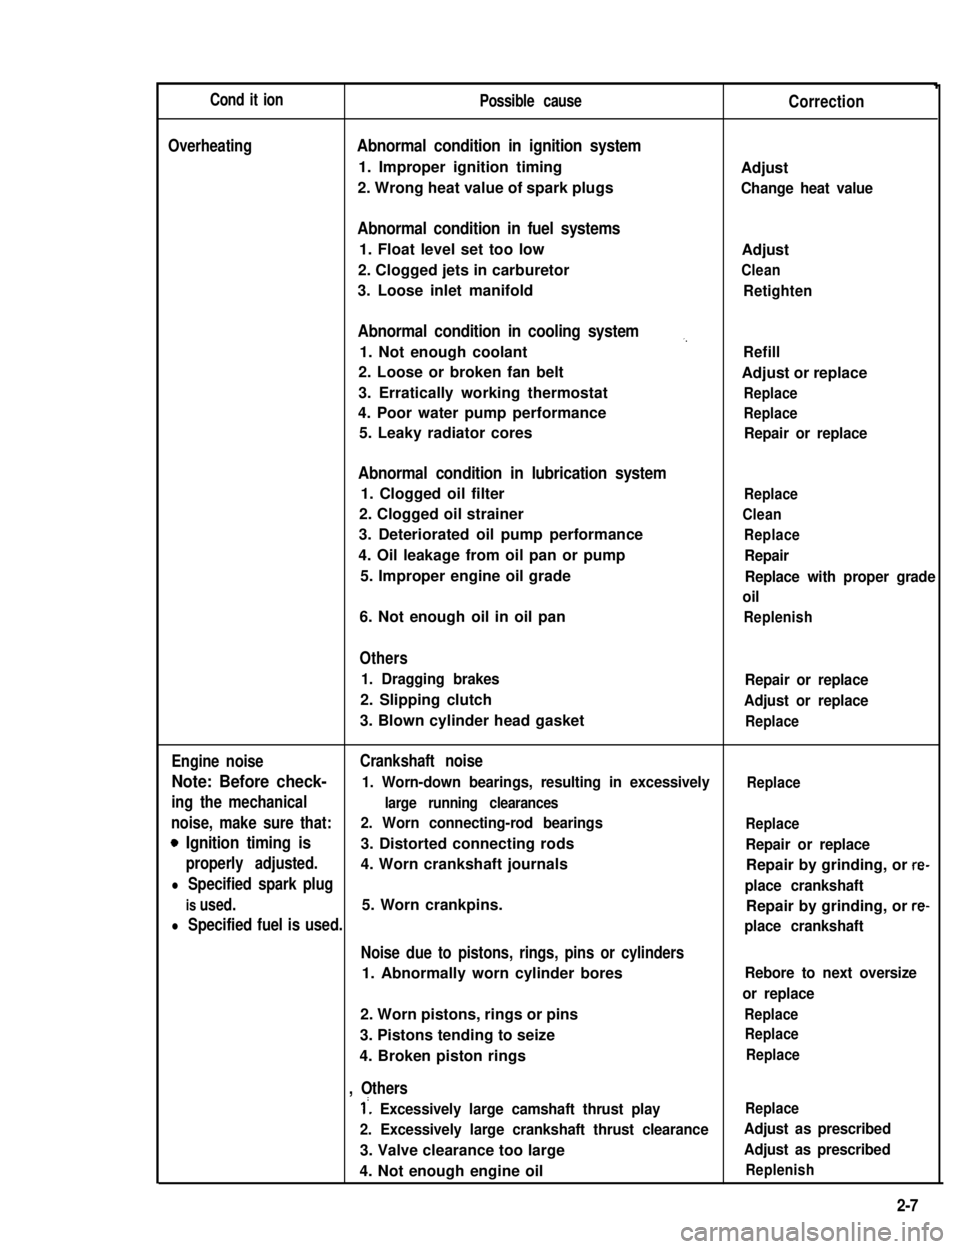
OverheatingAbnormal condition in ignition system
1. Improper ignition timingAdjust
2. Wrong heat value of spark plugsChange heat value
Abnormal condition in fuel systems
1. Float level set too lowAdjust
2. Clogged jets in carburetorClean
3. Loose inlet manifoldRetighten
Abnormal condition in cooling system,,
1. Not enough coolantRefill
2. Loose or broken fan beltAdjust or replace
3. Erratically working thermostatReplace
4. Poor water pump performanceReplace
5. Leaky radiator coresRepair or replace
Abnormal condition in lubrication system
1. Clogged oil filterReplace
2. Clogged oil strainerClean
3. Deteriorated oil pump performanceReplace
4. Oil leakage from oil pan or pumpRepair
5. Improper engine oil gradeReplace with proper grade
oil
6. Not enough oil in oil panReplenish
Others
1. Dragging brakesRepair or replace
2. Slipping clutchAdjust or replace
3. Blown cylinder head gasketReplace
Engine noiseCrankshaft noise
Note: Before check- 1. Worn-down bearings, resulting in excessivelyReplace
ing the mechanicallarge running clearances
noise, make sure that:2. Worn connecting-rod bearingsReplace
0 Ignition timing is3. Distorted connecting rodsRepair or replace
properly adjusted.4. Worn crankshaft journalsRepair by grinding, or re-
l Specified spark plugplace crankshaft
is used.5. Worn crankpins.Repair by grinding, or re-
l Specified fuel is used.place crankshaft
Noise due to pistons, rings, pins or cylinders
1. Abnormally worn cylinder boresRebore to next oversize
or replace
2. Worn pistons, rings or pinsReplace
3. Pistons tending to seizeReplace
4. Broken piston ringsReplace
, Others
1’. Excessively large camshaft thrust playReplace
2. Excessively large crankshaft thrust clearanceAdjust as prescribed
3. Valve clearance too largeAdjust as prescribed
4. Not enough engine oilReplenish
2-7