Page 2284 of 2389
Remarks:
*1 2VZ±FE only
* 2 Transmission case oil seal (E52 and E56F5)
* 3 Transaxle side gear shaft oil seal (4WD only)
* 4 Crankshaft oil sea!
* 5 3S±FE only
* 6 Crankshaft front oil seal for 3S±FE
* 7 Steering main shaft bearing
SST (SPECIAL SERVICE TOOLS) (Cont'd)
Water Pump Overhaul
Tool Set
Water Pump Bearing
Remover & ReplacerCrankshaft Front
& Rear Bearing
Replacer Crankshaft Rear
Oil Seal Replacer
Crankshaft Rear
Oil Seal Replacer Crankshaft Rear
Oil Seal Replacer
Crankshaft Front
Oil Seal Replacer
Radiator Service
Tool Set
Illustration
Oil Filter Wrench Oil Filter Wrench
Wire Gauge Set
Part Name
Part No.Section
(Guide ºLº)
RA
SR
± SST AND SSMSST (Special Service Tools)C±4
Page 2312 of 2389

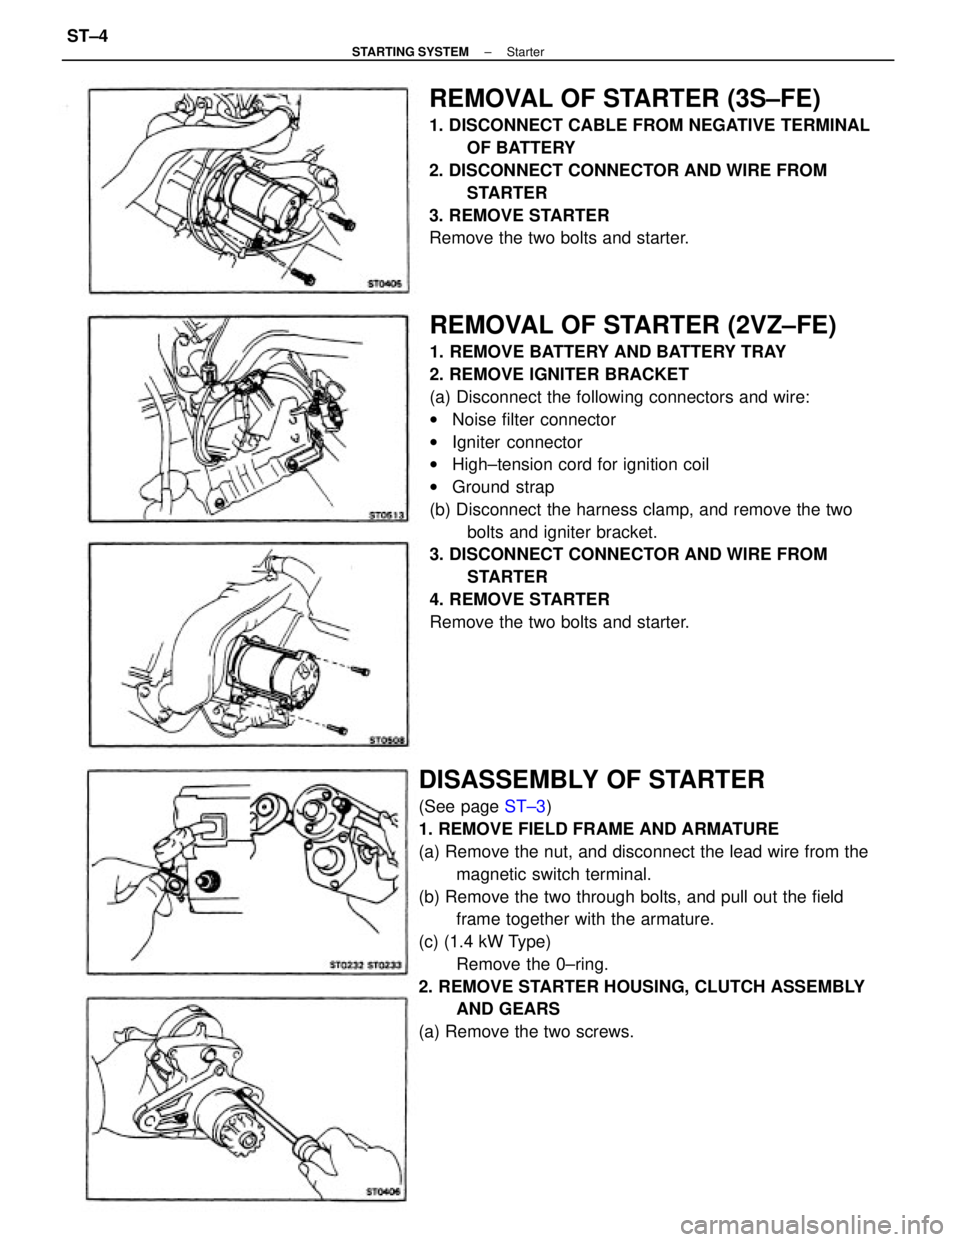
REMOVAL OF STARTER (2VZ±FE)
1. REMOVE BATTERY AND BATTERY TRAY
2. REMOVE IGNITER BRACKET
(a) Disconnect the following connectors and wire:
wNoise filter connector
wIgniter connector
wHigh±tension cord for ignition coil
wGround strap
(b) Disconnect the harness clamp, and remove the two
bolts and igniter bracket.
3. DISCONNECT CONNECTOR AND WIRE FROM
STARTER
4. REMOVE STARTER
Remove the two bolts and starter.
DISASSEMBLY OF STARTER
(See page ST±3)
1. REMOVE FIELD FRAME AND ARMATURE
(a) Remove the nut, and disconnect the lead wire from the
magnetic switch terminal.
(b) Remove the two through bolts, and pull out the field
frame together with the armature.
(c) (1.4 kW Type)
Remove the 0±ring.
2. REMOVE STARTER HOUSING, CLUTCH ASSEMBLY
AND GEARS
(a) Remove the two screws.
REMOVAL OF STARTER (3S±FE)
1. DISCONNECT CABLE FROM NEGATIVE TERMINAL
OF BATTERY
2. DISCONNECT CONNECTOR AND WIRE FROM
STARTER
3. REMOVE STARTER
Remove the two bolts and starter.
± STARTING SYSTEMStarterST±4
Page 2323 of 2389

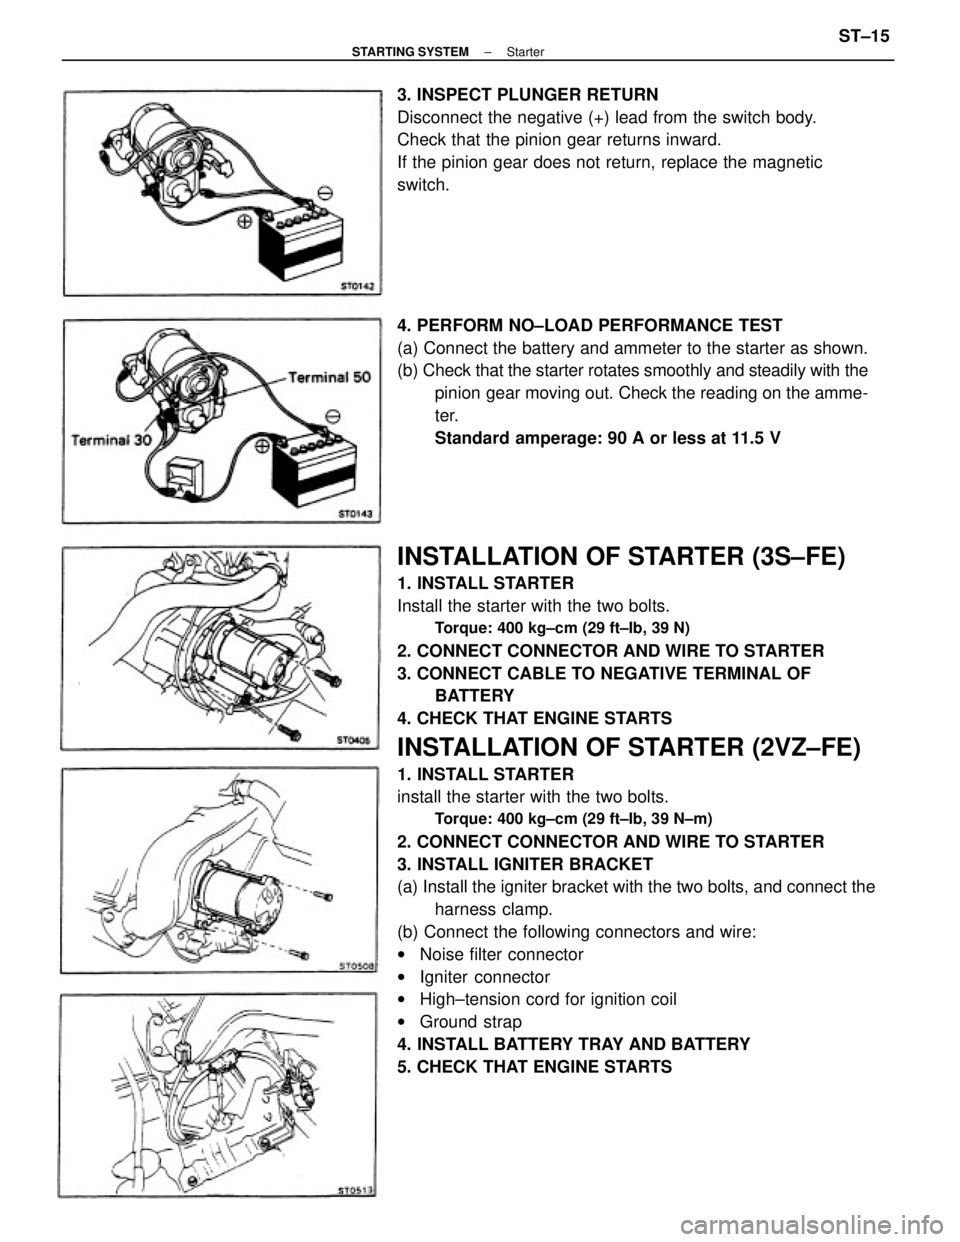
INSTALLATION OF STARTER (3S±FE)
1. INSTALL STARTER
Install the starter with the two bolts.
Torque: 400 kg±cm (29 ft±Ib, 39 N)
2. CONNECT CONNECTOR AND WIRE TO STARTER
3. CONNECT CABLE TO NEGATIVE TERMINAL OF
BATTERY
4. CHECK THAT ENGINE STARTS
INSTALLATION OF STARTER (2VZ±FE)
1. INSTALL STARTER
install the starter with the two bolts.
Torque: 400 kg±cm (29 ft±Ib, 39 N±m)
2. CONNECT CONNECTOR AND WIRE TO STARTER
3. INSTALL IGNITER BRACKET
(a) Install the igniter bracket with the two bolts, and connect the
harness clamp.
(b) Connect the following connectors and wire:
wNoise filter connector
wIgniter connector
wHigh±tension cord for ignition coil
wGround strap
4. INSTALL BATTERY TRAY AND BATTERY
5. CHECK THAT ENGINE STARTS 4. PERFORM NO±LOAD PERFORMANCE TEST
(a) Connect the battery and ammeter to the starter as shown.
(b) Check that the starter rotates smoothly and steadily with the
pinion gear moving out. Check the reading on the amme-
ter.
Standard amperage: 90 A or less at 11.5 V 3. INSPECT PLUNGER RETURN
Disconnect the negative (+) lead from the switch body.
Check that the pinion gear returns inward.
If the pinion gear does not return, replace the magnetic
switch.
± STARTING SYSTEMStarterST±15