Page 33 of 102

Downloaded from www.Manualslib.com manuals search engine Heater
The defrosting and
defogging
systenl assists in provid,
ing good visibility through desig
nated areas of the windshield under
most
inClement'Weather conditions.
For immediate operation of the ve
hicle, the windshield should be
scraped clear.
'
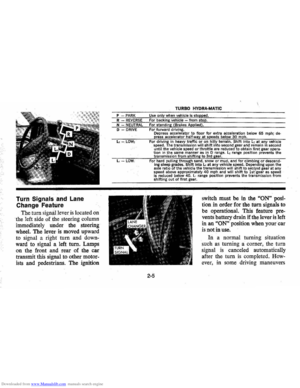
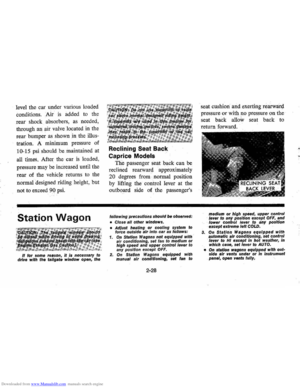
Lower Lever
Push the lower lever (Tempera
ture) as required to,give the desired
degree of heat. Full right position
provides maximum heat.
Move the
defroster lever (upper) to the right
when windshield defrost
is needed.
When this lever
is in the OFF posi- tion,
air is directed
up under the in
strument panel through a'venting
door, Full right position diverts the
entire air
flow to the defroster out
lets, Vary
lever as required.
Fan
The fan lever has three (3) po
sitions from LO at the bottom to
HI at the top.
NOTE: Fan will automatically op
erate in LO position (after engine
coolant temperature has reached
95
OF) whenever ignition switch is
in the ON position. There is no
OFF position.
Operate system for
30 seconds
2-19
before switching to DEF. This
will remove humid air from the
sys
tem and ,minimize rapid fogging of
the glass which can occur
if humid
air is blown onto a coo l windshield.
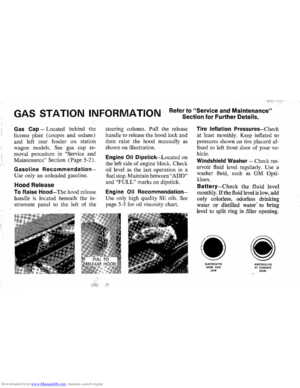
Heater Operating Tips
• Clear snow and ice from hood
and air inlet in front
of wind
shie ld to improve heater and de
frost er efficiency and reduce the
probability of fogging on inside
of windshield.
• Clear windshield, rear window,
outside
mirrors , and all side win
dows of ice ,and snow before
driving vehicle.
• Operate blower on HIGH for
a few seconds before moving the
vehicle, to clear the intake ducts
of snow to further reduce the
pos sibili
ty of fogging on inside
of windshield.
• Keep all windows and vents
clo sed to reduce dust, road and
wind noise and uncomfortable
drafts .
Page 34 of 102

Downloaded from www.Manualslib.com manuals search engine • For most satisfactory heater op
eration and air circulation , oper
ate fan on low or medium speeds
for normal operation and high
s peeds for quick warm -up and
during extremely low
tempera
tures.
• For adeq uate rear sea t he ating,
the area beneath the front seat
mus not be block ed by carpet
ing, rags, paper or oth er mate
rial and fan sh ould operate on
high blower.
Rear Window Defroster
To ensure clear vision through
the rear
window during inclem ent
weather , the Rear Window
De
froster is optionally available. This
unit dr
aws. in air from the pas
senger compart ment and directs it
aga inst the back window to remove
frost or moisture. Its blower h
as a
two-speed control switch on the
instrument panel.
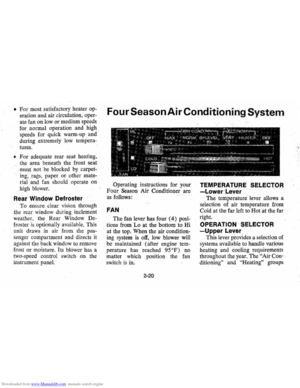
Four Season Air Conditioning System
Operating instructions for your
Four Season Air Conditioner are
a s follows:
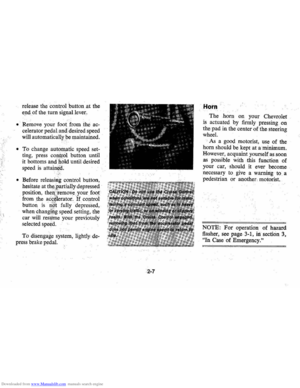
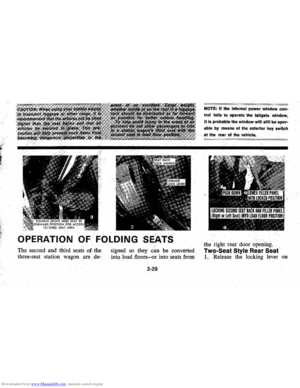
FAN
The fan lever has four (4) posi
tions from Lo at the bottom to Hi
at the top. When the air
condition
ing system is off, low blower will
be maintained (after engine
tem
perature has reached 95°F) no
matter which positi on the fan
switch is in.
2-20
TEMPERATURE SELECTOR
-Lower~Lever
The temperature ' lever allows a
selection of air temperature from
Cold at the far left to Hot at the far
right.
OPERATION SELECTOR
-Upper Lever
This lever prov ides a selection of
systems available to handle various
heating and cooling requirements
throughout the year.
The " Air Con-,
ditioning"
an d "He ating" groups
Page 35 of 102

Downloaded from www.Manualslib.com manuals search engine have several positions which im
prove the effectiveness of the sys
tem for various demands.
• Off-The system operates on low
blower regardless of fan switch
position with air discharged into
vehicle
through ,beater outlet.
• Max A/C-Air from the passen
ger compartment is recirculated
through the
system (with some
outside air) and discharged
from
the upper outlets. The max. Ale
position, with Temp, lever in Full
COLD,
is us~d when maximum
cooHng is required under condi
tions of high temperature and
humidity. High fan speed
is auto
matically attained in
this position.
• Norm A/C-Outside air is passed
through the system and dis
charged through the upper out
lets. This position is recommend-
ed for most air,conditioning
situations because of reduclld
blower noise and reduction of
cigarette smoke within the
vehi
cle. Fan speed and tempering,
may
be varied as required.
• Bi-Level A/C-Outside air is de
livered from the heater lower
outlet and the defroster duct and
upper outlets to provide comfort
and keep the windshield and side
glass clear under low fogging
conditions.
• "Economy Ranges" ~ These
positions, VENT
and HEATER,
are recommended
for greater
economy in vehicle operation.
The
AIC compressor will not op
erate in either of these positions.
• Vent -Outside air is passed
through the system and dis-
2-21
charged frorn the upper outlets.
This position
is provided for cool
to rnoderate weather when
refrig
eration is not required. Fan speed
.. and Temp. can be adjusted as
required.
• Heater-Outside air is delivered
through the heater outlet and
with some air through the
de
froster outlets .. Temperature may
be adjusted
as required. This
position
is recommended for most
winter driving.
• Oef -Outside air is delivered
through the defroster outlets and
some air through the floor
out
lets. Temperature and blower
speeds may be adjusted
wire
quired. This position isrecom
mended for conditions of severe
fogging and icing only.
Page 36 of 102

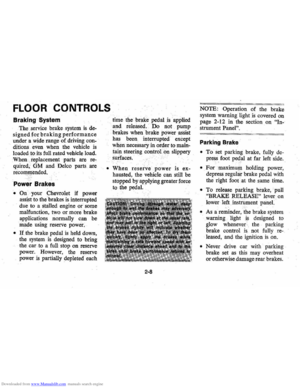
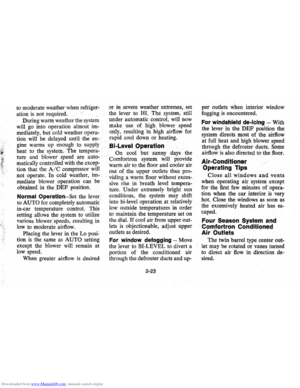
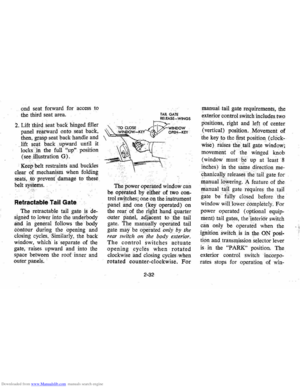
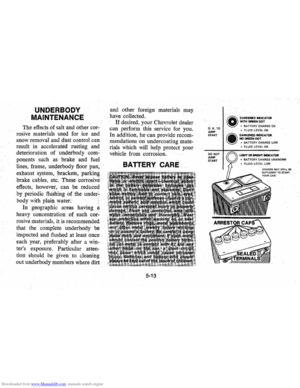
Downloaded from www.Manualslib.com manuals search engine Air Conditioning Comfortron System
The system will run at increased
. capacity
until the pre-set tempera
~
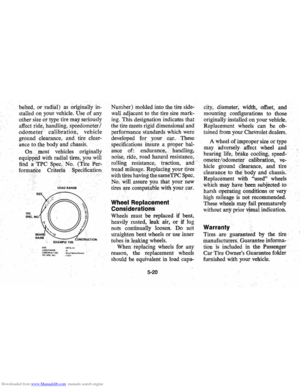
~ ~ OFF .00_:;;::;
• • • • • so i Ii
(U·LIEVEL OIEF
• • "I
Comfortron Air Conditioning adds
the convenience of completely
automatic control. to the combined
heating and cooling functions of
the Four-Season system,
automat
ically maintaining selected inside
temperature regardless of season or
outside weather conditions.
NOTE: In cool weather, the blower
will not start until engine is warmed
up . (Control lever in
"OFF" or
"AUTO" position.)
During warm weather, cooled,
dehumidified air enters the car
through the upper outlets. During
cold weather, heated airflow will
enter the car through the floor
dis
tributor duct.
Control Panel
The control panel has a tempera
ture dial and a single control lever.
Temperature Dial
This dial may be set once to the
desired temperature , much
as your
home thermostat, and normally
need not be adjusted thereafter.
2-22
ture is reached. Further movement
of the temperature dial will not
de
crease the time needed to bring the
car to this temperature . However,
since individual comfort
require
ments vary considerably, you may
wish to vary the dial setting slightly
to compensate for warmer
or cooler
weather.
Control .Lever
In the OFF position, the system
operates on low blower with air
dis
charged into vehicle through the
heater outlet.
It is not necessary to
turn the system to
OFF when leav
ing the car. It will then operate
automatically whenever the car is
started.
Economy
This position is provided for cool
Page 37 of 102

Downloaded from www.Manualslib.com manuals search engine (
-t·,
t "7,' ' , ' .
to moderate weather when refriger
ation is not required.
During warm weather the system
will
go into operation almost im
mediately, but cold weather opera
tion will be delayed until the en
gine warms up enough to supply
heat
to the system. The tempera- .
ture and blower speed are auto
matically controlled with the
excep
tion that the AIC compressor will
not operate. In cold weather,
im
mediate blower operation can be
obtained in the
DEF position.
Normal Operation-Set the lever
to
AUTO for completely automatic
in-car temperature control. This
setting allows the system
to utilize
various blower: speeds , resulting in
low to moderate airflow.
Placing the lever in the Lo posi
tion is the same as AUTO setting
except the blower wi\l remain at
low speed.
When greater airflow
is desired or
in severe weather extremes, . set
the lever to HI. The system , still
under automatic
·control, will now
make use of high blower speed
only, resulting in high airflow for
rapid cool
dOwn or heating .
BI-Level Operation
On cool but sunny days . the
Comfortron system
will provide
warm air to the floor and cooler air
out of the upper outlets thus
pro
viding a warm floot without 'exces
sive rise in breath level tempera
ture. Under extremely bright sun
conditions, the system may shift
into bi-level operation at relatively
low outside temperatures in order
to maintain the temperature set on
the dial.
If cool air from upper out
lets is objectionable, adjust upper
outlets
as desired.
For window defogging -Move
the lever
to BI-LEVEL to divert a
portion of the conditioned air
through the defroster ducts and up-
2-23
per outlets when interior window
fogging
is encountered.
For windshield de-icing -With
the lever in the
DEF position the
system directs most of the airflow
at full heat and high blower speed
through the defroster ducts.
Some
airflow is also directed to the floor.
Air-Conditioner
Operating Tips
Close all windows and vents
when operating air system except
for the
first few minutes of opera
tion when the car interior is very
hot. Close the windows
as soon as
the excessively heated air has es
caped.
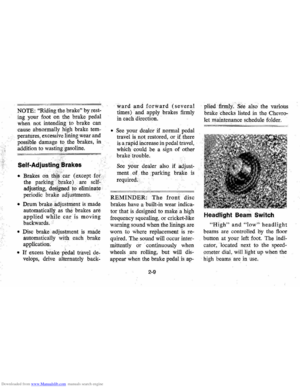
Four season System and
Comfort ron Conditioned
Air
Outlets
The twin barrel type center out·
let may be rotated or vanes turned
to direct air
flow in direction de
sired .
Page 38 of 102
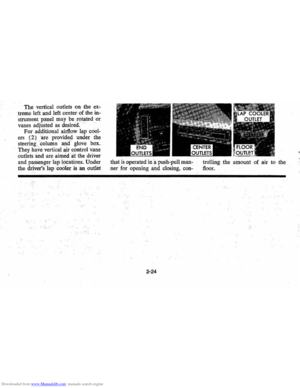
Downloaded from www.Manualslib.com manuals search engine The vertical outlets on the ex·
treme left and left center of the in·
strument panel may be rqtated or
vanes ad
juStect as desired. '
For additional airflow lap
cool·
ers (2) 'are provided under the
steering . 'column '
an9' glove box.
They have vertical ~ir control vane
outlets
and are aimed aJ the driver
and passenger
lap,·10cations, Under
the driver's lap .cQOler is an outlet that
is operated ina push'pull
man·
ner for opening, and closing, con·
2·24
trolling the amount of air to the
floor.
Page 39 of 102

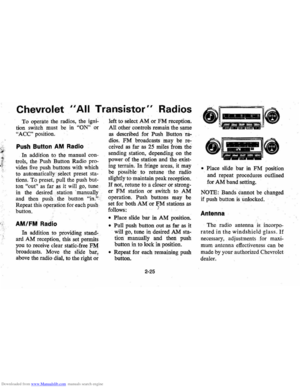
Downloaded from www.Manualslib.com manuals search engine Chevrolet "AU Transistor" Radios
To operate the radios, the igni
tion switch must be in "ON" or
"ACC" position .
Push Button AM Radio
In addition to the manual con
trols, the Push Bu.tton Radio pro
vides five push buttons with which
to automatically
select preset sta
tions. To preset, pull the push but
ton "out" as far as it will go, tune
in the desired station . manually
and then
push" the button "in."',
Repeat this ope(ation for each push ,
button.
AM/FM Radio
In addition to providing stand'
ard AM reception, this set permits
you to receive clear
static:{ree FM:
broadcasts. Move the slide bar,
above the radio dial, to the right
or
left to select AM or PM reception.
All
other controls remain the same
as described for Push Buttonra
dios. FM broadcasts may be re
ceived as far as 25 miles from the
sending station, depending on the
power of the station and the
exist
ing terrain .' In fringe areas , it may
be possible to retune the radio
slightly tornaintain peak reception.
If not, retune to a closer or strong
er FM station or switch to AM
operation.
Push buttons may be
set for both
AM or J;1M stations as
follows: j
• Place slide bar in AM position.
• Pull push button out as far as it
will go, tune in desired AM
sta
tion manually and then push
button in to lock in position.
• Repeat for each remaining push
button .
2-25
-"------~~ ..... ~ " IM~ rill< ~1111----;; ,...
• Place slide bar in FM position
and repeat procedures outlined
for
AM band setting.
NOTE: Bands cannot be changed
if push button
is unlocked.
Antenna
The radio antenna is incorpo,
rated in the windshield glass. If
necessary , adjustments for maxi
mum antenna effectiveness can be
made by your authorized Chevrolet
dealer.
Page 40 of 102

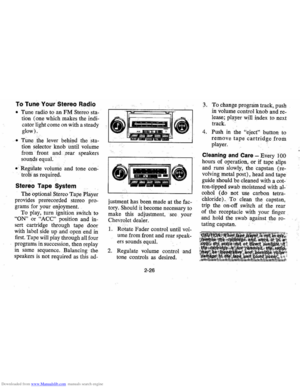
Downloaded from www.Manualslib.com manuals search engine To Tune Your Stereo Radio
• Tune radio to an FM Stereo sta
tion (one which makes the indi
cator light come on with a steady
glow).
.
. •
Tune .ihe lever behind the sta
tion .selector knob until volume
from . front and rear speakers
sounds equal. .
• Regulate volume and tone con~
troIS' as required.
Stereo Tape System
The optional !ltereo Tape Player
provides prerecorded stereo
pro
grams for you r enjoyment.
To play, turn ignition switch to
"ON" or "ACC " position and in
sert cartridge throu gh tape door
with label
side up arid open end in
first. Tape will play through aU four
program s in succe ssion, then replay
in same sequence. Balancing the
speakers
is not required as this ad- justment
has.
be~n made at the fac
tory. Should it become necessary to
make ihis
adjustPlent, see your
Chevrolet dealer.
I. Rotate Fader control until vol
ume from front and rear speak-
ers sounds equal. .
2. Regulate volume control and
tone controls as
desired,
2-26
3. To change program track, push
in volume control knob and re
lease; player will index to next
track. .
4.
Push in the "eject " button to
remove tape cartridge from
player.
Cleaning and Care -Every 100
hours of operation, or if tape slips
and
runs slowly , the capstan (re
volvingmetal post), head and tape
guide should be cleaned with a cot
ton-tipped swab moistened with al
cohol
(do not use carbon tetra
chloride)
.To clean the capstan,
trip the
on-off switch at the rear
of the receptacle with your finger
and hold the swab
~gainst the ro-
tating capstan .
' ..