2024 CHEVROLET SILVERADO EV battery
[x] Cancel search: batteryPage 110 of 429
Chevrolet Silverado EV Owner Manual (GMNA-Localizing-U.S./Canada-
16702912) - 2024 - CRC - 1/13/23
Instruments and Controls 109
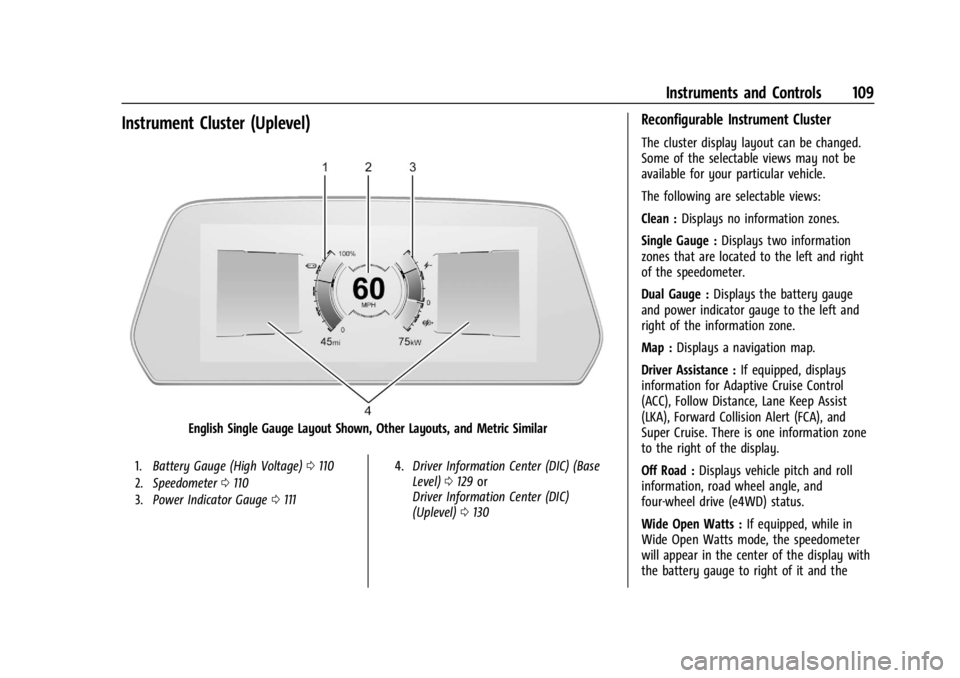
Instrument Cluster (Uplevel)
English Single Gauge Layout Shown, Other Layouts, and Metric Similar
1.Battery Gauge (High Voltage) 0110
2. Speedometer 0110
3. Power Indicator Gauge 0111 4.
Driver Information Center (DIC) (Base
Level) 0129 or
Driver Information Center (DIC)
(Uplevel) 0130
Reconfigurable Instrument Cluster
The cluster display layout can be changed.
Some of the selectable views may not be
available for your particular vehicle.
The following are selectable views:
Clean : Displays no information zones.
Single Gauge : Displays two information
zones that are located to the left and right
of the speedometer.
Dual Gauge : Displays the battery gauge
and power indicator gauge to the left and
right of the information zone.
Map : Displays a navigation map.
Driver Assistance : If equipped, displays
information for Adaptive Cruise Control
(ACC), Follow Distance, Lane Keep Assist
(LKA), Forward Collision Alert (FCA), and
Super Cruise. There is one information zone
to the right of the display.
Off Road : Displays vehicle pitch and roll
information, road wheel angle, and
four-wheel drive (e4WD) status.
Wide Open Watts : If equipped, while in
Wide Open Watts mode, the speedometer
will appear in the center of the display with
the battery gauge to right of it and the
Page 111 of 429
Chevrolet Silverado EV Owner Manual (GMNA-Localizing-U.S./Canada-
16702912) - 2024 - CRC - 1/13/23
110 Instruments and Controls
torque gauge to the left of it. There are two
information zones on the left and right of
the display. Follow the prompts on the
instrument cluster. SeeDriver Mode Control
0 209.
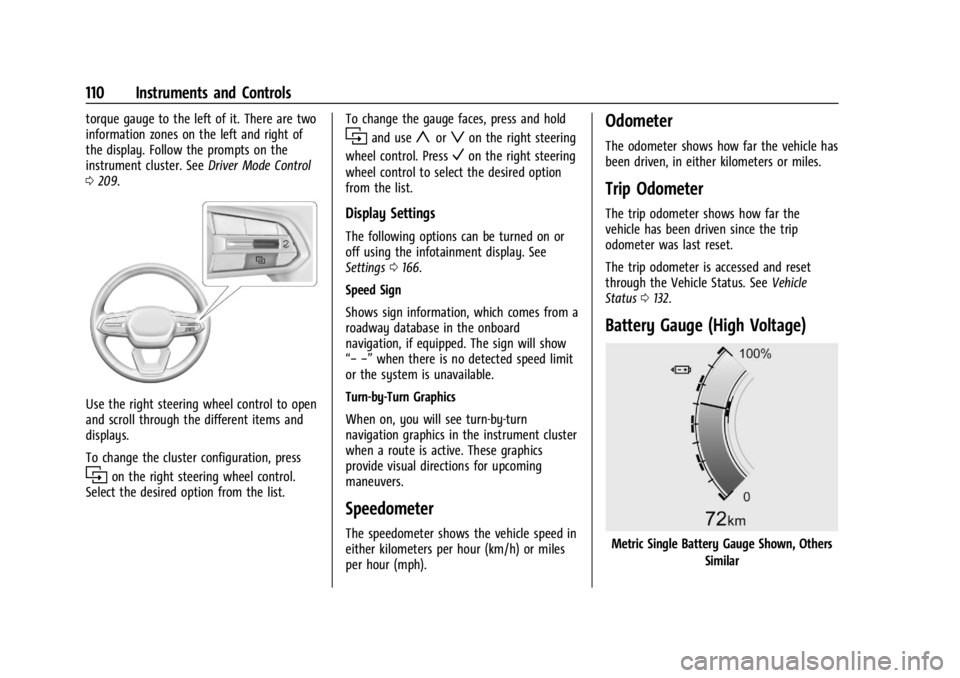
Use the right steering wheel control to open
and scroll through the different items and
displays.
To change the cluster configuration, press
ion the right steering wheel control.
Select the desired option from the list. To change the gauge faces, press and hold
iand useyorzon the right steering
wheel control. Press
Von the right steering
wheel control to select the desired option
from the list.
Display Settings
The following options can be turned on or
off using the infotainment display. See
Settings 0166.
Speed Sign
Shows sign information, which comes from a
roadway database in the onboard
navigation, if equipped. The sign will show
“− −” when there is no detected speed limit
or the system is unavailable.
Turn-by-Turn Graphics
When on, you will see turn-by-turn
navigation graphics in the instrument cluster
when a route is active. These graphics
provide visual directions for upcoming
maneuvers.
Speedometer
The speedometer shows the vehicle speed in
either kilometers per hour (km/h) or miles
per hour (mph).
Odometer
The odometer shows how far the vehicle has
been driven, in either kilometers or miles.
Trip Odometer
The trip odometer shows how far the
vehicle has been driven since the trip
odometer was last reset.
The trip odometer is accessed and reset
through the Vehicle Status. See Vehicle
Status 0132.
Battery Gauge (High Voltage)
Metric Single Battery Gauge Shown, Others
Similar
Page 112 of 429
Chevrolet Silverado EV Owner Manual (GMNA-Localizing-U.S./Canada-
16702912) - 2024 - CRC - 1/13/23
Instruments and Controls 111
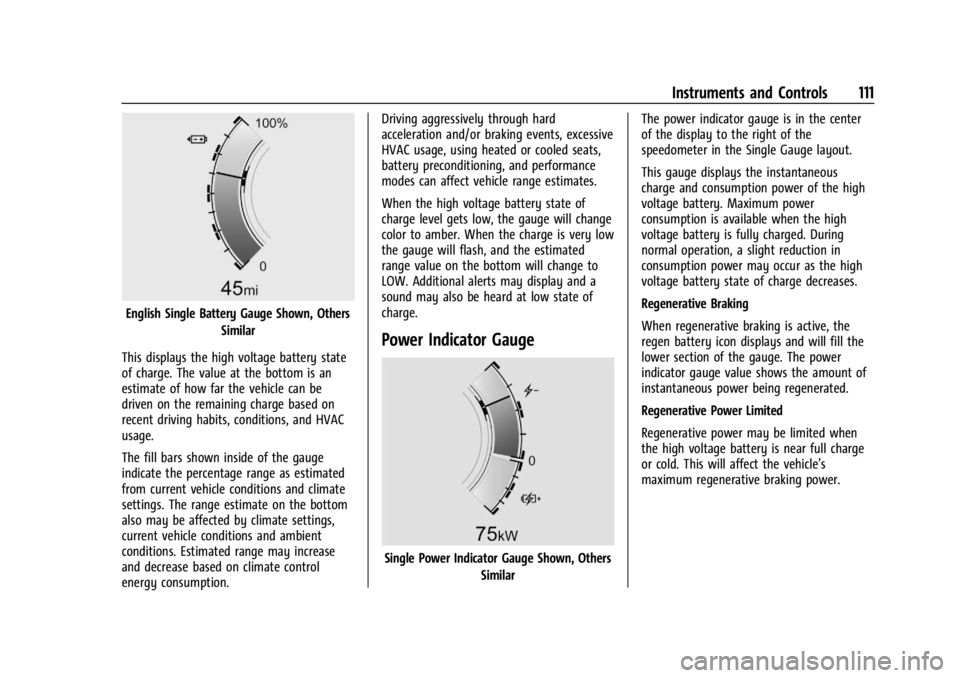
English Single Battery Gauge Shown, OthersSimilar
This displays the high voltage battery state
of charge. The value at the bottom is an
estimate of how far the vehicle can be
driven on the remaining charge based on
recent driving habits, conditions, and HVAC
usage.
The fill bars shown inside of the gauge
indicate the percentage range as estimated
from current vehicle conditions and climate
settings. The range estimate on the bottom
also may be affected by climate settings,
current vehicle conditions and ambient
conditions. Estimated range may increase
and decrease based on climate control
energy consumption. Driving aggressively through hard
acceleration and/or braking events, excessive
HVAC usage, using heated or cooled seats,
battery preconditioning, and performance
modes can affect vehicle range estimates.
When the high voltage battery state of
charge level gets low, the gauge will change
color to amber. When the charge is very low
the gauge will flash, and the estimated
range value on the bottom will change to
LOW. Additional alerts may display and a
sound may also be heard at low state of
charge.
Power Indicator Gauge
Single Power Indicator Gauge Shown, Others
Similar The power indicator gauge is in the center
of the display to the right of the
speedometer in the Single Gauge layout.
This gauge displays the instantaneous
charge and consumption power of the high
voltage battery. Maximum power
consumption is available when the high
voltage battery is fully charged. During
normal operation, a slight reduction in
consumption power may occur as the high
voltage battery state of charge decreases.
Regenerative Braking
When regenerative braking is active, the
regen battery icon displays and will fill the
lower section of the gauge. The power
indicator gauge value shows the amount of
instantaneous power being regenerated.
Regenerative Power Limited
Regenerative power may be limited when
the high voltage battery is near full charge
or cold. This will affect the vehicle’s
maximum regenerative braking power.
Page 115 of 429

Chevrolet Silverado EV Owner Manual (GMNA-Localizing-U.S./Canada-
16702912) - 2024 - CRC - 1/13/23
114 Instruments and Controls
Passenger Airbag Status Indicator
The vehicle has a passenger sensing system.
SeePassenger Sensing System 065 for
important safety information. The overhead
console has a passenger airbag status
indicator.
When the vehicle is started, the passenger
airbag status indicator will light ON and OFF
for several seconds as a system check. Then,
after several more seconds, the status
indicator will light either ON or OFF to let
you know the status of the front outboard
passenger frontal airbag.
If the word ON is lit on the passenger
airbag status indicator, it means that the
front outboard passenger frontal airbag is
allowed to inflate.
If the word OFF is lit on the passenger
airbag status indicator, it means that the
passenger sensing system has turned off the
front outboard passenger frontal airbag. If, after several seconds, both status
indicator lights remain on, or if there are no
lights at all, or if the airbag readiness light
is on, there may be a problem with the
lights or the passenger sensing system. See
your dealer for service right away.
{Warning
If the airbag readiness light ever comes
on and stays on, it means that
something may be wrong with the airbag
system. To help avoid injury to yourself
or others, have the vehicle serviced right
away. See
Airbag Readiness Light 0113
for more information, including important
safety information.
Charging System Light
The charging system light comes on briefly
when the vehicle is started, as a check to
show the light is working. If the light stays on, or comes on while
driving, there could be a problem with the
electrical charging system. Have it checked
by your dealer. Driving while this light is on
could drain the 12-volt battery.
If a short distance must be driven with the
light on, be sure to turn off all accessories,
such as the radio. Find a safe place to stop
the vehicle.
Low State of Charge Light
This light comes on when the vehicle state
of charge is low. Proceed to a charging
station to charge the vehicle.
Charge Cord Connected Light
Page 116 of 429
Chevrolet Silverado EV Owner Manual (GMNA-Localizing-U.S./Canada-
16702912) - 2024 - CRC - 1/13/23
Instruments and Controls 115
This light comes on when a charge cord is
connected to the vehicle.
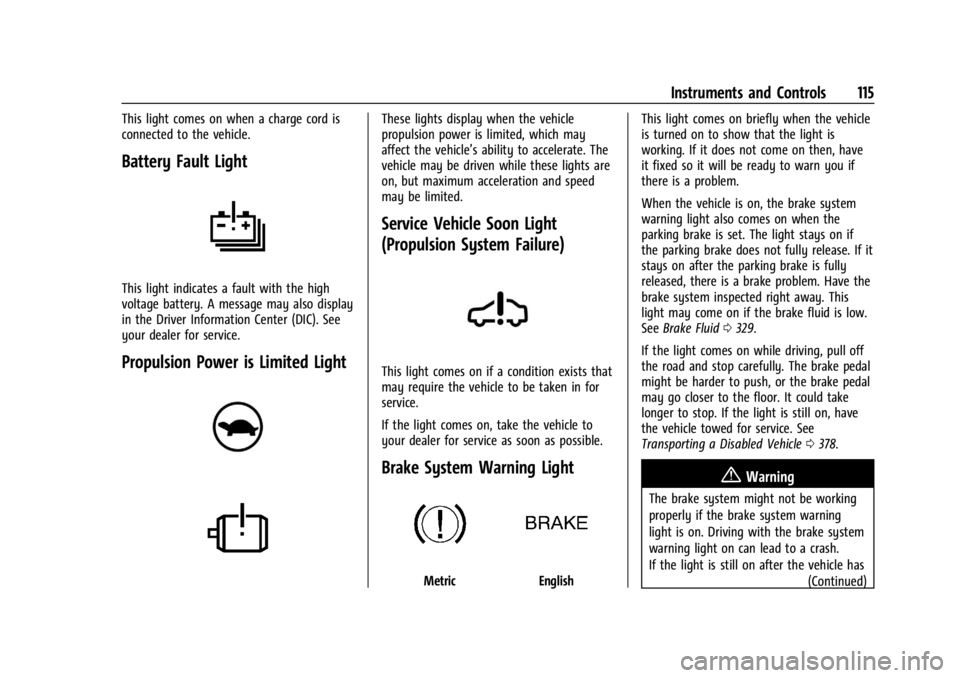
Battery Fault Light
This light indicates a fault with the high
voltage battery. A message may also display
in the Driver Information Center (DIC). See
your dealer for service.
Propulsion Power is Limited Light
These lights display when the vehicle
propulsion power is limited, which may
affect the vehicle’s ability to accelerate. The
vehicle may be driven while these lights are
on, but maximum acceleration and speed
may be limited.
Service Vehicle Soon Light
(Propulsion System Failure)
This light comes on if a condition exists that
may require the vehicle to be taken in for
service.
If the light comes on, take the vehicle to
your dealer for service as soon as possible.
Brake System Warning Light
MetricEnglishThis light comes on briefly when the vehicle
is turned on to show that the light is
working. If it does not come on then, have
it fixed so it will be ready to warn you if
there is a problem.
When the vehicle is on, the brake system
warning light also comes on when the
parking brake is set. The light stays on if
the parking brake does not fully release. If it
stays on after the parking brake is fully
released, there is a brake problem. Have the
brake system inspected right away. This
light may come on if the brake fluid is low.
See
Brake Fluid 0329.
If the light comes on while driving, pull off
the road and stop carefully. The brake pedal
might be harder to push, or the brake pedal
may go closer to the floor. It could take
longer to stop. If the light is still on, have
the vehicle towed for service. See
Transporting a Disabled Vehicle 0378.
{Warning
The brake system might not be working
properly if the brake system warning
light is on. Driving with the brake system
warning light on can lead to a crash.
If the light is still on after the vehicle has
(Continued)
Page 125 of 429
Chevrolet Silverado EV Owner Manual (GMNA-Localizing-U.S./Canada-
16702912) - 2024 - CRC - 1/13/23
124 Instruments and Controls
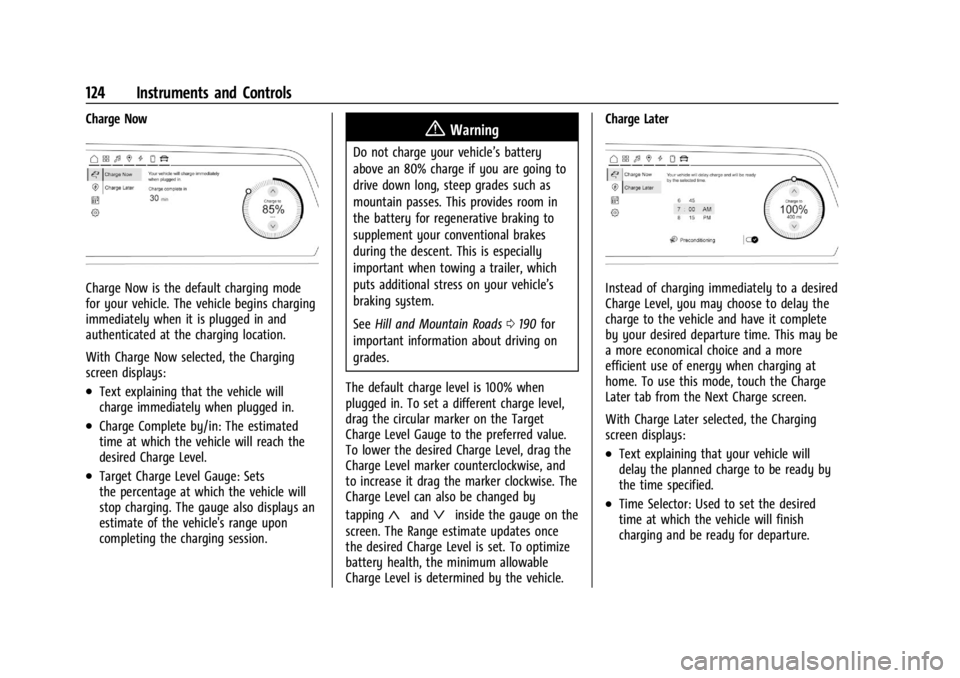
Charge Now
Charge Now is the default charging mode
for your vehicle. The vehicle begins charging
immediately when it is plugged in and
authenticated at the charging location.
With Charge Now selected, the Charging
screen displays:
.Text explaining that the vehicle will
charge immediately when plugged in.
.Charge Complete by/in: The estimated
time at which the vehicle will reach the
desired Charge Level.
.Target Charge Level Gauge: Sets
the percentage at which the vehicle will
stop charging. The gauge also displays an
estimate of the vehicle's range upon
completing the charging session.
{Warning
Do not charge your vehicle’s battery
above an 80% charge if you are going to
drive down long, steep grades such as
mountain passes. This provides room in
the battery for regenerative braking to
supplement your conventional brakes
during the descent. This is especially
important when towing a trailer, which
puts additional stress on your vehicle’s
braking system.
SeeHill and Mountain Roads 0190 for
important information about driving on
grades.
The default charge level is 100% when
plugged in. To set a different charge level,
drag the circular marker on the Target
Charge Level Gauge to the preferred value.
To lower the desired Charge Level, drag the
Charge Level marker counterclockwise, and
to increase it drag the marker clockwise. The
Charge Level can also be changed by
tapping
«andªinside the gauge on the
screen. The Range estimate updates once
the desired Charge Level is set. To optimize
battery health, the minimum allowable
Charge Level is determined by the vehicle. Charge Later
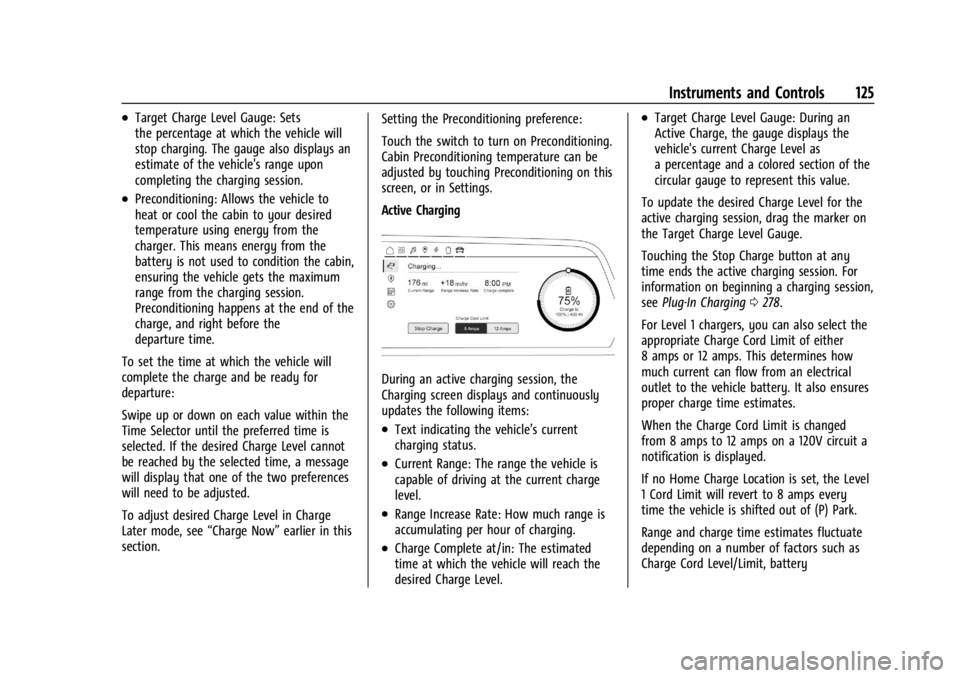
Instead of charging immediately to a desired
Charge Level, you may choose to delay the
charge to the vehicle and have it complete
by your desired departure time. This may be
a more economical choice and a more
efficient use of energy when charging at
home. To use this mode, touch the Charge
Later tab from the Next Charge screen.
With Charge Later selected, the Charging
screen displays:
.Text explaining that your vehicle will
delay the planned charge to be ready by
the time specified.
.Time Selector: Used to set the desired
time at which the vehicle will finish
charging and be ready for departure.
Page 126 of 429
Chevrolet Silverado EV Owner Manual (GMNA-Localizing-U.S./Canada-
16702912) - 2024 - CRC - 1/13/23
Instruments and Controls 125
.Target Charge Level Gauge: Sets
the percentage at which the vehicle will
stop charging. The gauge also displays an
estimate of the vehicle's range upon
completing the charging session.
.Preconditioning: Allows the vehicle to
heat or cool the cabin to your desired
temperature using energy from the
charger. This means energy from the
battery is not used to condition the cabin,
ensuring the vehicle gets the maximum
range from the charging session.
Preconditioning happens at the end of the
charge, and right before the
departure time.
To set the time at which the vehicle will
complete the charge and be ready for
departure:
Swipe up or down on each value within the
Time Selector until the preferred time is
selected. If the desired Charge Level cannot
be reached by the selected time, a message
will display that one of the two preferences
will need to be adjusted.
To adjust desired Charge Level in Charge
Later mode, see “Charge Now”earlier in this
section. Setting the Preconditioning preference:
Touch the switch to turn on Preconditioning.
Cabin Preconditioning temperature can be
adjusted by touching Preconditioning on this
screen, or in Settings.
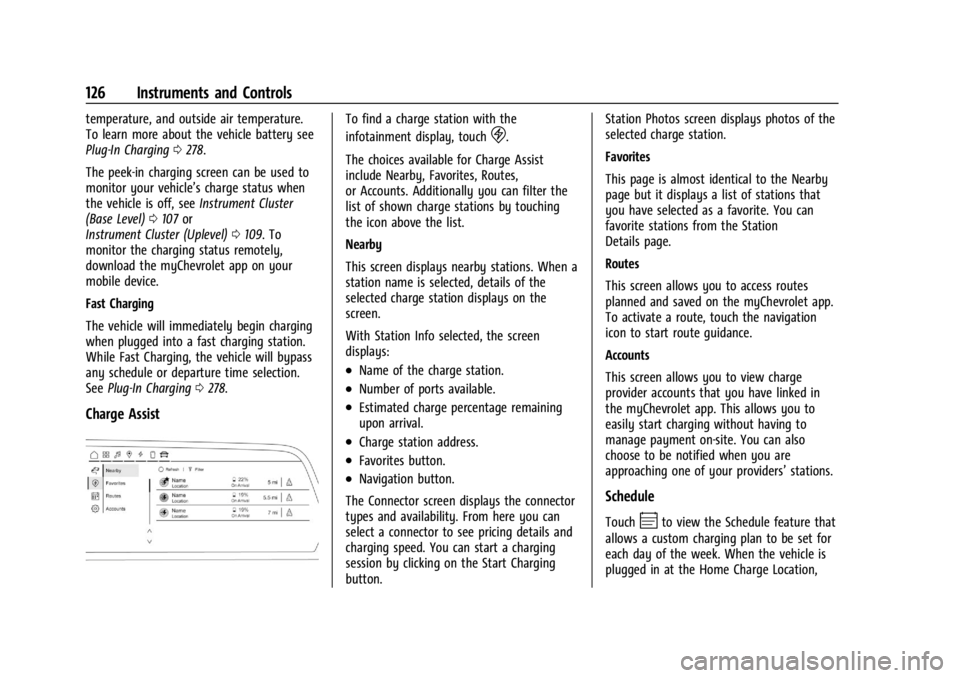
Active Charging
During an active charging session, the
Charging screen displays and continuously
updates the following items:
.Text indicating the vehicle’s current
charging status.
.Current Range: The range the vehicle is
capable of driving at the current charge
level.
.Range Increase Rate: How much range is
accumulating per hour of charging.
.Charge Complete at/in: The estimated
time at which the vehicle will reach the
desired Charge Level.
.Target Charge Level Gauge: During an
Active Charge, the gauge displays the
vehicle's current Charge Level as
a percentage and a colored section of the
circular gauge to represent this value.
To update the desired Charge Level for the
active charging session, drag the marker on
the Target Charge Level Gauge.
Touching the Stop Charge button at any
time ends the active charging session. For
information on beginning a charging session,
see Plug-In Charging 0278.
For Level 1 chargers, you can also select the
appropriate Charge Cord Limit of either
8 amps or 12 amps. This determines how
much current can flow from an electrical
outlet to the vehicle battery. It also ensures
proper charge time estimates.
When the Charge Cord Limit is changed
from 8 amps to 12 amps on a 120V circuit a
notification is displayed.
If no Home Charge Location is set, the Level
1 Cord Limit will revert to 8 amps every
time the vehicle is shifted out of (P) Park.
Range and charge time estimates fluctuate
depending on a number of factors such as
Charge Cord Level/Limit, battery
Page 127 of 429
Chevrolet Silverado EV Owner Manual (GMNA-Localizing-U.S./Canada-
16702912) - 2024 - CRC - 1/13/23
126 Instruments and Controls
temperature, and outside air temperature.
To learn more about the vehicle battery see
Plug-In Charging0278.
The peek-in charging screen can be used to
monitor your vehicle’s charge status when
the vehicle is off, see Instrument Cluster
(Base Level) 0107 or
Instrument Cluster (Uplevel) 0109. To
monitor the charging status remotely,
download the myChevrolet app on your
mobile device.
Fast Charging
The vehicle will immediately begin charging
when plugged into a fast charging station.
While Fast Charging, the vehicle will bypass
any schedule or departure time selection.
See Plug-In Charging 0278.
Charge Assist
To find a charge station with the
infotainment display, touch
D.
The choices available for Charge Assist
include Nearby, Favorites, Routes,
or Accounts. Additionally you can filter the
list of shown charge stations by touching
the icon above the list.
Nearby
This screen displays nearby stations. When a
station name is selected, details of the
selected charge station displays on the
screen.
With Station Info selected, the screen
displays:
.Name of the charge station.
.Number of ports available.
.Estimated charge percentage remaining
upon arrival.
.Charge station address.
.Favorites button.
.Navigation button.
The Connector screen displays the connector
types and availability. From here you can
select a connector to see pricing details and
charging speed. You can start a charging
session by clicking on the Start Charging
button. Station Photos screen displays photos of the
selected charge station.
Favorites
This page is almost identical to the Nearby
page but it displays a list of stations that
you have selected as a favorite. You can
favorite stations from the Station
Details page.
Routes
This screen allows you to access routes
planned and saved on the myChevrolet app.
To activate a route, touch the navigation
icon to start route guidance.
Accounts
This screen allows you to view charge
provider accounts that you have linked in
the myChevrolet app. This allows you to
easily start charging without having to
manage payment on-site. You can also
choose to be notified when you are
approaching one of your providers’
stations.
Schedule
TouchEto view the Schedule feature that
allows a custom charging plan to be set for
each day of the week. When the vehicle is
plugged in at the Home Charge Location,