2024 CHEVROLET SILVERADO EV battery
[x] Cancel search: batteryPage 281 of 429
Chevrolet Silverado EV Owner Manual (GMNA-Localizing-U.S./Canada-
16702912) - 2024 - CRC - 1/17/23
280 Driving and Operating
4. Plug in the AC charge cord into thevehicle charge port . Make sure the AC
vehicle plug is fully connected to the AC
charge port. If it is not properly
connected, the vehicle may not be
charged.
5. Verify that the Headlight Charging Status Indicator (CSI) illuminates on the
headlamps (if enabled), charge port light
turns on, and an audible chirp occurs.
See Charging Status Feedback 0283.
To End AC Charging 1. Unlock the charge cord from the vehicle by pressing the button on the top of the
charge cord plug. Unplug the charge cord
from the vehicle.
2. Close the charge port door by pressing firmly in the center until it latches.
3. Unplug the charge cord from the electrical outlet.
4. Place the charge cord into the storage case.
DC Charging
DC Charging Station Hardware
The vehicle can be charged using DC
charging equipment typically found at
service stations and other public locations. Check the charging station DC vehicle plug
for compatibility with the DC charge port on
this vehicle. This vehicle is compatible with a
Combined Charging System 1 (CCS1)
connector.
When recharging at a DC charge station, the
charging cable connected to the vehicle
must be less than 10 m (33 ft) in length to
meet functionality and regulatory
requirements.
{Warning
Do not use the charging station if the
handle has defects such as cracks,
exposed wires, burnt or missing pins,
or any other damage. A damaged handle
may result in personal injury and/or
damage to the vehicle, the charging port
or other property.
For maximum charging performance, and to
prevent charging interruptions or damage to
the high voltage battery and vehicle:
.Remove your hands from the charging
handle once it has been plugged in. If not
done, this can cause a charging
interruption.
.Ensure that the charge cord plug clicks. Follow the steps listed on the charging
station to perform a DC vehicle charge.
If for any reason DC charging does not
begin or is interrupted, check the DC
charging station display for messages.
Unplug the cord to restart the DC charging
process.
To Start DC Charging
1. Put the vehicle in P (Park).
2. Press the Electric Parking brake (EPB) switch. See Electric Parking Brake 0205.
3. Push the rearward edge of the charge port door and release to open the door.
In cold weather conditions, ice may form
around the charge port door. The charge
port door may not open on the first
attempt. Remove ice from the area and
repeat attempting to open the charge
port door.
Page 282 of 429
Chevrolet Silverado EV Owner Manual (GMNA-Localizing-U.S./Canada-
16702912) - 2024 - CRC - 1/17/23
Driving and Operating 281
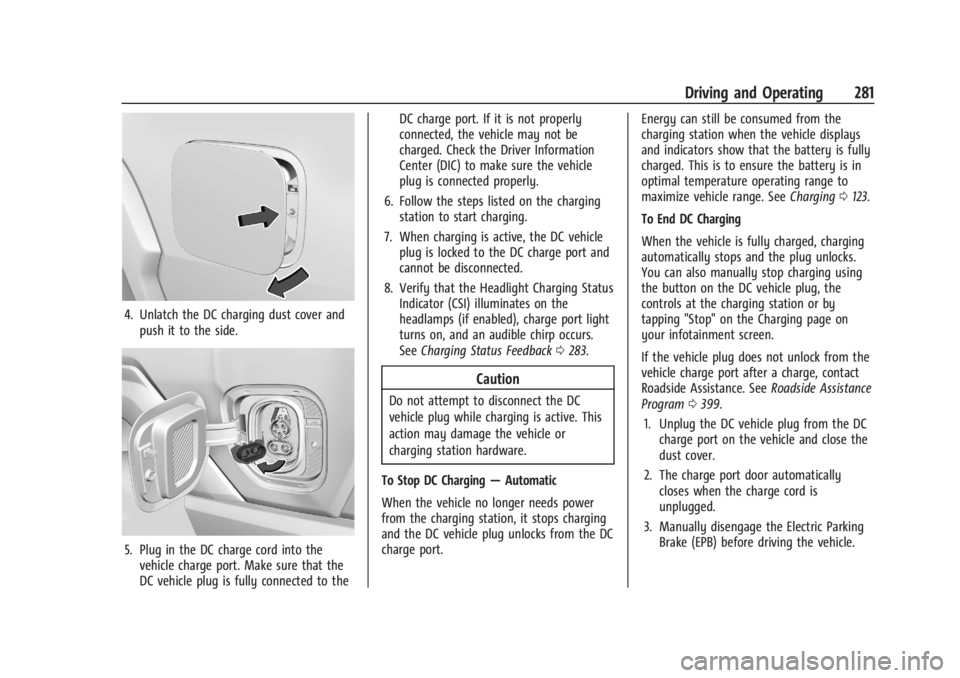
4. Unlatch the DC charging dust cover andpush it to the side.
5. Plug in the DC charge cord into thevehicle charge port. Make sure that the
DC vehicle plug is fully connected to the DC charge port. If it is not properly
connected, the vehicle may not be
charged. Check the Driver Information
Center (DIC) to make sure the vehicle
plug is connected properly.
6. Follow the steps listed on the charging station to start charging.
7. When charging is active, the DC vehicle plug is locked to the DC charge port and
cannot be disconnected.
8. Verify that the Headlight Charging Status Indicator (CSI) illuminates on the
headlamps (if enabled), charge port light
turns on, and an audible chirp occurs.
See Charging Status Feedback 0283.
Caution
Do not attempt to disconnect the DC
vehicle plug while charging is active. This
action may damage the vehicle or
charging station hardware.
To Stop DC Charging —Automatic
When the vehicle no longer needs power
from the charging station, it stops charging
and the DC vehicle plug unlocks from the DC
charge port. Energy can still be consumed from the
charging station when the vehicle displays
and indicators show that the battery is fully
charged. This is to ensure the battery is in
optimal temperature operating range to
maximize vehicle range. See
Charging0123.
To End DC Charging
When the vehicle is fully charged, charging
automatically stops and the plug unlocks.
You can also manually stop charging using
the button on the DC vehicle plug, the
controls at the charging station or by
tapping "Stop" on the Charging page on
your infotainment screen.
If the vehicle plug does not unlock from the
vehicle charge port after a charge, contact
Roadside Assistance. See Roadside Assistance
Program 0399.
1. Unplug the DC vehicle plug from the DC charge port on the vehicle and close the
dust cover.
2. The charge port door automatically closes when the charge cord is
unplugged.
3. Manually disengage the Electric Parking Brake (EPB) before driving the vehicle.
Page 287 of 429
Chevrolet Silverado EV Owner Manual (GMNA-Localizing-U.S./Canada-
16702912) - 2024 - CRC - 1/17/23
286 Driving and Operating
Charge Cord
IMPORTANT SAFETY INSTRUCTIONS
This symbol indicates risk of electrical shock.
SeeRadio Frequency Statement 0404.
The vehicle comes with a portable charge
cord used to charge the high voltage
battery. When used correctly, the Charge
Cord provides a safe connection between a
standard electrical outlet and your vehicle's
on-board charger.
When storing the charge cord in the vehicle,
ensure the charge cord bag is secured.
Depending on the storage location, tether
the charge cord bag to vehicle.
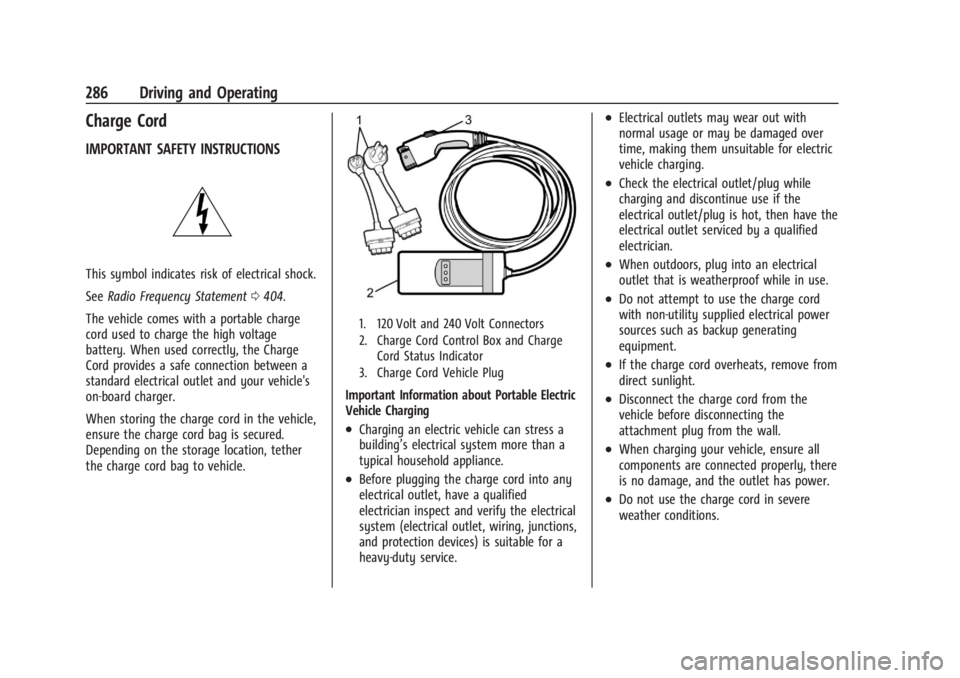
1. 120 Volt and 240 Volt Connectors
2. Charge Cord Control Box and Charge Cord Status Indicator
3. Charge Cord Vehicle Plug
Important Information about Portable Electric
Vehicle Charging
.Charging an electric vehicle can stress a
building’s electrical system more than a
typical household appliance.
.Before plugging the charge cord into any
electrical outlet, have a qualified
electrician inspect and verify the electrical
system (electrical outlet, wiring, junctions,
and protection devices) is suitable for a
heavy-duty service.
.Electrical outlets may wear out with
normal usage or may be damaged over
time, making them unsuitable for electric
vehicle charging.
.Check the electrical outlet/plug while
charging and discontinue use if the
electrical outlet/plug is hot, then have the
electrical outlet serviced by a qualified
electrician.
.When outdoors, plug into an electrical
outlet that is weatherproof while in use.
.Do not attempt to use the charge cord
with non-utility supplied electrical power
sources such as backup generating
equipment.
.If the charge cord overheats, remove from
direct sunlight.
.Disconnect the charge cord from the
vehicle before disconnecting the
attachment plug from the wall.
.When charging your vehicle, ensure all
components are connected properly, there
is no damage, and the outlet has power.
.Do not use the charge cord in severe
weather conditions.
Page 294 of 429
Chevrolet Silverado EV Owner Manual (GMNA-Localizing-U.S./Canada-
16702912) - 2024 - CRC - 1/17/23
Driving and Operating 293
Utility Interruption of Charging
This vehicle responds to requests through
the utility company to limit or completely
block electrical power grid use. This feature
is inactive during DC charging. A utility
interruption will lengthen the vehicle
charge time.
When electrical grid power is completely
blocked, the vehicle will not charge until the
utility interruption has expired. The vehicle
should be left plugged in so that the vehicle
will automatically resume charging.
Changing the charge mode to Charge Now
or performing a delayed charging override
will not disable a utility interruption.
A message will display on the instrument
cluster indicating that a utility interruption
has occurred.
Charging Station Troubleshooting
If the vehicle does not charge after being
plugged in to a residential 240-volt charging
station:1. Verify that the charge mode is set to Charge Now.
2. Verify that the charging station circuit breaker is not tripped. 3. Plug the portable charge cord into the
wall outlet, verify that the indicator light
on the charge cord is solid green, and
connect it to the vehicle. See “Charge
Cord Status Indicators” inCharge Cord
0 286.
4. If the vehicle charges with the portable charge cord and a different 240-volt
charging station, such as a public station,
there may be a problem with the
charging station. Contact the charging
station manufacturer for service.
Electrical Requirements for
Battery Charging
The vehicle is designed for compatibility
with most standard vehicle charging
equipment in the region of sale. Check for
charger compatibility before purchasing a
charger
The portable charge cord defaults to
120 volts and 8 amps. Have the outlet
inspected before changing to 12 amps on the
Charging Screens. If 12 amps is selected, a
pop-up will show on the infotainment
display to confirm the change to 12 amps.
See the “Active Charging” section under
Charging 0123.
Caution
Do not use portable or stationary backup
generating equipment to charge the
vehicle. This may cause damage to the
vehicle's charging system. Only charge
the vehicle from utility supplied power.
Trailer Towing
General Towing Information
Only use towing equipment that has been
designed for the vehicle. Contact your dealer
or trailering dealer for assistance with
preparing the vehicle to tow a trailer. Read
the entire section before towing a trailer.
To tow a disabled vehicle, see Transporting
a Disabled Vehicle 0378. To tow the vehicle
behind another vehicle such as a motor
home, see Recreational Vehicle Towing
0 379.
Page 296 of 429
Chevrolet Silverado EV Owner Manual (GMNA-Localizing-U.S./Canada-
16702912) - 2024 - CRC - 1/17/23
Driving and Operating 295
The trailer structure, the tires, and the
brakes must be all be rated to carry the
intended cargo. Inadequate trailer
equipment can cause the combination to
operate in an unexpected or unsafe manner.
Before driving, inspect all trailer hitch parts
and attachments, safety chains, electrical
connectors, lamps, tires, and mirrors. See
Towing Equipment0301. If the trailer has
electric brakes, start the combination
moving and then manually apply the trailer
brake controller to check the trailer brakes
work. During the trip, occasionally check
that the cargo and trailer are secure and
that the lamps and any trailer brakes are
working.
Towing with a Stability Control System
When towing, the stability control system
might be heard. The system reacts to
vehicle movement caused by the trailer,
which mainly occurs during cornering. This is
normal when towing heavier trailers.
Following Distance
Stay at least twice as far behind the vehicle
ahead as you would when driving without a
trailer to help to avoid heavy braking and
sudden turns.
Passing
More passing distance is needed when
towing a trailer. The combination of the
vehicle and trailer will not accelerate as
quickly and is much longer than the vehicle
alone. It is necessary to go much farther
beyond the passed vehicle before returning
to the lane. Pass on level roadways. Avoid
passing on hills if possible.
Backing Up
Hold the bottom of the steering wheel with
one hand. To move the trailer to the left,
move that hand to the left. To move the
trailer to the right, move that hand to the
right. Always back up slowly and, if possible,
have someone guide you.
Making Turns
Caution
Turn more slowly and make wider arcs
when towing a trailer to prevent damage
to your vehicle. Making very sharp turns
could cause the trailer to contact the
vehicle. Make wider turns than normal when towing,
so the trailer does not go over soft
shoulders, over curbs, or strike road signs,
trees, or other objects. Always signal turns
well in advance. Do not steer or brake
suddenly.
Driving on Grades
Reduce speed before starting down a long or
steep downhill grade. Use regenerative
braking to help slow the vehicle or maintain
speed by keeping the vehicle in gear and
limiting the initial battery charge to 80% or
less. Avoid using Regen on Demand. See
Hill
and Mountain Roads 0190.
Viewing Systems
If equipped, the viewing systems on the
vehicle can improve visibility while hitching,
backing up, and driving with a trailer. See
Advanced Driver Assistance Systems 0244.
Parking on Hills
{Warning
To prevent serious injury or death,
always park your vehicle and trailer on a
level surface when possible.
Page 316 of 429
Chevrolet Silverado EV Owner Manual (GMNA-Localizing-U.S./Canada-
16702912) - 2024 - CRC - 1/17/23
Driving and Operating 315
.Maintenance
.Checklist
.Weight
.Brakes (if equipped)
Each section shows high level status
information for the feature. Selecting a
section opens up a new screen with
additional information and/or options.
Selecting the checklist, camera,
or maintenance icon opens up the
corresponding screen.
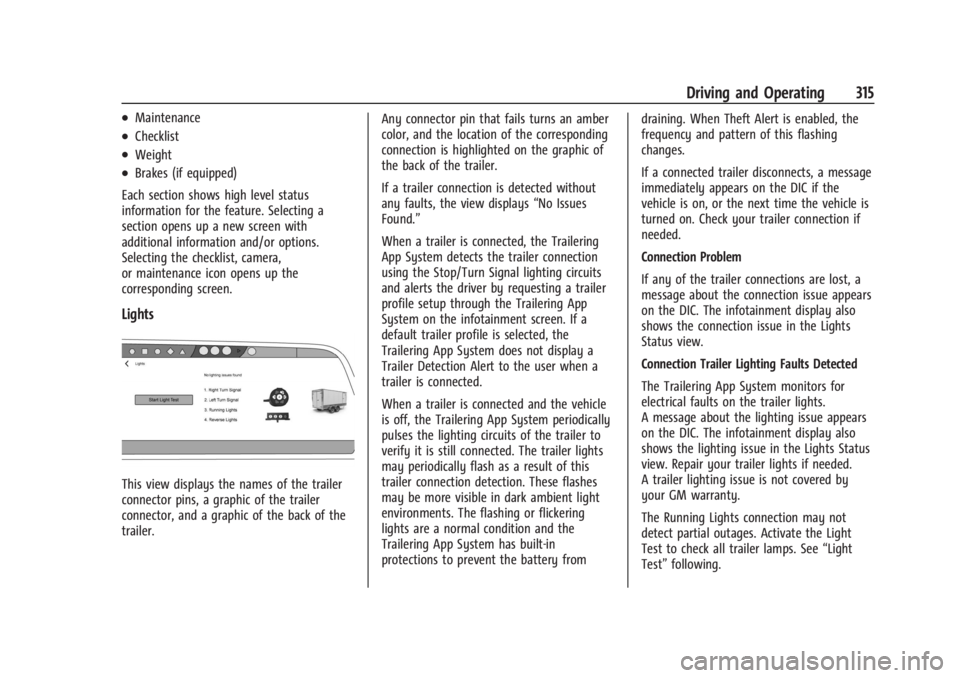
Lights
This view displays the names of the trailer
connector pins, a graphic of the trailer
connector, and a graphic of the back of the
trailer. Any connector pin that fails turns an amber
color, and the location of the corresponding
connection is highlighted on the graphic of
the back of the trailer.
If a trailer connection is detected without
any faults, the view displays
“No Issues
Found.”
When a trailer is connected, the Trailering
App System detects the trailer connection
using the Stop/Turn Signal lighting circuits
and alerts the driver by requesting a trailer
profile setup through the Trailering App
System on the infotainment screen. If a
default trailer profile is selected, the
Trailering App System does not display a
Trailer Detection Alert to the user when a
trailer is connected.
When a trailer is connected and the vehicle
is off, the Trailering App System periodically
pulses the lighting circuits of the trailer to
verify it is still connected. The trailer lights
may periodically flash as a result of this
trailer connection detection. These flashes
may be more visible in dark ambient light
environments. The flashing or flickering
lights are a normal condition and the
Trailering App System has built-in
protections to prevent the battery from draining. When Theft Alert is enabled, the
frequency and pattern of this flashing
changes.
If a connected trailer disconnects, a message
immediately appears on the DIC if the
vehicle is on, or the next time the vehicle is
turned on. Check your trailer connection if
needed.
Connection Problem
If any of the trailer connections are lost, a
message about the connection issue appears
on the DIC. The infotainment display also
shows the connection issue in the Lights
Status view.
Connection Trailer Lighting Faults Detected
The Trailering App System monitors for
electrical faults on the trailer lights.
A message about the lighting issue appears
on the DIC. The infotainment display also
shows the lighting issue in the Lights Status
view. Repair your trailer lights if needed.
A trailer lighting issue is not covered by
your GM warranty.
The Running Lights connection may not
detect partial outages. Activate the Light
Test to check all trailer lamps. See
“Light
Test” following.
Page 322 of 429
Chevrolet Silverado EV Owner Manual (GMNA-Localizing-U.S./Canada-
16702912) - 2024 - CRC - 1/17/23
Driving and Operating 321
Conversions and Add-Ons
Add-On Electrical Equipment
{Warning
The Data Link Connector (DLC) is used for
vehicle service and Emission Inspection/
Maintenance testing. SeeService Vehicle
Soon Light (Propulsion System Failure)
0 115. A device connected to the DLC —
such as an aftermarket fleet or
driver-behavior tracking device —may
interfere with vehicle systems. This could
affect vehicle operation and cause a
crash. Such devices may also access
information stored in the vehicle’s
systems.
Caution
Some electrical equipment can damage
the vehicle or cause components to not
work and would not be covered by the
vehicle warranty. Always check with your
dealer before adding electrical equipment. Add-on equipment can drain the vehicle's
12-volt battery, even if the vehicle is not
operating.
When adding electrical equipment, it should
only be connected using the accessory
power outlets. The maximum power that
can be supplied by one accessory power
outlet or spread across all three is 200 watts
or 15 amps. Exceeding 200 watts or 15 amps
may cause erratic vehicle operation.
The vehicle has an airbag system. Before
attempting to add anything electrical to the
vehicle, see
Servicing the Airbag-Equipped
Vehicle 068 and
Adding Equipment to the Airbag-Equipped
Vehicle 068.
Auxiliary Switches
On-screen auxiliary switches, if equipped, are
quick-touch icons that appear within the
infotainment system, giving you easy access
to some of the features of certain
aftermarket accessories installed on the
vehicle (off-road lighting, light bars, etc.). To access the on-screen auxiliary switches,
select Controls > Aux Switches. Six on-screen
auxiliary switches are available.
Use of the on-screen switches requires
installation of an auxiliary switch interface
module, which is mounted under the hood.
See your dealer for purchase and installation
of the necessary components. When an
aftermarket accessory is installed onto the
vehicle, it should be hard-wired to the
auxiliary switch interface module to the
numbered connection that corresponds with
the numbered on-screen auxiliary switch.
See
Accessories and Modifications 0324.
If you touch an on-screen auxiliary switch
but the auxiliary switch interface module is
not installed or has no accessory wired at
that connection, a message “No accessory
connected to this switch” displays.
Customizing the On-Screen Auxiliary
Switches
After a purchased accessory is installed,
create a text label for the corresponding
on-screen auxiliary switch and choose an
icon to represent the installed accessory.
1. While the vehicle is in P (Park), touch the Controls icon on the infotainment
home page.
Page 324 of 429
Chevrolet Silverado EV Owner Manual (GMNA-Localizing-U.S./Canada-
16702912) - 2024 - CRC - 1/13/23
Vehicle Care 323
Vehicle Care
General Information
General Information . . . . . . . . . . . . . . . . . . . 324
California Perchlorate MaterialsRequirements . . . . . . . . . . . . . . . . . . . . . . . . 324
Accessories and Modifications . . . . . . . . . 324
Vehicle Checks
Doing Your Own Service Work . . . . . . . . 324
Underhood Compartment Overview . . . 325
Cooling System . . . . . . . . . . . . . . . . . . . . . . . . 327
Washer Fluid . . . . . . . . . . . . . . . . . . . . . . . . . . 328
Brakes . . . . . . . . . . . . . . . . . . . . . . . . . . . . . . . . . 328
Brake Fluid . . . . . . . . . . . . . . . . . . . . . . . . . . . . 329
Battery - North America . . . . . . . . . . . . . . . 330
Noise Control System (RST Only) . . . . . . 332
Wiper Blade Replacement . . . . . . . . . . . . . 333
Glass Replacement . . . . . . . . . . . . . . . . . . . . . 333
Windshield Replacement . . . . . . . . . . . . . . 334
Gas Strut(s) . . . . . . . . . . . . . . . . . . . . . . . . . . . 334
Headlamp Aiming
Front Headlamp Aiming . . . . . . . . . . . . . . . 335
Bulb Replacement
LED Lighting . . . . . . . . . . . . . . . . . . . . . . . . . . . 335
Electrical System
High Voltage Devices and Wiring . . . . . . 335
Electrical System Overload . . . . . . . . . . . . . 335 Fuses and Circuit Breakers . . . . . . . . . . . . . 337
Underhood Compartment Fuse
Block . . . . . . . . . . . . . . . . . . . . . . . . . . . . . . . . 337
Instrument Panel Fuse Block (Left) . . . . 340
Instrument Panel Fuse Block (Right) . . . 342
Wheels and Tires
Tires . . . . . . . . . . . . . . . . . . . . . . . . . . . . . . . . . . 344
All-Season Tires . . . . . . . . . . . . . . . . . . . . . . . . 345
Winter Tires . . . . . . . . . . . . . . . . . . . . . . . . . . . 345
Tire Sidewall Labeling . . . . . . . . . . . . . . . . . 346
Tire Designations . . . . . . . . . . . . . . . . . . . . . . 347
Tire Terminology and Definitions . . . . . . 347
Tire Pressure . . . . . . . . . . . . . . . . . . . . . . . . . . 349
Tire Pressure for High-Speed Operation . . . . . . . . . . . . . . . . . . . . . . . . . . . 350
Tire Pressure Monitor System . . . . . . . . . . 351
Tire Pressure Monitor Operation . . . . . . . 351
Tire Inspection . . . . . . . . . . . . . . . . . . . . . . . . . 355
Tire Rotation . . . . . . . . . . . . . . . . . . . . . . . . . . 356
When It Is Time for New Tires . . . . . . . . 357
Buying New Tires . . . . . . . . . . . . . . . . . . . . . 358
Different Size Tires and Wheels . . . . . . . 359
Uniform Tire Quality Grading . . . . . . . . . 359
Wheel Alignment and Tire Balance . . . . 360
Wheel Replacement . . . . . . . . . . . . . . . . . . . 360
Tire Chains . . . . . . . . . . . . . . . . . . . . . . . . . . . . 361
If a Tire Goes Flat . . . . . . . . . . . . . . . . . . . . . 362
Tire Sealant and Compressor Kit . . . . . . . 363
Storing the Tire Sealant and
Compressor Kit . . . . . . . . . . . . . . . . . . . . . . 368 Tire Changing . . . . . . . . . . . . . . . . . . . . . . . . . 369
Full-Size Spare Tire . . . . . . . . . . . . . . . . . . . . 374
Jump Starting
Jump Starting - North America . . . . . . . . 375
Towing the Vehicle
Transporting a Disabled Vehicle . . . . . . . 378
Recreational Vehicle Towing . . . . . . . . . . . 379
Appearance Care
Exterior Care . . . . . . . . . . . . . . . . . . . . . . . . . . 379
Interior Care . . . . . . . . . . . . . . . . . . . . . . . . . . 384
Floor Mats . . . . . . . . . . . . . . . . . . . . . . . . . . . . 387