2021 VOLVO V90 CROSS COUNTRY park assist
[x] Cancel search: park assistPage 392 of 683

DRIVER SUPPORT
* Option/accessory.
390
Camera The camera is used by several driver support systems to e.g. detect lane marker lines orroad signs.
Location of the camera
The camera is used by the following functions:
Adaptive Cruise Control
*
Pilot Assist
*
Lane Keeping Aid
*
Steering assistance at risk of collision
City Safety
Driver Alert Control
*
Road Sign Information
*
Active high beams
*
Park Assist
*
Related information
Driver support systems (p. 278)
Camera/radar sensor limitations (p. 390)
Recommended camera and radar sensor maintenance (p. 393)
Camera/radar sensor limitations The camera and radar sensor used by several of the driver support functions has certainlimitations, which also affect the functionsusing the camera and radar sensor. The drivershould be aware of the following limitations:
Page 395 of 683

DRIVER SUPPORT
}}
* Option/accessory.393
Additional Park Assist Camera *
limitations
Blind sectors
There are "blind" sectors between the cameras' fields of vision.
With the Park Assist Camera's 360° view *
selected, objects/obstacles may not be detected if they are located in the "joints"where the edges of the individual cameraviews meet.
WARNING
Even if it seems as though only a fairly small section of the screen image isobstructed, this may mean that a relativelylarge sector is hidden and obstacles theremay not be detected until they are verynear the vehicle.
Lighting conditions
The camera image is automatically adjusted according to the current lighting conditions.This means that the brightness and quality ofthe image may vary slightly. Poor lighting con-ditions may result in reduced image quality.
NOTE
A bike carrier and other accessories moun- ted on the rear of the vehicle can obscurethe camera's view.
Related information
Camera (p. 390)
Radar sensor (p. 387)
Recommended camera and radar sensor maintenance (p. 393)
Park Assist Camera
* (p. 369)
Volvo Cars support site (p. 21)
Recommended camera and radar sensor maintenance
In order for the camera and radar units to function properly, they must be kept free ofdirt, ice, snow, etc. and should be washedregularly with water and car washing deter-gent.
NOTE
Dirt, ice and snow covering the sensors could cause false warnings, reduced func-tion, or no function.
Location of the Park Assist sensors
Page 396 of 683

||
DRIVER SUPPORT
* Option/accessory.
394
Location of rear radar sensors. Keep the marked area clean (on both the left and right sides of the vehicle).
For best possible performance, it is impor- tant to keep the areas in front of the sen-sors clean.
Do not attach any objects, tape or decalsto the surface of the sensors.
Clean the camera lenses regularly usinglukewarm water and car washing deter-gent. Wash gently to avoid scratching thelens.
CAUTION
Only a workshop may perform mainte- nance on driver support components – anauthorized Volvo workshop is recom-mended.
Related information
Camera (p. 390)
Radar sensor (p. 387)
Camera/radar sensor limitations (p. 390)
Park Assist Camera
* (p. 369)
Page 398 of 683

||
DRIVER SUPPORT
396
Defective cameraIf a camera sector is dark and contains this symbol, thisindicates that the camera isnot functioning properly.
The vehicle's left-side camera is malfunctioning.
A dark camera sector may also be displayed in the following situations, but without the
defective camera symbol: a door is open
the tailgate is open
a rearview mirror is folded in
Rear Park Assist Camera
WARNING
Be extra cautious when reversing if this symbol isshown when a trailer, bikecarrier or similar isattached and electricallyconnected to the vehicle. The symbol indicates that
the rear parking assist sensors are deacti-
vated and will not warn of any obstacles.
Related information
Camera (p. 390)
Radar sensor (p. 387)
Camera/radar sensor limitations (p. 390)
Volvo Cars support site (p. 21)
Page 405 of 683

STARTING AND DRIVING
}}
403
Brake functions
The vehicle's brakes are used to reduce speed or prevent the vehicle from rolling.
In addition to the wheel brakes and parking brakes, the vehicle is also equipped with anumber of automatic brake assist functions.These systems provide assistance by e.g. thedriver not needing to depress the brake pedalat a traffic light, when starting up a hill orwhen driving down a hill. Depending on how the vehicle is equipped, the following brake assist functions may beincluded:
Auto-hold brake function at a standstill(Auto Hold)
Hill Start Assist (Hill Start Assist)
Braking assist after a collision
City Safety
Hill Descent Control (Hill Descent Control)
Related information
Brakes (p. 403)
Parking brake (p. 406)
Auto-hold brakes (p. 409)
Braking assist after a collision (p. 411)
Hill Start Assist (p. 411)
City Safety
™ (p. 331)
Hill Descent Control (p. 433)
Brakes
The brake pedal is used to apply the vehicle's regular brakes, which are part of the brakesystem.
The vehicle is equipped with two brake cir- cuits. If one brake circuit is damaged, thebrake pedal may go down further whendepressed. More pressure will then berequired from the driver for normal brakingeffect. The driver's pressure on the brake pedal is enhanced by a power braking function.
WARNING
Power braking only functions if the engine is running.
If the brake pedal is used when the engine is turned off, the pedal will feel stiffer than usualand greater pressure must be applied to brakethe vehicle. In very hilly areas or when driving with a heavy load, engine braking in manual gear should beused to augment the brakes. Engine braking ismost effective if the same gear is used bothuphill and downhill. Use the Off Road drivemode to increase the engine braking effectwhen driving on steep downgrades at lowspeeds.
Anti-lock brakesThe vehicle is equipped with an Anti-lock Braking System (ABS 2
), which helps prevent
the wheels from locking and helps maintain steering control when braking. Vibrations maybe felt from the brake pedal when ABS isoperating, which is normal. After the vehicle is started, a brief test of the ABS system is automatically performed whenthe driver releases the brake pedal. An addi-tional automatic test of the system may beperformed when the vehicle is traveling at alow speed. During the test, the brake pedalmay feel as though it is pulsating.
Page 412 of 683

||
STARTING AND DRIVING
410
Symbols in the instrument panel
Symbol Meaning
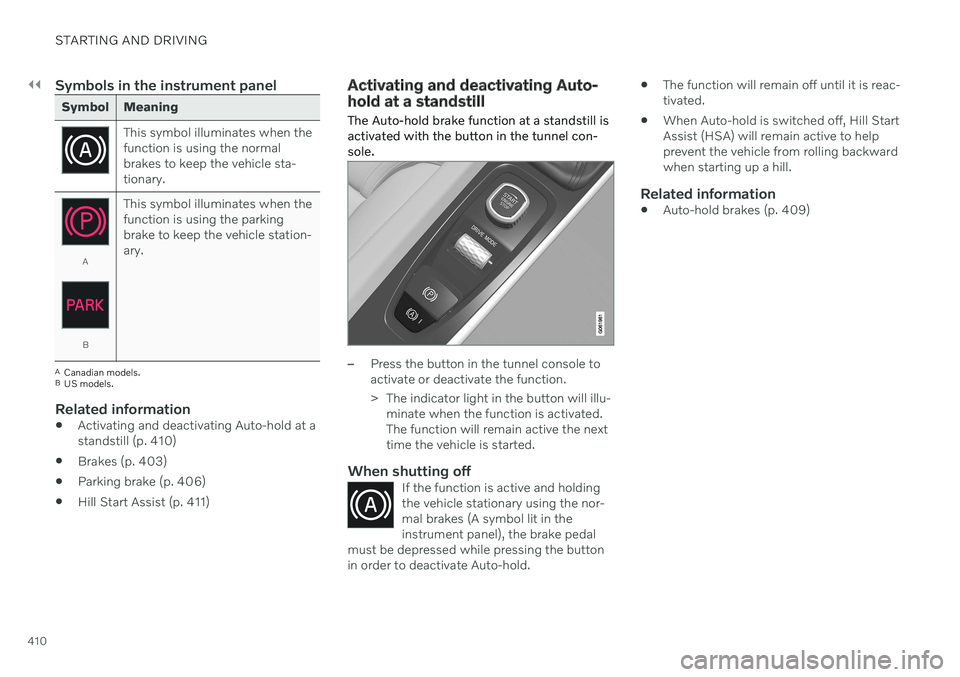
This symbol illuminates when the function is using the normalbrakes to keep the vehicle sta-tionary.
A
BThis symbol illuminates when the function is using the parkingbrake to keep the vehicle station-ary.
A
Canadian models.
B US models.
Related information
Activating and deactivating Auto-hold at a standstill (p. 410)
Brakes (p. 403)
Parking brake (p. 406)
Hill Start Assist (p. 411)
Activating and deactivating Auto- hold at a standstill
The Auto-hold brake function at a standstill is activated with the button in the tunnel con-sole.
–Press the button in the tunnel console to activate or deactivate the function.
> The indicator light in the button will illu- minate when the function is activated. The function will remain active the nexttime the vehicle is started.
When shutting offIf the function is active and holdingthe vehicle stationary using the nor-mal brakes (A symbol lit in theinstrument panel), the brake pedal
must be depressed while pressing the buttonin order to deactivate Auto-hold.
The function will remain off until it is reac- tivated.
When Auto-hold is switched off, Hill StartAssist (HSA) will remain active to helpprevent the vehicle from rolling backwardwhen starting up a hill.
Related information
Auto-hold brakes (p. 409)
Page 438 of 683

||
STARTING AND DRIVING
* Option/accessory.
436
After driving
If possible, park in a climate-controlled garage.
Related information
Eco drive mode (p. 422)
Starting and stopping preconditioning
*
(p. 234)
Checking tire pressure (p. 541)
Activating and deactivating Auto-hold at astandstill (p. 410)
Start/Stop function (p. 425)
Trip computer (p. 93)
Preparing for a long trip
It is important to have the vehicle's systems and equipment checked carefully before driv-ing long distances.
Check that
the engine is running properly and that fuel consumption is normal
there are no leaks (fuel, oil or other fluid)
the brake pedal is functioning properly
tire tread depth and air pressure are atcorrect levels. Change to snow tires whendriving in areas where there is a risk ofsnowy or icy roads
the start battery is sufficiently charged
the wiper blades are in good condition
Related information
Checking tire pressure (p. 541)
Filling washer fluid (p. 646)
Winter driving (p. 436)
Economical driving (p. 435)
Vehicle modem settings (p. 517)
Loading recommendations (p. 570)
Driving with a trailer (p. 446)
Pilot Assist
*
(p. 304)
Tire sealing system (p. 556)
Winter driving
It is important to check the vehicle before driving in cold/snowy conditions to makesure it can be driven safely.
Before the cold season arrives: Make sure the engine coolant contains 50% antifreeze. This mixture helps pro-tect the engine from frost erosion down toapprox. –35 °C (–31 °F). Do not mix dif-ferent types of antifreeze as this couldpose a health risk.
Keep the fuel tank well filled to preventcondensation from forming.
Check the viscosity of the engine oil. Oilwith low viscosity (thinner oil) improvescold-weather starting and reduces fuelconsumption when driving with a coldengine.
Check the condition and charge level ofthe start battery. Cold weather placesgreater demands on the start battery andreduces its capacity.
Use washer fluid containing antifreeze tohelp prevent ice from forming in thewasher fluid reservoir.
See separate section for engine oil recommen-dations.
Page 446 of 683

STARTING AND DRIVING
444
Jump starting using another battery If the start battery is discharged, current from another battery can be used to start the vehi-cle.
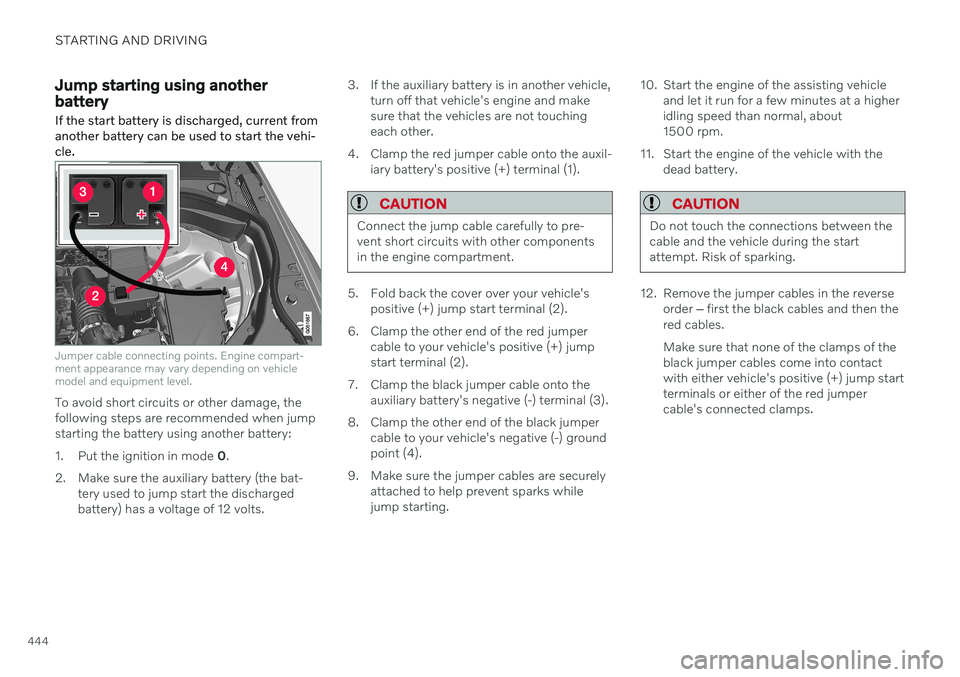
Jumper cable connecting points. Engine compart- ment appearance may vary depending on vehiclemodel and equipment level.
To avoid short circuits or other damage, the following steps are recommended when jumpstarting the battery using another battery:
1. Put the ignition in mode 0.
2. Make sure the auxiliary battery (the bat- tery used to jump start the discharged battery) has a voltage of 12 volts. 3. If the auxiliary battery is in another vehicle,
turn off that vehicle's engine and makesure that the vehicles are not touchingeach other.
4. Clamp the red jumper cable onto the auxil- iary battery's positive (+) terminal (1).
CAUTION
Connect the jump cable carefully to pre- vent short circuits with other componentsin the engine compartment.
5. Fold back the cover over your vehicle'spositive (+) jump start terminal (2).
6. Clamp the other end of the red jumper cable to your vehicle's positive (+) jump start terminal (2).
7. Clamp the black jumper cable onto the auxiliary battery's negative (-) terminal (3).
8. Clamp the other end of the black jumper cable to your vehicle's negative (-) groundpoint (4).
9. Make sure the jumper cables are securely attached to help prevent sparks whilejump starting. 10. Start the engine of the assisting vehicle
and let it run for a few minutes at a higheridling speed than normal, about1500 rpm.
11. Start the engine of the vehicle with the dead battery.
CAUTION
Do not touch the connections between the cable and the vehicle during the startattempt. Risk of sparking.
12. Remove the jumper cables in the reverseorder ‒ first the black cables and then the
red cables. Make sure that none of the clamps of the black jumper cables come into contactwith either vehicle's positive (+) jump startterminals or either of the red jumpercable's connected clamps.