2021 VOLVO V90 CROSS COUNTRY engine overheat
[x] Cancel search: engine overheatPage 11 of 683
9
STARTING AND DRIVING
Starting the vehicle398
Switching off the vehicle 400
Ignition modes 401
Selecting ignition mode 402
Brake functions 403
Brakes 403
Brake Assist System 404
Braking on wet roads 405
Braking on salted roads 405
Maintenance of the brake system 405
Parking brake 406
Activating and deactivating the parking brake 406
Settings for automatically activat-ing the parking brake 408
Parking on a hill 408
Parking brake malfunction 408
Auto-hold brakes 409
Activating and deactivating Auto-hold at a standstill 410
Hill Start Assist 411
Braking assist after a collision 411
Regenerative braking *
411
Transmission 412
Automatic transmission 412
Shifting gears with automatic transmission413
Using the steering wheel paddles *
to shift 415
Shiftlock 417
Deactivating the automatic shiftlock 417
The kickdown function 418
The Launch function *
418
Automatic transmission symbolsand messages 419
All Wheel Drive (AWD) 419
Drive modes *
419
Changing drive mode *
421
Eco drive mode 422
Activating and deactivating Ecodrive mode using the function button 424
Start/Stop function 425
Driving with the Start/Stop function 425
Deactivating the Start/Stop function 426
Conditions for the Start/Stop function 427
Leveling control * and suspension
429
Leveling control settings *
432
Low Speed Control 432
Activating and deactivating LowSpeed Control using the functionbutton 433
Hill Descent Control
433
Activating and deactivating Hill Descent Control using the func-tion button 434
Economical driving 435
Preparing for a long trip 436
Winter driving 436
Driving through standing water 437
Opening/closing the fuel filler door 438
Refueling 438
Fuel 439
Octane rating 440
Emission controls 442
Overheating of engine and trans-mission 442
Battery drain 443
Jump starting using another battery 444
Driving with a trailer 446
Trailer Stability Assist *
448
Checking trailer lights 449
Towing using a towline 450
Attaching and removing the tow-ing eyelet 451
Recovery 453
HomeLink ®
* 454
Programming HomeLink ®
* 455
Page 326 of 683

||
DRIVER SUPPORT
* Option/accessory.
324
WARNING
The driver support system only issues a warning for obstacles detected by its radarsensor – thus, a warning may come after adelay or not at all.
Never wait for a warning or assistance. Apply the brakes when necessary.
NOTE
Driver support can keep the vehicle sta- tionary for no more than 5 minutes – afterthat time the parking brake is applied andthe function is deactivated. The parking brake must be released before driver support can be reactivated.
Deactivation of the Auto-hold brake function
In certain situations, auto-hold will be deacti- vated when the vehicle is at a standstill andthe function will go into standby mode. This means that the brakes will be released and the vehicle could begin to roll. The driver mustactively apply the brakes to keep the vehiclestationary. This can occur if:
The driver depresses the brake pedal.
The parking brake is applied.
The gear selector is moved to the
P, N or
R position.
The driver puts Adaptive Cruise Control or Pilot Assist in standby mode.
Auto Activate Parking BrakeThe parking brake will be applied if the func-tion is keeping the vehicle stationary using thebrakes and:
The driver opens the door or unbuckleshis/her seat belt.
The function has kept the vehicle at astandstill for more than approx. 5 minutes.
The brakes overheat.
The driver switches off the engine.
Related information
Driver support systems (p. 278)
Adaptive Cruise Control
* (p. 294)
Pilot Assist
* (p. 304)
Brake functions (p. 403)
Lane Keeping Aid
Lane Keeping Aid (LKA 69
) is designed to
actively steer the vehicle on freeways, high- ways and other major roads to help the driverreduce the risk of the vehicle unintentionallyveering out of the lane.
Lake Keeping Aid steers the vehicle back into the lane and/or alerts the driver using vibra-tions in the steering wheel. Lane Keeping Aid is active at speeds between 65–200 km/h (40–125 mph) on roads withclearly visible traffic lane marker lines. On narrow roads, the function may be unavail- able and go into standby mode. The functionwill become available again when the roadbecomes sufficiently wide.
A camera monitors the road/traffic lane's marker lines.
Page 400 of 683

STARTING AND DRIVING
* Option/accessory.
398
Starting the vehicle
The vehicle can be started using the start knob in the tunnel console when the remotekey is in the passenger compartment.
Start knob in the tunnel console.
WARNING
Before starting:
Buckle your seat belt.
Adjust the seat, steering wheel and mirrors.
Make sure you can fully depress thebrake pedal.
The remote key is not physically used to startthe ignition because the vehicle is equippedwith the keyless Passive Start system. To start the vehicle:
1. The remote key must be inside the vehicle.
For vehicles with Passive Start, the key must be in the front section of the passen-ger compartment. With the optional key- less locking/unlocking function *, the key
can be anywhere in the vehicle.
2. Press and hold down the brake pedal 1
as
far as possible.
3. Turn the start knob clockwise and release. The control will automatically return to the original position.
WARNING
Never use more than one inlay mat at a time on the driver's floor. If any othertype of floor mat is used, remove theoriginal mat from the driver's seat floorbefore driving. All types of mats mustbe securely anchored in the attach-ment points in the floor. Make sure thefloor mat does not impede the move-ment of the brake pedal or acceleratorpedal in any way, as this could be aserious safety hazard.
Volvo's floor mats are specially manu-factured for your vehicle. They must beproperly secured in the attachmentpoints in the floor to help ensure theycannot slide and become trappedunder the pedals.
The starter motor will crank until the enginestarts or until overheating protection is trig-gered.
Error messagesIf the Vehicle key not found message is
shown in the instrument panel at start, place the remote key at the backup reader and thenmake a new start attempt.
1 If the vehicle is moving, it is only necessary to turn the start knob clockwise to start the engine.
Page 401 of 683
STARTING AND DRIVING
}}
399
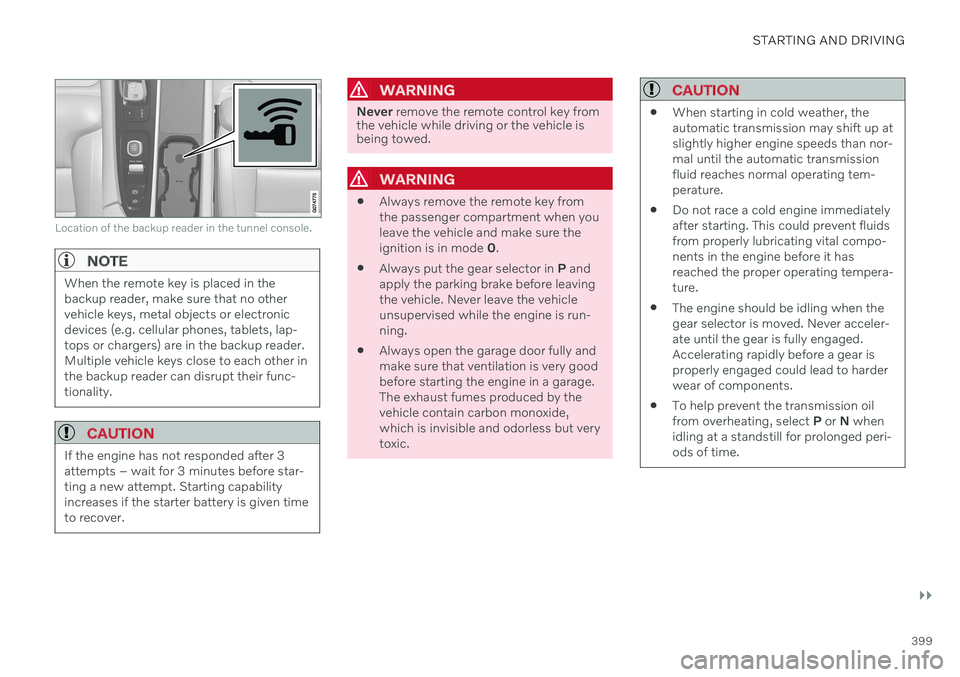
Location of the backup reader in the tunnel console.
NOTE
When the remote key is placed in the backup reader, make sure that no othervehicle keys, metal objects or electronicdevices (e.g. cellular phones, tablets, lap-tops or chargers) are in the backup reader.Multiple vehicle keys close to each other inthe backup reader can disrupt their func-tionality.
CAUTION
If the engine has not responded after 3 attempts – wait for 3 minutes before star-ting a new attempt. Starting capabilityincreases if the starter battery is given timeto recover.
WARNING
Never remove the remote control key from
the vehicle while driving or the vehicle is being towed.
WARNING
Always remove the remote key from the passenger compartment when youleave the vehicle and make sure theignition is in mode
0.
Always put the gear selector in
P and
apply the parking brake before leavingthe vehicle. Never leave the vehicleunsupervised while the engine is run-ning.
Always open the garage door fully andmake sure that ventilation is very goodbefore starting the engine in a garage.The exhaust fumes produced by thevehicle contain carbon monoxide,which is invisible and odorless but verytoxic.
CAUTION
When starting in cold weather, the automatic transmission may shift up atslightly higher engine speeds than nor-mal until the automatic transmissionfluid reaches normal operating tem-perature.
Do not race a cold engine immediatelyafter starting. This could prevent fluidsfrom properly lubricating vital compo-nents in the engine before it hasreached the proper operating tempera-ture.
The engine should be idling when thegear selector is moved. Never acceler-ate until the gear is fully engaged.Accelerating rapidly before a gear isproperly engaged could lead to harderwear of components.
To help prevent the transmission oilfrom overheating, select
P or N when
idling at a standstill for prolonged peri-ods of time.
Page 420 of 683
||
STARTING AND DRIVING
* Option/accessory.
418
Lift the rubber mat in the storage com- partment in front of the gear selector.Locate the hole with a spring-loaded but-ton in the bottom of the compartment.
Press a small screwdriver or similar object into the hole and hold it down.
Move the gear selector to N and release
the button.
4. Replace the rubber mat.
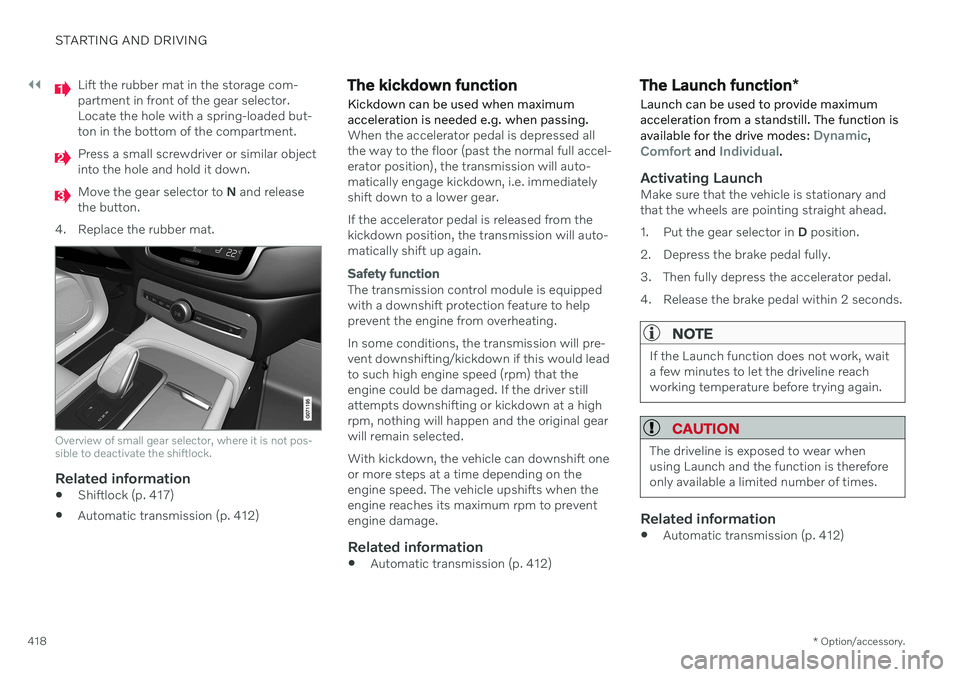
Overview of small gear selector, where it is not pos- sible to deactivate the shiftlock.
Related information
Shiftlock (p. 417)
Automatic transmission (p. 412)
The kickdown function Kickdown can be used when maximum acceleration is needed e.g. when passing.
When the accelerator pedal is depressed all the way to the floor (past the normal full accel-erator position), the transmission will auto-matically engage kickdown, i.e. immediatelyshift down to a lower gear. If the accelerator pedal is released from the kickdown position, the transmission will auto-matically shift up again.
Safety function
The transmission control module is equipped with a downshift protection feature to helpprevent the engine from overheating. In some conditions, the transmission will pre- vent downshifting/kickdown if this would leadto such high engine speed (rpm) that theengine could be damaged. If the driver stillattempts downshifting or kickdown at a highrpm, nothing will happen and the original gearwill remain selected. With kickdown, the vehicle can downshift one or more steps at a time depending on theengine speed. The vehicle upshifts when theengine reaches its maximum rpm to preventengine damage.
Related information
Automatic transmission (p. 412)
The Launch function
*
Launch can be used to provide maximum acceleration from a standstill. The function is available for the drive modes:
Dynamic,Comfort and Individual.
Activating LaunchMake sure that the vehicle is stationary and that the wheels are pointing straight ahead.
1. Put the gear selector in D position.
2. Depress the brake pedal fully.
3. Then fully depress the accelerator pedal.
4. Release the brake pedal within 2 seconds.
NOTE
If the Launch function does not work, wait a few minutes to let the driveline reachworking temperature before trying again.
CAUTION
The driveline is exposed to wear when using Launch and the function is thereforeonly available a limited number of times.
Related information
Automatic transmission (p. 412)
Page 421 of 683
STARTING AND DRIVING
}}
* Option/accessory.419
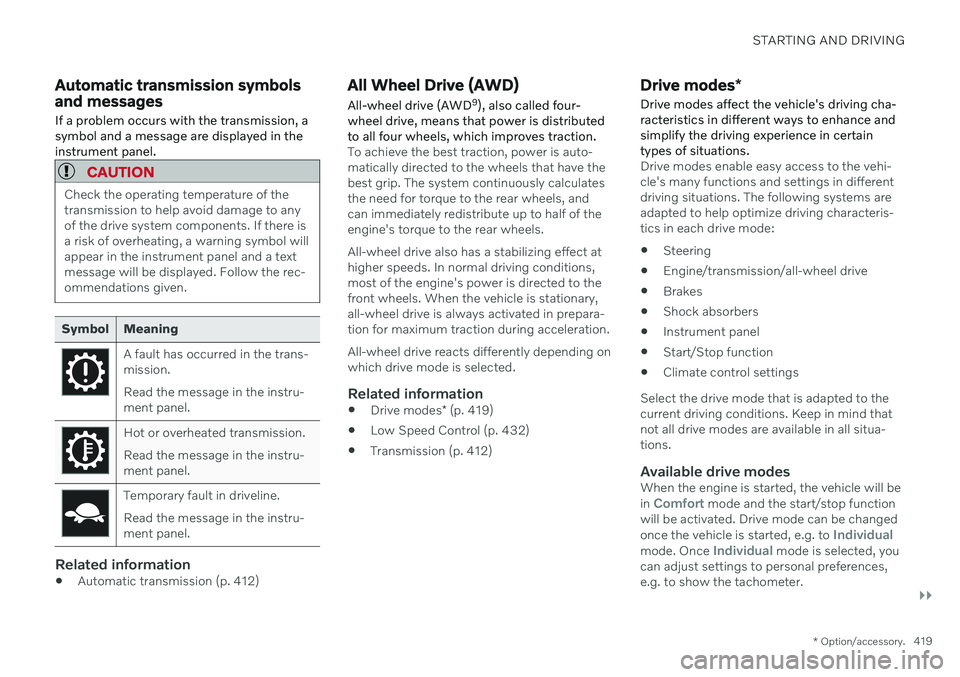
Automatic transmission symbols and messages If a problem occurs with the transmission, a symbol and a message are displayed in theinstrument panel.
CAUTION
Check the operating temperature of the transmission to help avoid damage to anyof the drive system components. If there isa risk of overheating, a warning symbol willappear in the instrument panel and a textmessage will be displayed. Follow the rec-ommendations given.
Symbol Meaning
A fault has occurred in the trans- mission. Read the message in the instru- ment panel.
Hot or overheated transmission. Read the message in the instru- ment panel.
Temporary fault in driveline. Read the message in the instru- ment panel.
Related information
Automatic transmission (p. 412)
All Wheel Drive (AWD)
All-wheel drive (AWD 9
), also called four-
wheel drive, means that power is distributed to all four wheels, which improves traction.
To achieve the best traction, power is auto- matically directed to the wheels that have thebest grip. The system continuously calculatesthe need for torque to the rear wheels, andcan immediately redistribute up to half of theengine's torque to the rear wheels. All-wheel drive also has a stabilizing effect at higher speeds. In normal driving conditions,most of the engine's power is directed to thefront wheels. When the vehicle is stationary,all-wheel drive is always activated in prepara-tion for maximum traction during acceleration. All-wheel drive reacts differently depending on which drive mode is selected.
Related information
Drive modes
* (p. 419)
Low Speed Control (p. 432)
Transmission (p. 412)
Drive modes
*
Drive modes affect the vehicle's driving cha- racteristics in different ways to enhance andsimplify the driving experience in certaintypes of situations.
Drive modes enable easy access to the vehi- cle's many functions and settings in differentdriving situations. The following systems areadapted to help optimize driving characteris-tics in each drive mode: Steering
Engine/transmission/all-wheel drive
Brakes
Shock absorbers
Instrument panel
Start/Stop function
Climate control settings
Select the drive mode that is adapted to the current driving conditions. Keep in mind thatnot all drive modes are available in all situa-tions.
Available drive modesWhen the engine is started, the vehicle will be in Comfort mode and the start/stop function
will be activated. Drive mode can be changed once the vehicle is started, e.g. to
Individualmode. Once Individual mode is selected, you
can adjust settings to personal preferences, e.g. to show the tachometer.
Page 444 of 683

STARTING AND DRIVING
442
Emission controls
Three-way catalytic converter
Keep your engine properly tuned. Certain engine malfunctions, particularly involvingthe electrical, fuel or distributor ignitionsystems, may cause unusually high three-way catalytic converter temperatures. Donot continue to operate your vehicle if youdetect engine misfire, noticeable loss ofpower or other unusual operating condi-tions, such as engine overheating or back-firing. A properly tuned engine will helpavoid malfunctions that could damage thethree-way catalytic converter.
Do not park your vehicle over combustiblematerials, such as grass or leaves, whichcan come into contact with the hotexhaust system and cause such materialsto ignite under certain wind and weatherconditions.
Excessive starter cranking (in excess ofone minute), or an intermittently firing orflooded engine can cause three-way cata-lytic converter or exhaust system over-heating.
Remember that tampering or unauthor-ized modifications to the engine, theEngine Control Module, or the vehicle maybe illegal and can cause three-way cata-lytic converter or exhaust system over-heating. This includes: altering fuel injec- tion settings or components, alteringemission system components or locationor removing components, and/or repeateduse of leaded fuel.
NOTE
Unleaded fuel is required for vehicles with three-way catalytic converters.
Heated oxygen sensorsThe heated oxygen sensors monitor the oxy- gen content of the exhaust gases. Readings are fed into a control module that continuouslymonitors engine functions and controls fuelinjection. The ratio of fuel to air into the engineis continuously adjusted for efficient combus-tion to help reduce harmful emissions.
Related information
Octane rating (p. 440)
Fuel (p. 439)
Overheating of engine and transmission
In certain driving conditions, such as driving in mountainous areas or hot weather, there isa risk of the engine or transmission overheat-ing, especially when carrying heavy loads.
Engine power may be temporarily limited.
Remove any auxiliary lights mounted in front of the grille when driving in hotweather.
If the temperature in the engine's coolingsystem becomes too high, a warning sym-bol will appear in the instrument panel along with the message
Engine
temperature High temperature Stop
safely. Pull over to a safe location and let
the engine idle for a few minutes to cool down.
If the message
Engine temperature
High temperature Turn off engine orEngine coolant Level low, turn off
engine is displayed, stop the vehicle and
turn off the engine.
If the transmission begins to overheat, an alternative gear shifting program will beselected. An integrated protective functionwill also be activated, the warning symbolwill illuminate and the message
Transmission warm Reduce speed to
lower temperature or Transmission hot
Stop safely, wait for cooling will be dis-
Page 445 of 683
STARTING AND DRIVING
443
played in the instrument panel. Follow the recommendations given by reducingspeed or stopping the vehicle safely andletting the engine idle for a few minutes tolet the transmission cool.
If the vehicle begins to overheat, the airconditioning may be temporarily switchedoff.
After a prolonged period of driving indemanding conditions, do not turn off theengine immediately after stopping.
NOTE
It is normal for the engine's cooling fan to operate for a short time after the engine isswitched off.
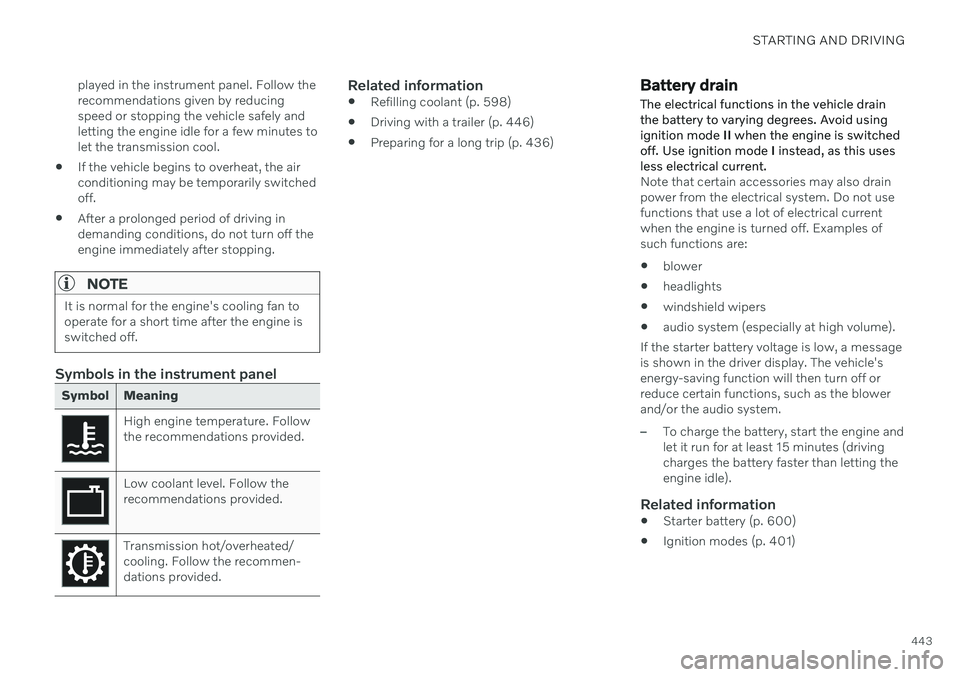
Symbols in the instrument panel
Symbol Meaning
High engine temperature. Follow the recommendations provided.
Low coolant level. Follow the recommendations provided.
Transmission hot/overheated/ cooling. Follow the recommen-dations provided.
Related information
Refilling coolant (p. 598)
Driving with a trailer (p. 446)
Preparing for a long trip (p. 436)
Battery drain
The electrical functions in the vehicle drain the battery to varying degrees. Avoid usingignition mode II when the engine is switched
off. Use ignition mode I instead, as this uses
less electrical current.
Note that certain accessories may also drain power from the electrical system. Do not usefunctions that use a lot of electrical currentwhen the engine is turned off. Examples ofsuch functions are: blower
headlights
windshield wipers
audio system (especially at high volume).
If the starter battery voltage is low, a message is shown in the driver display. The vehicle'senergy-saving function will then turn off orreduce certain functions, such as the blowerand/or the audio system.
–To charge the battery, start the engine and let it run for at least 15 minutes (drivingcharges the battery faster than letting theengine idle).
Related information
Starter battery (p. 600)
Ignition modes (p. 401)