2021 VOLVO V90 CROSS COUNTRY park assist
[x] Cancel search: park assistPage 455 of 683

STARTING AND DRIVING
}}
* Option/accessory.453
To consider before using the towing eyelet
In certain conditions, the towing eyelet may be used to pull the vehicle onto a flat-bed tow truck. The vehicle's position andground clearance determines if this is pos-sible.
If the incline of the tow truck is too steepor if the ground clearance under the vehi-cle is insufficient, attempting to pull it upusing the towing eyelet may result in dam-age.
If necessary, lift the vehicle using the towtruck's lifting device instead of using thetowing eyelet.
WARNING
No person or object should be behind the tow truck when the vehicle is lifted ontothe bed of the truck.
CAUTION
The towing eyelet is only intended for tow- ing on roads – not for pulling vehicles fromditches or any similar purpose involvingsevere strain. Call a tow truck for profes-sional assistance.
Removing the towing eyelet–Unscrew the towing eyelet after use and return it to the foam block. Replace the cover on the bumper.
Related information
Towing using a towline (p. 450)
Recovery (p. 453)
Tool kit (p. 550)
Recovery
This section refers to transporting the vehicle with a tow truck or similar vehicle.
Call a professional towing service for assis- tance. In certain conditions, the towing eyelet can be used to pull the vehicle onto a flatbed towtruck. For vehicles equipped with leveling con- trol *: If the vehicle is equipped with pneumatic
suspension, this feature must be turned off before the vehicle is lifted onto a tow truck.Turning off the function in the center display. 1. Tap
Settings in the Top view.
2. Tap
My CarParking Brake and
Suspension.
3. Select
Disable Leveling Control.
The vehicle's location and ground clearance determine if it can be lifted onto a tow truck. Ifthe incline of the tow truck is too steep or ifthe ground clearance under the vehicle isinsufficient, attempting to pull it up may resultin damage. In this case, the vehicle shouldonly be lifted with the tow truck's lifting equip-ment.
Page 465 of 683

AUDIO, MEDIA AND INTERNET
* Option/accessory.463
Control, Park Assist and Phone
Ringtone.
High Performance Pro * (Harman
Kardon)
Equalizer - setting of equalizer.
Balance - balance between right/left and
front/rear speakers.
System Volumes – adjusts volume in the
various systems of the car, e.g. Voice
Control, Park Assist and Phone
Ringtone.
High Performance
Tone - setting for e.g. bass, treble, equal-
izer, etc.
Balance - balance between right/left and
front/rear speakers.
System Volumes – adjusts volume in the
various systems of the car, e.g. Voice
Control, Park Assist and Phone
Ringtone.
Related information
Sound experience
* (p. 463)
Media player (p. 483)
Voice control settings (p. 154)
Phone settings (p. 506)
Audio, media and Internet (p. 462)
Internet-connected vehicle
* (p. 514)
Sound experience *
Sound experience is an app that provides access to additional sound settings.
Open Sound Experience from the center dis-
play's App view. Depending on the sound sys- tem installed in the vehicle, the following set-tings are possible:
Premium Sound * (Bowers & Wilkins)
Studio – sound settings can be adjusted
to be primarily adapted for Driver, All andRear.
Individual stage - surround sound mode
with settings for intensity and enclosure.
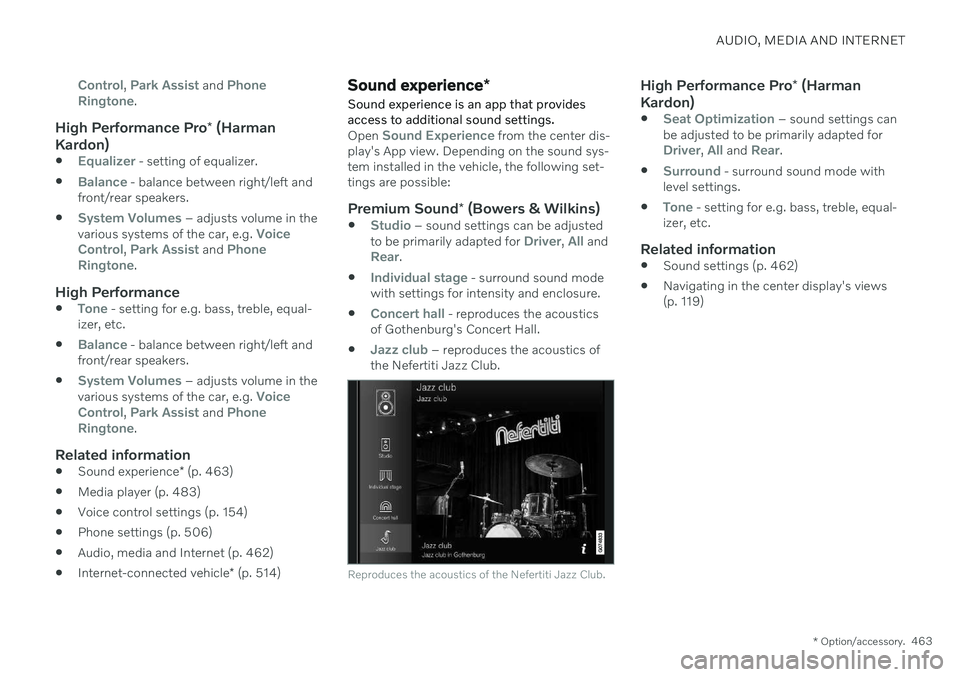
Concert hall - reproduces the acoustics
of Gothenburg's Concert Hall.
Jazz club – reproduces the acoustics of
the Nefertiti Jazz Club.
Reproduces the acoustics of the Nefertiti Jazz Club.
High Performance Pro * (Harman
Kardon)
Seat Optimization – sound settings can
be adjusted to be primarily adapted for
Driver, All and Rear.
Surround - surround sound mode with
level settings.
Tone - setting for e.g. bass, treble, equal-
izer, etc.
Related information
Sound settings (p. 462)
Navigating in the center display's views (p. 119)
Page 610 of 683

||
MAINTENANCE AND SERVICE
608Fuse pliers are provided on the inside of the fuse box cover to assist in removing andinserting fuses.
There are also spaces for several extra fuses inthe fusebox.
PositionsThere is a decal with a diagram of the loca-tions of the fuses on the inside of the cover.
Function
Ampere Type
– – Micro
–– Micro
Lambda sensors; Electric charge pressure module15 Micro
Ignition coils (gasoline); spark plugs (gasoline) Exhaust sensor; Diesel particulate sensor15 Micro
Oil pump solenoid; A/C magnetic coupling; heated oxygen sensor, center (gasoline); heated oxygen sensor, rear (diesel); heated oxygen sensor, front (gasoline/diesel)
15 Micro
Vacuum regulator; Valve; Output pulse valve (diesel); Oil level/temperature sensor (gasoline/diesel); Glow plug (GCU) (diesel)7.5 Micro
Engine control module; actuator; throttle unit; EGR valve (diesel); turbo position sensor (diesel); turbocharger valve (gasoline) 20 Micro
Engine control module
5 Micro
–– Micro
Solenoids (gasoline); Fuel leakage control valve; Engine cooling system thermostat (gasoline); EGR vacuum valve (die- sel); Glow control module (diesel); Supercharger clutch (gasoline); Crankshaft ventilation heater (diesel); Transmissionoil cooler valve (diesel)10 Micro
Spoiler damper control module; Cooler damper control module; Relay coils for output pulse (diesel); Coolant valve Fuel leakage detection (gasoline)
5 Micro
Page 623 of 683

MAINTENANCE AND SERVICE
}}
* Option/accessory.621
Function Ampere Type
– – Micro
– –
Door module left side, rear20 Micro
USB hub/accessory port 5 Micro
–– Micro
Towbar* control module 25
MCaseA
Accessory module 40
Power driver seat* 20
MCaseA
Seat belt tensioner module (left side)
40
MCaseA
Park Assist Camera
* 5 Micro
Taillight module backup power supply
10 Micro
– – Micro
–– Micro
–– Micro
–– Micro
–– Micro
Heated rear seat (left side)* 15 Micro
Page 626 of 683

MAINTENANCE AND SERVICE
* Option/accessory.
624
Removing the plastic cover to replace bulbs The headlight bulbs can be replaced without the assistance of a workshop, but before abulb can be replaced, the plastic cover overthe headlight needs to be removed.
–Release the pins in the plastic cover's four clips by pressing them down with ascrewdriver or similar object and removethe covering.
NOTE
To bear in mind when refitting the cover- ing:
The pin in the clip must be pressedback completely before the clip is rein-stalled in the covering.
When the covering is reinstalled, thepin must be pressed in until the endsurface is level with the surface of theclip.
Related information
Replacing bulbs (p. 623)
Replacing the low beam headlight bulbs (p. 625)
Replacing the high beam headlight bulbs(p. 626)
Replacing daytime running lights/frontparking light bulbs (p. 626)
Replacing front turn signal bulbs (p. 627)
Bulb specifications (p. 628)
Location of exterior lights The vehicle's exterior lighting consists of sev- eral different bulbs. LED 17
bulbs must be
replaced by a workshop. An authorized Volvo workshop is recommended.
Front bulbs (vehicles with halogen headlights)
Low beams
High beams
Daytime running light/parking light
Turn signal
Front fog light/cornering illumination *
(LED)
17 LED (Light Emmitting Diode)
Page 666 of 683

INDEX
664Auto-hold brakes 409
activating/deactivating 410
after collision 411
driver support 278
Automatic car wash 637 Automatic engine stop auto-stop 425
Automatic high beam 161
Automatic locking 268
Automatic relocking 249, 263
Automatic transmission 412, 413 kickdown 418
oil 658
Trailer 446
B
Backrestfront seat, adjusting 190, 191, 194, 195 , 196, 197
rear seat, folding 200
Battery jump-start 444
Maintenance 600
recycling 604
starter battery 600
support 602
symbols on the battery 604
Blind Spot Information 352
BLIS 352 activating/deactivating 353
limitations 354
Symbols and messages 355
Blower adjusting 228, 229
air distribution 213
air vents 214
Bluetooth connect 489
connecting vehicle to Internet 515
phone 499
settings 507
Book service and repair 587
Booster cushions 74 Brake assist after collision 411
Brake fluid grade 659
Brake functions 403
Brakes 403 anti-lock brakes, ABS 403
auto-brake with Pilot Assist 323auto-braking with Adaptive Cruise
Control 323automatic when stationary 409
Brake Assist System, BAS 404
brake lights 165
brake system 403
emergency brake lights 165
Maintenance 405
on salted roads 405
on wet roads 405
parking brake 406
brake system fluid 659
C
Camera sensorsee Camera 390
Camera unit 390 limitations 390
maintenance and cleaning 393
Symbols and messages 395
Capacity weight 561, 655 Care Key restricted remote key 256
settings 257
Cargo compartment 569 attachment points 572
cargo net 577
Page 672 of 683

INDEX
670Keyless
locking/unlocking 263
settings 264
touch-sensitive surfaces 262
Key tag 246
L
Labels location 650
Laminated glass 172 Lamps changing 623
location 624
specifications 628
Trailer 449
Lane Keeping Aid 324 activating/deactivating 326
display 330
limitations 327
see Lane Keeping Aid 324
select assistance option 327
Symbols and messages 328
Language 136
Large Animal Detection (LAD) 335
Launch function 418
Leather upholstery, cleaning instruc-
tions 632
Leveling control 429 settings 432
License agreement 102, 523
Lifting tools 551Light bulbs changing 623
specifications 628
Light control 156, 168 Lighting Active Bending Lights 162
approach lighting 166
automatic high beam 161
brake lights 165
control, instrument, display 168
controls 156, 166
cornering illumination 163
daytime running lights 158
emergency brake lights 165
front fog lights 163
Hazard warning flashers 165
high beams 160, 161
home safe lighting 166
in passenger compartment 166
light locations 624
low beams 159
position lights 158
rear fog light 164settings 157
Turn signals 162
Lighting, replacing bulbs 623 daytime running lights/front parking
lights 626
front turn signals 627
high beams 626
light bulbs, specifications 628
low beams 625
remove plastic cover 624
Limp home 412 Load anchoring eyelets cargo compartment 572
Load anchoring hooks 571
Load carriers 571
Load index 538Loading general 570
load anchoring eyelets 572
long load 570
Lock indication 244 setting 246
Locking/unlocking Tailgate 251, 264
Locking wheel bolts 551 Locks locking/unlocking 249
Page 673 of 683

INDEX
671
Locks and remote keys 244 Low battery charge level
start battery 443
Low beams 159
Low-speed driving 432 activate with function button 433
M
Maintained climate comfort 239start/stop 239
Maintenance 582 corrosion protection 641
Max. axle weight 655
Max. roof load 655
Media player 483, 484, 485 compatible file formats 491
voice control 153
Messages and symbols Adaptive Cruise Control 302
Assistance at risk of collision 350
BLIS 355
camera and radar unit 395
City Safety 344
Cross Traffic Alert 363
Lane Keeping Aid 328
Park Assist Camera 377
Park Assist Pilot 386
Parking Assist 368
Pilot Assist 314
stability and traction control system 282
Messages in display 110, 144 handling 111, 144
saved 112, 145
Mileage 93 Misting condensation in headlights 634, 637
Mood lighting 168 adjusting 168
N
Netcargo compartment 577
O
Occupant safety 45
Occupant weight sensor 59
Octane rating 440
Oil, see also Engine oil 658
Oil filter 595
Oil level 596
On-board diagnostics 582
On-board Diagnostic socket 37
Option/accessory 21
Outside temperature gauge 98
Overheating 442, 446
Owner's information 16
OWNER'S MANUAL 21 environmental labeling 23
in cellular phone 20
in the center display 17, 18
P
Paddle at steering wheel 202 Paint
color code 643
paint damage and touch-up 641, 642 , 643
Panoramic roof 179 opening and closing 180
pinch protection 172
sun shade 182
ventilation position 181
Parallel parking 379
Park Assist Camera 369 activating 375
limitations 390