2021 VOLVO V90 CROSS COUNTRY wheel bolts
[x] Cancel search: wheel boltsPage 13 of 683
11
Using Android Auto*
497
Settings for Android Auto *
498
Tips for using Android Auto *
498
Phone 499
Connecting a phone to the car via Bluetooth for the first time 500
Connecting a phone to the car viaBluetooth automatically 502
Connecting a phone to the car viaBluetooth manually 502
Disconnecting a Bluetooth-con-nected phone 502
Switch between phones con-nected via Bluetooth 503
Disconnecting Bluetooth-con-nected devices 503
Handling phone calls 503
Handling text messages 504
Text message settings 505
Managing the phone book 506
Phone settings 506
Settings for Bluetooth devices 507
Wireless phone charger *
508
Using the wireless phone charger *
508
Certificate for wireless charger 510
Internet-connected vehicle *
514
Connecting the vehicle to the Internet via a Bluetooth-connectedphone 515
Connecting the vehicle to theInternet via a phone (Wi-Fi) 515
Connecting the vehicle to theInternet via vehicle modem (SIM card) 516
Vehicle modem settings 517
Sharing Internet from the vehiclevia Wi-Fi hotspot (tethering) 518
No or poor Internet connection 519
Deleting Wi-Fi networks 519
Wi-Fi technology and security 520
Terms of use and data sharing 520
Activating and deactivating datasharing 521
Data sharing for services 521
Hard disk storage space 522
License agreement for audio andmedia 523
WHEELS AND TIRES
Tires
534
Tire direction of rotation 536
Tread wear indicator 537
Tire terminology 537
Tire sidewall designations 538
Uniform Tire Quality Grading 540
Checking tire pressure 541
Adjusting tire pressure 542
Recommended tire pressure 543
Tire pressure monitoring system *
543
Saving new reference values for tire inflation pressure monitoring *545
Viewing tire pressure status in thecenter display * 546
Action when warned of low tire pressure 547
Tire inflation pressure monitoring system * messages 548
Changing a wheel 548
Tool kit 550
Jack *
551
Wheel bolts 551
Spare wheel 552
Handling the spare wheel 553
Snow tires 554
Snow chains 555
Page 551 of 683
WHEELS AND TIRES
}}
* Option/accessory.549
CAUTION
When not in use, the jack
* should be
kept in its storage compartment under the cargo compartment floor.
The jack provided with your vehicle isintended to be used only in temporarysituations such as changing wheels inthe event of a flat tire. Only the jackthat came with your particular modelshould be used to lift the vehicle. If thevehicle needs to be lifted more fre-quently or for a prolonged period, usinga garage jack or hoist is recommended.Always follow this device's instructionsfor use.
Removing a wheelRead through all instructions before starting. Before raising the vehicle using a jack or lift,take out all the tools you will need.
1. Turn on the vehicle's hazard warning
flashers if a wheel change must be per- formed in an area with traffic.
2. Make sure that the parking brake is engaged and put the gear selector in P
position.
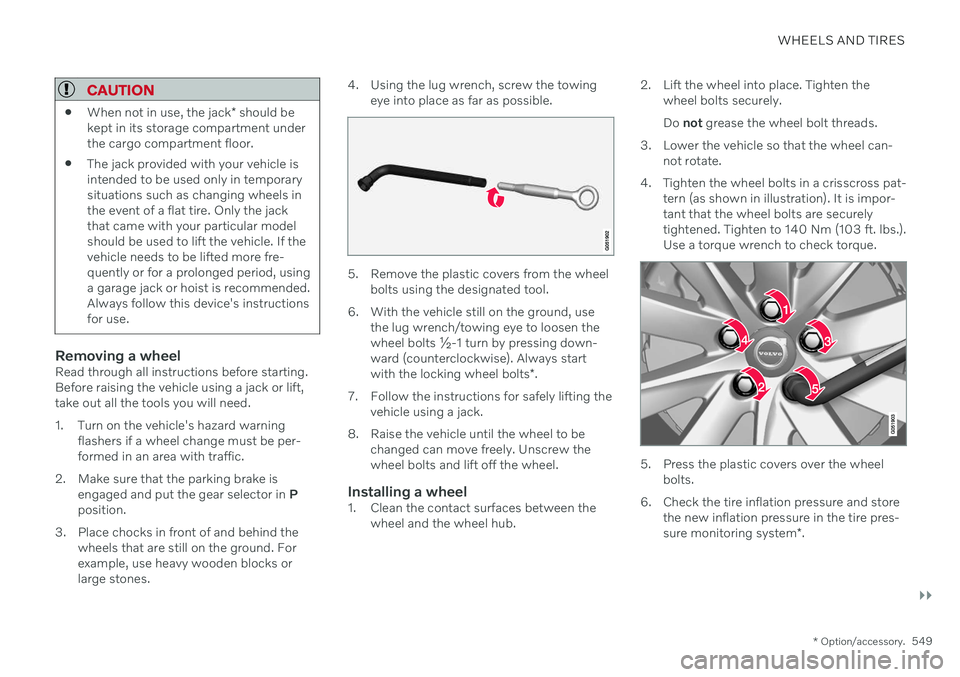
3. Place chocks in front of and behind the wheels that are still on the ground. Forexample, use heavy wooden blocks orlarge stones. 4. Using the lug wrench, screw the towing
eye into place as far as possible.
5. Remove the plastic covers from the wheelbolts using the designated tool.
6. With the vehicle still on the ground, use the lug wrench/towing eye to loosen the wheel bolts ½-1 turn by pressing down-ward (counterclockwise). Always start with the locking wheel bolts *.
7. Follow the instructions for safely lifting the vehicle using a jack.
8. Raise the vehicle until the wheel to be changed can move freely. Unscrew the wheel bolts and lift off the wheel.
Installing a wheel1. Clean the contact surfaces between thewheel and the wheel hub. 2. Lift the wheel into place. Tighten the
wheel bolts securely. Do not grease the wheel bolt threads.
3. Lower the vehicle so that the wheel can- not rotate.
4. Tighten the wheel bolts in a crisscross pat- tern (as shown in illustration). It is impor- tant that the wheel bolts are securelytightened. Tighten to 140 Nm (103 ft. lbs.).Use a torque wrench to check torque.
5. Press the plastic covers over the wheelbolts.
6. Check the tire inflation pressure and store the new inflation pressure in the tire pres- sure monitoring system *.
Page 552 of 683
||
WHEELS AND TIRES
* Option/accessory.
550
WARNING
The wheel bolts may need to be tightened again several days after a wheel change.Temperature fluctuations and vibrationscan cause them to loosen slightly.
NOTE
After inflating a tire, always replace the valve cap to help prevent valve damagecaused by gravel, dirt, etc.
Use plastic valve caps only. Metal capscould corrode and become difficult toremove.
Related information
Leveling control settings
* (p. 432)
Hoisting the vehicle (p. 589)
Tool kit (p. 550)
Saving new reference values for tire infla- tion pressure monitoring
* (p. 545)
Tool kit
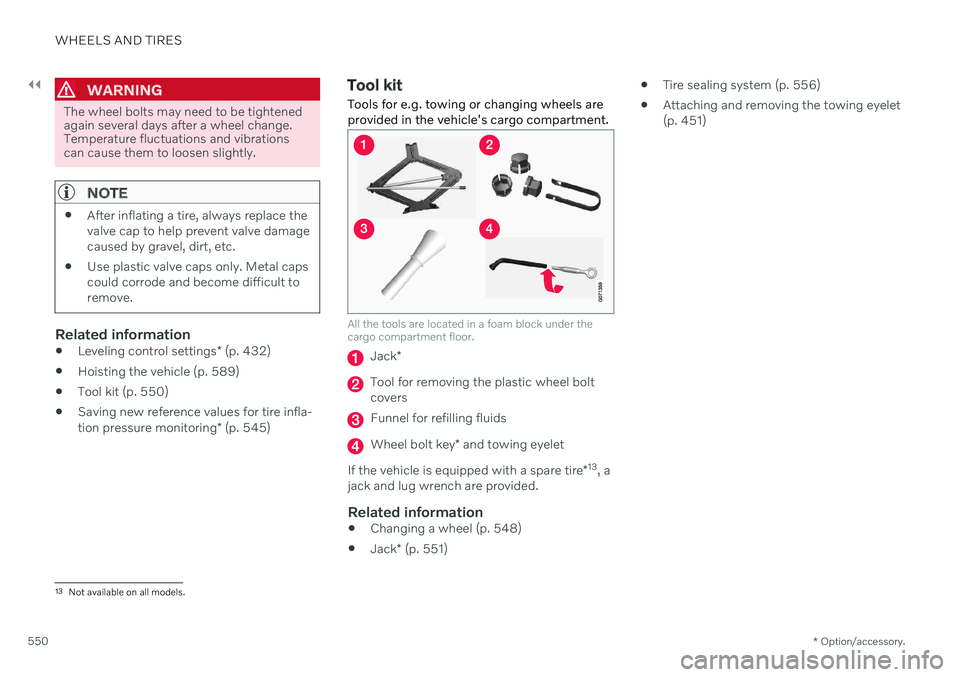
Tools for e.g. towing or changing wheels are provided in the vehicle's cargo compartment.
All the tools are located in a foam block under the cargo compartment floor.
Jack *
Tool for removing the plastic wheel bolt covers
Funnel for refilling fluids
Wheel bolt key * and towing eyelet
If the vehicle is equipped with a spare tire *13
, a
jack and lug wrench are provided.
Related information
Changing a wheel (p. 548)
Jack
* (p. 551)
Tire sealing system (p. 556)
Attaching and removing the towing eyelet (p. 451)
13
Not available on all models.
Page 553 of 683
WHEELS AND TIRES
}}
* Option/accessory.551
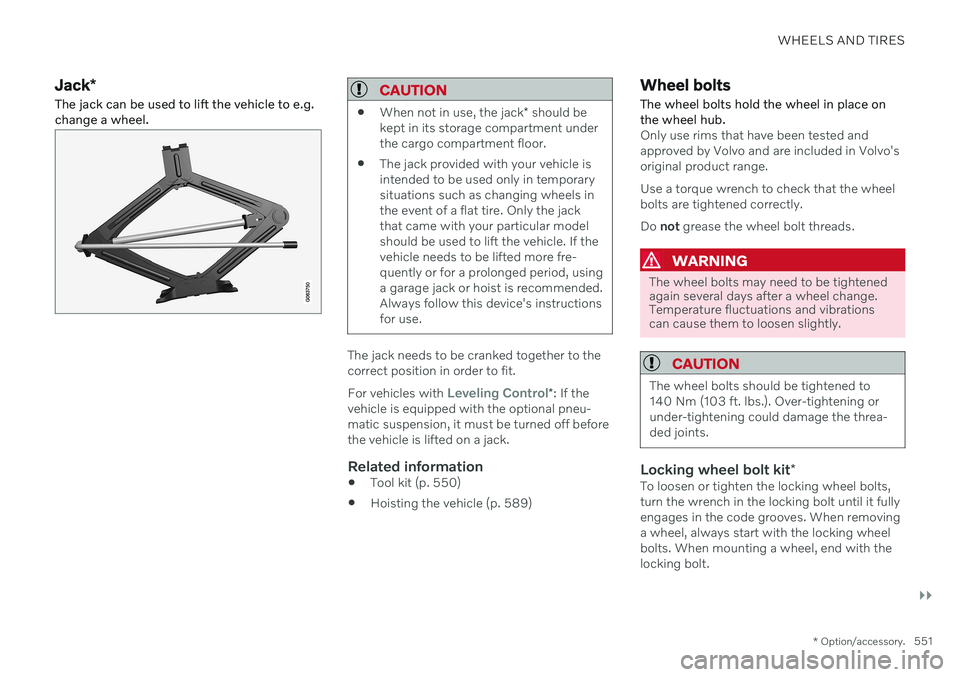
Jack*
The jack can be used to lift the vehicle to e.g. change a wheel.CAUTION
When not in use, the jack
* should be
kept in its storage compartment under the cargo compartment floor.
The jack provided with your vehicle isintended to be used only in temporarysituations such as changing wheels inthe event of a flat tire. Only the jackthat came with your particular modelshould be used to lift the vehicle. If thevehicle needs to be lifted more fre-quently or for a prolonged period, usinga garage jack or hoist is recommended.Always follow this device's instructionsfor use.
The jack needs to be cranked together to the correct position in order to fit. For vehicles with
Leveling Control*
: If the
vehicle is equipped with the optional pneu- matic suspension, it must be turned off beforethe vehicle is lifted on a jack.
Related information
Tool kit (p. 550)
Hoisting the vehicle (p. 589)
Wheel bolts
The wheel bolts hold the wheel in place on the wheel hub.
Only use rims that have been tested and approved by Volvo and are included in Volvo'soriginal product range. Use a torque wrench to check that the wheel bolts are tightened correctly. Do not grease the wheel bolt threads.
WARNING
The wheel bolts may need to be tightened again several days after a wheel change.Temperature fluctuations and vibrationscan cause them to loosen slightly.
CAUTION
The wheel bolts should be tightened to 140 Nm (103 ft. lbs.). Over-tightening orunder-tightening could damage the threa-ded joints.
Locking wheel bolt kit *To loosen or tighten the locking wheel bolts, turn the wrench in the locking bolt until it fullyengages in the code grooves. When removinga wheel, always start with the locking wheelbolts. When mounting a wheel, end with thelocking bolt.
Page 554 of 683
||
WHEELS AND TIRES
552
CAUTION
Make sure you have a solid connection between bolt and wheel bolt key whenloosening/tightening the wheel bolts.Applying force at an angle could damagethe slots in the wheel bolts and the wheelbolt key and make it impossible to install orremove the wheel.
When the wheel bolt key is not being used, stow it in its designated location in the foamblock under the cargo compartment floor. Thisis important to remember so that the tool isavailable if the vehicle is taken to a workshop.If you lose the key, contact your Volvo retailer.
Related information
Changing a wheel (p. 548)
Tool kit (p. 550)
Spare wheel 14
The spare wheel is a Temporary Spare and can be used to temporarily replace a punc-tured tire on one of the vehicle's regularwheels.
The spare wheel is only intended for tempo- rary use. Replace it with a normal wheel assoon as possible. The driving characteristics of the vehicle change and ground clearance reduces whenthe spare wheel is used. Do not wash the vehi-cle in an automatic car wash while using theTemporary Spare. The recommended tire pressure must be maintained regardless of at which position thetemporary spare wheel is used on the vehicle. If the spare wheel is damaged, a replacement can be purchased from a Volvo retailer.
WARNING
Current legislation prohibits the use of the "Temporary Spare" wheel other than as atemporary replacement for a puncturedtire. It must be replaced as soon as possi-ble by a standard tire. Roadholding andhandling may be affected with the "Tempo-rary Spare" wheel in use.
WARNING
Never drive faster than 80 km/h (50 mph) with a spare tire mounted onthe vehicle.
The vehicle must never be driven withmore than one "Temporary Spare"wheel mounted.
Driving with a spare wheel may alterthe driving characteristics of the vehi-cle. Replace the spare wheel with anormal wheel as soon as possible.
The spare wheel is smaller than thenormal wheel, which affects the vehi-cle's ground clearance. Watch for highcurbs and do not wash the vehicle inan automatic car wash when a sparewheel is mounted.
Follow the manufacturer's recom-mended tire inflation pressure for thespare wheel.
On all-wheel drive vehicles, the driveon the rear axle can be disconnected.
If the spare wheel is mounted on thefront axle, snow chains must not beused.
The spare wheel must not be repaired.
14
Not available on all models.
Page 593 of 683
MAINTENANCE AND SERVICE
* Option/accessory.591
6. Crank it up until it is properly aligned and
it is in contact with the vehicle's jack attachment point. Make sure the top ofthe jack (or the garage lift arms) is cor-rectly positioned in the attachment point,with the bump on the top of the jack in therecess in the attachment point and itsbase positioned vertically under theattachment point.
7. Turn the jack so that the crank is as far as possible from the side of the vehicle,which will position the jack's arms per-pendicular to the vehicle's direction ofmovement.
8. Raise the vehicle to a suitable height for the operation to be performed.
Related information
Jack
* (p. 551)
Wheel bolts (p. 551)
Tool kit (p. 550)
Leveling control settings
* (p. 432)
Page 672 of 683

INDEX
670Keyless
locking/unlocking 263
settings 264
touch-sensitive surfaces 262
Key tag 246
L
Labels location 650
Laminated glass 172 Lamps changing 623
location 624
specifications 628
Trailer 449
Lane Keeping Aid 324 activating/deactivating 326
display 330
limitations 327
see Lane Keeping Aid 324
select assistance option 327
Symbols and messages 328
Language 136
Large Animal Detection (LAD) 335
Launch function 418
Leather upholstery, cleaning instruc-
tions 632
Leveling control 429 settings 432
License agreement 102, 523
Lifting tools 551Light bulbs changing 623
specifications 628
Light control 156, 168 Lighting Active Bending Lights 162
approach lighting 166
automatic high beam 161
brake lights 165
control, instrument, display 168
controls 156, 166
cornering illumination 163
daytime running lights 158
emergency brake lights 165
front fog lights 163
Hazard warning flashers 165
high beams 160, 161
home safe lighting 166
in passenger compartment 166
light locations 624
low beams 159
position lights 158
rear fog light 164settings 157
Turn signals 162
Lighting, replacing bulbs 623 daytime running lights/front parking
lights 626
front turn signals 627
high beams 626
light bulbs, specifications 628
low beams 625
remove plastic cover 624
Limp home 412 Load anchoring eyelets cargo compartment 572
Load anchoring hooks 571
Load carriers 571
Load index 538Loading general 570
load anchoring eyelets 572
long load 570
Lock indication 244 setting 246
Locking/unlocking Tailgate 251, 264
Locking wheel bolts 551 Locks locking/unlocking 249
Page 679 of 683

INDEX
677
Vehicle recovery 453
Vehicle status 586
inflation pressure 546
Vehicle upholstery 628, 630, 631, 632, 633, 634
Vehicle weight 655
Ventilation 212, 213, 214 Seats 223
Video 488, 490 settings 489
Voice control 149 climate 208
phone 152
radio and media 153
settings 154
use 150, 152, 153, 154
VOL mark 534
Volvo ID 26 create and register 27
W
Warning lights
Adaptive Cruise Control 319
Pilot Assist 319
stability and traction control system 279
Warning sound parking brake 408
warning symbols 99 Warning symbols safety 44
Warranties 582Washer headlights 186
rear window 187, 188
washer fluid, filling 646
Windshield 186
Washer fluid 183, 646
Washer nozzles, heated 183
Waxing 635Weights Curb weight 655
Wheel bolts 551Wheels cleaning 640
removing and installing 548
Snow chains 555
Wheels and tiresLoad index and speed symbol 538
Whiplash protection 48
Whiplash Protection System 48
WHIPS (Whiplash Protection System) 48Wi-Fi connecting vehicle to Internet 515
delete network 519sharing Internet connection, tether-
ing, hotspot 518
technology and security 520
Window sun shade 176
Windows and glass 172 Windshield projected image 146, 148
Windshield washing 186
Windshield wipers 183 rain sensor 184, 185
Winter driving 436 Snow chains 555
winter tires 554
Wiper blade 183 replacing 643, 644
service position 645
Wiper blade and washing fluid 183
WPC 508