Page 65 of 280

System
This vehicle is equipped with a BTSI that holds
the transmission gear selector in PARK unless
the brakes are applied. To")
STARTING AND OPERATING63
Brake/Transmission Shift Interlock (BTSI)
System
This vehicle is equipped with a BTSI that holds
the transmission gear selector in PARK unless
the brakes are applied. To shift the
transmission out of PARK, the ignition must be
in the MAR (ON/RUN) mode (engine running or
not) and the brake pedal must be pressed.
The brake pedal must also be pressed to shift
from NEUTRAL into DRIVE or REVERSE when the
vehicle is stopped or moving at low speeds.
Nine-Speed Automatic Transmission
The transmission gear range (PRND) is
displayed both beside the gear selector and in
the instrument cluster display. To select a gear
range, push the lock button on the gear selector
and move the lever rearward or forward. You
must also press the brake pedal to shift the
transmission out of PARK (or NEUTRAL, when
the vehicle is stopped or moving at low speeds).
Select the DRIVE range for normal driving. NOTE:
In the event of a mismatch between the gear
selector position and the actual transmission
gear (for example, driver selects REVERSE while
driving forward), the position indicator will blink
continuously until the selector is returned to the
proper position, or the requested shift can be
completed.
The electronically-controlled transmission
adapts its shift schedule based on driver inputs,
along with environmental and road conditions.
The transmission electronics are
self-calibrating; therefore, the first few shifts on
a new vehicle may be somewhat abrupt. This is
a normal condition, and precision shifts will
develop within a few hundred miles or
kilometers.
The nine-speed transmission has been
developed to meet the needs of current and
future FWD/AWD vehicles. Software and
calibration is refined to optimize the customer’s
driving experience and fuel economy. By design,
some vehicle and driveline combinations utilize
9th gear only in very specific driving situations
and conditions.Only shift from DRIVE to PARK or REVERSE
when the accelerator pedal is released and the
vehicle is stopped. Be sure to keep your foot on
the brake pedal when shifting between these
gears.
The transmission gear selector provides PARK,
REVERSE, NEUTRAL, DRIVE, and Electronic
Range Select (ERS) shift positions. Manual
downshifts can be made using the ERS shift
control. Moving the gear selector into the ERS
(-/+) position (beside the DRIVE position)
activates ERS mode, displays the current gear
in the instrument cluster, and prevents
automatic upshifts beyond this gear. In ERS
mode, toggling the gear selector forward (-) or
rearward (+) will change the highest available
gear Ú
page 67.
NOTE:
If the gear selector cannot be moved to the
PARK, REVERSE, or NEUTRAL position (when
pushed forward) it is probably in the ERS (+/-)
position (beside the DRIVE position). In ERS
mode, the transmission gear limit (1, 2, 3, etc.)
is displayed in the instrument cluster. Move the
4
21_VM_OM_EN_USC_t.book Page 63
Page 66 of 280
![RAM PROMASTER CITY 2021 Owners Manual
64STARTING AND OPERATING
(Continued)
(Continued)
gear selector to the right (into the DRIVE [D]
position) for access to PARK, REVERSE, and
NEUTRAL.
Gear Selector
Gear Ranges
Do not press the ac](/manual-img/34/59212/w960_59212-65.png "RAM PROMASTER CITY 2021 Owners Manual
64STARTING AND OPERATING
(Continued)
(Continued)
gear selector to the right (into the DRIVE [D]
position) for access to PARK, REVERSE, and
NEUTRAL.
Gear Selector
Gear Ranges
Do not press the ac")
64STARTING AND OPERATING
(Continued)
(Continued)
gear selector to the right (into the DRIVE [D]
position) for access to PARK, REVERSE, and
NEUTRAL.
Gear Selector
Gear Ranges
Do not press the accelerator pedal when
shifting out of PARK or NEUTRAL.
NOTE:
After selecting any gear range, wait a moment
to allow the selected gear to engage before
accelerating. This is especially important when
the engine is cold.
PARK (P)
The engine can be started in this range. Never
attempt to use PARK while the vehicle is in
motion. If necessary, apply the parking brake
prior to placing the vehicle in PARK.
When parking on a hill, apply the parking brake
before shifting the transmission to PARK,
otherwise the load on the transmission locking
mechanism may make it difficult to move the
gear selector out of PARK. As an added
precaution, turn the front wheels toward the
curb on a downhill grade and away from the
curb on an uphill grade.
When exiting the vehicle, always:
Apply the parking brake.
Shift the transmission into PARK.
Turn the engine off.
Remove the ignition key.
WARNING!
Never use the PARK position as a substi -
tute for the parking brake. Always apply the
parking brake fully when exiting the vehicle
to guard against vehicle movement and
possible injury or damage.
Your vehicle could move and injure you and
others if it is not in PARK. Check by trying to
move the gear selector out of PARK with the
brake pedal released. Make sure the trans -
mission is in PARK before exiting the vehicle.
It is dangerous to shift out of PARK or
NEUTRAL if the engine speed is higher than
idle speed. If your foot is not firmly pressing
the brake pedal, the vehicle could accel -
erate quickly forward or in reverse. You
could lose control of the vehicle and hit
someone or something. Only shift into gear
when the engine is idling normally and your
foot is firmly pressing the brake pedal.
Unintended movement of a vehicle could
injure those in or near the vehicle. As with
all vehicles, you should never exit a vehicle
while the engine is running. Before exiting a
vehicle always come to a complete stop,
then apply the parking brake, shift the
transmission into PARK, turn the engine off,
and remove the ignition key. Once the key is
removed, the transmission is locked in
PARK, securing the vehicle against
unwanted movement.
WARNING! (Continued)
21_VM_OM_EN_USC_t.book Page 64
Page 67 of 280

The following indicators should be used to
ensure that you have properly engaged the
transmission into the PARK position:
When shifting into PARK, push the l")
STARTING AND OPERATING65
(Continued)
The following indicators should be used to
ensure that you have properly engaged the
transmission into the PARK position:
When shifting into PARK, push the lock
button on the gear selector and firmly move
the gear selector all the way forward until it
stops and is fully seated.
Look at the transmission gear position
display and verify that it indicates the PARK
position.
With brake pedal released, verify that the
gear selector will not move out of PARK.
REVERSE (R)
This range is for moving the vehicle backward.
Shift into REVERSE only after the vehicle has
come to a complete stop.
NEUTRAL (N)
Use this range when the vehicle is standing for
prolonged periods with the engine running.
Apply the parking brake and shift the
transmission into PARK if you must exit the
vehicle.When exiting the vehicle, always remove
the ignition key from the vehicle and lock
the vehicle.
Never leave children alone in a vehicle, or
with access to an unlocked vehicle.
Allowing children to be in a vehicle unat -
tended is dangerous for a number of
reasons. A child or others could be seriously
or fatally injured. Children should be
warned not to touch the parking brake,
brake pedal or the transmission gear
selector.
Do not leave the ignition key in or near the
vehicle (or in a location accessible to chil -
dren). A child could operate power windows,
other controls, or move the vehicle.
CAUTION!
Before moving the transmission gear
selector out of PARK, you must turn the igni -
tion to the ON/RUN mode, and also press
the brake pedal. Otherwise, damage to the
gear selector could result.
WARNING! (Continued)
DO NOT race the engine when shifting from
PARK or NEUTRAL into another gear range,
as this can damage the drivetrain.
CAUTION! (Continued)
WARNING!
Do not coast in NEUTRAL and never turn off
the ignition to coast down a hill. These are
unsafe practices that limit your response to
changing traffic or road conditions. You might
lose control of the vehicle and have a
collision.
CAUTION!
Towing the vehicle, coasting, or driving for any
other reason with the transmission in
NEUTRAL can cause severe transmission
damage.
For Recreational Towing Ú page 83.
For Towing A Disabled Vehicle Ú page 211.
4
21_VM_OM_EN_USC_t.book Page 65
Page 68 of 280

This range should be used for most city and
highway driving. It provides the smoothest
upshifts and downshifts, and the best fuel
economy. The transmission aut")
66STARTING AND OPERATING
DRIVE (D)
This range should be used for most city and
highway driving. It provides the smoothest
upshifts and downshifts, and the best fuel
economy. The transmission automatically
upshifts through all forward gears.
When frequent transmission shifting occurs
(such as when operating the vehicle under
heavy loading conditions, in hilly terrain,
traveling into strong head winds, or while towing
a heavy trailer), use the Electronic Range Select
(ERS) shift control to select a lower gear range
Úpage 67. Under these conditions, using a
lower gear range will improve performance and
extend transmission life by reducing excessive
shifting and heat buildup.
If the transmission temperature exceeds
normal operating limits, the transmission
controller may modify the transmission shift
schedule, reduce engine torque, and/or expand
the range of torque converter clutch
engagement. This is done to prevent
transmission damage due to overheating.
If the transmission becomes extremely hot, the
“Transmission Temperature Warning Light” may
illuminate and the transmission may operate
differently until the transmission cools down. During cold temperatures, transmission
operation may be modified depending on
engine and transmission temperature as well
as vehicle speed. This feature improves warm
up time of the engine and transmission to
achieve maximum efficiency. Engagement of
the torque converter clutch, and shifts into
8th or 9th gear, are inhibited until the
transmission fluid is warm Ú
page 67. Normal
operation will resume once the transmission
temperature has risen to a suitable level.
Transmission Limp Home Mode
Transmission function is monitored
electronically for abnormal conditions. If a
condition is detected that could result in
transmission damage, Transmission Limp
Home Mode is activated. In this mode, the
transmission may operate only in a fixed gear,
or may remain in NEUTRAL. The Malfunction
Indicator Light (MIL) may be illuminated. Limp
Home Mode may allow the vehicle to be driven
to an authorized dealer for service without
damaging the transmission. In the event of a momentary problem, the
transmission can be reset to regain all forward
gears by performing the following steps:
1. Stop the vehicle.
2. Shift the transmission into PARK.
3. Turn the ignition OFF.
4. Wait approximately 10 seconds.
5. Restart the engine.
6. Shift into the desired gear range. If the
problem is no longer detected, the
transmission will return to normal
operation.
NOTE:
Even if the transmission can be reset, we
recommend that you visit an authorized dealer
at your earliest possible convenience. An autho -
rized dealer has diagnostic equipment to
assess the condition of your transmission. If the
transmission cannot be reset, authorized dealer
service is required.
21_VM_OM_EN_USC_t.book Page 66
Page 69 of 280

STARTING AND OPERATING67
Torque Converter Clutch
A feature designed to improve fuel economy
has been included in the automatic
transmission on your vehicle. A clutch within the
torque converter engages automatically at
calibrated speeds. This may result in a slightly
different feeling or response during normal
operation in the upper gears. When the vehicle
speed drops or during some accelerations, the
clutch automatically disengages.
NOTE:
The torque converter clutch will not engage until
the transmission fluid is warm [usually after 1 to
3 miles (2 to 5 km) of driving]. Because the
engine speed is higher when the torque
converter clutch is not engaged, it may seem as
if the transmission is not shifting properly when
cold. This is normal. The torque converter clutch
will function normally once the transmission is
sufficiently warm.
Electronic Range Select (ERS) Operation
The Electronic Range Select (ERS) shift control
allows the driver to limit the highest available
gear. For example, if you set the transmission
gear limit to fifth gear, the transmission will not
shift above fifth gear, but will shift through the
lower gears normally. You can switch between DRIVE and ERS mode
at any vehicle speed. When the gear selector is
in the DRIVE position, the transmission will
operate automatically, shifting between all
available gears.
Moving the gear selector to the ERS position
(beside DRIVE) will activate ERS mode, display
the current gear in the instrument cluster, and
set that gear as the top available gear. Once in
ERS mode, moving the gear selector forward (-)
or rearward (+) will change the top available
gear, which will be displayed in the instrument
cluster.
To exit ERS mode, simply return the gear
selector to the DRIVE position.
NOTE:
To select the proper gear position for maximum
deceleration (engine braking), move the gear
selector into the ERS position, then simply press
and hold it forward (-). The transmission will
shift to the range from which the vehicle can
best be slowed down.
POWER STEERING
The standard power steering system will give
you good vehicle response and increased ease
of maneuverability in tight spaces. The system
will provide mechanical steering capability if
power assist is lost.
If for some reason the power assist is
interrupted, it will still be possible to steer your
vehicle. Under these conditions, you will
observe a substantial increase in steering
effort, especially at very low vehicle speeds and
during parking maneuvers.
WARNING!
Do not downshift for additional engine
braking on a slippery surface. The drive
wheels could lose their grip and the vehicle
could skid, causing a collision or personal
injury.
4
21_VM_OM_EN_USC_t.book Page 67
Page 70 of 280

68STARTING AND OPERATING
NOTE:
Increased noise levels at the end of the
steering wheel travel are considered normal
and do not indicate that there is a problem
with the power steering system.
Upon initial start-up in cold weather, the
power steering pump may make noise for a
short amount of time. This is due to the cold,
thick fluid in the steering system. This noise
should be considered normal, and it does not
in any way damage the steering system.
Power Steering Fluid Check
Checking the power steering fluid level at a
defined service interval is not required. The fluid
should only be checked if a leak is suspected,
abnormal noises are apparent, and/or the
system is not functioning as anticipated. Coordinate inspection efforts through an
authorized dealer.
If necessary, add fluid to restore to the proper
indicated level. With a clean cloth, wipe any
spilled fluid from all surfaces Ú
page 261.
CRUISE CONTROL — IF EQUIPPED
When engaged, the Cruise Control takes over
accelerator operations at speeds greater than
25 mph (40 km/h).
The Cruise Control buttons are located on the
right side of the steering wheel.
Cruise Control Buttons
CAUTION!
Prolonged operation of the steering system at
the end of the steering wheel travel will
increase the steering fluid temperature and it
should be avoided when possible. Damage to
the power steering pump may occur.
WARNING!
Fluid level should be checked on a level
surface and with the engine off to prevent
injury from moving parts and to ensure
accurate fluid level reading. Do not overfill.
Use only FCA recommended power steering
fluid.
CAUTION!
Do not use chemical flushes in your power
steering system as the chemicals can
damage your power steering components.
Such damage is not covered by the New
Vehicle Limited Warranty.
1 — On/Off
2 — RES (+)/Resume/Accel
3 — SET (–)/Set Speed/Decel
4 — CAN/Cancel
21_VM_OM_EN_USC_t.book Page 68
Page 71 of 280

STARTING AND OPERATING69
To Activate
Push the on/off button to activate the Cruise
Control. The cruise indicator light in the
instrument cluster display will illuminate. To
turn the system off, push the on/off button a
second time. The cruise indicator light will turn
off. The system should be turned off when not in
use.
To Set A Desired Speed
Turn the Cruise Control on. When the vehicle
has reached the desired speed greater than
25 mph (40 km/h), push the SET (-) button and
release. Release the accelerator and the
vehicle will operate at the selected speed.
NOTE:
The vehicle should be traveling at a steady
speed and on level ground before pushing the
SET (-) button.
To Vary The Speed Setting
To Increase Or Decrease The Set Speed
When the Cruise Control is set, you can increase
speed by pushing the RES (+) button, or
decrease the speed by pushing the SET (-)
button.
U.S. Speed (mph)
Pushing the RES (+) or SET (-) button once will
result in a 1 mph speed adjustment. Each
subsequent tap of the button results in an
adjustment of 1 mph.
If the button is continually pushed, the set
speed will continue to adjust until the button
is released, then the new set speed will be
established.
Metric Speed (km/h)
Pushing the RES (+) or SET (-) button once will
result in a 1 km/h speed adjustment. Each
subsequent tap of the button results in an
adjustment of 1 km/h.
If the button is continually pushed, the set
speed will continue to adjust until the button
is released, then the new set speed will be
established.
To Accelerate For Passing
Press the accelerator as you would normally.
When the pedal is released, the vehicle will
return to the set speed.
Using Cruise Control On Hills
The transmission may downshift on hills to
maintain the vehicle set speed.
NOTE:
The Cruise Control system maintains speed up
and down hills. A slight speed change on
moderate hills is normal.
On steep hills, a greater speed loss or gain may
occur so it may be preferable to drive without
Cruise Control.
WARNING!
Leaving the Cruise Control system on when
not in use is dangerous. You could
accidentally set the system or cause it to go
faster than you want. You could lose control
and have an accident. Always leave the
system off when you are not using it.
WARNING!
Cruise Control can be dangerous where the
system cannot maintain a constant speed.
Your vehicle could go too fast for the
conditions, and you could lose control and
have an accident. Do not use Cruise Control
in heavy traffic or on roads that are winding,
icy, snow-covered or slippery.
4
21_VM_OM_EN_USC_t.book Page 69
Page 72 of 280
 button and release. Resume can be used
at any speed above 20 mph (32 km/h) up to the maximum speed of")
70STARTING AND OPERATING
To Resume Speed
To resume a previously set speed, push the
RES (+) button and release. Resume can be used
at any speed above 20 mph (32 km/h) up to the maximum speed of 100 mph (160 km/h).
To Deactivate
A tap on the brake pedal, pushing the CAN
button, or normal brake pressure will deactivate
the Cruise Control system without erasing the
set speed from memory.
Pushing the on/off button or turning the ignition
switch off erases the set speed from memory.
PARKSENSE REAR PARK ASSIST — IF
EQUIPPED
The ParkSense system provides an audible
indication of the distance between the rear
fascia/bumper and a detected obstacle when
backing up (e.g. during a parking maneuver)
Ú page 72.
The ParkSense system is automatically
activated when the transmission is placed into
REVERSE. As the distance from an obstacle
behind the vehicle decreases, the audible alert
becomes more frequent. Interaction With Trailer Towing
The ParkSense system is automatically
deactivated when a trailer equipped by Mopar is
hitched to the vehicle. The system will be
automatically activated as soon as the trailer is
removed. If it does not happen, turning the key
ignition switch to OFF and then to ON again
would be needed. If a non-Mopar trailer hitch is
mounted, the sensor deactivation cannot be
guaranteed.
ParkSense Rear Park Assist Sensors
The four ParkSense sensors, located in the rear
fascia/bumper, monitor the area behind the
vehicle that is within the sensors’ field of view.
The sensors can detect obstacles, in the
horizontal direction, from approximately
12 inches (30 cm) up to 55 inches (140 cm)
from the center of the rear fascia/bumper and
up to 24 inches (60 cm) from the corners of the
rear fascia/bumper, depending on the location,
type and orientation of the obstacle.
ParkSense Rear Park Assist Sensors Locations
If several obstacles are detected, the
ParkSense system indicates the nearest
obstacle.
The minimum height of a detectable obstacle
corresponds to the maximum height of an
obstacle that would clear the underside of the
vehicle during the parking maneuver.
21_VM_OM_EN_USC_t.book Page 70
 1
1 2
2 3
3 4
4 5
5 6
6 7
7 8
8 9
9 10
10 11
11 12
12 13
13 14
14 15
15 16
16 17
17 18
18 19
19 20
20 21
21 22
22 23
23 24
24 25
25 26
26 27
27 28
28 29
29 30
30 31
31 32
32 33
33 34
34 35
35 36
36 37
37 38
38 39
39 40
40 41
41 42
42 43
43 44
44 45
45 46
46 47
47 48
48 49
49 50
50 51
51 52
52 53
53 54
54 55
55 56
56 57
57 58
58 59
59 60
60 61
61 62
62 63
63 64
64 65
65 66
66 67
67 68
68 69
69 70
70 71
71 72
72 73
73 74
74 75
75 76
76 77
77 78
78 79
79 80
80 81
81 82
82 83
83 84
84 85
85 86
86 87
87 88
88 89
89 90
90 91
91 92
92 93
93 94
94 95
95 96
96 97
97 98
98 99
99 100
100 101
101 102
102 103
103 104
104 105
105 106
106 107
107 108
108 109
109 110
110 111
111 112
112 113
113 114
114 115
115 116
116 117
117 118
118 119
119 120
120 121
121 122
122 123
123 124
124 125
125 126
126 127
127 128
128 129
129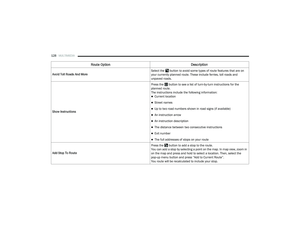 130
130 131
131 132
132 133
133 134
134 135
135 136
136 137
137 138
138 139
139 140
140 141
141 142
142 143
143 144
144 145
145 146
146 147
147 148
148 149
149 150
150 151
151 152
152 153
153 154
154 155
155 156
156 157
157 158
158 159
159 160
160 161
161 162
162 163
163 164
164 165
165 166
166 167
167 168
168 169
169 170
170 171
171 172
172 173
173 174
174 175
175 176
176 177
177 178
178 179
179 180
180 181
181 182
182 183
183 184
184 185
185 186
186 187
187 188
188 189
189 190
190 191
191 192
192 193
193 194
194 195
195 196
196 197
197 198
198 199
199 200
200 201
201 202
202 203
203 204
204 205
205 206
206 207
207 208
208 209
209 210
210 211
211 212
212 213
213 214
214 215
215 216
216 217
217 218
218 219
219 220
220 221
221 222
222 223
223 224
224 225
225 226
226 227
227 228
228 229
229 230
230 231
231 232
232 233
233 234
234 235
235 236
236 237
237 238
238 239
239 240
240 241
241 242
242 243
243 244
244 245
245 246
246 247
247 248
248 249
249 250
250 251
251 252
252 253
253 254
254 255
255 256
256 257
257 258
258 259
259 260
260 261
261 262
262 263
263 264
264 265
265 266
266 267
267 268
268 269
269 270
270 271
271 272
272 273
273 274
274 275
275 276
276 277
277 278
278 279
279