2021 RAM PROMASTER CITY jump cable
[x] Cancel search: jump cablePage 60 of 280

58
STARTING AND OPERATING
STARTING THE ENGINE
Before starting your vehicle, adjust your seat,
adjust both inside and outside mirrors, and
fasten your seat belts.
Automatic Transmission
The gear selector must be in the PARK (P) or
NEUTRAL (N) position before you can start the
engine. Press the brake pedal before shifting to
any driving gear.
NOTE:
You must press the brake pedal before shifting
out of PARK.
Normal Starting
Turn the ignition switch to the AVV (START)
position and release it when the engine starts.
If the engine fails to start within 10 seconds,
turn the ignition switch to the STOP (OFF/LOCK)
position, wait 10 to 15 seconds, then repeat
this procedure.
Cold Weather Operation
To ensure reliable starting at low temperatures,
use of an externally powered electric engine
block heater (available from an authorized
dealer) is recommended.To prevent possible engine damage while
starting at low temperatures, this vehicle will
inhibit engine cranking when the ambient
temperature is less than -31°F (-35° C) and the
oil temperature sensor reading indicates an
engine block heater has not been used. The
message “plug in engine heater” will be
displayed in the instrument cluster when the
ambient temperature is below -25°F (-32° C) at
the time the engine is shut off as a reminder.
Extended Park Starting
NOTE:
Extended Park condition occurs when the
vehicle has not been started or driven for at
least 30 days.
1. Install a battery charger or jumper cables
to the battery to ensure a full battery
charge during the crank cycle.
2. Place the ignition in the AVV (START) position and release it when the engine
starts.
WARNING!
Never leave children alone in a vehicle, or
with access to an unlocked vehicle.
Allowing children to be in a vehicle unat -
tended is dangerous for a number of
reasons. A child or others could be seriously
or fatally injured. Children should be
warned not to touch the parking brake,
brake pedal or the transmission gear
selector.
Do not leave the key fob in or near the
vehicle (or in a location accessible to chil -
dren). A child could operate power
windows, other controls, or move the
vehicle.
21_VM_OM_EN_USC_t.book Page 58
Page 110 of 280

108MULTIMEDIA
Seek Up/Seek Down
Seek Up /Seek Down
Press and release the Right Arrow button on
the touchscreen for the next selection. Press
and release the Left Arrow button on the
touchscreen to return to the beginning of the
current selection, or return to the beginning of
the previous selection if the track is within the
first few seconds of the current selection.
Fast Seek Up /Fast Seek Down
Press and hold the Right Arrow or Left Arrow
button on the touchscreen and the desired mode
will begin to fast forward or reverse through the
current track until the button on the touchscreen
is released.
Track Selection (Browse)
Rotate the Browse button to scroll through and
select a desired track on the device or USB.
Press the Exit button on the touchscreen if you
wish to cancel the browse function.
Repeat
Press the Repeat button on the touchscreen to
repeat the song selection. To cancel repeat,
press the Repeat button on the touchscreen a
second time. Shuffle
Press the Shuffle button on the touchscreen to
play the selections on the USB or Bluetooth®
device in random order to provide an interesting
change of pace. Press the Shuffle button on the
touchscreen a second time to turn this feature
off.
Info
Press the Info button to display the current
track information. Press the X button to cancel
this feature.
USB Mode
USB Mode is entered by either inserting a USB
Jump Drive cable into the USB port or by
pushing the Media button located on the
faceplate. Once in Media Mode, press the
Source button on the touchscreen and select
“USB”.
NOTE:
The system supports only FAT32 or ExFAT
formatted USB devices. The system does not
support devices with a capacity higher than
64GB. The system does not support USB hubs
connected to the USB port of the vehicle.
Connect your multimedia device directly to the
USB port using the specific connection cable for
the device if necessary.
Inserting USB Device
Gently insert the USB device into the USB Port.
If you insert a USB device with the ignition ON,
the unit will switch to USB Mode and begin to
play. The display will show the track number and
index time in minutes and seconds. Play will
begin at the start of track 1.
Browse
Press the Browse button on the touchscreen to
select Artist, Album, Genre, Song, Playlist or
Folder from the USB device. Once the desired
selection is made, you can chose from the
available media by pressing the button on the
touchscreen. Press the Exit button on the
touchscreen if you wish to cancel the browse
function.
Bluetooth® Mode
Before proceeding, the Bluetooth® device must
be paired with the Uconnect Phone to
communicate with the Uconnect system
Ú
page 112.
21_VM_OM_EN_USC_t.book Page 108
Page 206 of 280

204IN CASE OF EMERGENCY
If the pressure is at 19 psi (1.3 bar) or above
repeat the inflation process to reach the correct
tire pressure and continue driving.
Peel off the warning label from the bottle and
place it on the dashboard as a reminder to the
driver that a tire has been treated with Tire
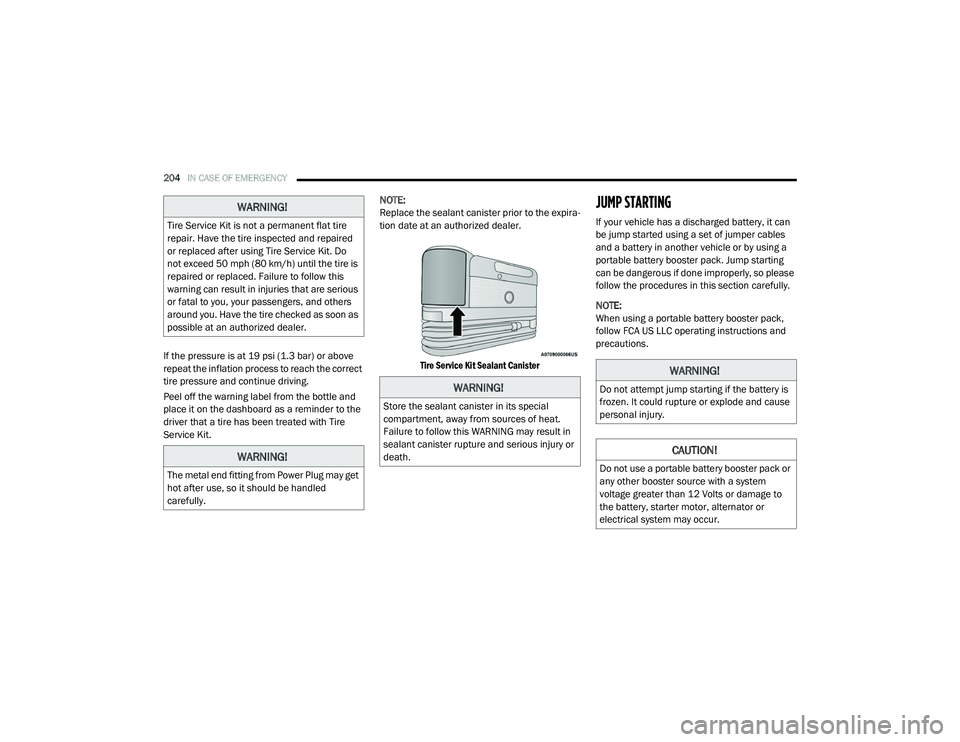
Service Kit. NOTE:
Replace the sealant canister prior to the expira-
tion date at an authorized dealer.
Tire Service Kit Sealant Canister
JUMP STARTING
If your vehicle has a discharged battery, it can
be jump started using a set of jumper cables
and a battery in another vehicle or by using a
portable battery booster pack. Jump starting
can be dangerous if done improperly, so please
follow the procedures in this section carefully.
NOTE:
When using a portable battery booster pack,
follow FCA US LLC operating instructions and
precautions.
WARNING!
Tire Service Kit is not a permanent flat tire
repair. Have the tire inspected and repaired
or replaced after using Tire Service Kit. Do
not exceed 50 mph (80 km/h) until the tire is
repaired or replaced. Failure to follow this
warning can result in injuries that are serious
or fatal to you, your passengers, and others
around you. Have the tire checked as soon as
possible at an authorized dealer.
WARNING!
The metal end fitting from Power Plug may get
hot after use, so it should be handled
carefully.
WARNING!
Store the sealant canister in its special
compartment, away from sources of heat.
Failure to follow this WARNING may result in
sealant canister rupture and serious injury or
death.
WARNING!
Do not attempt jump starting if the battery is
frozen. It could rupture or explode and cause
personal injury.
CAUTION!
Do not use a portable battery booster pack or
any other booster source with a system
voltage greater than 12 Volts or damage to
the battery, starter motor, alternator or
electrical system may occur.
21_VM_OM_EN_USC_t.book Page 204
Page 208 of 280

206IN CASE OF EMERGENCY
See below steps to prepare for jump starting:
1. Apply the parking brake, shift the
automatic transmission into PARK (P) and
turn the ignition to STOP.
2. Turn off the heater, radio, and all electrical accessories.
3. If using another vehicle to jump-start the battery, park the vehicle within the jumper
cables reach, apply the parking brake and
make sure the ignition is OFF.
Jump Starting Procedure
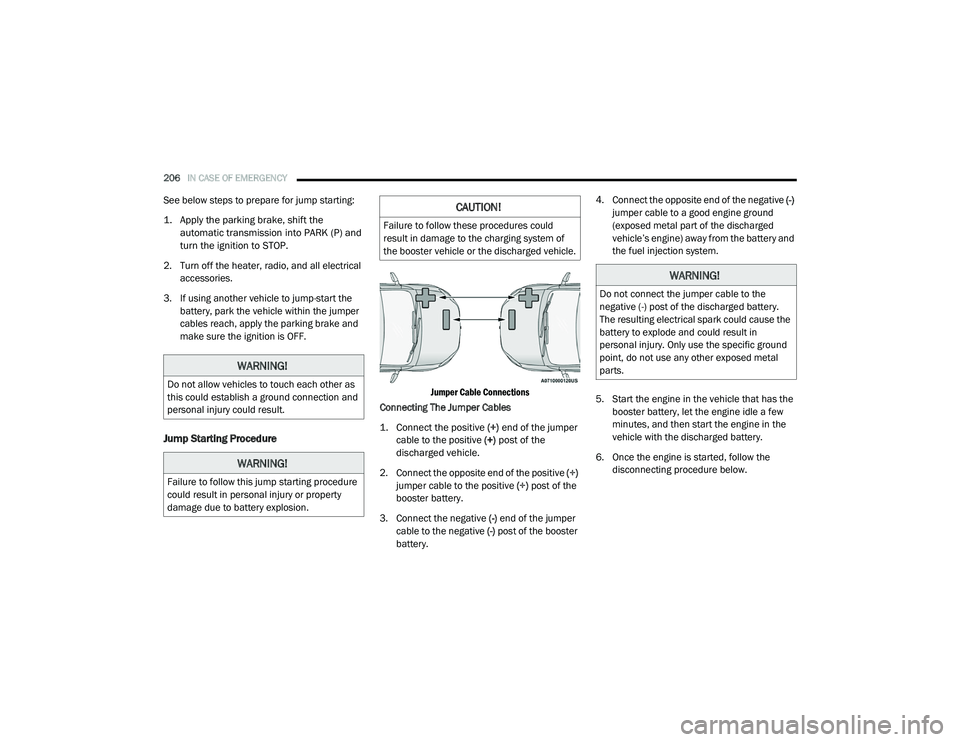
Jumper Cable Connections
Connecting The Jumper Cables
1. Connect the positive
(+) end of the jumper
cable to the positive (+)
post of the
discharged vehicle.
2. Connect the opposite end of the positive (+)
jumper cable to the positive (+) post of the
booster battery.
3. Connect the negative (-) end of the jumper
cable to the negative (-) post of the booster
battery. 4. Connect the opposite end of the negative
(-)
jumper cable to a good engine ground
(exposed metal part of the discharged
vehicle’s engine) away from the battery and
the fuel injection system.
5. Start the engine in the vehicle that has the booster battery, let the engine idle a few
minutes, and then start the engine in the
vehicle with the discharged battery.
6. Once the engine is started, follow the disconnecting procedure below.
WARNING!
Do not allow vehicles to touch each other as
this could establish a ground connection and
personal injury could result.
WARNING!
Failure to follow this jump starting procedure
could result in personal injury or property
damage due to battery explosion.
CAUTION!
Failure to follow these procedures could
result in damage to the charging system of
the booster vehicle or the discharged vehicle.
WARNING!
Do not connect the jumper cable to the
negative (-) post of the discharged battery.
The resulting electrical spark could cause the
battery to explode and could result in
personal injury. Only use the specific ground
point, do not use any other exposed metal
parts.
21_VM_OM_EN_USC_t.book Page 206
Page 209 of 280

IN CASE OF EMERGENCY207
Disconnecting The Jumper Cables
1. Disconnect the negative
(-)
end of the
jumper cable from the engine ground of
the vehicle with the discharged battery.
2. Disconnect the opposite end of the negative (-) jumper cable from the
negative (-) post of the booster battery.
3. Disconnect the positive (+) end of the
jumper cable from the positive (+) post of
the booster battery.
4. Disconnect the opposite end of the positive (+) jumper cable from the
positive (+) post of the vehicle with the
discharged battery.
If frequent jump starting is required to start your
vehicle you should have the battery and
charging system inspected at an authorized
dealer.
IF YOUR ENGINE OVERHEATS
If the vehicle is overheating, it will need to be
serviced by an authorized dealer.
In any of the following situations, you can
reduce the potential for overheating by taking
the appropriate action.
On the highways — slow down.
In city traffic — while stopped, place the trans -
mission in NEUTRAL (N), but do not increase
the engine idle speed while preventing
vehicle motion with the brakes. NOTE:
There are steps that you can take to slow down
an impending overheat condition:
If your Air Conditioner (A/C) is on, turn it off.
The A/C system adds heat to the engine
cooling system and turning the A/C off can
help remove this heat.
You can also turn the temperature control to
maximum heat, the mode control to floor and
the blower control to high. This allows the
heater core to act as a supplement to the
radiator and aids in removing heat from the
engine cooling system.
CAUTION!
Accessories plugged into the vehicle power
outlets draw power from the vehicle’s battery,
even when not in use (i.e., cellular devices,
etc.). Eventually, if plugged in long enough
without engine operation, the vehicle’s
battery will discharge sufficiently to degrade
battery life and/or prevent the engine from
starting.
WARNING!
You or others can be badly burned by hot
engine coolant (antifreeze) or steam from
your radiator. If you see or hear steam coming
from under the hood, do not open the hood
until the radiator has had time to cool. Never
try to open a cooling system pressure cap
when the radiator or coolant bottle is hot.7
21_VM_OM_EN_USC_t.book Page 207