2021 RAM PROMASTER CITY lock
[x] Cancel search: lockPage 16 of 280
14GETTING TO KNOW YOUR VEHICLE
DOORS
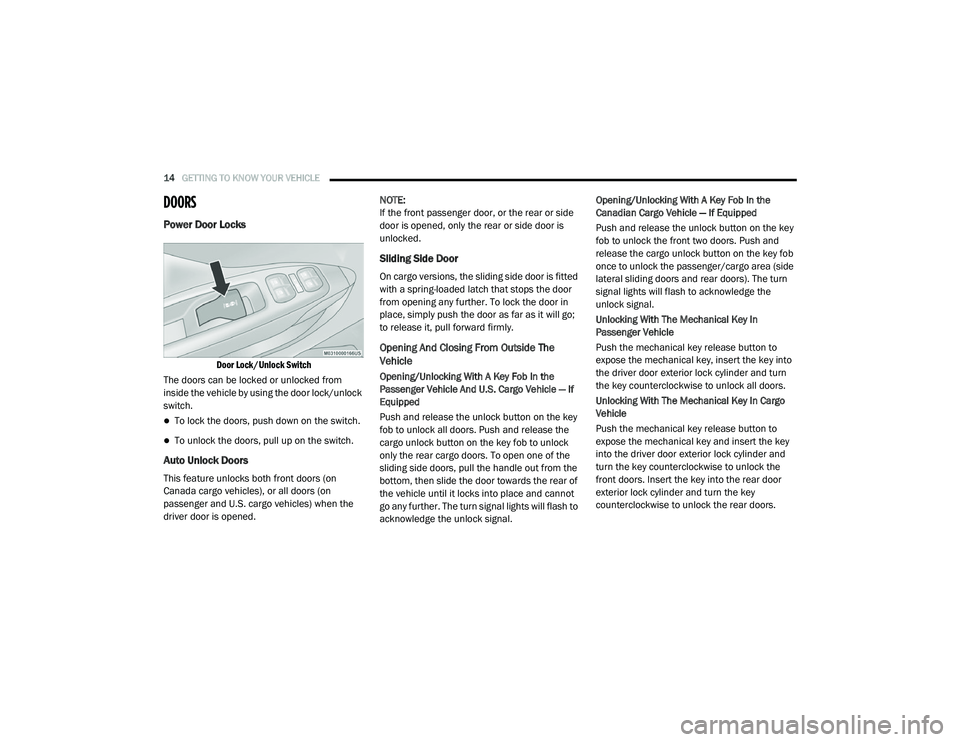
Power Door Locks
Door Lock/Unlock Switch
The doors can be locked or unlocked from
inside the vehicle by using the door lock/unlock
switch.
To lock the doors, push down on the switch.
To unlock the doors, pull up on the switch.
Auto Unlock Doors
This feature unlocks both front doors (on
Canada cargo vehicles), or all doors (on
passenger and U.S. cargo vehicles) when the
driver door is opened. NOTE:
If the front passenger door, or the rear or side
door is opened, only the rear or side door is
unlocked.
Sliding Side Door
On cargo versions, the sliding side door is fitted
with a spring-loaded latch that stops the door
from opening any further. To lock the door in
place, simply push the door as far as it will go;
to release it, pull forward firmly.
Opening And Closing From Outside The
Vehicle
Opening/Unlocking With A Key Fob In the
Passenger Vehicle And U.S. Cargo Vehicle — If
Equipped
Push and release the unlock button on the key
fob to unlock all doors. Push and release the
cargo unlock button on the key fob to unlock
only the rear cargo doors. To open one of the
sliding side doors, pull the handle out from the
bottom, then slide the door towards the rear of
the vehicle until it locks into place and cannot
go any further. The turn signal lights will flash to
acknowledge the unlock signal.Opening/Unlocking With A Key Fob In the
Canadian Cargo Vehicle — If Equipped
Push and release the unlock button on the key
fob to unlock the front two doors. Push and
release the cargo unlock button on the key fob
once to unlock the passenger/cargo area (side
lateral sliding doors and rear doors). The turn
signal lights will flash to acknowledge the
unlock signal.
Unlocking With The Mechanical Key In
Passenger Vehicle
Push the mechanical key release button to
expose the mechanical key, insert the key into
the driver door exterior lock cylinder and turn
the key counterclockwise to unlock all doors.
Unlocking With The Mechanical Key In Cargo
Vehicle
Push the mechanical key release button to
expose the mechanical key and insert the key
into the driver door exterior lock cylinder and
turn the key counterclockwise to unlock the
front doors. Insert the key into the rear door
exterior lock cylinder and turn the key
counterclockwise to unlock the rear doors.
21_VM_OM_EN_USC_t.book Page 14
Page 17 of 280
GETTING TO KNOW YOUR VEHICLE15
Closing/Locking With A Key Fob
Push and release the lock button on the key fob
to lock all doors, including the cargo area (side
lateral sliding doors and rear doors). The turn
signal lights will flash to acknowledge the lock
signal.
Horn activation settings after a key fob lock
command can be adjusted manually through
the Uconnect system Úpage 87.
Locking With The Mechanical Key In Passenger
Vehicle
Push the mechanical key release button to
expose the mechanical key, insert the key into
the driver door exterior lock cylinder and turn
the key clockwise to lock all doors.
Locking With The Mechanical Key In Cargo
Vehicle
Push the mechanical key release button to
expose the mechanical key, insert the key into
the driver door exterior lock cylinder and turn
the key clockwise to lock the front doors. Insert
the key into the rear door exterior lock cylinder
and turn the key clockwise to lock the rear
doors. Closing And Locking From Outside
Grab the side door handle and push towards
the front of the vehicle. Once the side door is
secured in the full closed position, use one of
the prior locking methods to lock the sliding
side doors.
Opening And Closing From The Inside
Opening:
Pull the interior door handle to unlock the door,
then pull the handle and slide the door towards
the rear of the vehicle until it can go no further.
Closing:
Pull the interior door handle to release the door
and then push it towards the front of the
vehicle.
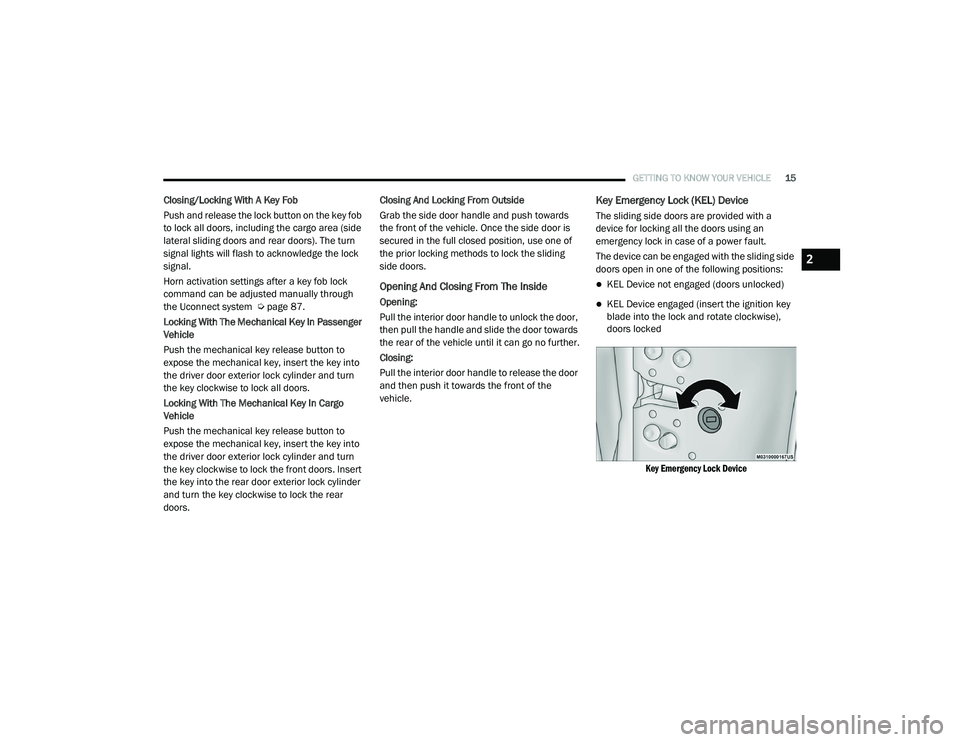
Key Emergency Lock (KEL) Device
The sliding side doors are provided with a
device for locking all the doors using an
emergency lock in case of a power fault.
The device can be engaged with the sliding side
doors open in one of the following positions:
KEL Device not engaged (doors unlocked)
KEL Device engaged (insert the ignition key
blade into the lock and rotate clockwise),
doors locked
Key Emergency Lock Device
2
21_VM_OM_EN_USC_t.book Page 15
Page 18 of 280
16GETTING TO KNOW YOUR VEHICLE
The device is released and the doors can be
opened as follows:
If the power is restored:
By remote control.
Opening a front door by inserting the key into
the key cylinder.
If the power is not restored:
Opening the driver side door by mechanical
key and the other doors (passenger's side
and sliding side door) by pulling the inner
handle.
If the child lock was engaged and the previously
described locking procedure was carried out,
operating the internal handle will not open the
door but will only realign the door lock knob. To
open the door, the outside handle must be
pulled. The door lock/unlock button is not
disabled by the engagement of the emergency
lock.
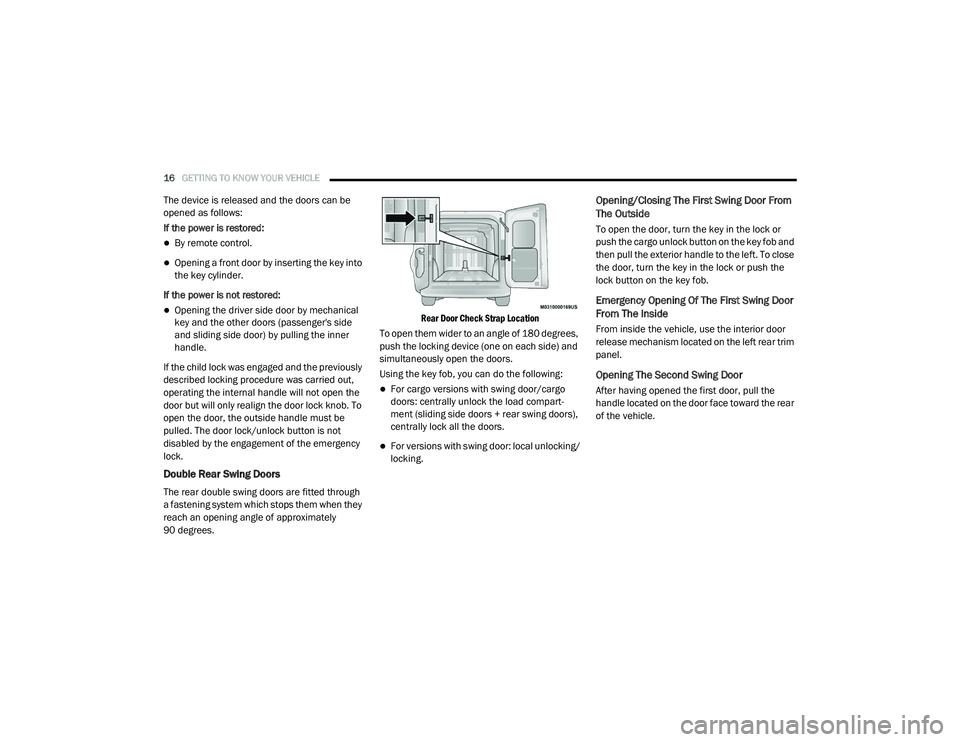
Double Rear Swing Doors
The rear double swing doors are fitted through
a fastening system which stops them when they
reach an opening angle of approximately
90 degrees.
Rear Door Check Strap Location
To open them wider to an angle of 180 degrees,
push the locking device (one on each side) and
simultaneously open the doors.
Using the key fob, you can do the following:
For cargo versions with swing door/cargo
doors: centrally unlock the load compart -
ment (sliding side doors + rear swing doors),
centrally lock all the doors.
For versions with swing door: local unlocking/
locking.
Opening/Closing The First Swing Door From
The Outside
To open the door, turn the key in the lock or
push the cargo unlock button on the key fob and
then pull the exterior handle to the left. To close
the door, turn the key in the lock or push the
lock button on the key fob.
Emergency Opening Of The First Swing Door
From The Inside
From inside the vehicle, use the interior door
release mechanism located on the left rear trim
panel.
Opening The Second Swing Door
After having opened the first door, pull the
handle located on the door face toward the rear
of the vehicle.
21_VM_OM_EN_USC_t.book Page 16
Page 19 of 280
GETTING TO KNOW YOUR VEHICLE17
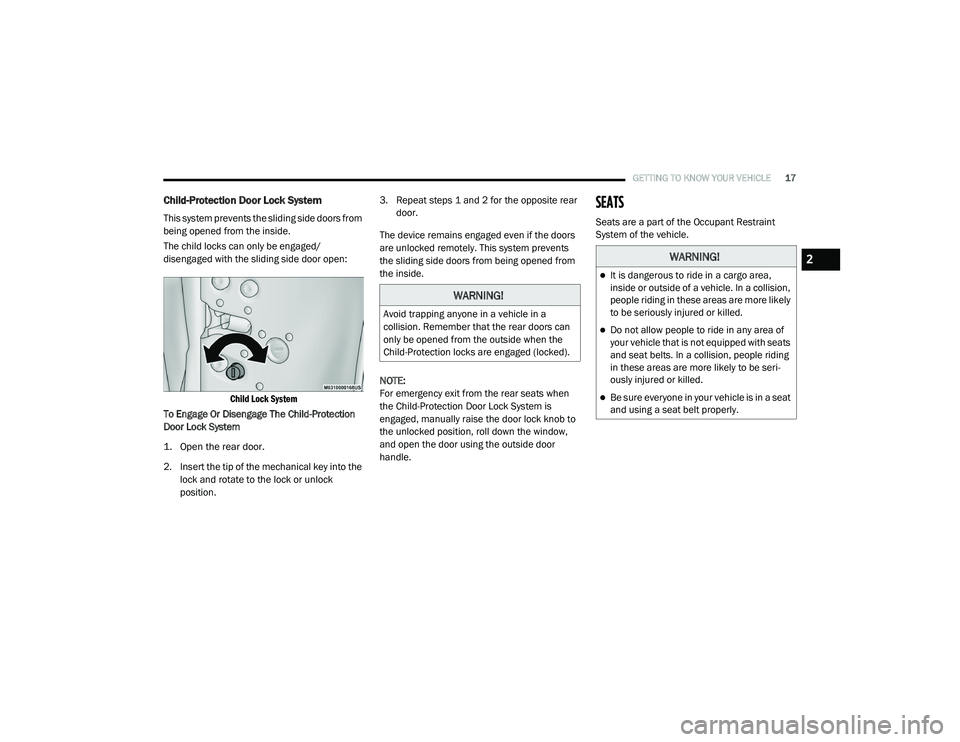
Child-Protection Door Lock System
This system prevents the sliding side doors from
being opened from the inside.
The child locks can only be engaged/
disengaged with the sliding side door open:
Child Lock System
To Engage Or Disengage The Child-Protection
Door Lock System
1. Open the rear door.
2. Insert the tip of the mechanical key into the lock and rotate to the lock or unlock
position. 3. Repeat steps 1 and 2 for the opposite rear
door.
The device remains engaged even if the doors
are unlocked remotely. This system prevents
the sliding side doors from being opened from
the inside.
NOTE:
For emergency exit from the rear seats when
the Child-Protection Door Lock System is
engaged, manually raise the door lock knob to
the unlocked position, roll down the window,
and open the door using the outside door
handle.
SEATS
Seats are a part of the Occupant Restraint
System of the vehicle.
WARNING!
Avoid trapping anyone in a vehicle in a
collision. Remember that the rear doors can
only be opened from the outside when the
Child-Protection locks are engaged (locked).
WARNING!
It is dangerous to ride in a cargo area,
inside or outside of a vehicle. In a collision,
people riding in these areas are more likely
to be seriously injured or killed.
Do not allow people to ride in any area of
your vehicle that is not equipped with seats
and seat belts. In a collision, people riding
in these areas are more likely to be seri -
ously injured or killed.
Be sure everyone in your vehicle is in a seat
and using a seat belt properly.
2
21_VM_OM_EN_USC_t.book Page 17
Page 26 of 280
24GETTING TO KNOW YOUR VEHICLE
To unlock the steering column, push the
steering column control downward. To tilt the
steering column, move the steering wheel
upward or downward as desired. To lengthen or
shorten the steering column, pull the steering
wheel outward or push it inward as desired. To
lock the steering column in position, pull the
steering column control up until fully engaged.
UCONNECT VOICE RECOGNITION QUICK TIPS
Introducing Voice Recognition
Start using Uconnect Voice Recognition with
these helpful quick tips. It provides the key Voice
Commands and tips you need to know to control
your vehicle’s Voice Recognition (VR) system.
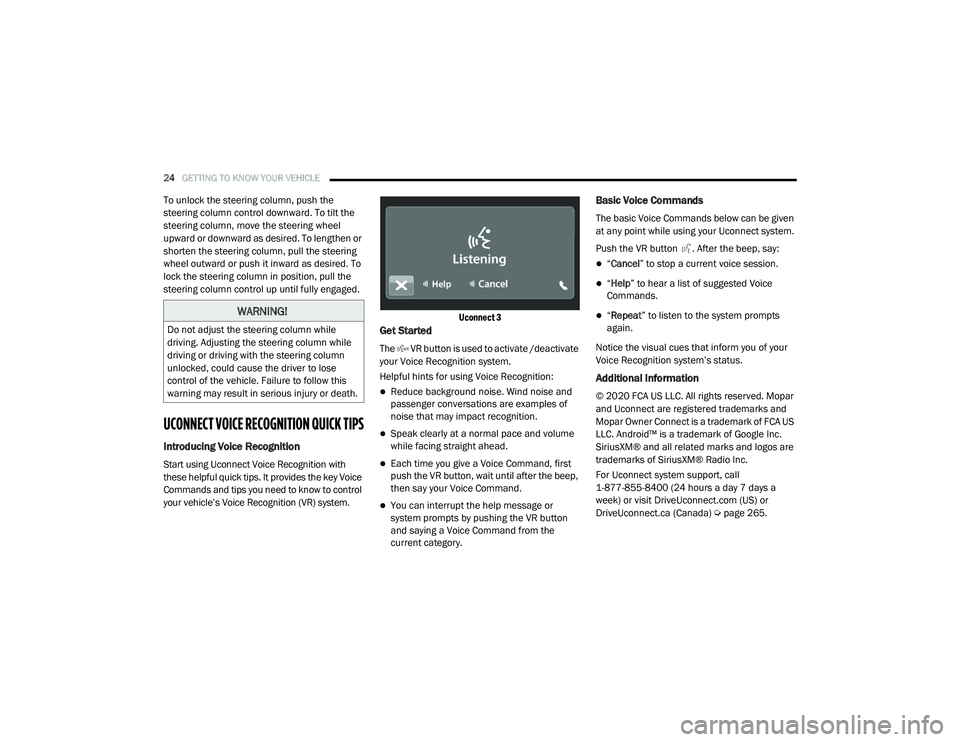
Uconnect 3
Get Started
The VR button is used to activate /deactivate
your Voice Recognition system.
Helpful hints for using Voice Recognition:
Reduce background noise. Wind noise and
passenger conversations are examples of
noise that may impact recognition.
Speak clearly at a normal pace and volume
while facing straight ahead.
Each time you give a Voice Command, first
push the VR button, wait until after the beep,
then say your Voice Command.
You can interrupt the help message or
system prompts by pushing the VR button
and saying a Voice Command from the
current category.
Basic Voice Commands
The basic Voice Commands below can be given
at any point while using your Uconnect system.
Push the VR button . After the beep, say:
“
Cancel ” to stop a current voice session.
“Help ” to hear a list of suggested Voice
Commands.
“ Repeat ” to listen to the system prompts
again.
Notice the visual cues that inform you of your
Voice Recognition system’s status.
Additional Information
© 2020 FCA US LLC. All rights reserved. Mopar
and Uconnect are registered trademarks and
Mopar Owner Connect is a trademark of FCA US
LLC. Android™ is a trademark of Google Inc.
SiriusXM® and all related marks and logos are
trademarks of SiriusXM® Radio Inc.
For Uconnect system support, call
1-877-855-8400 (24 hours a day 7 days a
week) or visit DriveUconnect.com (US) or DriveUconnect.ca (Canada) Ú page 265.
WARNING!
Do not adjust the steering column while
driving. Adjusting the steering column while
driving or driving with the steering column
unlocked, could cause the driver to lose
control of the vehicle. Failure to follow this
warning may result in serious injury or death.
21_VM_OM_EN_USC_t.book Page 24
Page 29 of 280
GETTING TO KNOW YOUR VEHICLE27
Sun Visor “Slide-On-Rod” Feature
The sun visor “Slide-On-Rod” feature allows for
additional flexibility in positioning the sun visor
to block out the sun.
1. Fold down the sun visor.
2. Unclip the visor from the corner clip.
3. Pull the sun visor toward the inside rearview
mirror to extend it.
EXTERIOR LIGHTS
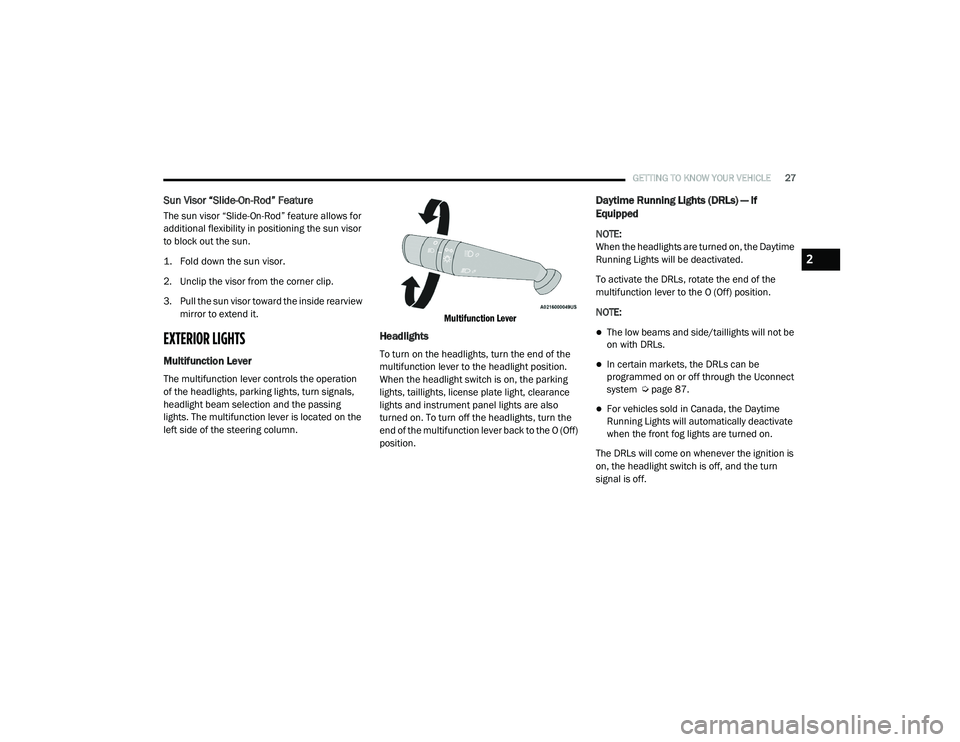
Multifunction Lever
The multifunction lever controls the operation
of the headlights, parking lights, turn signals,
headlight beam selection and the passing
lights. The multifunction lever is located on the
left side of the steering column.
Multifunction Lever
Headlights
To turn on the headlights, turn the end of the
multifunction lever to the headlight position.
When the headlight switch is on, the parking
lights, taillights, license plate light, clearance
lights and instrument panel lights are also
turned on. To turn off the headlights, turn the
end of the multifunction lever back to the O (Off)
position.
Daytime Running Lights (DRLs) — If
Equipped
NOTE:
When the headlights are turned on, the Daytime
Running Lights will be deactivated.
To activate the DRLs, rotate the end of the
multifunction lever to the O (Off) position.
NOTE:
The low beams and side/taillights will not be
on with DRLs.
In certain markets, the DRLs can be
programmed on or off through the Uconnect
system Ú
page 87.
For vehicles sold in Canada, the Daytime
Running Lights will automatically deactivate
when the front fog lights are turned on.
The DRLs will come on whenever the ignition is
on, the headlight switch is off, and the turn
signal is off.
2
21_VM_OM_EN_USC_t.book Page 27
Page 30 of 280

28GETTING TO KNOW YOUR VEHICLE
High/Low Beam Switch
Pull the multifunction lever toward the steering
wheel to switch the headlights to high beams.
Pull the multifunction lever again to turn the low
beams back on.
Flash-To-Pass
You can signal another vehicle with your
headlights by lightly pulling the multifunction
lever toward you. This will cause the high beam
headlights to turn on, and remain on, until the
lever is released.
Parking Lights
These lights can only be turned on with the
ignition in the STOP (OFF/LOCK) position or
removed. Move the end of the multifunction
lever to O (Off) position, and then to the
headlight position.
The indicator light telltale in the instrument
panel comes on. The lights stay on until the next
ignition cycle is performed.
Follow Me Home/Headlight Delay
When this feature is selected, the driver can
choose to have the headlights remain on for a
preset period of time after the engine is turned
off.
Activation
Remove the key or turn the ignition to the STOP
(OFF/LOCK) position, and pull the multifunction
lever toward the steering wheel within two
minutes. Each time the lever is pulled, the
activation of the lights will be extended by
30 seconds. The activation of the lights can be
extended to a maximum of 210 seconds.
Deactivation
Pull the multifunction lever toward the steering
wheel and hold it for more than two seconds.
Fog Lights — If Equipped
The fog light switch is located on the center
stack of the instrument panel, just above the
climate controls. Push the switch once to turn the fog
lights on. Push the switch a second
time to turn the fog lights off.
NOTE:
If the vehicle’s ignition is turned off, the fog
lights will also turn off.
Turn Signals
Move the multifunction lever up or down to
activate the turn signals. The arrows on each
side of the instrument cluster flash to show
proper operation.
NOTE:
If either light remains on and does not flash, or
there is a very fast flash rate, check for a defec -
tive outside light bulb.
Lane Change Assist
Lightly push the multifunction lever up or down,
without moving beyond the detent, and the turn
signal will flash five times then automatically
turn off.
21_VM_OM_EN_USC_t.book Page 28
Page 34 of 280
32GETTING TO KNOW YOUR VEHICLE
Recirculation Button
Press and release this button to
change the system between
recirculation mode and outside air
mode. The Recirculation indicator and
the A/C indicator illuminate when the
Recirculation button is pressed. Recirculation
can be used when outside conditions such as
smoke, odors, dust, or high humidity are
present. Recirculation can be used in all modes.
Recirculation may be unavailable (button on the
touchscreen greyed out) if conditions exist that
could create fogging on the inside of the
windshield. The A/C can be deselected
manually without disturbing the mode control
selection. Continuous use of the Recirculation
mode may make the inside air stuffy and
window fogging may occur. Extended use of this
mode is not recommended.
In cold weather, use of Recirculation mode may
lead to excessive window fogging. The
Recirculation feature may be unavailable if
conditions exist that could create fogging on the
inside of the windshield.
Front Defrost Button
Use Defrost mode with maximum
temperature settings for best
windshield and side window
defrosting and defogging. Turn the
knob to the Front Defrost position. Air comes
from the windshield and side window demist
outlets.
Rear Defrost Button — If Equipped
Push and release the Rear Defrost
Control button to turn on the rear
window defroster and the heated
outside mirrors (if equipped). An
indicator will illuminate when the rear window
defroster is on. The rear window defroster
automatically turns OFF after 20 minutes.
Temperature Control
Use this control to regulate the
temperature of the air inside the
passenger compartment. Rotating
the knob counterclockwise, from top
center into the blue area of the scale, indicates
cooler temperatures. Rotating the knob
clockwise, into the red area, indicates warmer
temperatures.
Blower Control
There are four blower speeds. Use
this control to regulate the amount of
air forced through the system in any
mode you select. The blower speed
increases as you move the control clockwise
from the OFF position.
Mode Control
Rotate this control to change the
airflow distribution mode. The airflow
distribution mode can be adjusted so
air comes from the instrument panel
outlets, floor outlets, defrost outlets and demist
outlets. The Mode settings are as follows:
Panel Mode
Air comes from the outlets in the
instrument panel. Each of these
outlets can be individually adjusted to
direct the flow of air. The air vanes of
the center outlets and outboard outlets can be
moved up and down or side to side to regulate
airflow direction. There is a shut off wheel
located below the air vanes to shut off or adjust
the amount of airflow from these outlets.
21_VM_OM_EN_USC_t.book Page 32