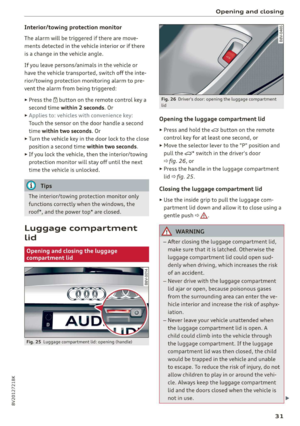
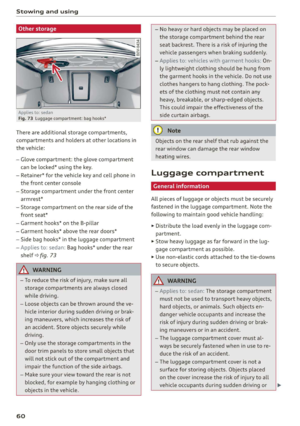
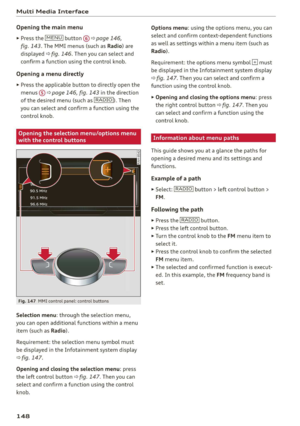
Page 193 of 400

8V2012721BK
Navigation
Setting a home address as the destination
Requirement: a home address must be stored
=> page 196.
Your
Home address is shown directly in the Enter
destination menu @) > page 1839, fig. 166.
> Select: Home address.
Setting a favorite as the destination
Requirement: a favorite must be stored as a des-
tination > page 196.
> Enter at least the first three letters of the de-
sired favorite in the free text search input field.
The favorites found are shown in the Infotain-
ment system display @) > page 189, fig. 166.
> Select and confirm the desired entry.
@ Tips
— Additional settings for the home address
can be found under > page 196.
— Additional settings for the favorites can be
found under > page 196.
Mice e Reishi m al
directory
Applies to: vehicles with navigation system
@ allele}
DS eran
a er re
fe MOM: ema on ey
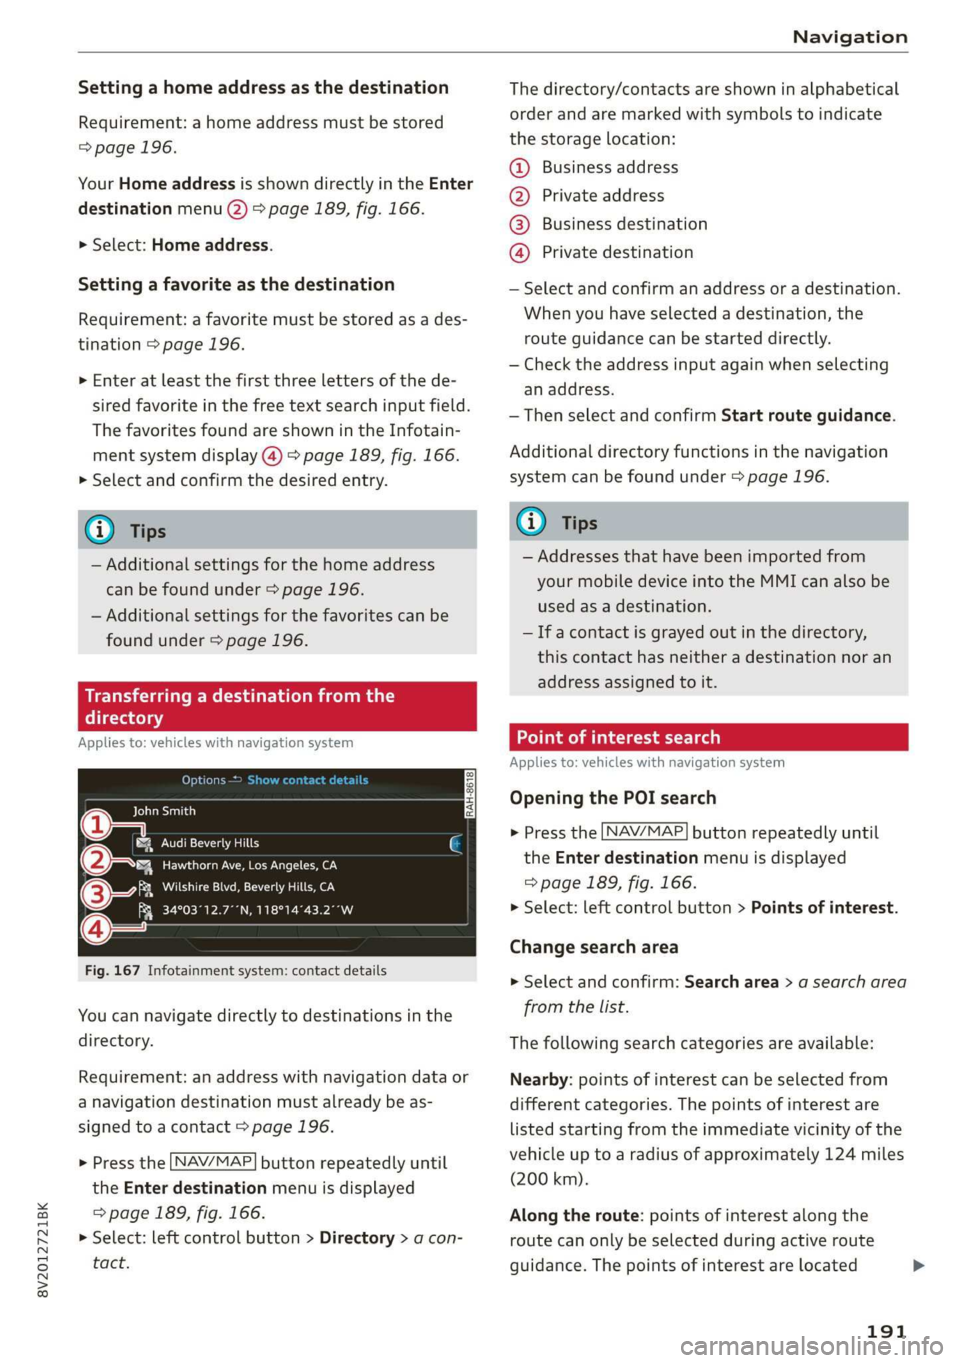
Fig. 167 Infotainment system: contact details
34°03°12.7°°N, 118°14°43.2°°W
You can navigate directly to destinations in the
directory.
Requirement: an address with navigation data or
a navigation destination must already be as-
signed to a contact > page 196.
> Press the [NAV/MAP] button repeatedly until
the Enter destination menu is displayed
=> page 189, fig. 166.
> Select: left control button > Directory > a con-
tact.
The directory/contacts are shown in alphabetical
order and are marked with symbols to indicate
the storage location:
@ Business address
@ Private address
@®) Business destination
@ Private destination
— Select and confirm an address or a destination.
When you have selected a destination, the
route guidance can be started directly.
— Check the address input again when selecting
an address.
—Then select and confirm Start route guidance.
Additional directory functions in the navigation
system can be found under > page 196.
Gi) Tips
— Addresses that have been imported from
your mobile device into the MMI can also be
used as a destination.
— If a contact is grayed out in the directory,
this contact has neither a destination nor an
address assigned to it.
ol em Teast Ta a)
Applies to: vehicles with navigation system
Opening the POI search
> Press the [NAV/MAP] button repeatedly until
the Enter destination menu is displayed
=> page 189, fig. 166.
> Select: left control button > Points of interest.
Change search area
> Select and confirm: Search area > a search area
from the list.
The following search categories are available:
Nearby: points of interest can be selected from
different categories. The points of interest are
listed starting from the immediate vicinity of the
vehicle up to a radius of approximately 124 miles
(200 km).
Along the route: points of interest along the
route can only be selected during active route
guidance. The points of interest are located
191
Page 194 of 400

Navigation
directly along or in the immediate vicinity of the
calculated route. The points of interest can like-
wise be selected from various categories. For ex-
ample, you can search for a hotel or parking lot
along the route.
Near destination/Near stopover: points of inter-
est near a destination or a stopover can only be
selected during active route guidance. The points
of interest can likewise be selected from various
categories. For example, you can search for a ho-
tel or parking lot at the destination.
In a new city: select a country/state or search in
a new city. Enter the name of the desired city.
Points of interest can be selected from various
categories. This function allows you to search for
points of interest in any city regardless of the ac-
tive route guidance or the vehicle position.
Searching for the name of a point of interest
in the selected search area
> Select: Find entry > Enter POI.
> Enter the name of the point of interest.
Searching for a point of interest in a specific
category
> Select Select category.
> Select and confirm a category, such as Restau-
rants.
G) Tips
— Distances to points of interest are displayed
as a straight-line distance from your current
location. The actual distance from your cur-
rent location to the point of interest is up-
dated automatically. The list of points of in-
terest that were found is not resorted when
this happens.
— There may be entries in the list that cannot
be displayed completely due to their length.
Select the corresponding entry from the list.
Select: right control button > Show destina-
tion details. Detailed information for the se-
lected entry in the list is then displayed.
192
Point of interest search (charging station)
Applies to: vehicles with navigation system and plug-in hybrid
drive
aurea
BB Los Angeles Law Library
Py n
J &}) BROOKEIELD WEST / WFC HILL ST O...
roe) J r
SHARED / 43 (24h
rs ea
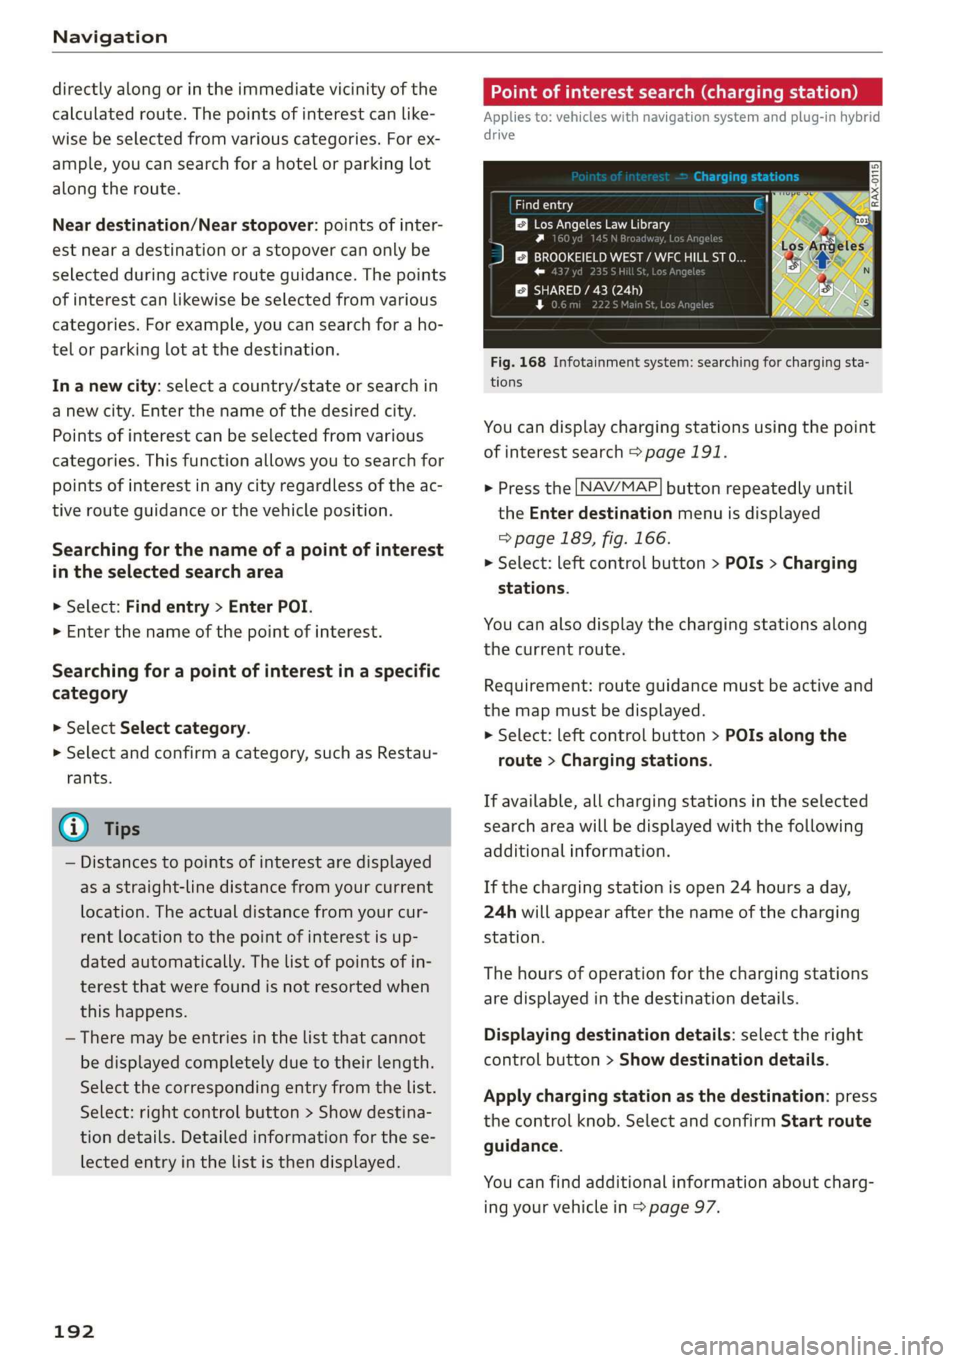
Fig. 168 Infotainment system: searching for charging sta-
tions
You can display charging stations using the point
of interest search > page 191.
> Press the [NAV/MAP] button repeatedly until
the Enter destination menu is displayed
> page 189, fig. 166.
> Select: left control button > POIs > Charging
stations.
You can also display the charging stations along
the current route.
Requirement: route guidance must be active and
the map must be displayed.
> Select: left control button > POIs along the
route > Charging stations.
If available, all charging stations in the selected
search area will be displayed with the following
additional information.
If the charging station is open 24 hours a day,
24h will appear after the name of the charging
station.
The hours of operation for the charging stations
are displayed in the destination details.
Displaying destination details: select the right
control button > Show destination details.
Apply charging station as the destination: press
the control knob. Select and confirm Start route
guidance.
You can find additional information about charg-
ing your vehicle in > page 97.
Page 195 of 400

8V2012721BK
Navigation
Online point of interest search (online Accessing destinations from myAudi
search) account
Applies to: vehicles with a navigation system and Audi con-
nect Infotainment
You can search for points of interest on the Inter-
net.
Requirement: the requirements for Audi connect
Infotainment must be met > page 182.
Opening the online search
> Press the [NAV/MAP] button repeatedly until
the Enter destination menu is displayed
=> page 189, fig. 166.
> Select: left control button > Online search. The
search area last set is displayed in the input
field.
Change search area
> Select: right control button > Select search
area.
Searching for an online destination in the
selected search area
> If necessary, enter a new city, state, or country.
> Enter the search term, such as hotel.
> Press the control knob.
> Select and confirm an online destination from
the list.
Searching for an online destination ina
specific category
> Select and confirm Select category.
> Select and confirm a category, such as Restau-
rants.
Find which search areas are available under
=>page 191.
You can search for online destinations using the
voice recognition system* > table on page 165.
@) Note
Read the information about Audi connect, and
be sure to note the connectivity costs section
=> page 182.
Applies to: vehicles with a navigation system and Audi con-
nect Infotainment
Import individual destinations from your myAudi
account into the MMI.
Requirement: the requirements for Audi connect
Infotainment must be met > page 182. You
must have a registered myAudi account at my.
audi.com. You must have a vehicle assigned to
your myAudi account and you must have stored
one or more destinations.
> Press the [NAV/MAP] button repeatedly until
the Enter destination menu is displayed
=> page 189, fig. 166.
> Select: left control button > myAudi contacts.
> If necessary, enter your myAudi user data or
your myAudi PIN > page 183. The contacts
stored in myAudi are displayed.
> Select and confirm a contact.
» Select and confirm a private or business desti-
nation.
> Select and confirm Start route guidance.
@) Tips
— You only need to enter the myAudi user data
one time.
— You can receive your myAudi PIN if you have
set up a myAudi account.
— For additional information, visit www.
audiusa.com.
Entering a destination using geo
coordinates
Applies to: vehicles with navigation system
> Press the [NAV/MAP] button repeatedly until
the Enter destination menu is displayed
> page 189, fig. 166.
> Select: left control button > Geographical coor-
dinates.
> Select Latitude/Longitude.
> Press the control knob to set the individual val-
ues.
> Turn the control knob to the left/right to
change the selected value.
> Select and confirm Start route guidance.
193
Page 196 of 400
![AUDI A3 2020 Owner´s Manual Navigation
Adding a stopover
Applies to: vehicles with navigation system
RAX-0083] A CUA] a
= De Conch) —@
RCO oe
Ne
Fig. 169 Infotainment system: active route guidance with
stopover
You AUDI A3 2020 Owner´s Manual Navigation
Adding a stopover
Applies to: vehicles with navigation system
RAX-0083] A CUA] a
= De Conch) —@
RCO oe
Ne
Fig. 169 Infotainment system: active route guidance with
stopover
You](/manual-img/6/40265/w960_40265-195.png)
Navigation
Adding a stopover
Applies to: vehicles with navigation system
RAX-0083] A CUA] a
= De Conch) —@
RCO oe
Ne
Fig. 169 Infotainment system: active route guidance with
stopover
You can enter an additional destination when
route guidance is active.
Requirement: route guidance must already be ac-
tive.
Opening a menu
> Press the LNAV/MAP] button repeatedly until
the Enter destination menu is displayed
=> page 189, fig. 166.
Entering a destination as a stopover
> Enter a destination in the input line @
=> page 189, fig. 166
> Select and confirm a destination from the re-
sults list.
> Select and confirm Add as stopover.
Deleting a stopover
> Push the control knob up. Free text search and
active route guidance are displayed, or:
> Turn the control knob to the left until the active
route guidance is shown.
> Select and confirm Delete stopover (2). The
stopover is deleted.
Cancel route guidance
Applies to: vehicles with navigation system
Requirement: route guidance must be active.
> Press the LNAV/MAP] button repeatedly until
the Enter destination menu is displayed
=> page 189, fig. 166.
> Turn the control knob to the left until the active
route guidance is shown > page 194, fig. 169.
194
> Select and confirm Delete destination @
=> page 194, fig. 169. The destination is delet-
ed, or:
>» Select: right control button > Cancel route
guidance
Additional options when entering a
Ciel)
Applies to: vehicles with navigation system
> Press the right control button.
Depending on the selected function, the follow-
ing options may be available when entering a
destination:
Cancel route guidance: Requirement: route guid-
ance must be active. Route guidance is canceled.
For additional information, see > page 194.
Country information: you can display the appli-
cable urban and rural speed limits for any coun-
try/state. If this function is activated, the infor-
mation will be automatically shown to you in the
route information @ > page 199, fig. 174 when
the speed limit is exceeded > page 201.
Country/state selection: > page 189.
Route criteria: > page 198.
Show location on map: Requirement: you must
have selected a destination from the results list.
The destination entered is displayed on the map.
Parking at this location*: Requirement: you must
have selected a destination from the results list.
All parking options near the selected location are
displayed in the Infotainment system.
Delete: the selected entry is deleted. You can de-
lete individual entries or all entries (for example,
favorites or last destinations).
Audi connect at this location*: Requirement: you
must have selected a destination from the results
list. Allows you to search for items in the vicinity
of the selected location, such as travel informa-
tion.
Online traffic data*: the online traffic informa-
tion = page 204 can be switched on or off.
Add destination to contact: > page 196.
Page 197 of 400

8V2012721BK
Navigation
Store as favorite: > page 196.
Voice guidance: > page 198.
Navigation settings: > page 197.
@ Tips
Information on online traffic data* can also
be found online at www.audiusa.com.
Personal route
assistance
Applies to: vehicles with navigation system and personal
route assistance
Rameau e- (ele ge}
= ie (Ota
LS a
® Market Street
4
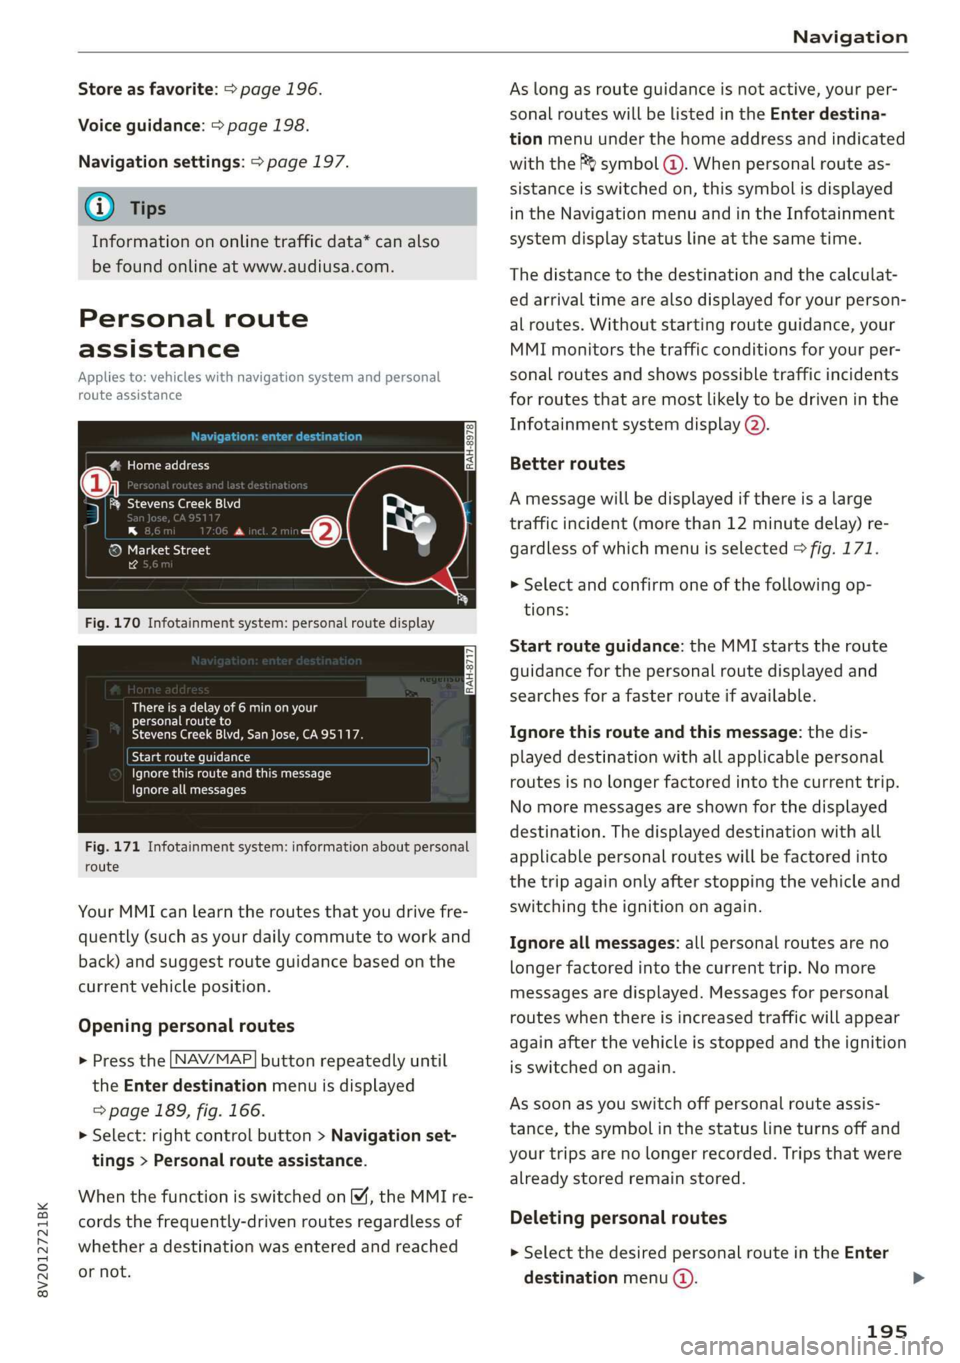
Fig. 170 Infotainment system: personal route display
There is a delay of 6 min on your
personal route to
Stevens Creek Blvd, San Jose, CA95117.
Start route guidance
Ignore this route and this message
Ignore all messages
Fig. 171 Infotainment system: information about personal
route
Your MMI can learn the routes that you drive fre-
quently (such as your daily commute to work and
back) and suggest route guidance based on the
current vehicle position.
Opening personal routes
> Press the [NAV/MAP] button repeatedly until
the Enter destination menu is displayed
=> page 189, fig. 166.
>» Select: right control button > Navigation set-
tings > Personal route assistance.
When the function is switched on M, the MMI re-
cords the frequently-driven routes regardless of
whether a destination was entered and reached
or not.
As long as route guidance is not active, your per-
sonal routes will be listed in the Enter destina-
tion menu under the home address and indicated
with the f& symbol @). When personal route as-
sistance is switched on, this symbol is displayed
in the Navigation menu and in the Infotainment
system display status line at the same time.
The distance to the destination and the calculat-
ed arrival time are also displayed for your person-
al routes. Without starting route guidance, your
MMI monitors the traffic conditions for your per-
sonal routes and shows possible traffic incidents
for routes that are most likely to be driven in the
Infotainment system display (2).
Better routes
A message will be displayed if there is a large
traffic incident (more than 12 minute delay) re-
gardless of which menu is selected > fig. 171.
> Select and confirm one of the following op-
tions:
Start route guidance: the MMI starts the route
guidance for the personal route displayed and
searches for a faster route if available.
Ignore this route and this message: the dis-
played destination with all applicable personal
routes is no longer factored into the current trip.
No more messages are shown for the displayed
destination. The displayed destination with all
applicable personal routes will be factored into
the trip again only after stopping the vehicle and
switching the ignition on again.
Ignore all messages: all personal routes are no
longer factored into the current trip. No more
messages are displayed. Messages for personal
routes when there is increased traffic will appear
again after the vehicle is stopped and the ignition
is switched on again.
As soon as you switch off personal route assis-
tance, the symbol in the status line turns off and
your trips are no longer recorded. Trips that were
already stored remain stored.
Deleting personal routes
> Select the desired personal route in the Enter
destination menu ().
195
Page 198 of 400
![AUDI A3 2020 Owner´s Manual Navigation
> Select: right control button > Delete destina-
tion.
Deleting all personal routes
> Select: [MENU] button > Settings > left control
button > MMI settings > Factory setting AUDI A3 2020 Owner´s Manual Navigation
> Select: right control button > Delete destina-
tion.
Deleting all personal routes
> Select: [MENU] button > Settings > left control
button > MMI settings > Factory setting](/manual-img/6/40265/w960_40265-197.png)
Navigation
> Select: right control button > Delete destina-
tion.
Deleting all personal routes
> Select: [MENU] button > Settings > left control
button > MMI settings > Factory settings.
> Select: Navigation and online memory > Re-
store factory settings > page 231.
G) Tips
— Personal routes are learned based on the ve-
hicle position. The route is prioritized ac-
cording to how frequently you drive to a
destination.
—A maximum of three personal routes are
displayed in the Enter destination menu.
Based on the current vehicle position, the
traffic situation for the route that is most
likely to be driven out of the three routes
will always be monitored.
— Please note that personal routes that have
already been stored will remain stored after
the
ignition is switched off and they must
be deleted manually.
Home address
Applies to: vehicles with navigation system
Opening a menu
> Press the LNAV/MAP] button repeatedly until
the Enter destination menu is displayed
=> page 189, fig. 166.
Storing a home address
> Select and confirm Home address (2)
=> page 189, fig. 166. After opening the home
address for the first time, you will be asked to
create a home address.
> Select and confirm Create now.
> Enter a destination or select a destination from
the list.
Editing the home address
> Select the Home address (2) > page 189,
fig. 166.
> Select: right control button > Edit home ad-
dress.
196
> Select and confirm a new destination as the
home address.
The selected destination is stored as the new
home address.
Favorites
Applies to: vehicles with navigation system
Opening a menu
> Press the [NAV/MAP] button repeatedly until
the Enter destination menu is displayed
=> page 189, fig. 166.
Saving a destination as a favorite
> Search for the desired destination in the input
field, or:
> Select a destination from the list.
> Select: right control button > Store as favorite.
Renaming a favorite
> Select: left control button > Favorites > select a
favorite from the list > right control button >
Rename favorite.
Moving a favorite
> Select a favorite from the list > right control
button > Move favorite.
> Select and confirm the location of the selected
favorite.
Deleting a favorite
> Select: a favorite from the list > right control
button > Delete favorite > Delete this favorite
or Delete all favorites.
Directory contacts
Applies to: vehicles with navigation system
Two addresses (private/business) can be assigned
as destinations for each contact in the directory.
Opening a menu
> Press the [NAV/MAP] button repeatedly until
the Enter destination menu is displayed
=> page 189, fig. 166.
Page 199 of 400

8V2012721BK
Navigation
Storing a destination as a contact in the
directory
Requirement: a mobile device must be connected
to the MMI 5 page 169.
> Select: a destination > right control button >
Add destination to contact.
> Enter the first letters of the desired contact in
the free text search input field > page 189,
fig. 166 and then select a contact from the list.
> Select and confirm Add business destination or
Add private destination.
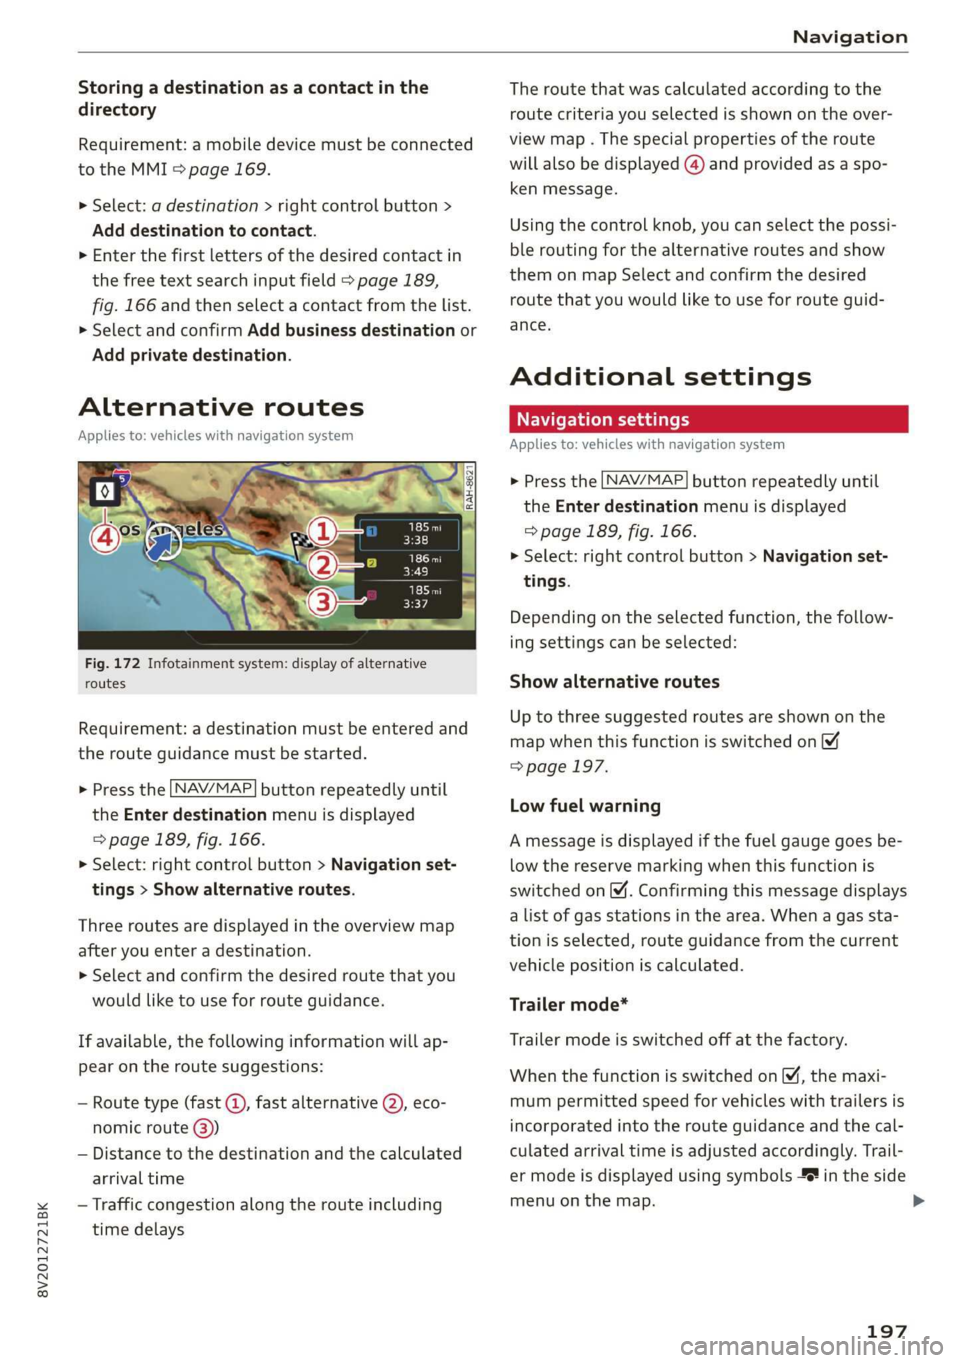
Alternative routes
Applies to: vehicles with navigation system
Fig. 172 Infotainment system: display of alternative
routes
Requirement: a destination must be entered and
the route guidance must be started.
> Press the [NAV/MAP| button repeatedly until
the Enter destination menu is displayed
=> page 189, fig. 166.
> Select: right control button > Navigation set-
tings > Show alternative routes.
Three routes are displayed in the overview map
after you enter a destination.
> Select and confirm the desired route that you
would like to use for route guidance.
If available, the following information will ap-
pear on the route suggestions:
— Route type (fast (, fast alternative (2), eco-
nomic route @))
— Distance to the destination and the calculated
arrival time
— Traffic congestion along the route including
time delays
The route that was calculated according to the
route criteria you selected is shown on the over-
view map . The special properties of the route
will also be displayed @) and provided as a spo-
ken message.
Using the control knob, you can select the possi-
ble routing for the alternative routes and show
them on map Select and confirm the desired
route that you would like to use for route guid-
ance.
Additional settings
Navigation settings
Applies
to: vehicles with navigation system
> Press the [NAV/MAP] button repeatedly until
the Enter destination menu is displayed
=> page 189, fig. 166.
> Select: right control button > Navigation set-
tings.
Depending on the selected function, the follow-
ing settings can be selected:
Show alternative routes
Up to three suggested routes are shown on the
map when this function is switched on
=> page 197.
Low fuel warning
A message is displayed if the fuel gauge goes be-
low the reserve marking when this function is
switched on (M. Confirming this message displays
a list of gas stations in the area. When a gas sta-
tion is selected, route guidance from the current
vehicle position is calculated.
Trailer mode*
Trailer mode is switched off at the factory.
When the function is switched on M, the maxi-
mum permitted speed for vehicles with trailers is
incorporated into the route guidance and the cal-
culated arrival time is adjusted accordingly. Trail-
er mode is displayed using symbols % in the side
menu on the map.
197
Page 200 of 400

Navigation
Personal route assistance*
Personal route assistance is switched off at the
factory.
Your trips are recorded and destinations are sug-
gested by the MMI when this function is switched
on page 195.
The personal route assistance is indicated by the
R& symbol in the status line of the Infotainment
system display.
Notification when nearby*
The notification when nearby is switched off at
the factory.
The MMI notifies you when you are approaching
selected points of interest when this function is
switched on M. You can also have a Notification
tone.
Presentation mode
The Presentation mode helps you to effectively
plan a trip and follow the planned route without
moving the vehicle. You can use Select starting
point
when you would like to calculate a route
starting
from a location other than the vehicle
position, for example. Start Presentation mode
to simulate route guidance.
lead]
Applies to: vehicles with navigation system
10) [8
> tak) ° [|
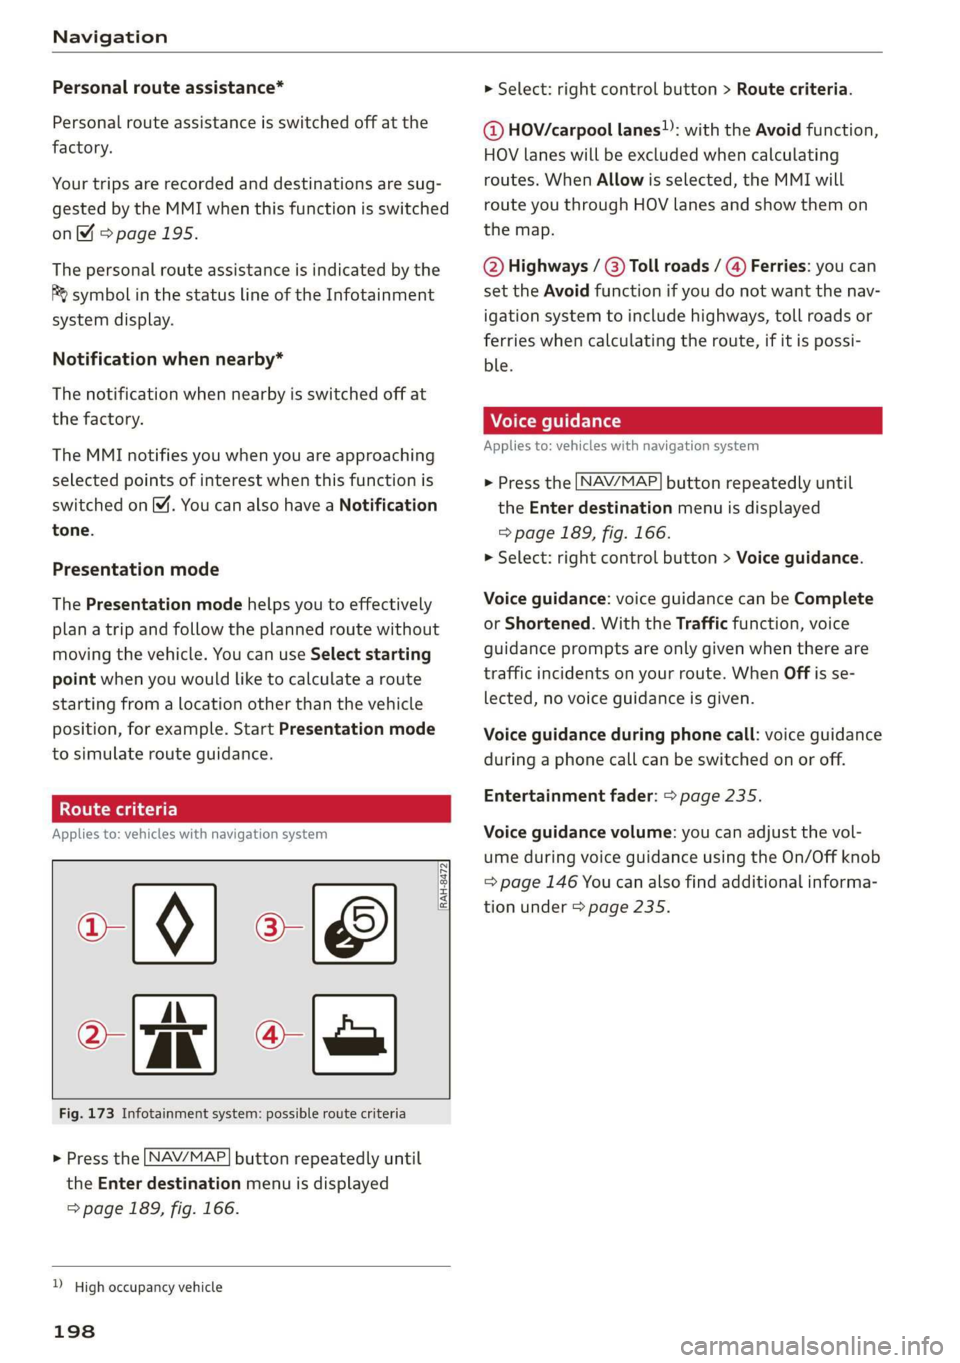
Fig. 173 Infotainment system: possible route criteria
RAH-8472
> Press the LNAV/MAP] button repeatedly until
the Enter destination menu is displayed
=> page 189, fig. 166.
) High occupancy vehicle
198
> Select: right control button > Route criteria.
@ HOV/carpool lanes”: with the Avoid function,
HOV lanes will be excluded when calculating
routes. When Allow is selected, the MMI will
route you through HOV lanes and show them on
the map.
@ Highways / @) Toll roads / @) Ferries: you can
set the Avoid function if you do not want the nav-
igation system to include highways, toll roads or
ferries when calculating the route, if it is possi-
ble.
Applies to: vehicles with navigation system
> Press the [NAV/MAP] button repeatedly until
the Enter destination menu is displayed
=> page 189, fig. 166.
> Select: right control button > Voice guidance.
Voice guidance: voice guidance can be Complete
or Shortened. With the Traffic function, voice
guidance prompts are only given when there are
traffic incidents on your route. When Off is se-
lected, no voice guidance is given.
Voice guidance during phone call: voice guidance
during a phone call can be switched on or off.
Entertainment fader: > page 235.
Voice guidance volume: you can adjust the vol-
ume during voice guidance using the On/Off knob
=> page 146 You can also find additional informa-
tion under > page 235.