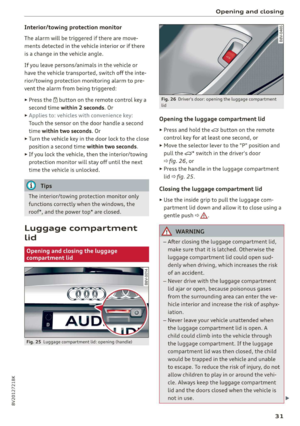
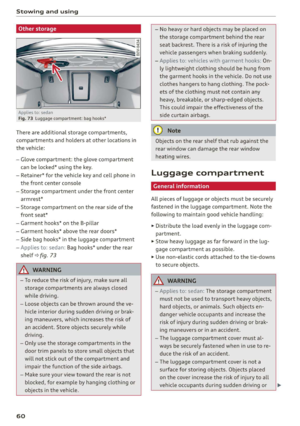
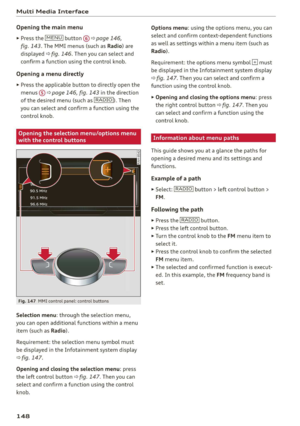
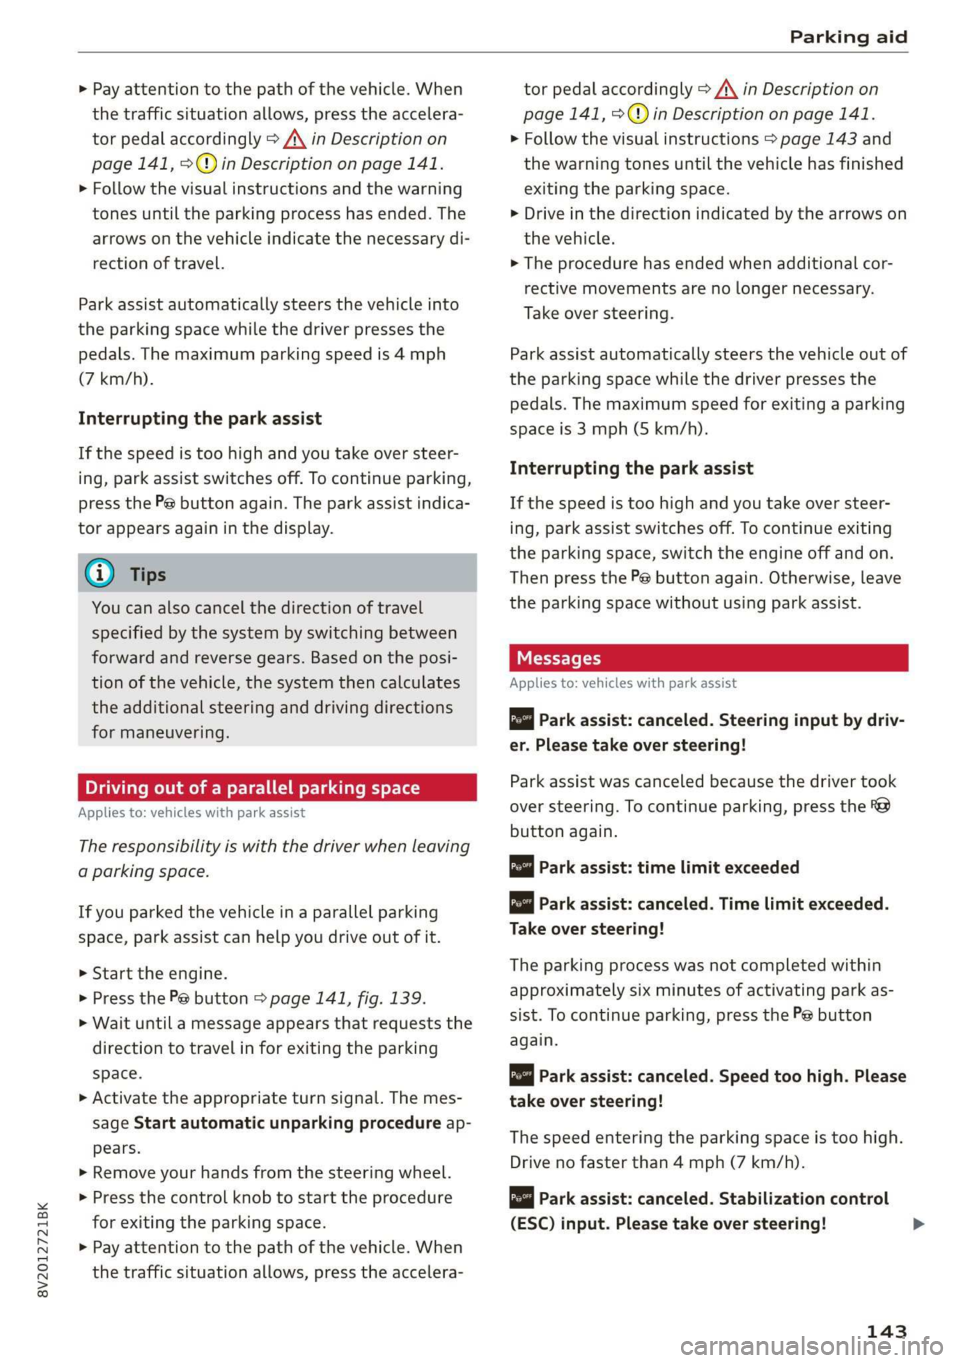
Page 145 of 400

8V2012721BK
Parking aid
> Pay attention to the path of the vehicle. When
the traffic situation allows, press the accelera-
tor pedal accordingly > A\ in Description on
page 141, >@) in Description on page 141.
> Follow the visual instructions and the warning
tones until the parking process has ended. The
arrows on the vehicle indicate the necessary di-
rection of travel.
Park assist automatically steers the vehicle into
the parking space while the driver presses the
pedals. The maximum parking speed is 4 mph
(7 km/h).
Interrupting the park assist
If the speed is too high and you take over steer-
ing, park assist switches off. To continue parking,
press the Pe button again. The park assist indica-
tor appears again in the display.
G) Tips
You can also cancel the direction of travel
specified by the system by switching between
forward and reverse gears. Based on the posi-
tion of the vehicle, the system then calculates
the additional steering and driving directions
for maneuvering.
Driving out of a parallel parking space
Applies to: vehicles with park assist
The responsibility is with the driver when leaving
a parking space.
If you parked the vehicle in a parallel parking
space, park assist can help you drive out of it.
> Start the engine.
> Press the Pe button > page 141, fig. 139.
> Wait until a message appears that requests the
direction to travel in for exiting the parking
space.
> Activate the appropriate turn signal. The mes-
sage Start automatic unparking procedure ap-
pears.
» Remove your hands from the steering wheel.
> Press the control knob to start the procedure
for exiting the parking space.
> Pay attention to the path of the vehicle. When
the traffic situation allows, press the accelera-
tor pedal accordingly > A\ in Description on
page 141, >@) in Description on page 141.
> Follow the visual instructions > page 143 and
the warning tones until the vehicle has finished
exiting the parking space.
> Drive in the direction indicated by the arrows on
the vehicle.
> The procedure has ended when additional cor-
rective movements are no longer necessary.
Take over steering.
Park assist automatically steers the vehicle out of
the parking space while the driver presses the
pedals. The maximum speed for exiting a parking
space is 3 mph (5 km/h).
Interrupting the park assist
If the speed is too high and you take over steer-
ing, park assist switches off. To continue exiting
the parking space, switch the engine off and on.
Then press the Pe button again. Otherwise, leave
the parking space without using park assist.
Messages
Applies to: vehicles with park assist
Park assist: canceled. Steering input by driv-
er. Please take over steering!
Park assist was canceled because the driver took
over steering. To continue parking, press the
button again.
ro" Park assist: time limit exceeded
& Park assist: canceled. Time limit exceeded.
Take over steering!
The parking process was not completed within
approximately six minutes of activating park as-
sist. To continue parking, press the Pe button
again.
Park assist: canceled. Speed too high. Please
take over steering!
The speed entering the parking space is too high.
Drive no faster than 4 mph (7 km/h).
Park assist: canceled. Stabilization control
(ESC) input. Please take over steering!
143
Page 146 of 400

Parking aid
The ESC took action to stabilize the vehicle. Take
over steering. Complete parking without using
park assist or drive out of the parking space.
Park assist: currently unavailable. Stabiliza-
tion control (ESC) off
The ESC was switched off. The ESC must be
switched on to use park assist.
Park assist: malfunction! Please contact
Service.
Park assist: malfunction! Take over steering!
Please contact Service.
Contact an authorized Audi dealer or authorized
Audi Service Facility. You cannot park with park
assist if there is a system malfunction.
Park assist: currently unavailable.
Park assist: currently unavailable. Please
take over steering!
Parking with park assist is not possible. Try park-
ing again or switch the ignition off and back on
again if necessary.
Park assist: ended. Please take over steering
and continue driving.
The process of exiting the parking space with
park assist has ended. Please take over steering.
Park assist: canceled. Parking space too
small. Please take over steering!
Parking in this space with park assist is not possi-
ble. Park without using park assist or find a larger
parking space.
Park assist: canceled. Obstacle detected.
Please take over steering!
Parking with park assist was stopped because the
vehicle could collide with an obstacle.
Park assist: ended
Park assist: ended. Please take over steer-
ing!
Parking with park assist has ended.
Park assist: unavailable in current Audi drive
select mode
144
roo" Park assist: canceled. Unavailable in current
Audi drive select mode. Please take over steer-
ing!
Park assist is not available in certain Audi drive
select modes. Select a different mode in drive se-
lect > page 91.
Park assist: stabilization control (ESC) input
The displayed parking space was rejected because
the ESC took action to stabilize the vehicle.
a=] Park assist: not stopped long enough
After engaging the reverse gear, park assist must
stop briefly in order to activate the steering. Fol-
low the instructions in the display.
ro="| Park assist: canceled. Unable to leave park-
ing space automatically. Parking space too
small.
The parking space is too small for the vehicle to
automatically leave the space. Leave the parking
space without using park assist.
roo} Park assist: canceled. Please take over steer-
ing!
Parking with park assist was stopped.
Adjusting the parking aid
Applies to: vehicles with parking system plus/rearview cam-
era/park assist
The functions are adjusted in the Infotainment
system.
> Select in the Infotainment system: [MENU] but-
ton > Vehicle > left control button > Driver as-
sistance > Parking aid. Or
> When the parking aid is active, select in the In-
fotainment system: right control button*.
End system* - Stop the parking aid
Activate automatically - Switch automatic activa-
tion on/off
Front volume* - Volume for the front and side*
area
Rear volume - Volume for the rear area
Page 147 of 400

8V2012721BK
Parking aid
Entertainment fader - The volume of the audio/
video source is Lowered when the parking system
is turned on.
G) Tips
— Several menus can be accessed with the
right control button only when the parking
aid is active.
— The new level is demonstrated briefly* when
the volume is adjusted.
— Certain settings are automatically stored
and assigned to the remote control key be-
ing used.
Error messages
Applies to: vehicles with parking system plus/rearview cam-
era/park assist
wm Rear parking aid: malfunction! Obstacles
cannot be detected
w Front parking aid: malfunction! Obstacles
cannot be detected
ww Parking aid: malfunction! Obstacles cannot
be detected
When one of these messages appears, there is a
system malfunction. The LED in the Pa button al-
so blinks when switching it on. The relevant mes-
sage only appears again when you manually acti-
vate the parking aid with the button.
Rear parking aid: obstacle detection restrict-
ed
The rear cross-traffic assist* > page 134, Rear
cross-traffic assist is not available. Either the ESC
is switched off, or the radar sensors may be cov-
ered by a bike rack, stickers, leaves, snow or other
objects. Switch the ESC on, or clean the area in
front of the sensors if necessary > page 132,
fig. 127. If this message continues to be dis-
played, drive immediately to an authorized Audi
dealer or authorized Audi Service Facility to have
the malfunction repaired.
Parking system plus*/Park assist*
If a sensor or speaker is faulty, the P4 symbol
will appear in front of/behind the vehicle in the
Infotainment system display. If a rear sensor is
faulty, only obstacles that are in areas @ and (2)
are shown > page 137, fig. 130. If a front sensor
is faulty, only obstacles that are in areas (3) and
@ are shown.
145
Page 148 of 400

Multi Media Interface
Traffic safety
information
Audi recommends performing certain Infotain-
ment system functions, such as entering a desti-
nation, only when the vehicle is stationary. Al-
ways be prepared to stop operating the Infotain-
ment system in the interest of your safety and
the safety of other road users.
Z\ WARNING
Only use the Infotainment system when road,
traffic, weather, and visibility conditions per-
mit and always in a way that allows you to
maintain complete control over your vehicle.
@ Tips
Certain functions are not available while driv-
ing.
Introduction
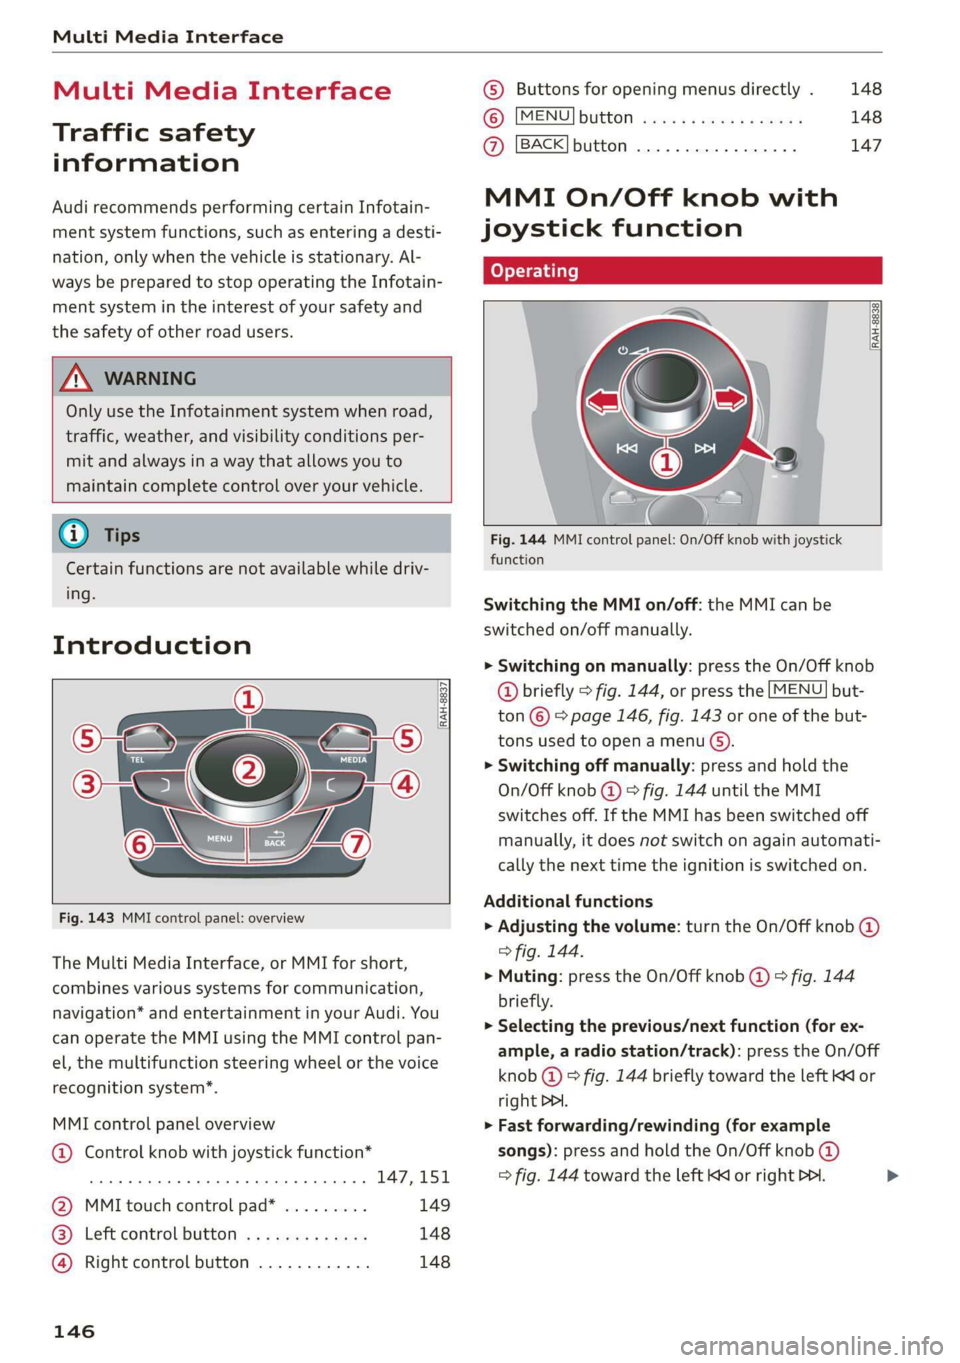
[RAH-8837
Fig. 143 MMI control panel: overview
The Multi Media Interface, or MMI for short,
combines various systems for communication,
navigation* and entertainment in your Audi. You
can operate the MMI using the MMI control pan-
el, the multifunction steering wheel or the voice
recognition system”.
MMI control panel overview
@ Control knob with joystick function*
eee teen eee 147,151
@ MMI touch control pad* ......... 149
® Left control button ............. 148
@ Right control button ............ 148
146
© Buttons for opening menus directly . 148
(6): [MENU] button suis se cas as sees 148
@ [BACK] button .... 2. 147
MMI On/Off knob with
joystick function
(ey YTelatare)
[RAH-8838,
Fig. 144 MMI control panel: On/Off knob with joystick
function
Switching the MMI on/off: the MMI can be
switched on/off manually.
> Switching on manually: press the On/Off knob
@ briefly > fig. 144, or press the [MENU] but-
ton © © page 146, fig. 143 or one of the but-
tons used to open a menu G).
> Switching off manually: press and hold the
On/Off knob @) > fig. 144 until the MMI
switches off. If the MMI has been switched off
manually, it does not switch on again automati-
cally the next time the ignition is switched on.
Additional functions
> Adjusting the volume: turn the On/Off knob @)
> fig. 144.
> Muting: press the On/Off knob @) ° fig. 144
briefly.
> Selecting the previous/next function (for ex-
ample, a radio station/track): press the On/Off
knob @ ® fig. 144 briefly toward the left KK or
right DDI.
> Fast forwarding/rewinding (for example
songs): press and hold the On/Off knob @)
=> fig. 144 toward the left Kd or right Po. >
Page 149 of 400

8V2012721BK
Multi Media Interface
ZA\ WARNING
To reduce the risk of an accident, adjust the
volume of the audio systems so that signals
outside of the vehicle, such as police and fire
sirens, can be heard easily at all times.
G) Tips
The MMI switches off automatically if the en-
gine is not running and the vehicle battery is
low.
Infotainment system
display
SY iieiemly Aol ai
The Infotainment system display automatically
extends and retracts when you switch the igni-
tion on and off.
> When it is extended, press the [@! button to
switch the Infotainment system display on or
off.
When the MMI is switched on and the display is
switched off, you can operate certain functions
using the On/Off knob with the MMI joystick
function > page 146.
@ Tips
There may be delays when switching on the
display.
MMI operation
Selecting and confirming a function
cy
= x
ce|
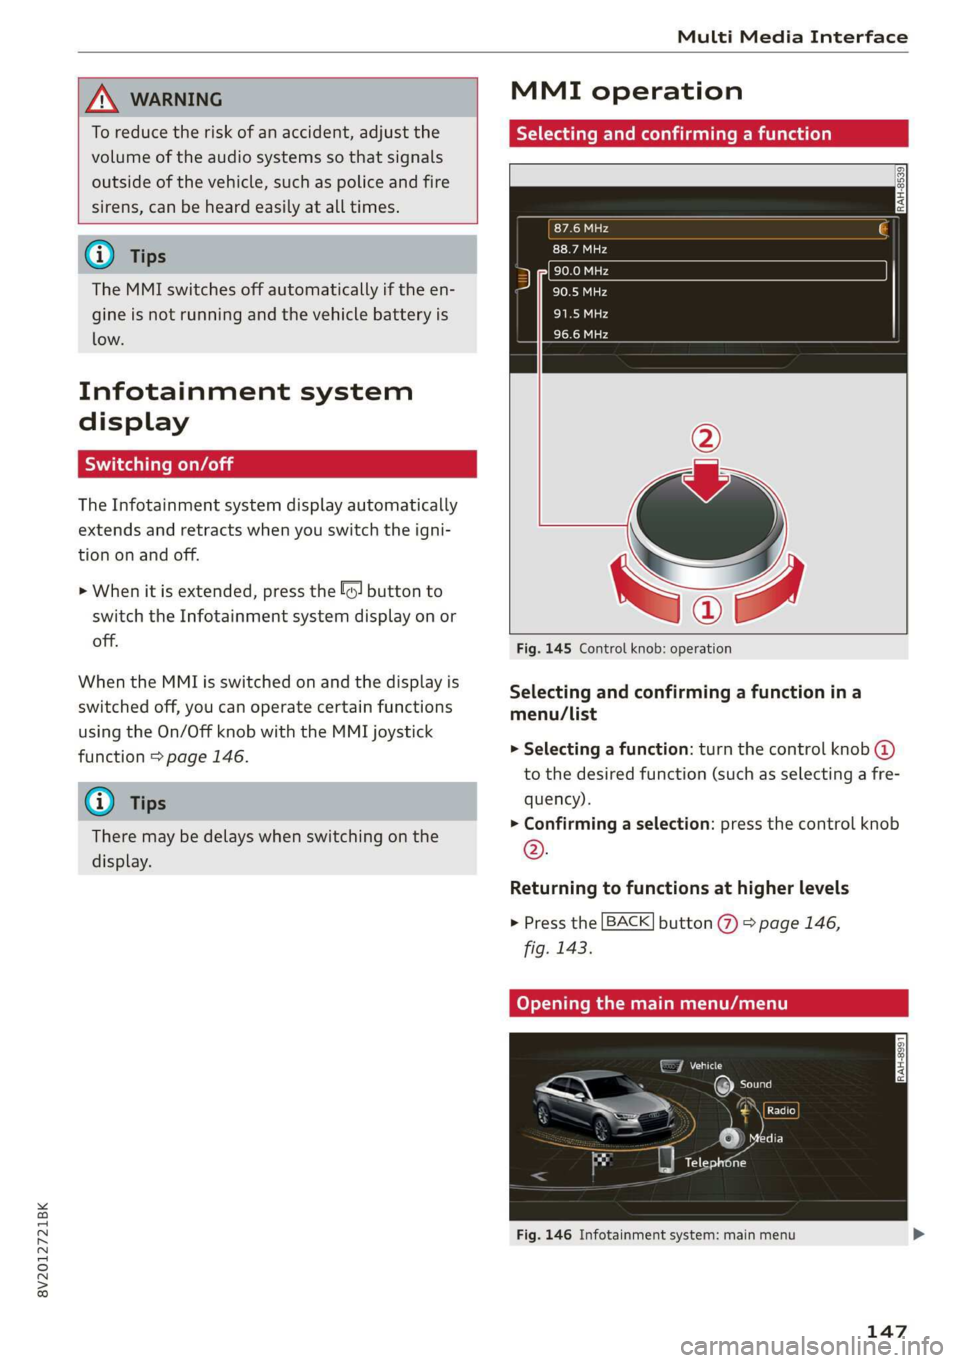
Fig. 145 Control knob: operation
Selecting and confirming a function in a
menu/list
> Selecting a function: turn the control knob @)
to the desired function (such as selecting a fre-
quency).
> Confirming a selection: press the control knob
©.
Returning to functions at higher levels
> Press the [BACK] button %) > page 146,
fig. 143.
Coy eY nema Anal)
Fig. 146 Infotainment system: main menu
147
Page 150 of 400
![AUDI A3 2020 Owner´s Manual Multi Media Interface
Opening the main menu
> Press the [MENU] button © & page 146,
fig. 143. The MMI menus (such as Radio) are
displayed > fig. 146. Then you can select and
confirm a functio AUDI A3 2020 Owner´s Manual Multi Media Interface
Opening the main menu
> Press the [MENU] button © & page 146,
fig. 143. The MMI menus (such as Radio) are
displayed > fig. 146. Then you can select and
confirm a functio](/manual-img/6/40265/w960_40265-149.png)
Multi Media Interface
Opening the main menu
> Press the [MENU] button © & page 146,
fig. 143. The MMI menus (such as Radio) are
displayed > fig. 146. Then you can select and
confirm a function using the control knob.
Opening a menu directly
> Press the applicable button to directly open the
menus () > page 146, fig. 143 in the direction
of the desired menu (such as [RADIO}). Then
you can select and confirm a function using the
control knob.
Options menu: using the options menu, you can
select and confirm context-dependent functions
as well as settings within a menu item (such as
Radio).
Requirement: the options menu symbol [+] must
be displayed in the Infotainment system display
=> fig. 147. Then you can select and confirm a
function using the control knob.
> Opening and closing the options menu: press
the
right control button > fig. 147. Then you
can select and confirm a function using the
control knob.
CO) T Temata eam al ce) aoe Ue -
ithithelcontrol buttons cele eClae lorie ray
Fig. 147 MMI control panel: control buttons
Selection menu: through the selection menu,
you can open additional functions within a menu
item (such as Radio).
Requirement: the selection menu symbol must
be displayed in the Infotainment system display
=> fig. 147.
Opening and closing the selection menu: press
the left control button > fig. 147. Then you can
select and confirm a function using the control
knob.
148
This guide shows you at a glance the paths for
opening a desired menu and its settings and
functions.
Example of a path
> Select: [RADIO] button > left control button >
FM.
Following the path
> Press the [RADIO] button.
> Press the left control button.
> Turn the control knob to the FM menu item to
select it.
> Press the control knob to confirm the selected
FM menu item.
> The selected and confirmed function is execut-
ed. In this example, the FM frequency band is
set.
Page 151 of 400

8V2012721BK
Multi Media Interface
MMI touch
MMI touch control pad
Applies to: vehicles with MMI touch
RAH-8776
, Los Angeles, CA
‘ ee
Fig. 148 MMI touch: entering the navigation destination
You can enter data using handwriting recognition
on the MMI touch control pad.
The MMI touch control pad is on the surface with
the control knob.
Entering letters, numbers and symbols
Applies to: vehicles with MMI touch
Fig. 149 Infotainment system: display when MMI touch is
active
The MMI touch allows you to enter data on the
MMI touch control pad using handwriting recog-
nition.
Requirement: it must be possible to enter text or
numbers and the symbol @ > fig. 149 must ap-
pear in the Infotainment system display.
> Initial entry: write an individual upper case or
lower case letter or number/symbol on the
MMI touch control pad using your finger. A
symbol that is recognized clearly by the system
is displayed in the Infotainment system display
@ ° page 149, fig. 148, confirmed with an au-
dible signal if necessary, and transferred to the
input field.
> Entering spaces: move your finger across the
MMI touch control pad from left to right.
> Deleting characters: move your finger across
the MMI touch control pad from right to left.
> Selecting the input suggestion: press the con-
trol knob.
> Switching directly to the results list: turn the
control knob to the right.
> Opening the speller: select the right control
button > Open speller. Text or numbers are en-
tered using the speller > page 153.
Moving the crosshairs
Applies to: vehicles with MMI touch
rans
~~
S Figueroa St ij
— | “ie
Lo
Fig. 150 MMI touch: moving the crosshairs
149
Page 152 of 400

Multi Media Interface
Requirement: a map must be displayed
=> page 199.
> Showing and hiding the crosshairs: press the
control knob to show the crosshairs (@)
=> fig. 150, or press the MMI touch control pad.
Press the [BACK] button () > page 146,
fig. 143 to hide the crosshairs again.
> Moving the crosshairs on a map: move the
crosshairs shown in the desired direction using
your finger on the MMI touch control pad
> fig. 150.
> Moving the crosshairs quickly: when the cross-
hairs are visible @) 9 fig. 150, slide your finger
quickly across the MMI touch control pad in the
desired direction. The crosshairs will come to a
stop after several seconds.
Moving the map
Applies to: vehicles with MMI touch
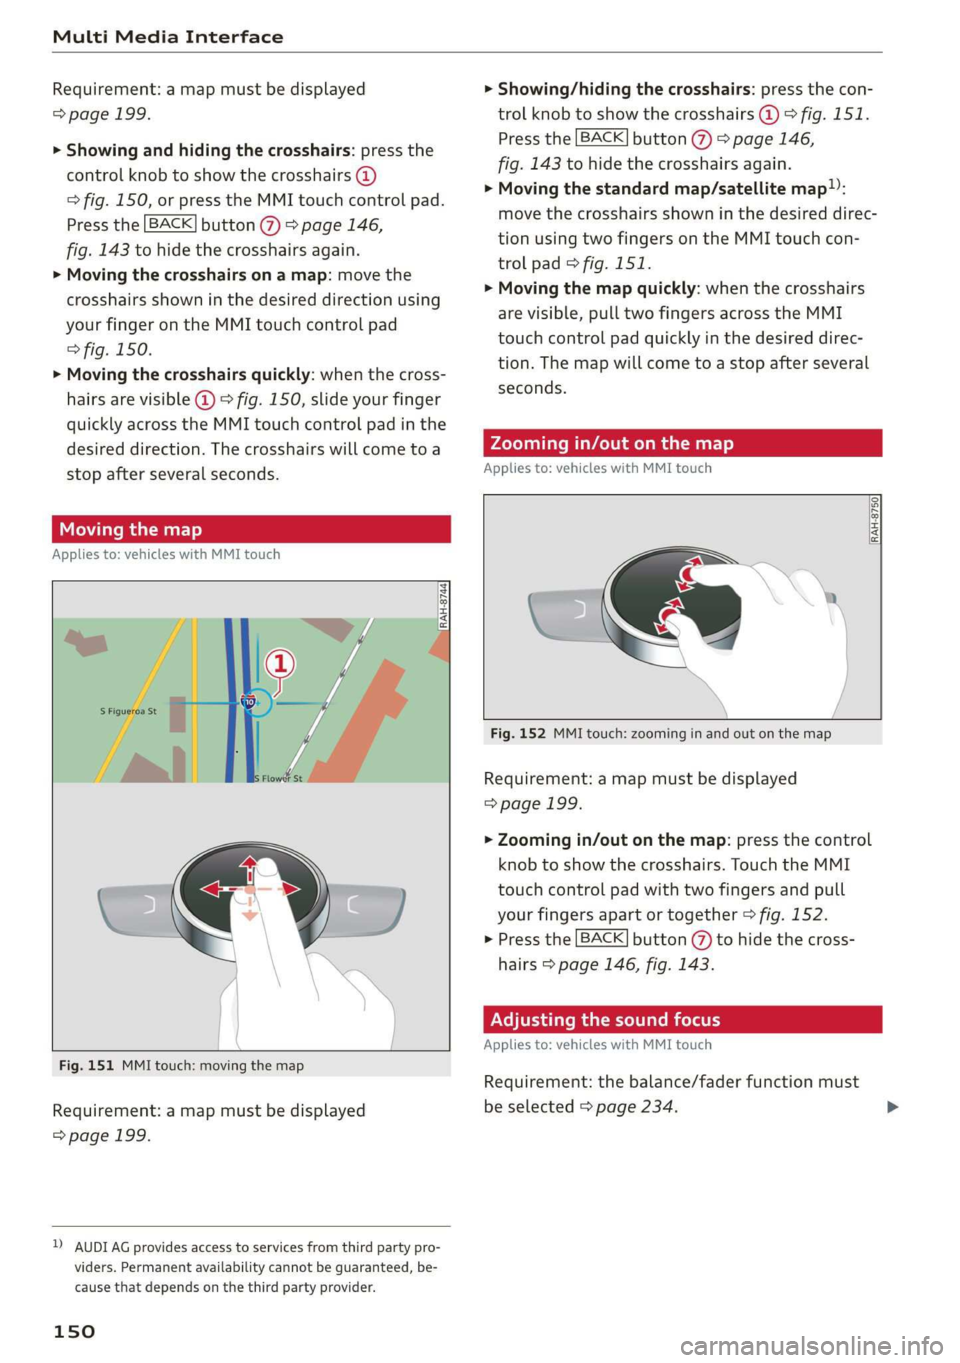
Fig. 151 MMI touch: moving the map
Requirement: a map must be displayed
=> page 199.
D AUDI AG provides access to services from third party pro-
viders. Permanent availability cannot be guaranteed, be-
cause that depends on the third party provider.
150
> Showing/hiding the crosshairs: press the con-
trol knob to show the crosshairs @) > fig. 151.
Press the [BACK] button (7) > page 146,
fig. 143 to hide the crosshairs again.
> Moving the standard map/satellite map:
move the crosshairs shown in the desired direc-
tion using two fingers on the MMI touch con-
trol pad © fig. 151.
> Moving the map quickly: when the crosshairs
are visible, pull two fingers across the MMI
touch control pad quickly in the desired direc-
tion. The map will come to a stop after several
seconds.
Zooming in/out on the map
Applies to: vehicles with MMI touch
RAH-8750|
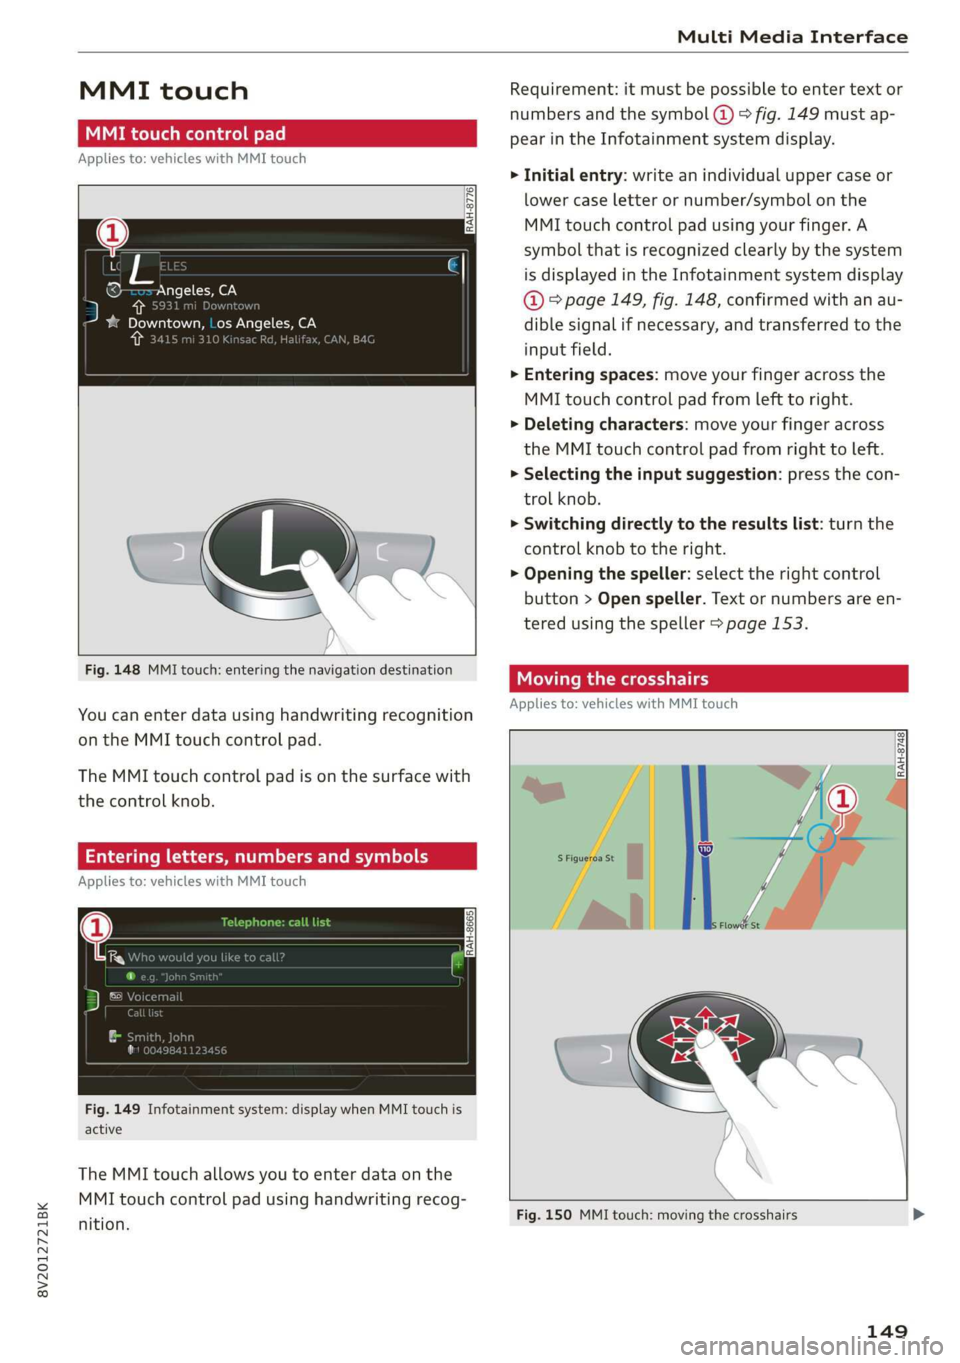
Fig. 152 MMI touch: zooming in and out on the map
Requirement: a map must be displayed
=>page 199.
> Zooming in/out on the map: press the control
knob to show the crosshairs. Touch the MMI
touch control pad with two fingers and pull
your fingers apart or together > fig. 152.
> Press the [BACK] button (7) to hide the cross-
hairs > page 146, fig. 143.
Adjusting the sound focus
Applies to: vehicles with MMI touch
Requirement: the balance/fader function must
be selected > page 234.