2019 MERCEDES-BENZ EQC SUV battery
[x] Cancel search: batteryPage 79 of 629
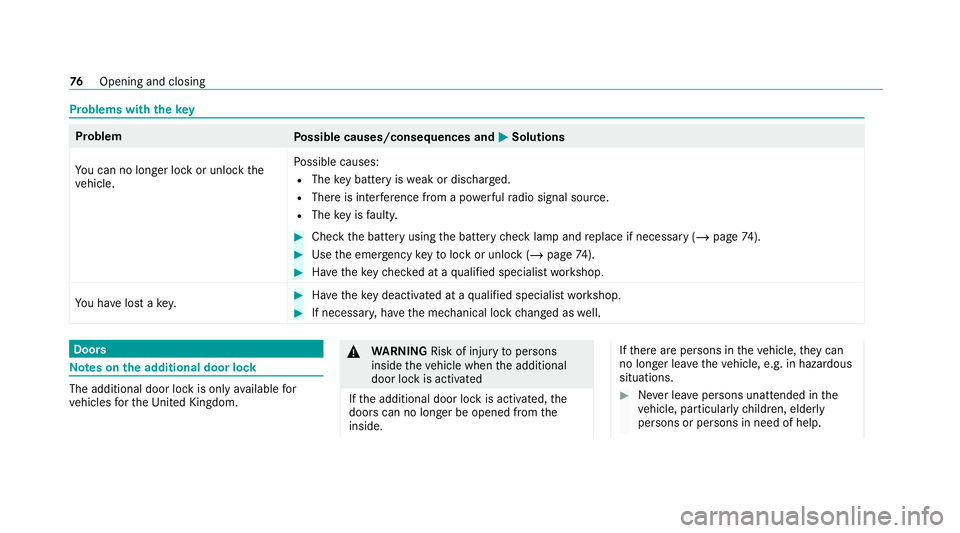
Problems with
thekey Problem
Possible causes/consequences and M
MSolutions
Yo u can no lon ger lock or unlock the
ve hicle. Po
ssible causes:
R The key bat tery iswe ak or dischar ged.
R There is inter fere nce from a po werful radio signal source.
R The key is faulty. #
Check the battery using the battery check lamp and replace if necessary (/ page74). #
Use the emer gency keyto lock or unlock (/ page74). #
Have theke ych ecked at a qualified specialist workshop.
Yo u ha velost a key. #
Have theke y deacti vated at a qualified specialist workshop. #
If necessar y,ha ve the mechanical lock changed as well. Doors
Note
s onthe additional door lock The additional door lock is only
available for
ve hicles forth eUni ted Kingdom. &
WARNING Risk of inju ryto persons
inside theve hicle when the additional
door lock is activated
If th e additional door lock is activated, the
doors can no longer be opened from the
inside. If
th ere are persons in theve hicle, they can
no longer le aveth eve hicle, e.g. in hazardous
situations. #
Never lea vepersons unattended in the
ve hicle, particularly children, elderly
persons or persons in need of help. 76
Opening and closing
Page 83 of 629

Problems with KEYLESS-GO
Problem
Possible causes/consequences and M
MSolutions
Yo u can no lon ger lock or unlock the
ve hicle using KEYLESS-GO. Po
ssible causes:
R The key functions ha vebeen deactivated (/ page73).
R The key bat tery iswe ak or dischar ged.
R There is inter fere nce from a po werful radio signal source.
R The key is faulty. #
Activate theke y functions (/ page73). #
Check the battery using the battery check lamp and replace if necessary (/ page74). #
Use the emer gency keyto unlo ckor lock theve hicle (/ page74). #
Have theve hicle and keych ecked at a qualified specialist workshop. Ac
tivating/deactivating the automatic lo ck‐
ing feature The
vehicle is loc ked automatically when the
ignition is switched on and the wheels are turn‐
ing fast erthan walking pace. 80
Opening and closing
Page 94 of 629
Problem
Possible causes/consequences and M
MSolutions #
Immediately af terth is, pull the cor responding button again until the side window has closed, and hold
th e button for at least one more second (follo w-up adjustment).
The side wind owis closed without the automatic reve rsing function.
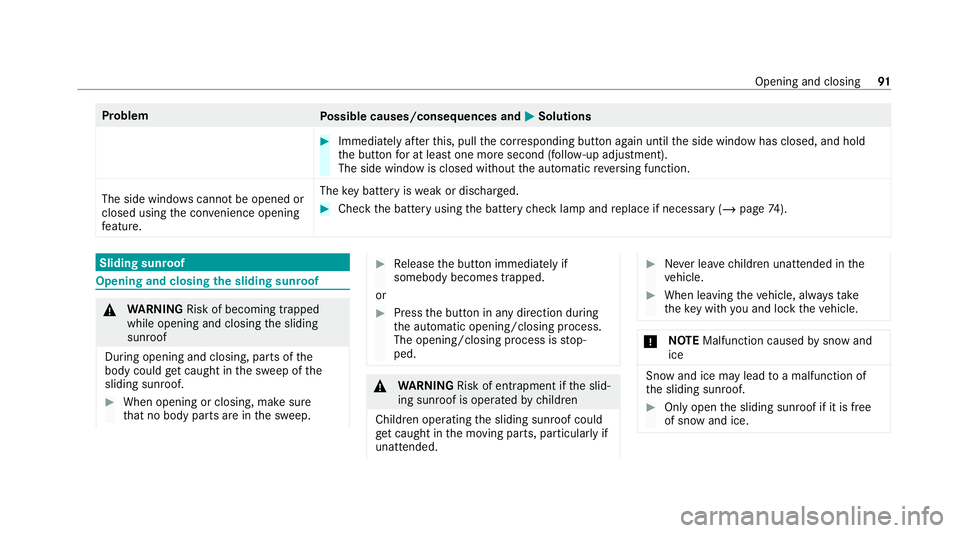
The side windo wscannot be opened or
closed using the con venience opening
fe ature. The
key bat tery iswe ak or dischar ged. #
Check the battery using the battery check lamp and replace if necessary (/ page74). Sliding sunroof
Opening and closing
the sliding sunroof &
WARNING Risk of becoming trapped
while opening and closing the sliding
sunroof
During opening and closing, parts of the
body could getcaught in the sweep of the
sliding sunroof. #
When opening or closing, make sure
that no body parts are in the sweep. #
Release the button immediately if
somebody becomes trapped.
or #
Press the button in any direction during
th e automatic opening/closing process.
The opening/closing process is stop‐
ped. &
WARNING Risk of entrapment if the slid‐
ing sunroof is operated bychildren
Children operating the sliding sunroof could
get caught in the moving parts, particularly if
unattended. #
Never lea vechildren unat tended in the
ve hicle. #
When leaving theve hicle, alw aysta ke
th eke y with you and lock theve hicle. *
NO
TEMalfunction caused bysnow and
ice Snow and ice may lead
toa malfunction of
th e sliding sunroof. #
Only open the sliding sunroof if it is free
of snow and ice. Opening and closing
91
Page 137 of 629
Exterior lighting
Note
s on adjusting the lights when driving
abroad It is not necessary
toadjust the headlamps. The
legal requirements are also met in countries in
which traf fic drives on theot her side of thero ad. Information about lighting sy
stems and your
re sponsibility The
various lighting sy stems of theve hicle are
only aids. The driver of theve hicle is responsible
fo r cor rect vehicle illumination in accordance
with the pr evailing light and visibility conditions,
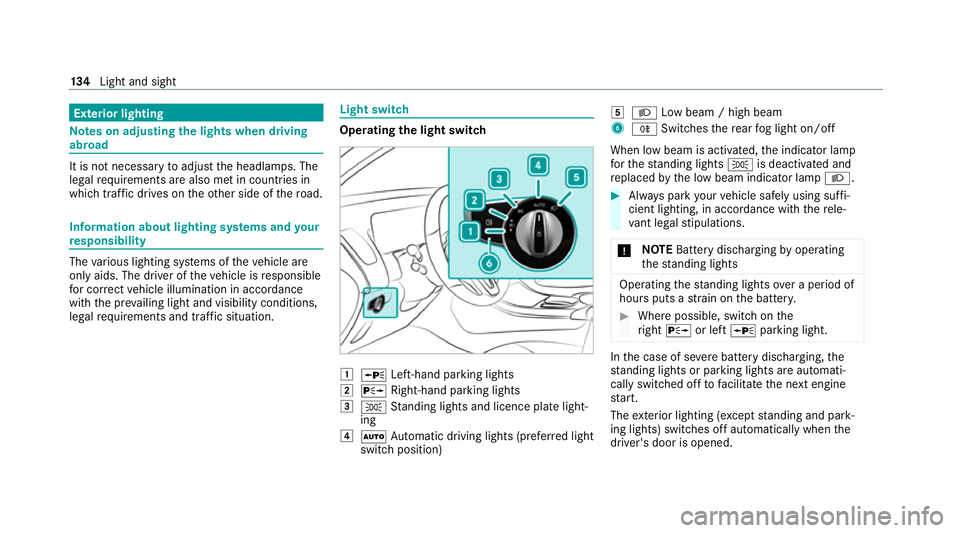
legal requirements and traf fic situation. Light switch
Ope
rating the light switch 1
W Left-hand pa rking lights
2 X Right-hand parking lights
3 T Standing lights and licence plate light‐
ing
4 Ã Automatic driving lights (prefer red light
switch position) 5
L Low beam / high beam
6 R Switches there ar fog light on/off
When low beam is activated, the indicator lamp
fo rth est anding lights Tis deactivated and
re placed bythe low beam indicator lamp L. #
Alw ays park your vehicle safely using suf fi‐
cient lighting, in acco rdance with there le‐
va nt le galst ipulations.
* NO
TEBattery discharging byoperating
th est anding lights Operating
thest anding lights over a period of
hours puts a stra in on the batter y. #
Where possible, switch on the
ri ght X or left Wparking light. In
the case of se vere battery discharging, the
st anding lights or parking lights are automati‐
cally swit ched off tofacilitate the next engine
st art.
The exterior lighting (e xcept standing and park‐
ing lights) swit ches off automatically when the
driver's door is opened. 134
Light and sight
Page 150 of 629
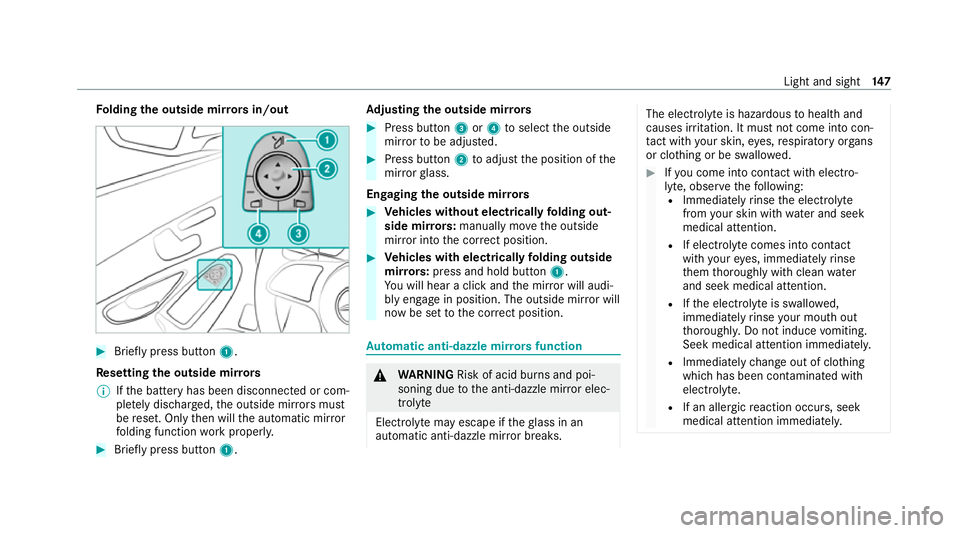
Fo
lding the outside mir rors in/out #
Brief lypress button 1.
Re setting the outside mir rors
% Ifth e battery has been disconnected or com‐
ple tely discharged, the outside mir rors must
be reset. Only then will the automatic mir ror
fo lding function workproperly. #
Brief lypress button 1. Ad
justing the outside mir rors #
Press button 3or4 toselect the outside
mir rorto be adjus ted. #
Press button 2toadjust the position of the
mir rorgl ass.
Engaging the outside mir rors #
Vehicles without electrical lyfolding out‐
side mir rors: manually mo vethe outside
mir ror into the cor rect position. #
Vehicles with electrical lyfolding outside
mir rors: press and hold button 1.
Yo u will hear a click and the mir ror will audi‐
bly engage in position. The outside mir ror will
now be set tothe cor rect position. Au
tomatic anti-dazzle mir rors function &
WARNING Risk of acid bu rns and poi‐
soning due tothe anti-dazzle mir ror elec‐
trolyte
Electrolyte may escape if theglass in an
automatic anti-dazzle mir ror breaks. The electrolyte is hazardous
tohealth and
causes ir rita tion. It mu stnot come into con‐
ta ct wi thyour skin, eyes,respiratory or gans
or clo thing or be swallo wed. #
Ifyo u come into contact with electro‐
ly te , obser vethefo llowing:
R Immediately rinse the electrolyte
from your skin with water and seek
medical attention.
R If electrolyte comes into contact
with your eyes, immediately rinse
th em thoroughly with clean water
and seek medical attention.
R Ifth e electrolyte is swallo wed,
immediately rinse your mouth out
th oroughl y.Do not induce vomiting.
Seek medical attention immediately.
R Immedia tely ch ange out of clo thing
which has been con taminated with
electrolyte.
R If an allergic reaction occurs, seek
medical attention immediatel y. Light and sight
147
Page 157 of 629
Dispose of
thege nuine Mercedes-Benz interior
pe rfume flacon when it is em pty and do not refill
it.
Re fillable flacon #
Unscr ew cap 1of em ptyflacon 2. #
Fillflacon 2with a maximum of 15ml. #
Screw cap 1back onto flacon 2.
Alw aysre fill th e em ptyre fillable flacon with the
same perfume. Obser vethe separate informa‐
tion sheet attached totheflacon. Pre-ent
ryclimate cont rol via key Fu
nction of pre-entry climate control using
th ekey
Before entering theve hicle, the driver's seat
area or the whole vehicle interior can be briefly
pre-warmed or pre-cooled.
When pre-cooling, thefo llowing functions are
activated as needed:
R Automatic clima tecontrol
R Blower R
Seat ventilation
When pre-heating, thefo llowing functions are
activated as needed:
R Automatic clima tecontrol
R Blower
R Seat hea ter
R Steering wheel heater
R Panel heating
R Mirror heater
R Rear wind owheater
R Frag rancing
R Ionisation
Setting pre-entry climate control via key #
Call up the air conditioning menu (see the
section on climate contro l intheve hicle
Owner's Manual). #
Select Pre-entry climate ctrl .
Ac tivating/deactivating #
Select Z. #
Select Pre-entry climate control via key .
Depending on the pr evious status, the func‐
tion is activated or deactivated.
Switching pre-entry climate on/off control
using thekey
Re quirements:
R the high-voltage battery is charge d suf fi‐
ciently
R the function has been activated via the multi‐
media sy stem #
Toswitch on: unlocktheve hicle.
The climate contro l functions are activated
fo r up tofive minutes for pre-heating and
pre-cooling.
Pre-entry clima tecontrol using theke y cannot
be activated more than thre e times when the
ve hicle is switched off. #
Todeactivate: presstheto p or bottom of
th e & button.
The following functions will remain active once
th eve hicle has been star ted:
R seat heating 15 4
Climate cont rol
Page 158 of 629
R
seat ventilation
R panel heating
R frag rancing
R ionisation Pre-entry climate control at depa
rture time Pre-entry climate control at departure time
function
&
WARNING Risk offata l injury due to
ex posure toextreme heat or cold in the
ve hicle
If people –particular lych ildren – are exposed
to extreme temp eratures over an extended
pe riod of time, there is a risk of serious or
eve nfa ta l injury! #
Never lea veanyone – pa rticularly chil‐
dren – unat tended in theve hicle. #
Never lea veanimals in theve hicle unat‐
te nded. The
vehicle interior can be heated or ventilated
when theve hicle is par ked. When
theve hicle is connected topowe r supply
equipment, priority is given tocharging the high-
vo ltage battery toa specified minimum charge.
The pre-ent ryclimate control running time may
be reduced under thefo llowing conditions:
R theve hicle is not connected topowe r supp ly
equipment
R the high-voltage battery is not fully charged
Wi th active pre-ent ryclimate control, thech arge
le ve l of the high-voltage battery may be reduced,
eve n if thech arging cable connec tor is connec‐
te d.
When cooling, thefo llowing functions are activa‐
te d as needed:
R Automatic clima tecontrol
R Blower
R Seat ventilation
When heating, thefo llowing functions are activa‐
te d as needed:
R Automatic clima tecontrol
R Blower R
Seat hea ter
R Steering wheel heater
R Panel heating
R Mirror heater
R Rear wind owheater
R Frag rancing
R Ionisation
Setting pre-entry climate control at depar‐
ture time #
Call up the air conditioning menu (see the
section on climate contro l intheve hicle
Owner's Manual). #
Select Pre-entry climate ctrl .
Setting a single departure time #
Select ONCE. #
Set a departure time.
Changing the active departu retime #
Select the pen icon next tothe displa yed
departure time. #
Set a departure time. Climate control
15 5
Page 159 of 629
Setting
thewe ek profile #
Select WEEK PROFILE. #
Set the desired departure times, e.g. every
day at 8:00 a.m.
Selecting the zone #
Select Z. #
Select Driver's seat only.
If th eDriver's seat only setting is deactiva‐
te d, pre-entry climate control take s place for
th e entire vehicle.
Ac tivating/deactivating pre-entry climate
control at depa rture time
Re quirements:
R The high- voltage battery is charge d suf fi‐
cientl y.
R The function has been activated via the mul‐
timedia sy stem. #
Toactivate: setthe departure time
(/ page 155).
Pre-en try clima tecontrol at departure time
switches on a maximum of 55 minu tes
before the selected departure time. It will re
main active for ano ther five minutes if the
departure is dela yed. #
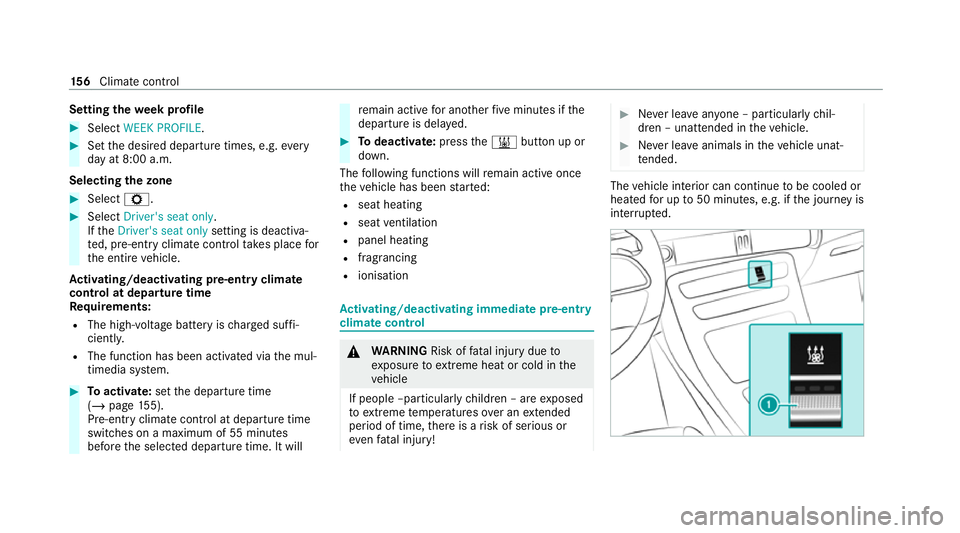
Todeactivate: pressthe& button up or
down.
The following functions will remain active once
th eve hicle has been star ted:
R seat heating
R seat ventilation
R panel heating
R fragrancing
R ionisation Ac
tivating/deactivating immediate pre-entry
climate control &
WARNING Risk offata l injury due to
ex posure toextreme heat or cold in the
ve hicle
If people –particular lych ildren – are exposed
to extreme temp eratures over an extended
pe riod of time, there is a risk of serious or
eve nfa tal injury! #
Never lea veanyone – pa rticularly chil‐
dren – unat tended in theve hicle. #
Never lea veanimals in theve hicle unat‐
te nded. The
vehicle interior can continue tobe cooled or
heated for up to50 minutes, e.g. if the journey is
inter rupte d. 15 6
Climate cont rol