Page 25 of 232
23
You have access to all the menus if your
vehicle is fitted with the audio system.
If your vehicle is fitted with the touch screen
audio system, certain menus are only
accessible using the audio system control
panel.
As a
safety measure, some menus can
only be accessed when the ignition is off.
The corresponding information appears in the
instrument panel screen.
Languages available: Italian, English, German,
French, Spanish, Portuguese, Dutch, Brazilian,
Polish, Russian, Turkish and Arabic.
This MODE button enables
you to:
-
a
ccess the menus and
sub-menus,
-
c
onfirm your selections,
within a
menu,
-
q
uit the menus. Hold it down to return to the
home page.
This button enables you to:
-
s
croll up through a menu,
-
i
ncrease a value.
This button enables you to:
-
s
croll down through a menu,
-
d
ecrease a value.
1
Dashboard instruments
Page 26 of 232
24
Menu…Press…Sub-menu… Press…Choose… Confirm and
quitAllows you to…
1
Brightness IncreaseAdjust the brightness of the
instrument panel and instruments and
controls (with sidelamps on).
Decrease
2
Speed beep ON IncreaseActivate/Deactivate the audible signal
indicating that the programmed speed
has been exceeded and select the
speed.
Decrease
OFF
3
Headlamp
sensor Increase
Adjust the sensitivity of the brightness
sensor (1
to 3), which has an effect on
the headlamps.
Decrease
4
Activation
Tr i p B ON
Display a
second "Trip B" distance.
OFF
5
Traffic Sign ONActivate/Deactivate the reading of
traffic signs.
OFF
6
Setting the
time Hours/Minutes
IncreaseSet the clock.
Decrease
Format 24
hour clockSelect the clock display mode.
12
hour clock
7
Setting the
date Year/Month/
DayIncrease
Set the date.
Decrease
Dashboard instruments
Page 27 of 232
25
Menu…Press…Sub-menu… Press…Choose… Confirm
and quitAllows you to…
8
Autoclose ONActivate/Deactivate automatic door
locking above 12
mph (20 km/h).
OFF
9 Measurement
unitDistance KmSelect the distance display unit.
Miles
Fuel
consumption km/l
Select the fuel consumption display
unit.
l/10 0
km
Temperature °CSelect the temperature display unit.
°F
Tyre pressures psiSelect the tyre pressure display unit.
bar
kPa
10
Languages List of
languages
availableSelect the display language.
11
Volume of
announcements
(Buz z)Increase Increase/Decrease the volume of
the announcements or of the audible
warning.
Decrease
1
Dashboard instruments
Page 28 of 232
26
Menu…Press…Sub-menu… Press…Choose… Confirm
and quitAllows you to…
12
Service Service (Miles/
Km before
service)Display the miles/kilometres remaining
before the next ser vice.
Oil change
(Miles/Km before
oil change)Display the miles/kilometres before the
next oil change.
13
Daytime
running lamps ON
Activate/Deactivate daytime running lamps.
OFF
14
Automatic
headlamp
dipping ON
Activate/Deactivate automatic headlamp
dipping.
OFF
15
Passenger
airbag (BAG
P) ON
Ye sActivate the passenger airbag.
No
OFF Ye sDeactivate the passenger airbag.
No
16
Quit menu Quit the menu.
Press the arrow at the bottom to go to the
first menu.
Dashboard instruments
Page 29 of 232

27
Using the touch screen
audio system
This audio system control panel, located in
the middle of the dashboard, gives access to
personalisation menus for certain systems.
The corresponding information appears in the
touch screen.
Nine languages are offered: German, English,
Spanish, French, Italian, Dutch, Polish,
Portuguese, Turkish.
As a
safety measure, some menus can only be
accessed when the ignition is off.
This control panel button gives
access to the "Settings" menu. This button in the screen allows you
to go up a
level in a menu or increase
a value.
This button in the screen allows
you to go down a level in a menu or
decrease a
value.
"
Settings " menu
1."Display".
2. "Voice commands".
3. "Clock and Date".
4. "Safety/Help".
5. "Lighting".
6. "Doors & locking".
7. "Audi o".
8. "Telephone/Bluetooth".
9. "Radio settings".
10. "Restore Settings" to return to factory
settings.
11. "Del. pers. data" to delete all of your
personal data, related to the Bluetooth
equipment, in the audio system.
For more information on the audio,
telephone, radio and navigation systems,
refer to the corresponding sections. The settings for sub-menus 4
, 5 and
6 vary according to the equipment
installed on the vehicle.
From the "Display" sub-menu, you can:
-
s
elect "Languages" and choose one of the
languages listed above,
-
S
elect "Measurement unit" and set
consumption (l/100 km, mpg), distances
(km, miles) and temperature (°C, °F),
- s elect "Display Trip B" to switch trip B On or
Off in the trip computer.
From the "Safety/Help" sub-menu, you can:
-
s
elect "Parkview Camera", then "Reversing
camera" to activate or deactivate its use
(On, Of f ),
-
s
elect "Parkview Camera", then "Camera
delay" to activate or deactivate the
maintaining of the display for 10
seconds or
up to 11
mph (18 km/h) (On, Off),
-
s
elect "Traffic Sign" to activate or deactivate
its use (On, Off),
-
s
elect "Passenger airbag" to activate or
deactivate its use (On, Off).
1
Dashboard instruments
Page 30 of 232

28
Setting the date and time
Using the MODE control panelUsing the touch screen audio
system
From the "Time and Date" sub-menu:
F
s elect "Set time and format" to set the
hours, minutes, seconds and choose the
format (24
h, 12 h with am or pm),
F
s
elect "Set date" to set the day, month and
ye a r.
To set the time manually, "Sync Time" must
be Of f.
Trip computer
Information displayed about the current journey
(range, current fuel consumption, average fuel
consumption, etc.).
F
T
o access the trip computer information,
press the TRIP button on the end of the
wiper control stalk.
From the "Lighting" sub-menu, you can:
-
s
elect "Daytime running lamps" to activate
or deactivate their use (On, Off),
-
s
elect "Auto headlamp dipping" to activate
or deactivate its use (On, Off),
-
s
elect "Headlamp sensor" to adjust its
sensitivity (1, 2, 3).
From the "Doors & locking" sub-menu, you can:
-
s
elect "Autoclose" to activate or deactivate
its use (On, Off). F
P
ress the "MODE" button.
F
S
elect the menu "Set time" to set the time
and the format of the clock (24
h or 12
h) or
select the menu "Set date" to set the day,
month and year.
For more information on Vehicle
configuration , refer to the corresponding
section.
Range
This indicates the distance that can still be
travelled with the fuel remaining in the tank on
the basis of the average consumption over the
last few miles (kilometres) travelled.
Distance A
This indicates the distance travelled since the
last trip computer zero reset.
Average fuel consumption A
This is the average fuel consumption since the
last trip computer zero reset.
Dashboard instruments
Page 31 of 232

29
Current fuel consumption A
This is the average fuel consumption during the
last few seconds.
Average speed A
This is the average speed calculated since the
last trip computer zero reset (with the ignition
o n).
Trip duration A
This indicates the total time since the last trip
computer zero reset.
If TRIP B is activated in the MODE menu:
-
D
istance B
-
A
verage fuel consumption B
-
A
verage speed B
-
T
rip duration B
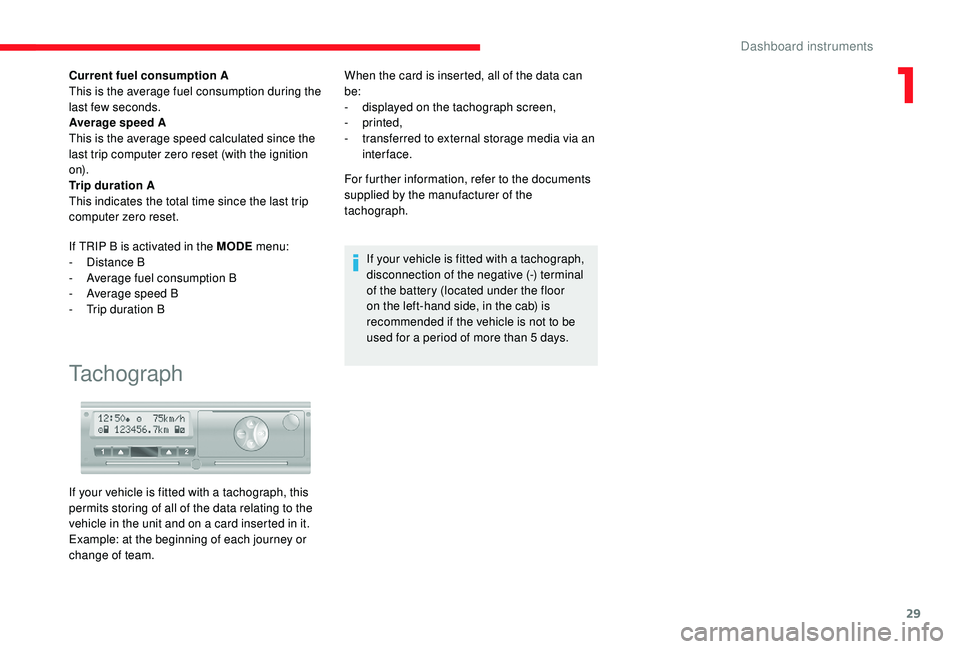
Tachograph
When the card is inserted, all of the data can
be:
-
d
isplayed on the tachograph screen,
-
printed,
-
t
ransferred to external storage media via an
inter face.
For further information, refer to the documents
supplied by the manufacturer of the
tachograph.
If your vehicle is fitted with a
tachograph,
disconnection of the negative (-) terminal
of the battery (located under the floor
on the left-hand side, in the cab) is
recommended if the vehicle is not to be
used for a
period of more than 5 days.
If your vehicle is fitted with a
tachograph, this
permits storing of all of the data relating to the
vehicle in the unit and on a
card inserted in it.
Example: at the beginning of each journey or
change of team.
1
Dashboard instruments
Page 32 of 232

30
Key
This locks and unlocks the vehicle, opens and
closes the fuel filler cap, as well as starting and
switching off the engine.
2-button remote control
Central unlocking
Pressing this button simultaneously
unlocks all of your vehicle's doors.The interior courtesy lamp comes on briefly
and the direction indicators flash twice.
If your vehicle has an alarm, pressing this
button disarms it.
The indicator lamp in the central locking button,
located in the dashboard, goes off.
Central locking
Pressing this button simultaneously
locks all of your vehicle's doors.
If one of the doors is open or not properly
closed, central locking does not take place.
The direction indicators flash once.
If your vehicle has an alarm, pressing this
button sets it.
The indicator lamp in the central locking button
comes on and flashes.
3-button remote control
Unlocking the cab
Pressing this button unlocks your
vehicle's cab.
The interior courtesy lamp comes on briefly
and the direction indicators flash twice.
The indicator lamp in the central locking button,
located in the dashboard, goes off.
Unlocking the load space
Pressing this button unlocks the side
door and the rear doors of the load
space.
The direction indicators flash twice.
If your vehicle has an alarm, pressing this
button disarms it.
Access