Page 161 of 204
Chassis
ComponentFluid, Lubricant, or Genuine Part
Automated Manual Transmission – Diesel Engine • Gearbox: Full synthetic 75W-85 manual transmission fluid meeting
the API GL4 specification.
• Control system: Mopar C Series DDCT SAE 75W Hydraulic Fluid or
equivalent.
• Hydraulic Clutch Operating System: Mopar Brake and Clutch Fluid
DOT 4 Motor Vehicle or equivalent.
Failure to use the correct fluid may affect the function or performance of
your transmission.
Brake Master Cylinder We recommend you use Mopar DOT 4.
DOT 4 brake fluid must be changed every 2 years regardless of mileage.
Power Steering Reservoir Use Pentosin CHF 11S power steering fluid meeting FCA Material Stan-
dard MS-11655.
159
Page 162 of 204

MOPAR ACCESSORIES
Authentic Accessories By Mopar
In choosing Authentic Accessories you gain
far more than expressive style, premium pro-
tection, or extreme entertainment, you also
benefit from enhancing your vehicle with
accessories that have been thoroughly tested
and factory-approved.
The following highlights just some of the
many Authentic Ram Accessories by Mopar
featuring a fit, finish, and functionality spe-
cifically for your Ram Promaster:EXTERIOR:
• Splash Guards
• Hitch Receiver
• Side Window Air Deflectors
• 7/4 Way Trailer Tow Wiring Harness
INTERIOR:
• B-Pillar Grab Handle
• D-Pillar Grab Handle
• All-Weather Floor Mats
• Premium Carpet Floor Mats
• Cargo Compartment Floor Liner
• DOT Certified Emergency Roadside Kit ELECTRONICS:
• Fog Lights
• Remote Start
• Back Up Camera
• Hands Free Bluetooth
• Mopar Connect (WiFi)
• Cargo Compartment LED Lighting
• Electronic Vehicle Tracking System
For the full line of Authentic Ram Accesso-
ries by Mopar, visit your local dealership or
online at mopar.com for U.S. residents and
mopar.ca for Canadian residents.
NOTE:
All parts are subject to availability.
TECHNICAL SPECIFICATIONS
160
Page 163 of 204

MULTIMEDIA
CYBERSECURITY..............162
UCONNECT 3/3 NAV WITH
5-INCH DISPLAY ..............163
Clock Setting.................164
Equalizer, Balance And Fade .......164
Radio Operation ...............166
USB/Audio Jack (AUX)/Bluetooth
Operation ...................167
Navigation ..................168
UCONNECT SETTINGS ...........169
STEERING WHEEL AUDIO CONTROLS . .170
Left Switch ..................170
Right Switch .................170
UCONNECT PHONE ............171
Uconnect Phone (Bluetooth Hands
Free Calling).................171
Pairing (Wirelessly Connecting)
Your Mobile Phone To The Uconnect
System ....................172
Common Phone Commands
(Examples) ..................175
Mute (Or Unmute) Microphone
During Call ..................175
Transfer Ongoing Call Between
Handset And Vehicle ............175
Phonebook ..................175
Voice Command Tips ............176
Changing The Volume ............176
Using Do Not Disturb ...........176
Incoming Text Messages ..........176Helpful Tips And Common Questions To
Improve Bluetooth Performance With Your
Uconnect System
..............178
Regulatory And Safety Information
USA/CANADA ................178
UCONNECT VOICE RECOGNITION QUICK
TIPS..................... .179
Introducing Uconnect............179
Get Started ..................180
Basic Voice Commands ...........182
Radio .....................182
Media .....................182
Phone .....................183
Voice Text Reply ...............183
Additional Information ...........184
MULTIMEDIA
161
Page 164 of 204

CYBERSECURITY
Your vehicle may be a connected vehicle and
may be equipped with both wired and wire-
less networks. These networks allow your
vehicle to send and receive information. This
information allows systems and features in
your vehicle to function properly.
Your vehicle may be equipped with certain
security features to reduce the risk of unau-
thorized and unlawful access to vehicle sys-
tems and wireless communications. Vehicle
software technology continues to evolve over
time and FCA US LLC, working with its sup-
pliers, evaluates and takes appropriate steps
as needed. Similar to a computer or other
devices, your vehicle may require software
updates to improve the usability and perfor-
mance of your systems or to reduce the po-
tential risk of unauthorized and unlawful ac-
cess to your vehicle systems.
The risk of unauthorized and unlawful access
to your vehicle systems may still exist, even if
the most recent version of vehicle software
(such as Uconnect software) is installed.
WARNING!
• It is not possible to know or to predict allof the possible outcomes if your vehi-
cle’s systems are breached. It may be
possible that vehicle systems, including
safety related systems, could be im-
paired or a loss of vehicle control could
occur that may result in an accident
involving serious injury or death.
• ONLY insert media (e.g., USB, SD card,
or CD) into your vehicle if it came from a
trusted source. Media of unknown origin
could possibly contain malicious soft-
ware, and if installed in your vehicle, it
may increase the possibility for vehicle
systems to be breached.
• As always, if you experience unusual
vehicle behavior, take your vehicle to
your nearest authorized dealer immedi-
ately. NOTE:
• FCA or your dealer may contact you directly
regarding software updates.
• To help further improve vehicle security and minimize the potential risk of a secu-
rity breach, vehicle owners should: –
Routinely checkwww.driveuconnect.com/
software-update
to learn about available
Uconnect software updates.
– Only connect and use trusted media devices (e.g. personal mobile phones,
USBs, CDs).
Privacy of any wireless and wired communi-
cations cannot be assured. Third parties may
unlawfully intercept information and private
communications without your consent. For
further information, refer to “Onboard Diag-
nostic System (OBD II) Cybersecurity” in
“Getting To Know Your Instrument Panel” in
your Owner’s Manual at www.mopar.com/
en-us/care/owners-manual.html (U.S. Resi-
dents) or www.owners.mopar.ca (Canada
Residents) for further information.
MULTIMEDIA
162
Page 165 of 204
UCONNECT 3/3 NAV WITH 5-INCH DISPLAY
Uconnect 3/3 NAV With 5–inch Display
1 — Settings Button
2 — Back Button
3 — Browse/Enter — Tune/Scroll
4 — MORE Button
5 — Uconnect PHONE
6 — COMPASS/NAV — If Equipped7 — MEDIA Button
8 — RADIO Button
9 — On/Off — Volume Knob
10 — Mute Button
11 — SCREEN ON/OFF
163
Page 166 of 204

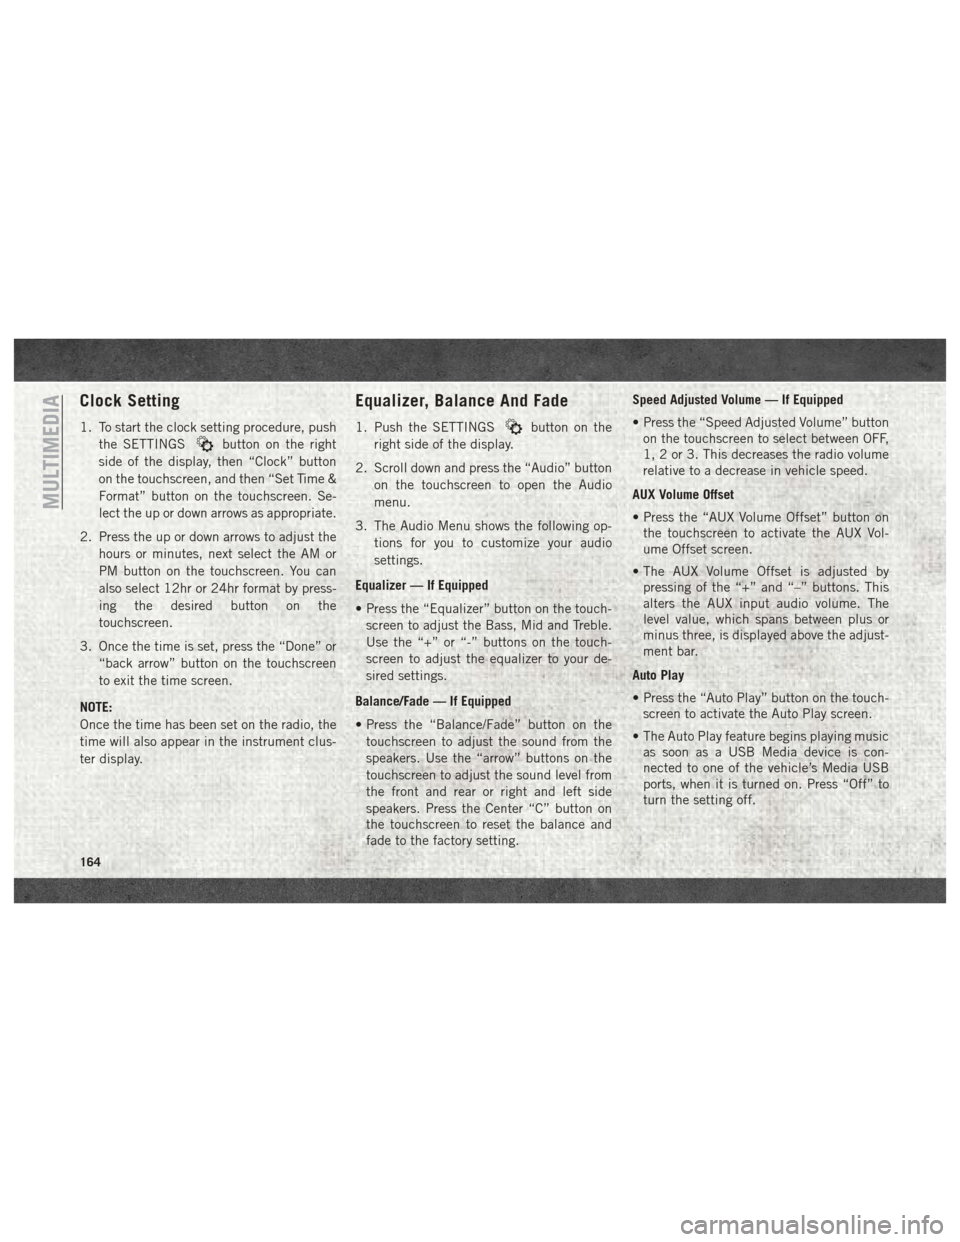
Clock Setting
1. To start the clock setting procedure, pushthe SETTINGS
button on the right
side of the display, then “Clock” button
on the touchscreen, and then “Set Time &
Format” button on the touchscreen. Se-
lect the up or down arrows as appropriate.
2. Press the up or down arrows to adjust the hours or minutes, next select the AM or
PM button on the touchscreen. You can
also select 12hr or 24hr format by press-
ing the desired button on the
touchscreen.
3. Once the time is set, press the “Done” or “back arrow” button on the touchscreen
to exit the time screen.
NOTE:
Once the time has been set on the radio, the
time will also appear in the instrument clus-
ter display.
Equalizer, Balance And Fade
1. Push the SETTINGSbutton on the
right side of the display.
2. Scroll down and press the “Audio” button on the touchscreen to open the Audio
menu.
3. The Audio Menu shows the following op- tions for you to customize your audio
settings.
Equalizer — If Equipped
• Press the “Equalizer” button on the touch- screen to adjust the Bass, Mid and Treble.
Use the “+” or “-” buttons on the touch-
screen to adjust the equalizer to your de-
sired settings.
Balance/Fade — If Equipped
• Press the “Balance/Fade” button on the touchscreen to adjust the sound from the
speakers. Use the “arrow” buttons on the
touchscreen to adjust the sound level from
the front and rear or right and left side
speakers. Press the Center “C” button on
the touchscreen to reset the balance and
fade to the factory setting. Speed Adjusted Volume — If Equipped
• Press the “Speed Adjusted Volume” button
on the touchscreen to select between OFF,
1, 2 or 3. This decreases the radio volume
relative to a decrease in vehicle speed.
AUX Volume Offset
• Press the “AUX Volume Offset” button on the touchscreen to activate the AUX Vol-
ume Offset screen.
• The AUX Volume Offset is adjusted by pressing of the “+” and “–” buttons. This
alters the AUX input audio volume. The
level value, which spans between plus or
minus three, is displayed above the adjust-
ment bar.
Auto Play
• Press the “Auto Play” button on the touch- screen to activate the Auto Play screen.
• The Auto Play feature begins playing music as soon as a USB Media device is con-
nected to one of the vehicle’s Media USB
ports, when it is turned on. Press “Off” to
turn the setting off.
MULTIMEDIA
164
Page 167 of 204
Loudness — If Equipped
• Press the “Loudness” button on the touch-screen to select the Loudness feature.
When this feature is activated, it improves
sound quality at lower volumes.
Auto-On Radio
• Press the “Auto-On Radio” button on the touchscreen, select On, Off, or Recall Last
followed by pressing “Done” or the “back
arrow” button on the touchscreen. When
this feature is activated, the radio auto-
matically turns on when the vehicle is in
run or recalls whether it was on or off at last
ignition off.
Radio Off Delay
• Press the “Radio Off Delay” button to keep the radio On for a preset amount of time
after the Ignition is switched OFF. Press the
“back arrow” button when completed.
165
Page 168 of 204
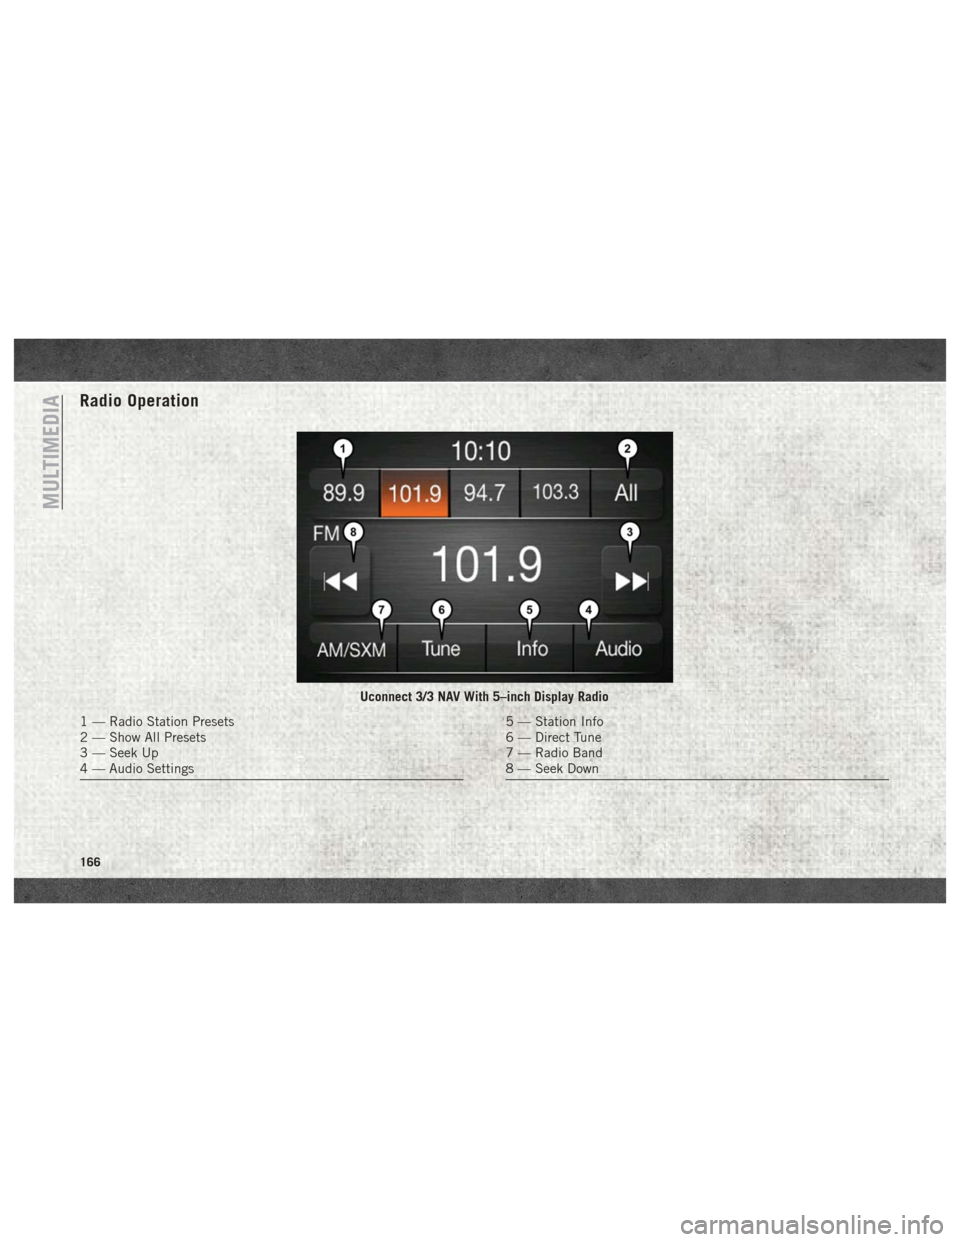
Radio Operation
Uconnect 3/3 NAV With 5–inch Display Radio
1 — Radio Station Presets
2 — Show All Presets
3 — Seek Up
4 — Audio Settings5 — Station Info
6 — Direct Tune
7 — Radio Band
8 — Seek Down
MULTIMEDIA
166