Page 73 of 204

mat fasteners so it cannot slip out of position
and interfere with the accelerator, brake or
clutch pedals or impair safe operation of your
vehicle in other ways.
WARNING!
An improperly attached, damaged, folded,
or stacked floor mat, or damaged floor mat
fasteners may cause your floor mat to in-
terfere with the accelerator, brake, or
clutch pedals and cause a loss of vehicle
control. To prevent SERIOUS INJURY or
DEATH:
• ALWAYS securely attach
your floor
mat using the floor mat fasteners. DO
NOT install your floor mat upside down
or turn your floor mat over. Lightly pull to
confirm mat is secured using the floor
mat fasteners on a regular basis.
• ALWAYS REMOVE THE EXISTING
FLOOR MAT FROM THE VEHICLE
before installing any other floor mat.
NEVER install or stack an additional
floor mat on top of an existing floor mat.
• ONLY install floor mats designed to fit
your vehicle. NEVER install a floor mat
WARNING!
that cannot be properly attached and
secured to your vehicle. If a floor mat
needs to be replaced, only use a FCA
approved floor mat for the specific
make, model, and year of your vehicle.
• ONLY use the driver’s side floor mat on
the driver’s side floor area. To check for
interference, with the vehicle properly
parked with the engine off, fully depress
the accelerator, the brake, and the
clutch pedal (if present) to check for
interference. If your floor mat interferes
with the operation of any pedal, or is not
secure to the floor, remove the floor mat
from the vehicle and place the floor mat
in your trunk.
• ONLY use the passenger’s side floor mat
on the passenger’s side floor area.
• ALWAYS make sure objects cannot fall or
slide into the driver’s side floor area
when the vehicle is moving. Objects can
become trapped under accelerator,
brake, or clutch pedals and could cause
a loss of vehicle control.
WARNING!
• NEVER place any objects under the floormat (e.g., towels, keys, etc.). These ob-
jects could change the position of the
floor mat and may cause interference
with the accelerator, brake, or clutch
pedals.
• If the vehicle carpet has been removed
and re-installed, always properly attach
carpet to the floor and check the floor
mat fasteners are secure to the vehicle
carpet. Fully depress each pedal to
check for interference with the accelera-
tor, brake, or clutch pedals then re-
install the floor mats.
• It is recommended to only use mild soap
and water to clean your floor mats. After
cleaning, always check your floor mat
has been properly installed and is se-
cured to your vehicle using the floor mat
fasteners by lightly pulling mat.
71
Page 74 of 204
Periodic Safety Checks You
Should Make Outside The Vehicle
Tires
Examine tires for excessive tread wear and
uneven wear patterns. Check for stones,
nails, glass, or other objects lodged in the
tread or sidewall. Inspect the tread for cuts
and cracks. Inspect sidewalls for cuts,
cracks, and bulges. Check the wheel bolts for
tightness. Check the tires (including spare)
for proper cold inflation pressure.
Lights
Have someone observe the operation of brake
lights and exterior lights while you work the
controls. Check turn signal and high beam
indicator lights on the instrument panel.
Door Latches
Check for proper closing, latching, and lock-
ing.
Fluid Leaks
Check area under the vehicle after overnight
parking for fuel, coolant, oil, or other fluid
leaks. Also, if gasoline fumes are detected or
if fuel, or brake fluid leaks are suspected. The
cause should be located and corrected imme-
diately.
SAFETY
72
Page 75 of 204

STARTING AND OPERATING
STARTING THE ENGINE —
GAS ENGINE..................74
Normal Starting ................74
STARTING THE ENGINE —
DIESEL ENGINE................74
Normal Starting Procedure .........75
Extreme Cold Weather ............76
NORMAL OPERATION.............76
Stopping The Diesel Engine ........76
ENGINE BREAK-IN RECOMMENDATIONS —
GASOLINE ENGINE..............77
ENGINE BREAK-IN RECOMMENDATIONS –
DIESEL ENGINE ................77
ELECTRIC PARK BRAKE (EPB) —
DIESEL ONLY (IF EQUIPPED) ........78
Loss Of Electric Power............80
AUTOMATED MANUAL TRANSMISSION —
DIESEL ONLY..................81
Gear Ranges ..................82
Parking The Vehicle ..............84 Instrument Cluster Messages
........86
Towing The Vehicle ..............88
SPEED CONTROL...............89
To Activate...................89
To Set A Desired Speed ...........89
To Vary The Speed Setting ..........89
To Accelerate For Passing ..........90
To Resume Speed ...............91
To Deactivate ..................91
PARKSENSE REAR PARK ASSIST .....91
PARKVIEW REAR BACK-UP CAMERA . . .91
REFUELING THE VEHICLE —
GAS ENGINE ..................91
Materials Added To Fuel ..........92
REFUELING THE VEHICLE —
DIESEL ENGINE................92
Diesel Exhaust Fluid .............93
Adding Diesel Exhaust Fluid ........94
TRAILER TOWING..............95
Trailer Towing Weights (Maximum Trailer
Weight Ratings)................95
RECREATIONAL TOWING (BEHIND
MOTORHOME, ETC.) .............96
Towing This Vehicle Behind
Another Vehicle................96
Recreational Towing — Gasoline Engine
All Models ...................97
STARTING AND OPERATING
73
Page 76 of 204

STARTING THE ENGINE — GAS
ENGINE
Before starting your vehicle, adjust your seat,
adjust both inside and outside mirrors, and
fasten your seat belts.
WARNING!
• Never leave children alone in a vehicle,or with access to an unlocked vehicle.
• Allowing children to be in a vehicle un-
attended is dangerous for a number of
reasons. A child or others could be seri-
ously or fatally injured. Children should
be warned not to touch the parking
brake, brake pedal or the transmission
gear selector.
• Do not leave the key fob in or near the
vehicle (or in a location accessible to
children). A child could operate power
windows, other controls, or move the
vehicle.
Normal Starting
NOTE:
Normal starting of either a cold or a warm
engine is obtained without pumping or press-
ing the accelerator pedal.
Turn the ignition switch to the AVV (START)
position and release it when the engine
starts. If the engine fails to start within
10 seconds, turn the ignition switch to the
STOP (OFF/LOCK) position, wait 10 to
15 seconds, then repeat the “Normal Start-
ing” procedure.
STARTING THE ENGINE — DIESEL
ENGINE
Before starting your vehicle, adjust your seat,
both inside and outside mirrors, and fasten
your seat belts.
The starter is allowed to crank for up to
10-second intervals. Waiting a few minutes
between such intervals will protect the starter
from overheating.
WARNING!
• Never leave children alone in a vehicle,or with access to an unlocked vehicle.
• Allowing children to be in a vehicle un-
attended is dangerous for a number of
reasons. A child or others could be seri-
ously or fatally injured. Children should
be warned not to touch the parking
brake, brake pedal or the transmission
gear selector.
• Do not leave the key fob in or near the
vehicle (or in a location accessible to
children). A child could operate power
windows, other controls, or move the
vehicle.
NOTE:
Engine start up in very low ambient tempera-
ture could result in evident white smoke. This
condition will disappear as the engine warms
up.
STARTING AND OPERATING
74
Page 77 of 204

CAUTION!
If the “Generic Warning Light” remains on
and a “Service Fuel Filter” message dis-
plays, DO NOT START engine before you
drain the water from the fuel filter housing
to avoid engine damage. Please see your
authorized dealer for draining the fuel
filter/water separator and fuel filter re-
placement.
Normal Starting Procedure
The gear selector must be in the NEUTRAL
(N) position, and the brake pedal must be
pressed, to allow engine cranking. Place the
gear selector in NEUTRAL (N) and apply the
brake pedal BEFORE turning the key to the
START/AVV position; otherwise, the engine
will not crank and the key must be cycled
OFF, then back on, before cranking is al-
lowed.
Observe the instrument panel cluster lights
when starting the engine.NOTE:
Normal starting of either a cold or a warm
engine is obtained without pumping or press-
ing the accelerator pedal.
1. Press and hold the brake pedal.
2. Place the gear selector into the NEUTRAL
(N) position while keeping the brake pedal
depressed.
3. Turn the ignition switch to the ON/RUN/ MAR position and watch the instrument
panel cluster lights.CAUTION!
If the “Generic Warning Light” remains on
and a “Service Fuel Filter” message dis-
plays, DO NOT START engine before you
drain the water from the fuel filter housing
to avoid engine damage. Please see your
authorized dealer for draining the fuel
filter/water separator and fuel filter re-
placement.
4. After the Glow Plug light turns off, turn the ignition switch to the AVV (START)
position to start the engine. Do not press
the accelerator during starting. 5. If you wish to stop the cranking of the
engine prior to the engine starting, release
the ignition key so that it turns back to the
ON/RUN position.
6. Check that the oil pressure warning light has turned off.
7. Release the parking brake.
To start the engine if the transmission is
faulty, the “Delayed startup” procedure may
be required.
NOTE:
Not all Transmission Failures requires the
“Delayed startup” Procedure, it depends on
the type of failure.(refer to "Instrument Clus-
ter Messages" under "Automated Manual
Transmission" in this section for further infor-
mation):
• Begin with the key in the OFF position.
• Press and hold the brake pedal.
• Turn the key to the START/AVV position and hold it there for at least seven seconds with
the brake depressed. The engine will start,
and the transmission will operate in recov-
ery mode (maximum gear permitted = 3rd,
75
Page 78 of 204
. If the en-
gine does not start, contact your authorized
dealer.
Extreme Cold Weather
Your vehicle may be equipped with three
heating elements; one engine block heater (a")
automatic mode not available). If the en-
gine does not start, contact your authorized
dealer.
Extreme Cold Weather
Your vehicle may be equipped with three
heating elements; one engine block heater (a
resistance heater installed in the water jacket
of the engine) and two transmission heaters
(one resistance heater installed under the oil
reservoir of the hydraulic actuation system
and one on the differential cover of the trans-
mission). To ensure reliable starting/
operating in extreme cold temperatures, use
of an externally powered electric engine
block/transmission heater (available from
your authorized dealer) is recommended.
They require a 110–115 Volt AC electrical
outlet with a grounded, three-wire extension
cord. Their use is recommended for environ-
ments that routinely fall below -10°F
(-23°C). They should be used when the ve-
hicle has not been running overnight or lon-
ger periods and should be plugged in two
hours prior to start. Their use is required for
cold starts with temperatures under -17°F
(-27°C).NOTE:
The engine is designed to work at an ambient
temperature ranging from -22°F to + 122°F
(-30°C to + 50C°). Rubber, pipes, timing belt
cover and electronic devices are not designed
to work out of this range.
In the case of LOW temperature after Start-
ing, the Automated Manual Transmission
may not be able to engage first gear. In this
case a message "Shift not allowed" appears.
In this situation use the engine block heater.
NOTE:
The engine and transmission block heater
cord is a factory installed option. If your
vehicle is not equipped, heater cords are
available from your authorized Mopar dealer.
• A 12 Volt heater built into the fuel filter
housing aids in preventing fuel gelling. It is
controlled by a built-in thermostat.
• A Diesel Pre-Heat system both improves engine starting and reduces the amount of
white smoke generated by a warming
engine.
NORMAL OPERATION
Observe the following when the diesel engine
is operating.
• All message center lights are off.
• Malfunction Indicator Light (MIL) is off.
• Generic Warning Light is off.
• Engine Oil Pressure telltale is notilluminated.
Stopping The Diesel Engine
Idle the engine a few minutes before routine
shutdown. After full load operation, idle the
engine three to five minutes before shutting it
down. This idle period will allow the lubricat-
ing oil and coolant to carry excess heat away
from the combustion chamber, bearings, in-
ternal components, and turbocharger. This is
especially important for turbocharged diesel
engines.
NOTE:
Refer to the following chart for proper engine
shutdown.STARTING AND OPERATING
76
Page 79 of 204

Before
Engine
Shutdown
Stop and Go Empty Cool Less than
One
Stop and Go Medium
One
Highway Speeds Medium Warm Two
City Traf- fic Max")
Driving
Condition LoadTurbo-
charger
Tempera- ture Idle Time
(min.)
Before
Engine
Shutdown
Stop and Go Empty Cool Less than
One
Stop and Go Medium
One
Highway Speeds Medium Warm Two
City Traf- fic Maximum
GCWR Three
Highway Speeds Maximum
GCWR Four
Uphill Grade Maximum
GCWR Hot Five
ENGINE BREAK-IN RECOMMENDATIONS
— GASOLINE ENGINE
A long break-in period is not required for the
engine and drivetrain (transmission and axle)
in your vehicle. Drive moderately during the first 300 miles
(500 km). After the initial 60 miles
(100 km), speeds up to 50 or 55 mph (80 or
90 km/h) are desirable.
While cruising, brief full-throttle acceleration
within the limits of local traffic laws contrib-
utes to a good break-in. Wide-open throttle
acceleration in low gear can be detrimental
and should be avoided.
The engine oil installed in the engine at the
factory is a high-quality energy conserving
type lubricant. Oil changes should be consis-
tent with anticipated climate conditions un-
der which vehicle operations will occur. For
the recommended viscosity and quality
grades, refer to “Fluids And Lubricants” in
“Technical Specifications”.
CAUTION!
Never use Non-Detergent Oil or Straight
Mineral Oil in the engine or damage may
result.
NOTE:
A new engine may consume some oil during
its first few thousand miles (kilometers) of
operation. This should be considered a nor-
mal part of the break-in and not interpreted
as a problem. Please check your oil level with
the engine oil indicator often during the
break in period. Add oil as required.
ENGINE BREAK-IN RECOMMENDATIONS
– DIESEL ENGINE
The diesel engine does not require a break-in
period due to its construction. Normal opera-
tion is allowed, providing the following rec-
ommendations are followed:
• Warm up the engine before placing it under
load.
• Do not operate the engine at idle for pro- longed periods.
• Use the appropriate transmission gear to prevent engine lugging.
• Observe vehicle oil pressure and tempera- ture indicators.
• Check the coolant and oil levels frequently.
77
Page 80 of 204

• Vary accelerator pedal position at highwayspeeds when carrying or towing significant
weight.
NOTE:
Light duty operation such as light trailer
towing or no load operation will extend the
time before the engine is at full efficiency.
Reduced fuel economy and power may be
seen at this time.
The engine oil installed in the engine at the
factory is a high-quality energy conserving
type lubricant. Oil changes should be consis-
tent with anticipated climate conditions un-
der which vehicle operations will occur. The
recommended viscosity and quality grades
are shown under “Fluids And Lubricants” in
the “Technical Specifications” chapter in
this manual. NON-DETERGENT OR
STRAIGHT MINERAL OILS MUST NEVER
BE USED.ELECTRIC PARK BRAKE (EPB) —
DIESEL ONLY (IF EQUIPPED)
Your vehicle is equipped with an Electric
Park Brake System (EPB) that offers simple
operation, and some additional features that
make the park brake more convenient and
useful.
The park brake is primarily intended to pre-
vent the vehicle from rolling while parked.
Before leaving the vehicle, make sure that
the park brake is applied.
You can engage the park brake in two ways;
• Manually, by applying the park brake switch.
• Automatically, by the Auto Park Brake fea- ture whenever the vehicle speed is below
1.25 mph (2 km/h) and the ignition switch
is in the STOP/OFF position.
The park brake switch is located on the in-
strument panel to the right of the instrument
cluster. To apply the parking brake manually, pull and
tilt the top of the switch away from the
instrument panel momentarily. You may hear
a mechanical sound while the parking brake
operates; this is normal operating noise.
Once the parking brake is fully engaged, the
BRAKE warning lamp in the instrument clus-
ter and an indicator on the switch will illumi-
nate. The park brake can be applied even
Electric Park Brake SwitchSTARTING AND OPERATING
78
 1
1 2
2 3
3 4
4 5
5 6
6 7
7 8
8 9
9 10
10 11
11 12
12 13
13 14
14 15
15 16
16 17
17 18
18 19
19 20
20 21
21 22
22 23
23 24
24 25
25 26
26 27
27 28
28 29
29 30
30 31
31 32
32 33
33 34
34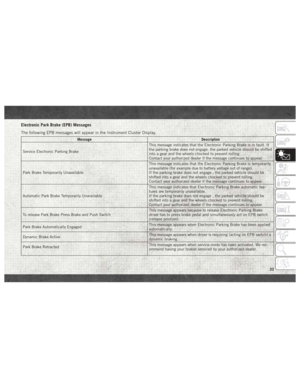 35
35 36
36 37
37 38
38 39
39 40
40 41
41 42
42 43
43 44
44 45
45 46
46 47
47 48
48 49
49 50
50 51
51 52
52 53
53 54
54 55
55 56
56 57
57 58
58 59
59 60
60 61
61 62
62 63
63 64
64 65
65 66
66 67
67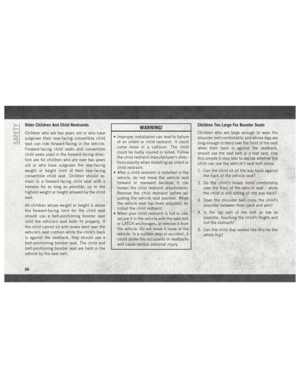 68
68 69
69 70
70 71
71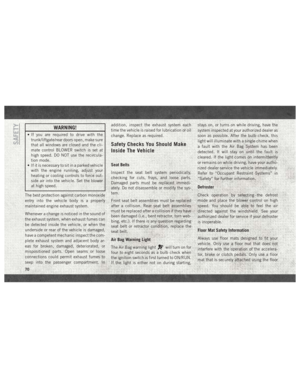 72
72 73
73 74
74 75
75 76
76 77
77 78
78 79
79 80
80 81
81 82
82 83
83 84
84 85
85 86
86 87
87 88
88 89
89 90
90 91
91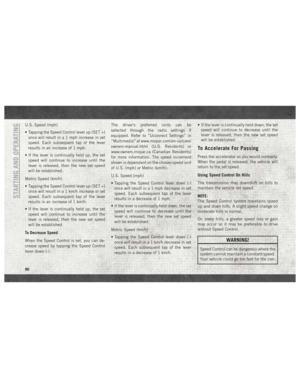 92
92 93
93 94
94 95
95 96
96 97
97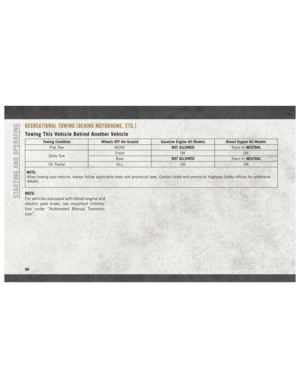 98
98 99
99 100
100 101
101 102
102 103
103 104
104 105
105 106
106 107
107 108
108 109
109 110
110 111
111 112
112 113
113 114
114 115
115 116
116 117
117 118
118 119
119 120
120 121
121 122
122 123
123 124
124 125
125 126
126 127
127 128
128 129
129 130
130 131
131 132
132 133
133 134
134 135
135 136
136 137
137 138
138 139
139 140
140 141
141 142
142 143
143 144
144 145
145 146
146 147
147 148
148 149
149 150
150 151
151 152
152 153
153 154
154 155
155 156
156 157
157 158
158 159
159 160
160 161
161 162
162 163
163 164
164 165
165 166
166 167
167 168
168 169
169 170
170 171
171 172
172 173
173 174
174 175
175 176
176 177
177 178
178 179
179 180
180 181
181 182
182 183
183 184
184 185
185 186
186 187
187 188
188 189
189 190
190 191
191 192
192 193
193 194
194 195
195 196
196 197
197 198
198 199
199 200
200 201
201 202
202 203
203