Page 233 of 416

231
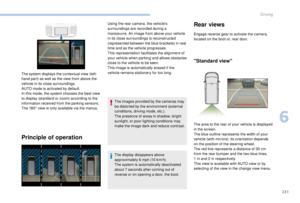
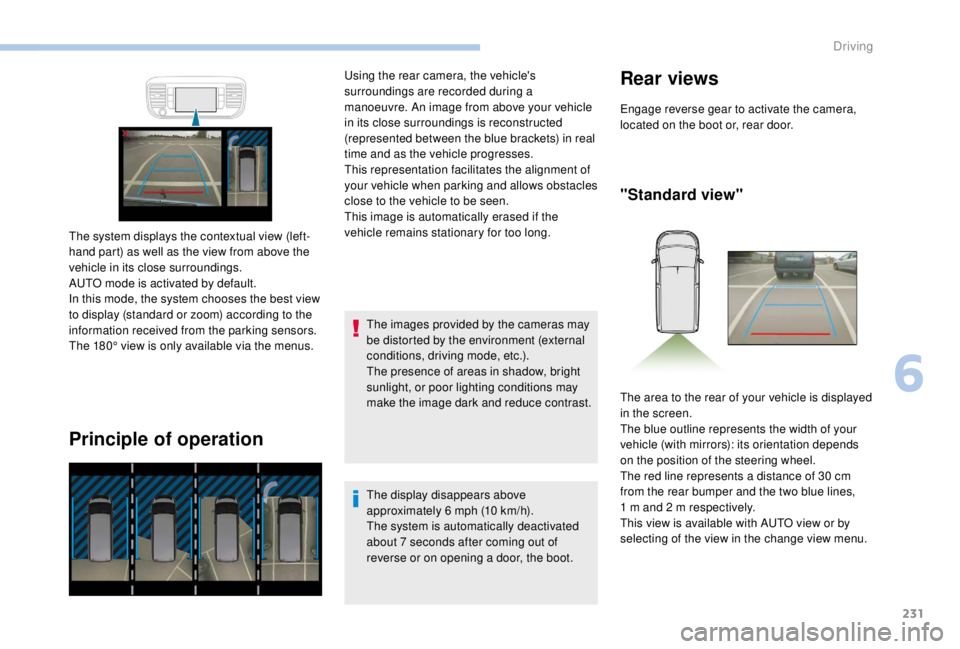
Principle of operation
The images provided by the cameras may
be distorted by the environment (external
conditions, driving mode, etc.).
The presence of areas in shadow, bright
sunlight, or poor lighting conditions may
make the image dark and reduce contrast.
The system displays the contextual view (left-
hand part) as well as the view from above the
vehicle in its close surroundings.
AUTO mode is activated by default.
In this mode, the system chooses the best view
to display (standard or zoom) according to the
information received from the parking sensors.
The 180° view is only available via the menus. Using the rear camera, the vehicle's
surroundings are recorded during a
manoeuvre. An image from above your vehicle
in its close surroundings is reconstructed
(represented between the blue brackets) in real
time and as the vehicle progresses.
This representation facilitates the alignment of
your vehicle when parking and allows obstacles
close to the vehicle to be seen.
This image is automatically erased if the
vehicle remains stationary for too long.
The display disappears above
approximately 6 mph (10 km/h).
The system is automatically deactivated
about 7
seconds after coming out of
reverse or on opening a door, the boot.
Rear views
Engage reverse gear to activate the camera,
located on the boot or, rear door.
"Standard view"
The area to the rear of your vehicle is displayed
in the screen.
The blue outline represents the width of your
vehicle (with mirrors): its orientation depends
on the position of the steering wheel.
The red line represents a distance of 30
cm
from the rear bumper and the two blue lines,
1
m and 2 m respectively.
This view is available with AUTO view or by
selecting of the view in the change view menu.
6
Driving
Page 234 of 416

232
"180° view""Zoom view"
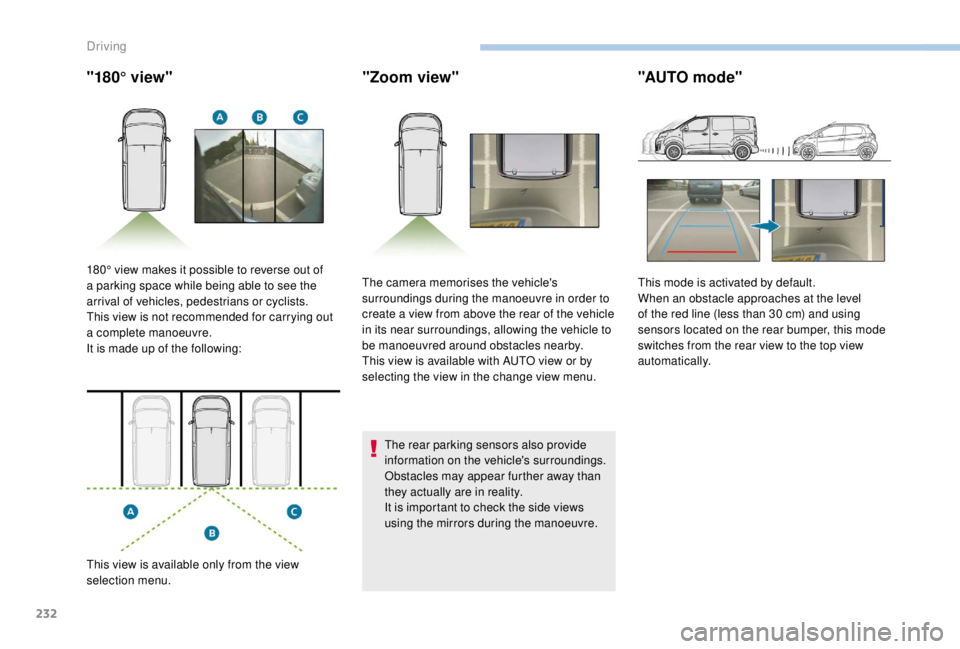
The rear parking sensors also provide
information on the vehicle's surroundings.
Obstacles may appear further away than
they actually are in reality.
It is important to check the side views
using the mirrors during the manoeuvre.
"AUTO mode"
180° view makes it possible to reverse out of
a parking space while being able to see the
arrival of vehicles, pedestrians or cyclists.
This view is not recommended for carrying out
a complete manoeuvre.
It is made up of the following:
This view is available only from the view
selection menu. The camera memorises the vehicle's
surroundings during the manoeuvre in order to
create a view from above the rear of the vehicle
in its near surroundings, allowing the vehicle to
be manoeuvred around obstacles nearby.
This view is available with AUTO view or by
selecting the view in the change view menu.
This mode is activated by default.
When an obstacle approaches at the level
of the red line (less than 30
cm) and using
sensors located on the rear bumper, this mode
switches from the rear view to the top view
automatically.
Driving
Page 235 of 416
233
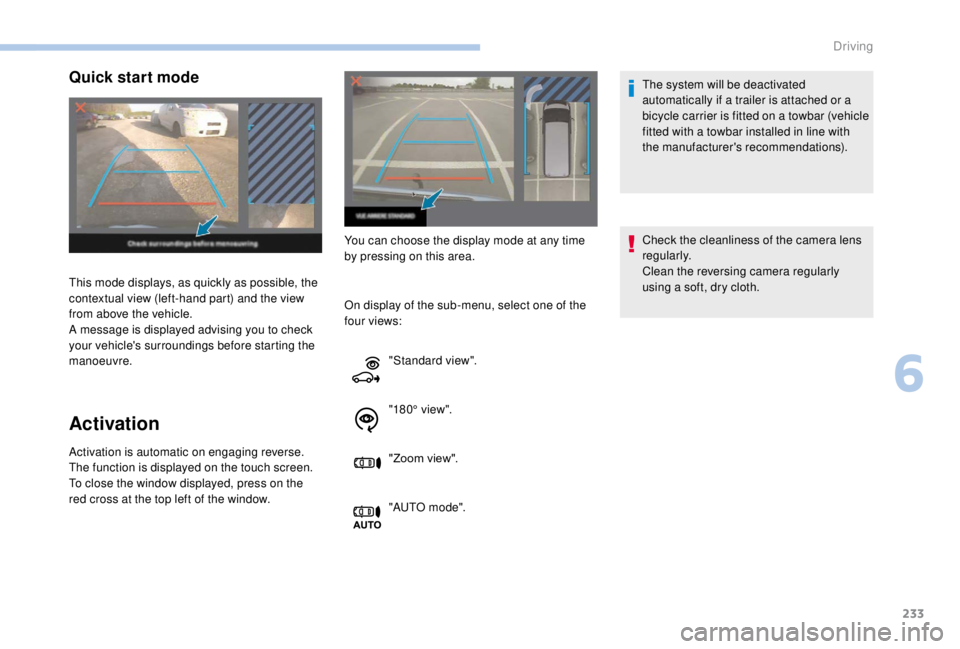
Quick start mode
Activation
Activation is automatic on engaging reverse.
The function is displayed on the touch screen.
To close the window displayed, press on the
red cross at the top left of the window.This mode displays, as quickly as possible, the
contextual view (left-hand part) and the view
from above the vehicle.
A message is displayed advising you to check
your vehicle's surroundings before starting the
manoeuvre.
You can choose the display mode at any time
by pressing on this area.
On display of the sub-menu, select one of the
four views: The system will be deactivated
automatically if a trailer is attached or a
bicycle carrier is fitted on a towbar (vehicle
fitted with a towbar installed in line with
the manufacturer's recommendations).
Check the cleanliness of the camera lens
regularly.
Clean the reversing camera regularly
using a soft, dry cloth.
"Standard view".
"180° view".
"Zoom view".
"AUTO m o de".
6
Driving
Page 236 of 416

234
Under-inflation detection
This system automatically monitors the tyre
pressure while driving.
The system monitors the pressure in all four
tyres, once the vehicle is moving.
It compares the information given by the
wheel speed sensors with reference values,
which must be reinitialised after ever y tyre
pressure adjustment or wheel change.
The system triggers an alert as soon as it
detects a drop in the pressure of one or more
tyres.
The tyre under-inflation detection system
does not replace the need for vigilance on
the part of the driver.
This system still requires you to check the
tyre inflation pressure (including the spare
wheel) every month as well as before a
long journey.
Driving with under-inflated tyres impairs
handling, extends braking distances and
causes early tyre wear, particularly in
adverse conditions (heavy loads, high
speeds, long journeys). Driving with under-inflated tyres
increases fuel consumption.
The tyre pressure specifications for your
vehicle can be found on the tyre pressure
label.
For more information on the
Identification markings , refer to the
corresponding section.
Tyre pressures should be checked when
the tyres are "cold" (vehicle stopped for
1
hour or after a journey of less than
6
miles (10 km) at moderate speeds).
Other wise (when hot), add 0.3
bar to the
pressures shown on the label.
Snow chains
The system does not have to be
reinitialised after fitting or removing snow
chains. Spare wheel
The steel spare wheel does not have an
under-inflation detection sensor.
Under-inflation alert
This warning is indicated by
continuous illumination of the lamp,
an audible signal and, depending on
the equipment installed, a message
displayed on the screen.
F
R
educe speed immediately, avoid excessive
steering movements and sudden braking.
F
S
top the vehicle as soon as it is safe to do
so.
The loss of pressure detected does not
always cause visible bulging of the tyre.
Do not satisfy yourself with just a visual
check.
F
I
n the event of a puncture, use the
temporary puncture repair kit or the spare
wheel (depending on equipment),
or
F
i
f you have a compressor, such as the one
in the temporary puncture repair kit, check
the pressures of the four tyres when cold,
Driving
Page 237 of 416

235
The alert is kept active until the system is
reinitialised.
Réinitialisation
The system must be reinitialised after any
adjustment to the pressures of one or more
tyres, and after changing one or more wheels.Before reinitialising the system, ensure
that the pressures of the four tyres
are correct for the conditions of use
of the vehicle and conform to the
recommendations on the tyre pressure
label.
The under-inflation alert can only be relied
on if the reinitialisation of the system has
been done with the pressures in the four
tyres correctly adjusted.
The under-inflation detection system
does not give a warning if a pressure is
incorrect at the time of reinitialisation. Initialisation of the system is done with the
ignition on and the vehicle stationary.
The new pressure parameters saved are
treated as reference values by the system.
With audio system
or
F i f it is not possible to make this check
immediately, drive carefully at reduced
speed. With touch screen
Operating fault
The flashing and then fixed illumination of the
under-inflation warning lamp accompanied
by illumination of the Ser vice warning lamp
indicates a fault with the system.
In this case, under-inflation monitoring of the
tyres is no longer assured.
Have the system checked by a PEUGEOT
dealer or a qualified workshop.
After carrying out any work on the system,
the pressures of the four tyres must be
checked and the system reinitialised.
In the "
Personalisation-
configuration " menu, select
"
Under-inflation initialisation ".In the "
Driving/Vehicle "
menu, select "
Under-inflation
initialisation ".
Press on " Ye s" to Confirm the command,
initialisation is confirmed by an audible signal
and a message.
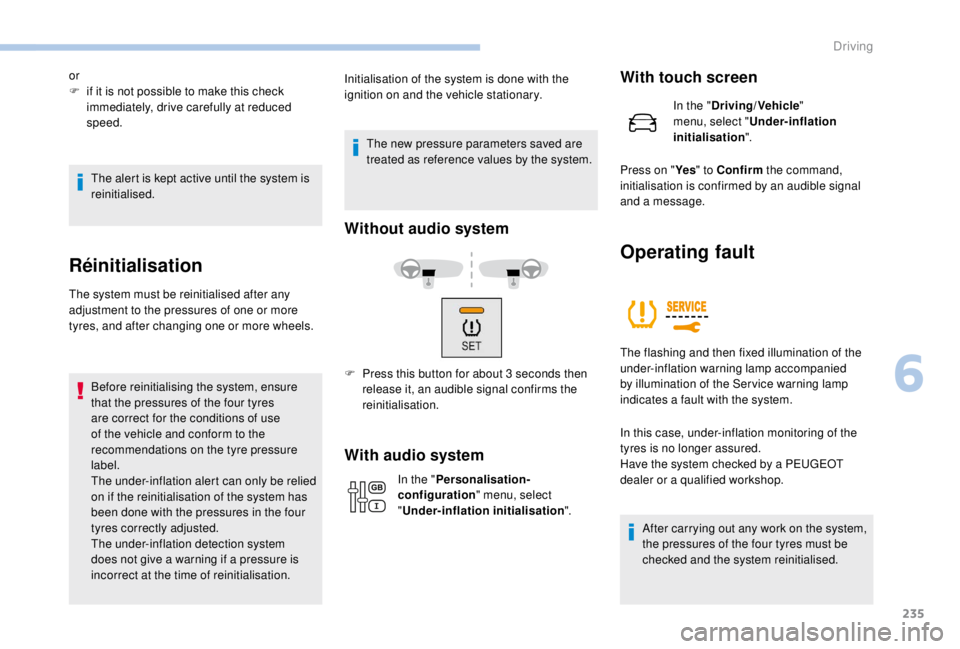
Without audio system
F Press this button for about 3 seconds then
release it, an audible signal confirms the
reinitialisation.
6
Driving
Page 238 of 416
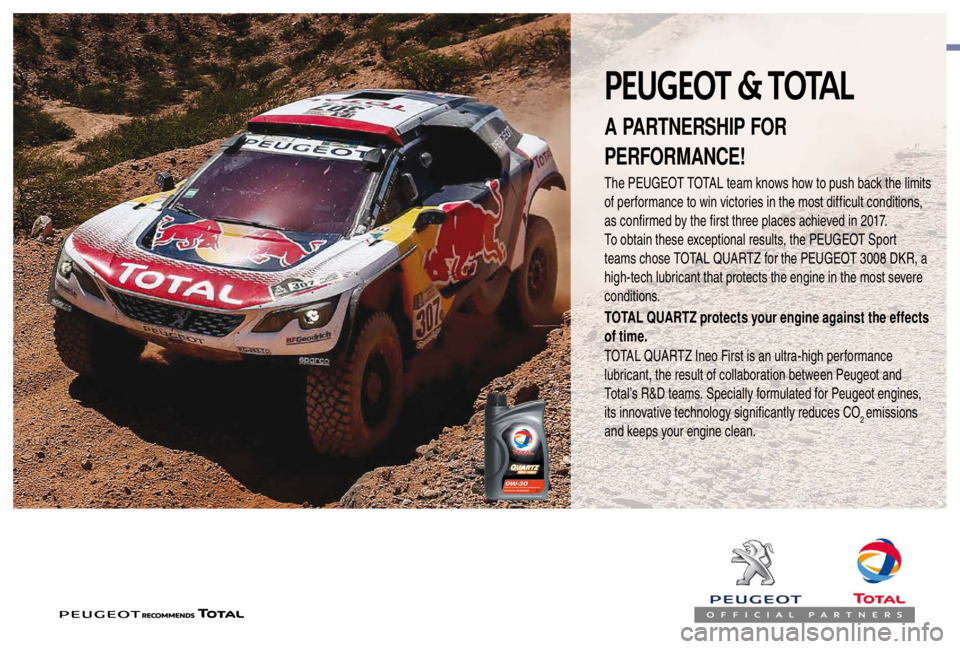
PEUGEOT & TOTAL
The PEUGEOT TOTAL team knows how to push back the limits
of performance to win victories in the most difficult conditions,
as confirmed by the first three places achieved in 2017.
To obtain these exceptional results, the PEUGEOT Sport
teams chose TOTAL QUARTZ for the PEUGEOT 3008 DKR, a
high-tech lubricant that protects the engine in the most severe
conditions.
TOTAL QUARTZ protects your engine against the effects
of time.
TOTAL QUARTZ Ineo First is an ultra-high performance
lubricant, the result of collaboration between Peugeot and
Total’s R&D teams. Specially formulated for Peugeot engines,
its innovative technology significantly reduces CO
2 emissions
and keeps your engine clean.
A PARTNERSHIP FOR
PERFORMANCE!
Page 239 of 416

237
Fuel
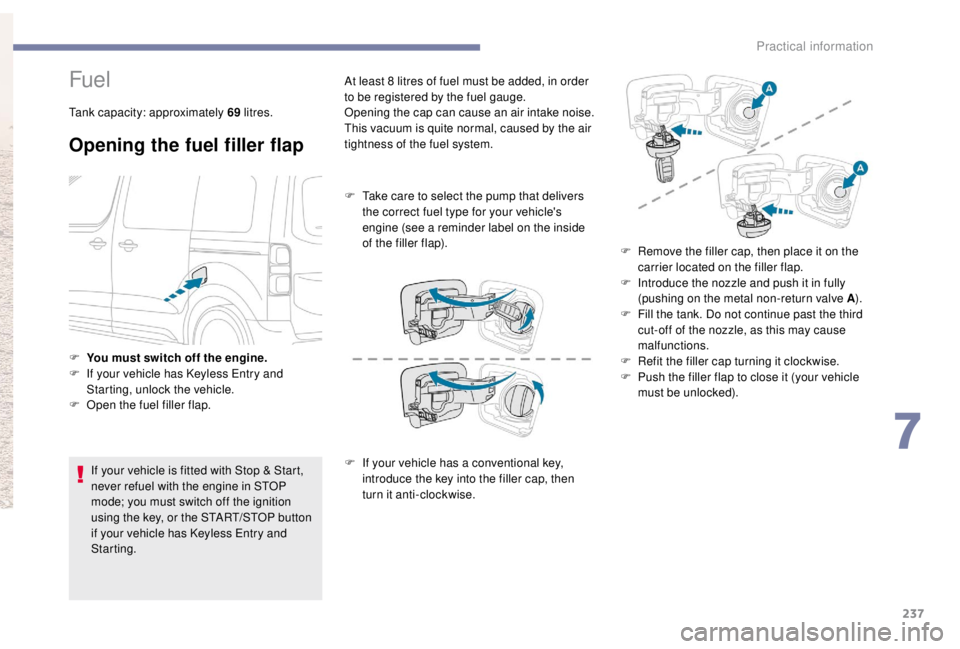
Tank capacity: approximately 69 litres.
Opening the fuel filler flap
If your vehicle is fitted with Stop & Start,
never refuel with the engine in STOP
mode; you must switch off the ignition
using the key, or the START/STOP button
if your vehicle has
K
eyless Entry and
Starting. At least 8
litres of fuel must be added, in order
to be registered by the fuel gauge.
Opening the cap can cause an air intake noise.
This vacuum is quite normal, caused by the air
tightness of the fuel system.
F
T
ake care to select the pump that delivers
the correct fuel type for your vehicle's
engine (see a reminder label on the inside
of the filler flap).
F I f your vehicle has a conventional key,
introduce the key into the filler cap, then
turn it anti-clockwise.
F
Y
ou must switch off the engine.
F
I
f your vehicle has
K
eyless Entry and
Starting, unlock the vehicle.
F
O
pen the fuel filler flap. F
R
emove the filler cap, then place it on the
carrier located on the filler flap.
F
I
ntroduce the nozzle and push it in fully
(pushing on the metal non-return valve A ).
F
F
ill the tank. Do not continue past the third
cut-off of the nozzle, as this may cause
malfunctions.
F
R
efit the filler cap turning it clockwise.
F
P
ush the filler flap to close it (your vehicle
must be unlocked).
7
Practical information
Page 240 of 416

238
If your vehicle has sliding side doors, do
not open the left-hand sliding door as
there is a risk of damaging the fuel filler
flap when refuelling.
Your vehicle is fitted with a catalytic converter,
which helps to reduce the level of harmful
emissions in the exhaust gases.
If you have added the wrong fuel, you
must have the tank drained and refilled
with the correct fuel before you star t
the engine.
Low fuel level
When the low fuel level in
the tank is reached, this
warning lamp comes on
in the instrument panel,
accompanied by an audible
warning and a message.
Fuel cut- of f
Your vehicle is fitted with a safety system that
cuts off the supply of fuel in the event of an
impact.
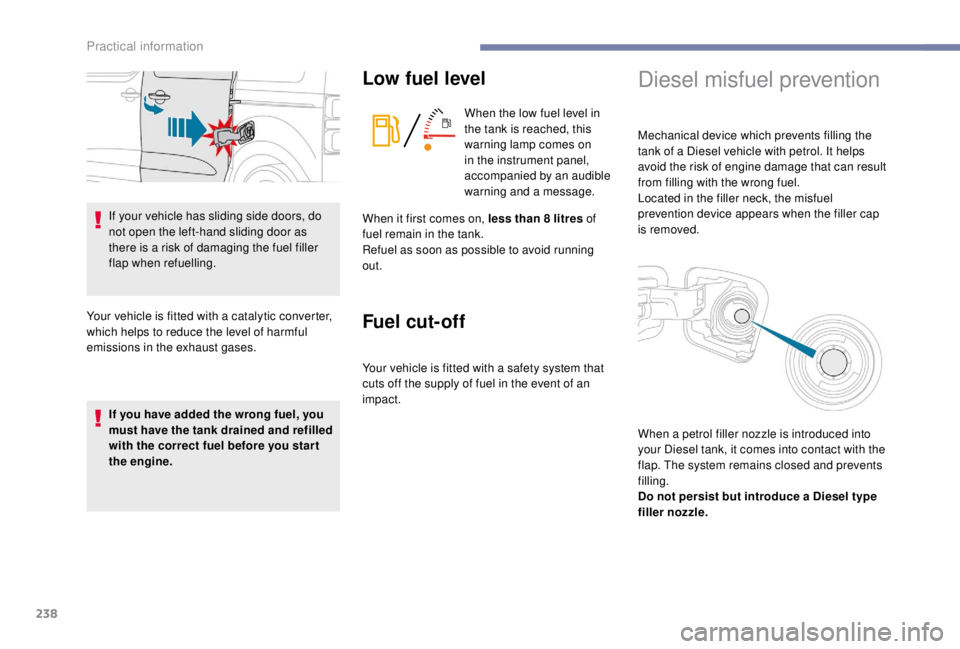
Diesel misfuel prevention
Mechanical device which prevents filling the
tank of a Diesel vehicle with petrol. It helps
avoid the risk of engine damage that can result
from filling with the wrong fuel.
Located in the filler neck, the misfuel
prevention device appears when the filler cap
is removed.
When it first comes on, less than 8
litres of
fuel remain in the tank.
Refuel as soon as possible to avoid running
out.
When a petrol filler nozzle is introduced into
your Diesel tank, it comes into contact with the
flap. The system remains closed and prevents
filling.
Do not persist but introduce a Diesel type
filler nozzle.
Practical information