Page 97 of 466

Fuel remaining display
E00522201757
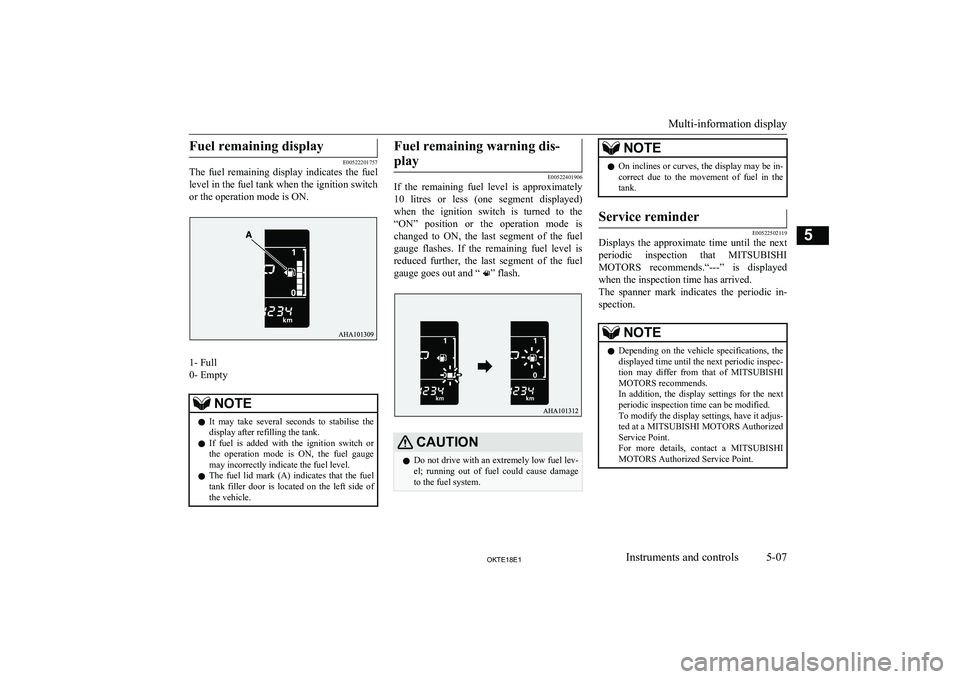
The fuel remaining display indicates the fuel
level in the fuel tank when the ignition switch or the operation mode is ON.
1- Full
0- Empty
NOTEl It may take several seconds to stabilise the
display after refilling the tank.
l If fuel is added with the ignition switch or
the operation mode is ON, the fuel gauge
may incorrectly indicate the fuel level.
l The fuel lid mark (A) indicates that the fuel
tank filler door is located on the left side of the vehicle.Fuel remaining warning dis-
play
E00522401906
If the remaining fuel level is approximately
10 litres or less (one segment displayed)
when the ignition switch is turned to the “ON” position or the operation mode is
changed to ON, the last segment of the fuel gauge flashes. If the remaining fuel level is
reduced further, the last segment of the fuel gauge goes out and “
” flash.
CAUTIONl Do not drive with an extremely low fuel lev-
el; running out of fuel could cause damage to the fuel system.NOTEl On inclines or curves, the display may be in-
correct due to the movement of fuel in the
tank.Service reminder
E00522502119
Displays the approximate time until the next
periodic inspection that MITSUBISHI
MOTORS recommends.“---” is displayed
when the inspection time has arrived.
The spanner mark indicates the periodic in- spection.
NOTEl Depending on the vehicle specifications, the
displayed time until the next periodic inspec-
tion may differ from that of MITSUBISHI
MOTORS recommends.
In addition, the display settings for the next periodic inspection time can be modified.
To modify the display settings, have it adjus-
ted at a MITSUBISHI MOTORS Authorized Service Point.
For more details, contact a MITSUBISHI
MOTORS Authorized Service Point.
Multi-information display
5-07OKTE18E1Instruments and controls5
Page 98 of 466

1.Displays the time until the next periodic
inspection.
NOTEl The distance is shown in units of 100 km
(100 miles). The time is shown in units of months.
2. This informs you that a periodic inspec-
tion is due. Please consult a MITSUBISHI MOTORS Authorized
Service Point.
3. After your vehicle is inspected at a
MITSUBISHI MOTORS Authorized
Service Point, it displays the time until the next periodic inspection.
To reset
The “---” display can be reset while the igni- tion switch or the operation mode is in OFF. 1. When you lightly press the multi infor-
mation display switch a few times, the
information display switches to the serv- ice reminder display.
2. Press and hold the multi information dis-
play switch for about 2 seconds or more to make the spanner mark start flashing.
(If there is no operation for about 10 sec-
onds with flashing, the display will re-
vert to its original indication.)
3. Lightly press the multi information dis-
play switch while the icon is flashing to
change the display from “---” to
“cLEAr”. After this, the time until the next periodic inspection will be dis-played.CAUTIONl The customer is responsible for making sure
that periodic inspection and maintenance are
performed.
Inspections and maintenance must be per- formed to prevent accidents and malfunc- tions.NOTEl “---” display cannot be reset when the igni-
tion switch or the operation mode is in ON.
Multi-information display
5-08OKTE18E1Instruments and controls5Distance
Month
Page 99 of 466

NOTElWhen “---” is displayed, after a certain dis-
tance and a certain period of time, the dis-
play is reset and the time until the next peri- odic inspection is displayed.
l If you accidentally reset the display, consult
a MITSUBISHI MOTORS Authorized Serv-
ice Point.Changing the function settings
E00522700595
The “Average fuel consumption reset mode”,
“Fuel consumption unit” and “Temperature unit” setting can be modified as desired,when the ignition switch or the operation
mode is ON.
CAUTIONl The driver should not operate the display
while the vehicle is in motion.
l When operating the system, stop the vehicle
in a safe area.Changing the reset mode for
average fuel consumption
E00522902100
The mode conditions for the average fuel consumption display can be switched be- tween “Auto reset” and “Manual reset”.
1. When you lightly press the multi infor-
mation display switch a few times, the information display switches to the driv-
ing range display.
Refer to “Information display” on page
5-03.
2. Each time you press the multi informa-
tion display switch for 2 seconds or
more on driving range display, you can
switch reset mode for average fuel con- sumption. (A: Auto reset mode, B: Man-ual reset mode)
Manual reset mode
l When the average fuel consumption is
being displayed, if you hold down the multi-information meter switch, the
average fuel consumption displayed at that time is reset.
l When the following operation is per-
formed, the mode setting is automatical-
ly switched from manual to auto.
[Except for vehicles equipped with key- less operation system]
Turn the ignition switch from the
“ACC” or “LOCK” position to the “ON” position.
[For vehicles equipped with keyless op- eration system]
Change the operation mode from ACC
or OFF to ON.
Switching to auto occurs automatically. If switching to manual mode is done,
however, the data from the last reset is
displayed.
Auto reset mode
l When the average fuel consumption is
being displayed, if you hold down the multi information display switch, the average fuel consumption displayed atthat time are reset.
Multi-information display
5-09OKTE18E1Instruments and controls5 Auto reset mode Manual reset mode
Page 100 of 466

lWhen the engine switch or the operation
mode is in the following conditions, the
average fuel consumption display is au-
tomatically reset.
[Except for vehicles equipped with key-
less operation system]
The ignition switch is in the “ACC” or “LOCK” position for about 4 hours or
longer.
[For vehicles equipped with keyless op- eration system]
The operation mode is in ACC or OFF
for about 4 hours or longer.NOTEl The average fuel consumption display can
be reset separately for the auto reset mode and for the manual reset mode.
l The memory of the auto reset mode or man-
ual reset mode for the average fuel con- sumption display is erased if the battery isdisconnected.
l The initial (default) setting is “Auto reset
mode”.Changing the fuel consumption
display unit
E00523001808
The display unit for fuel consumption can be
switched. The distance and amount units are also switched to match the selected fuel con- sumption unit.
1. When you lightly press the multi infor-
mation display switch a few times, theinformation display switches to the aver-age fuel consumption display.
Refer to “Information display” on page
5-03.
2. Press and hold the multi information dis-
play switch for about 5 seconds or more until buzzer sound is heard twice.
3. Press and hold the multi information dis-
play switch to switch in sequence from “km/L” → “L/100 km” → “mpg” →“km/L”.NOTEl The display units for the driving range, the
average fuel consumption are switched, but the units for the indicating needle (speedom- eter), the odometer, the tripmeter and the
service reminder will remain unchanged.NOTEl The memory of the unit setting is erased if
the battery is disconnected, and it returns au- tomatically to factory setting.
The distance units is also switched in the fol-
lowing combinations to match the selected
fuel consumption unit.
Fuel consumptionDistance (driving range)km/LkmL/100 kmkmmpgmile(s)Changing the temperature unit
E00523101753
The display unit for outside temperature canbe switched. 1. When you lightly press the multi infor-
mation display switch a few times, the information display switches to the out-
side temperature display.
Refer to “Information display” on page
5-03.
2. Each time you press the multi informa-
tion display switch for 2 seconds or more on outside temperature display,you can switch from °C to °F or from °F
to °C unit of outside temperature dis-
play.
Multi-information display
5-10OKTE18E1Instruments and controls5
Page 101 of 466
NOTElThe temperature value on air conditioner
panel is switched in conjunction with outside
temperature display unit of the multi infor-
mation display.
However, “°C” or “°F” are not shown to
temperature display of an air conditioner.
Multi-information display
5-11OKTE18E1Instruments and controls5
Page 102 of 466

Indication and warning lamps (multi information display)E005015040931. Front fog lamp indication lamp*® p. 5-13
2. Turn-signal indication lamps/Hazard warning indication lamps ® p. 5-13
3. High-beam indication lamp ® p. 5-13
4. Auto Stop & Go (AS&G) indication lamp* ® p. 6-23
5. Lane departure warning (LDW) standby indication lamp (green)* ® p. 6-75
Lane departure warning (LDW) lamp
(amber)* ® p. 6-75
6. Position lamp indication lamp* ® p. 5-147. Lane departure warning (LDW) system
ON indication lamp* ® p. 6-75
8. Rear fog lamp indication lamp ® p. 5-13
9. Cruise control indication lamp* ® p. 6-63
10. Diesel particulate filter (DPF) warning lamp ® p. 6-22
11. Diesel preheat indication lamp ® p. 5-14
12. Charge warning lamp ® p. 5-16
13. Check engine warning lamp ® p. 5-15
14. Fuel filter indication lamp ® p. 5-1415. A/T (automatic transmission) fluid tem-
perature warning lamp (vehicles with
A/T) ® p. 6-34
16. Oil pressure warning lamp ® p. 5-16
17. Auto Stop & Go (AS&G) OFF indica- tion lamp* ® p. 6-26
18. Washer fluid level warning lamp* ® p. 5-16
19. Multi-information display ® p. 5-02
20- For details, refer to “Warning activa- tion” on page 3-12 (if so equipped).
21. For details, refer to “Warning activa- tion” on page 3-12 (if so equipped).
22- Door ajar warning lamp ® p. 5-16
Indication and warning lamps (multi information display)
5-12OKTE18E1Instruments and controls5Type 1
Type 2
Page 103 of 466

23- Seat belt reminder/warning lamp® p. 4-08
24- Anti-lock brake system (ABS) warning lamp ® p. 6-57
25- Active Stability & Traction Control (ASTC) indication lamp ® p. 6-61
26- Active Stability & Traction Control (ASTC) OFF indication lamp
® p. 6-6127- Supplement Restraint System (SRS)
warning lamp ® p. 4-34
28- Brake warning lamp ® p. 5-15
29. Rear differential lock indication lamp* ® p. 6-45
30. 2WD/4WD operation indication lamp* ® p. 6-38
31. Low-range indication lamp* ® p. 6-3832- 2WD/4WD operation indication lamp*
® p. 6-42
33- Low-range indication lamp* ® p. 6-42
Indication lamps
E00501600100Turn-signal indication lamps/
Hazard warning indication lamps
E00501701616
These indication lamps blink
in the following situations.
l When the turn-signal
lever is moved to acti-
vate a turn-signal lamp.
Refer to “Turn-signal
lever” on page 5-20.
l When the hazard warning flasher switch
is pressed to activate the hazard warning lamps.
Refer to “Hazard warning flasher switch” on page 5-21.
l When the hazard warning lamps auto-
matically activate due to sudden braking
while driving.
Refer to “Emergency stop signal sys- tem*” on page 6-56.High-beam indication lamp
E00501801271
This indication lamp illumi-
nates when the high-beam is used.
Front fog lamp indication
lamp*
E00501901621
This lamp illuminates while
the front fog lamps are on.
Rear fog lamp indication lamp
E00502001397
This lamp illuminates while the rear fog lamp is on.
Indication lamps
5-13OKTE18E1Instruments and controls5
Page 104 of 466

Position lamp indication lamp*
E00508901301
This indication lamp illumi-
nates while the position
lamps are on.
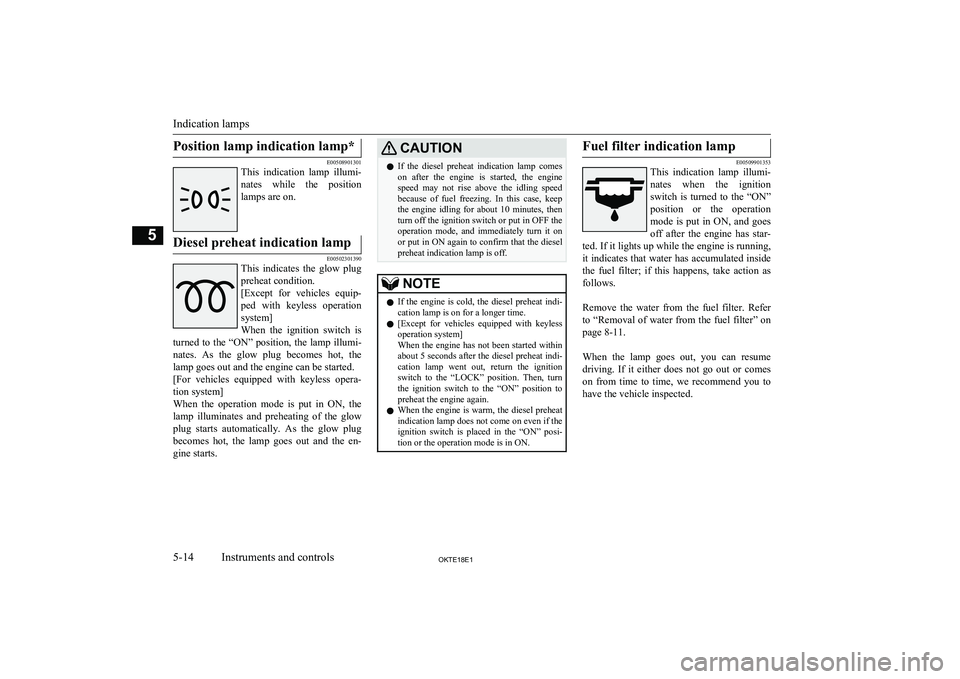
Diesel preheat indication lamp
E00502301390
This indicates the glow plug
preheat condition.
[Except for vehicles equip-
ped with keyless operation system]
When the ignition switch is
turned to the “ON” position, the lamp illumi-
nates. As the glow plug becomes hot, the lamp goes out and the engine can be started.
[For vehicles equipped with keyless opera- tion system]
When the operation mode is put in ON, the
lamp illuminates and preheating of the glow
plug starts automatically. As the glow plug becomes hot, the lamp goes out and the en-
gine starts.
CAUTIONl If the diesel preheat indication lamp comes
on after the engine is started, the engine speed may not rise above the idling speedbecause of fuel freezing. In this case, keep
the engine idling for about 10 minutes, then turn off the ignition switch or put in OFF the operation mode, and immediately turn it onor put in ON again to confirm that the diesel
preheat indication lamp is off.NOTEl If the engine is cold, the diesel preheat indi-
cation lamp is on for a longer time.
l [Except for vehicles equipped with keyless
operation system]
When the engine has not been started within about 5 seconds after the diesel preheat indi- cation lamp went out, return the ignition
switch to the “LOCK” position. Then, turn
the ignition switch to the “ON” position to preheat the engine again.
l When the engine is warm, the diesel preheat
indication lamp does not come on even if the
ignition switch is placed in the “ON” posi-
tion or the operation mode is in ON.Fuel filter indication lamp
E00509901353
This indication lamp illumi-
nates when the ignition switch is turned to the “ON”
position or the operation
mode is put in ON, and goes off after the engine has star-
ted. If it lights up while the engine is running,
it indicates that water has accumulated inside the fuel filter; if this happens, take action as
follows.
Remove the water from the fuel filter. Refer to “Removal of water from the fuel filter” on
page 8-11.
When the lamp goes out, you can resume driving. If it either does not go out or comes
on from time to time, we recommend you to have the vehicle inspected.
Indication lamps
5-14OKTE18E1Instruments and controls5