2018 MERCEDES-BENZ CLA COUPE fuel type
[x] Cancel search: fuel typePage 18 of 326
Remote controlGarag edooro pener ....................... 252
Programming (garag edoor
opener) .......................................... 252
Replacing bulbs
Brake lamp .................................... 106
High-beam headlamp s................... 106
Important safety notes .................. 104
Installing/removing the cover
(front wheela rch).......................... 105
Low-bea mheadlamp s.................... 105
Overview of bulb types .................. 104
Rear fog lamp ................................ 106
Turn signal s(front) ......................... 106
Turn signal s(rear) .......................... 106
Reporting safety defects .................... 28
Rescue card ......................................... 29
Reserve (fuel tank)
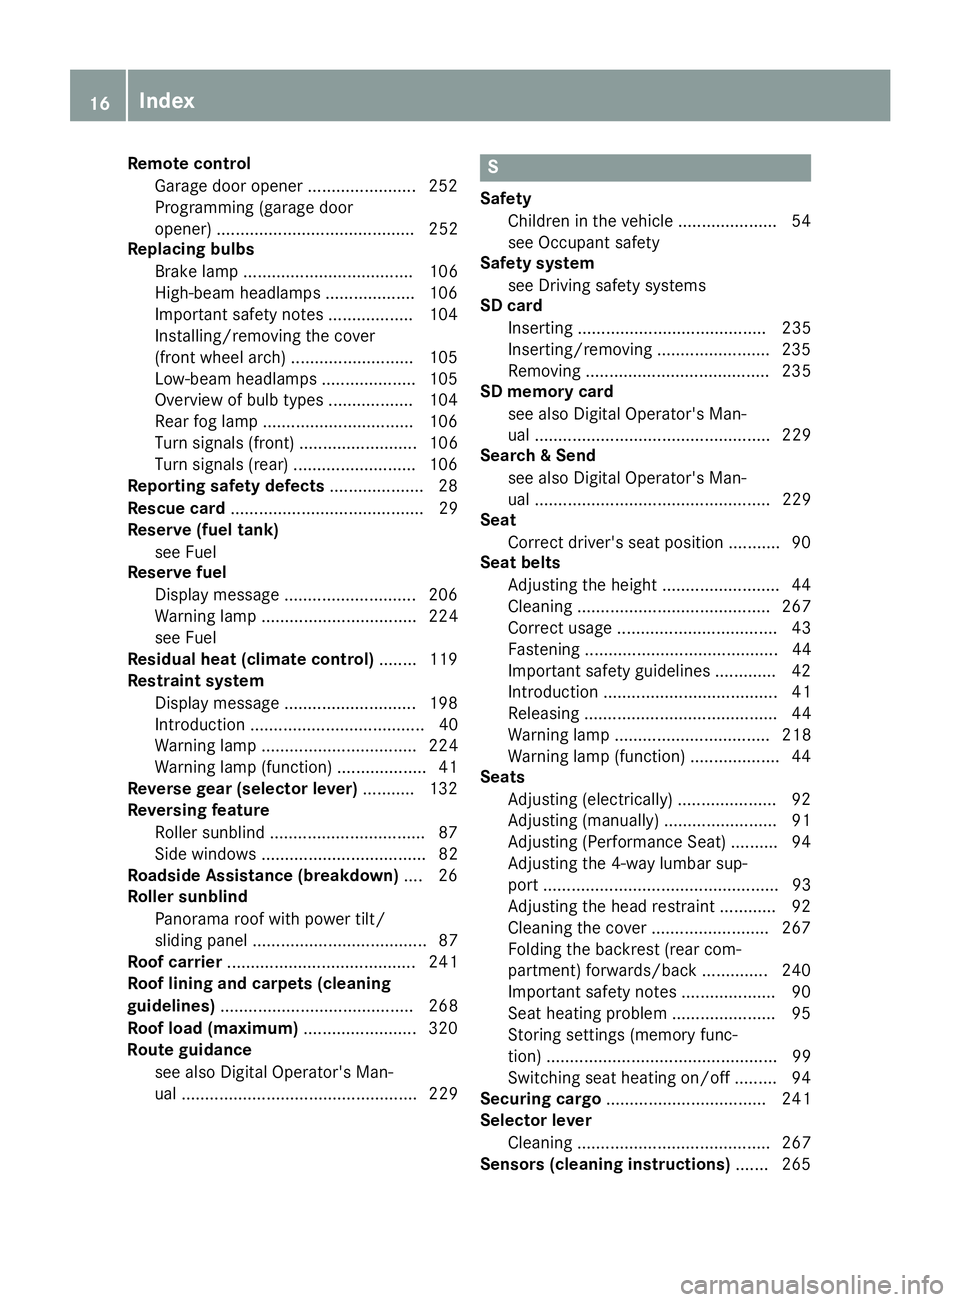
see Fuel
Reserve fuel
Displa ymessage ............................ 206
Warning lamp ................................. 224
see Fuel
Residual hea t(clim ate control) ........ 119
Restrain tsystem
Displa ymessage ............................ 198
Introduction ..................................... 40
Warning lamp ................................. 224
Warning lamp (function) ................... 41
Revers egear(selecto rlever )........... 132
Reversin gfeature
Roller sunblind ................................. 87
Sid ew indow s................................... 82
Roadside Assistance (breakdown) .... 26
Rolle rsunblind
Panorama roofw ithp ower tilt/
sliding panel ..................................... 87
Roo fcarrier ........................................ 241
Roo flinin gand carpets (cleaning
guidelines) ......................................... 268
Roo floa d( maximum) ........................ 320
Route guidance
see also Digital Operator's Man-
ual.................................................. 229S
Safety
Childre ninthe vehicl e..................... 54
see Occupant safety
Safety system
see Driving safety systems
SD card
Inserting ........................................ 235
Inserting/removing ........................ 235
Removing ....................................... 235
SD memory card
see also Digital Operator's Man-
ual.................................................. 229
Search &Send
see also Digital Operator's Man-
ua l.................................................. 229
Seat
Correct driver'ss eatposition ........... 90
Seat belts
Adjusting the height ......................... 44
Cleaning ......................................... 267
Correct usag e.................................. 43
Fastening ......................................... 44
Important safety guideline s............. 42
Introduction ..................................... 41
Releasing ......................................... 44
Warning lamp ................................. 218
Warning lamp (function) ................... 44
Seats
Adjusting (electrically) ..................... 92
Adjusting (manually) ........................ 91
Adjusting (Performance Seat) .......... 94
Adjusting the 4-wa ylum bars up-
por t.................................................. 93
Adjusting the headr estraint ............ 92
Cleaning the cover. ........................ 267
Folding the backrest( rear com-
partment) forwards/back .............. 240
Important safety notes .................... 90
Seath eating problem ...................... 95
Storing settings (memory func-
tion) ................................................. 99
Switching seath eating on/off......... 94
Securing cargo .................................. 241
Selecto rlever
Cleaning ......................................... 267
Sensors (cleaning instructions) ....... 265
16Index
Page 56 of 326
sive role in the deployment of an air bag. Nor do
they provide an indication of air bag deploy-
ment.
The vehicle can be deformed considerably, with-
out an air bag being deployed. This is the case if only parts which are relatively easilyd eformed
are affected and the rate of deceleration is not
high. Conversely, air bags may be deployed even
though the vehicle suffers only minor deforma-
tion. This is the case if, for example, very rigid
vehicle parts such as longitudinal body mem-
bers are hit, and sufficient deceleration occurs
as aresult.
If the restraint system control unit detects aside
impact or if the vehicle rolls over, the applicable
componentsoft he restraint system are activa-
ted independently of each other depending on
the apparent type of accident.
RSide impact air bags on the side where the
impact takes place, independently of the
EmergencyT ensioning Device and the use of
the seat belt on the driver's seat and outer
seats in the second row
The side impact air bag on the front-
passenger side deploysu nder the following
conditions:
-the OCS system detects that the front-
passenger seat is occupied or
-the seat belt buckle tongue is engaged in
the belt buckle of the front-passenger seat
RWindow curtain air bag on the side of impact, independently of the use of the seat belt and
independently of whether the front-
passenger seat is occupied
REmergencyT ensioning Devices, if the system
determines that deployment can offer addi-
tional protection in this situation
RWindow curtain air bags on the driver's and
front-passenger side in certain situations
when the vehicle rolls over, if the system
determines that deployment can offer addi-
tional protection to that provided by the seat
belt
iNot all air bags are deployed in an accident.
The different air bag systems work independ- ently of each other. How the air bag system works is determined
by the severity of the accident detected,
especially the vehicle deceleration or accel-
eration and the apparent type of accident:
RFrontal collision
RSide impact
RRollover
Automatic measures after an acci-
dent
Immediately after an accident, the following
measures are implemented, depending on the
type and severity of the impact:
Rthe hazard warning lamps are activated
Rthe emergency lighting is activated
Rthe vehicle doors are unlocked
Rthe front side windows are lowered
Rthe engine is switched off and the fuel supply
is cut off
Rvehicles with mbrace: automatic emergency
call
Children in the vehicle
Important safety notes
Accident statistics show that children secured
in the rear seats are safer than children secured
in the front-passenger seat. For this reason,
Mercedes-Benz strongly advises that you install
ac hild restraint system on arear seat. Children
are generally better protected there.
If ac hild younger than twelve years old and
under 5ft(1.50 m) in height is traveling in the
vehicle:
Ralways secure the child in achild restraint
system suitable for Mercedes-Benz vehicles.
The child restraint system must be appropri-
ate to the age, weight and size of the child
Rbe sure to observe the instructions and safety
notes in this section in addition to the child
restraint system manufacturer's installation
instructions
Rbe sure to observe the instructions and safety notes on the "Occupant classification system
(OCS)" (
Ypage 47)
54Children in the vehicle
Safety
Page 141 of 326
You must make sure that fuel does not comeint oc ontac twith your skin ,eyes or clothing
and that it is not swallowed. Do not inhale fuel
vapors.K eep fuel away from children.
If you or others com eintoc ontac twith fuel,
observet he following:
RWash away fuel from skin immediately
using soap and water.
RIf fuel comes int ocontac twith your eyes,
immediately rinse the mthoroughly with
clean water. Seek medical assistanc ewith-
out delay.
RIf fuel is swallowed, seek medical assis-
tance without delay. Do not induc evomit-
ing.
RImmediately change out of clothing which
has com eintoc ontac twith fuel.
GWARNING
Electrostatic buildup can create sparksa nd
ignit efuel vapors.T here isarisk of fire and
explosion.
Always touc hthe vehicle body beforeo pening
the fuel filler flap or touching the fuel pump
nozzle. An yexisting electrostatic buildup is
thereby discharged.
!Do not use diesel to refuel vehicles with a
gasolinee ngine. Do not switc honthe ignition
if you accidentally refuel with the wrongf uel.
Otherwise, the fuel will enter the fuel system. Even small amount softhe wrongf uel could
result in damage to the fuel syste mand the
engine. Notify aqualified specialis tworkshop
and have the fuel tan kand fuel lines drained
completely.
!Overfilling the fuel tan kcould damage the
fuel system.
!Take care not to spill any fuel on painted
surfaces. You could otherwise damage the
paintwork.
!Use afilter when adding fuel from afuel can.
The fuel lines and/or the fuel injection system
could otherwise be blocked by particles from
the fuel can. Do not get int
othe vehicle again during the refu-
eling process. Otherwise, electrostatic charge
could build up again.
If you overfill the fuel tank, fuel could spray out
when the fuel pump nozzle is removed.
For further information on fuel and fuel quality
(
Ypage 315).
Refueling
Genera linformation
Pay attention to the importan tsafetyn otes
(Ypage 138).
The fuel filler flap is unlocked/locked automat-
ically when you unlock/lock the vehicle with the
SmartKey.
The position of the fuel filler cap is displayed
æ in the instrumentc luster. The arrow on the
filling pump indicates the side of the vehicle.
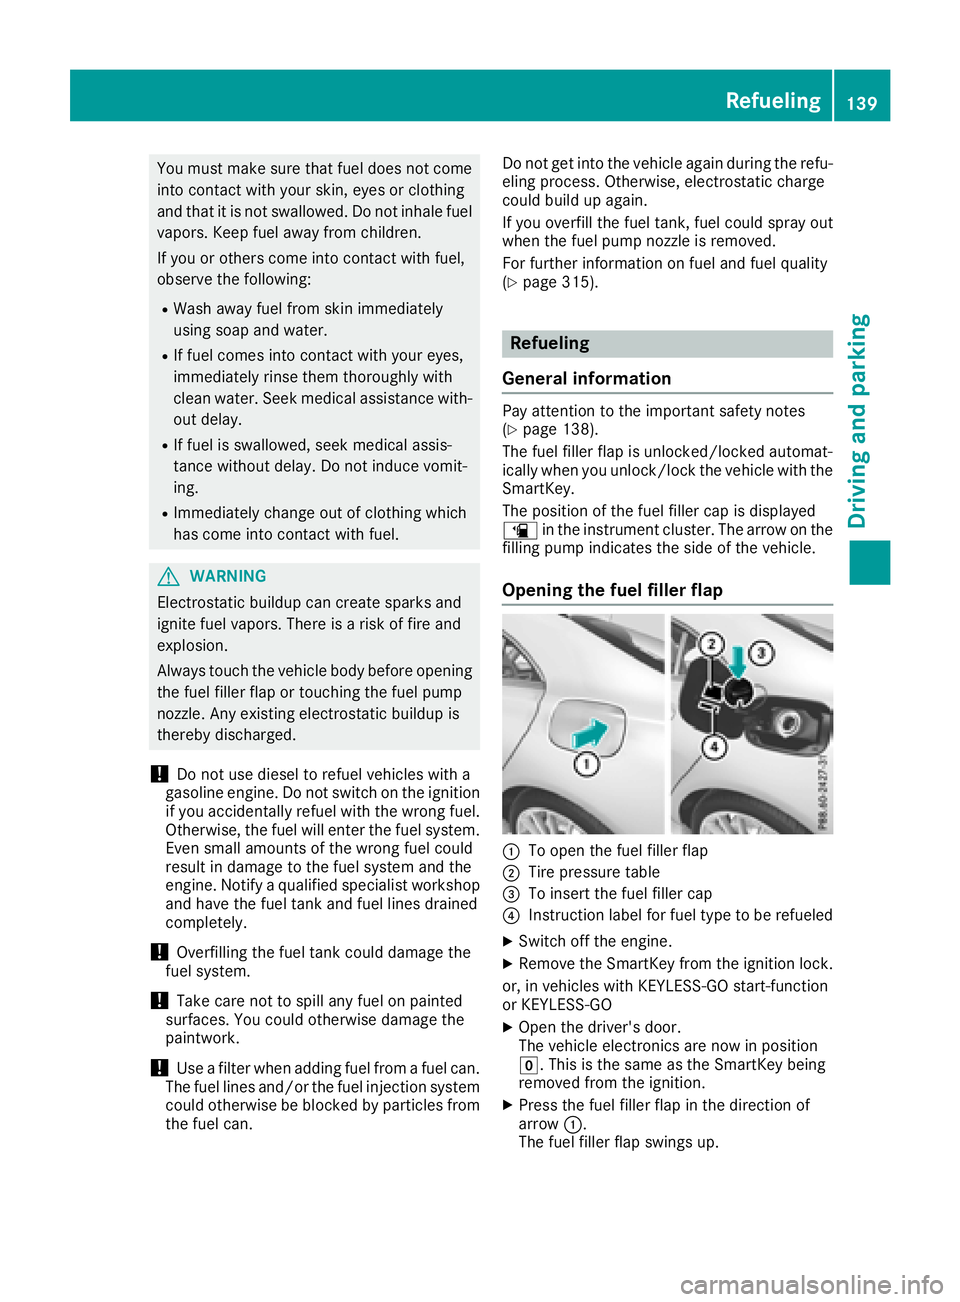
Opening th efuel filler flap
:To open the fuel filler flap
;Tire pressure table
=To inser tthe fuel filler cap
?Instruction label for fuel type to be refueled
XSwitch off the engine.
XRemove the SmartKey from the ignition lock.
or, in vehicles with KEYLESS-GO start-function
or KEYLESS‑ GO
XOpen the driver's door.
The vehicle electronics are now in position
g.This is the same as the SmartKey being
removed from the ignition.
XPress the fuel filler flap in the direction of
arrow :.
The fuel filler flap swings up.
Refueling139
Driving and parking
Z
Page 226 of 326
Warning/
indicator
lampNSignal type
Possiblec auses/consequences and M
Solutions
!FNF (USA only), !(Canada only): the red indicator lamp for the electric
parking brake flashes or lights up and/or the yellow warning lamp for the electric
parking brake lights up.
XObserve the additiona ldisplay messages in the multifunction display.
6N The red restraint system warning lamp is lit while the engine is running.
The restraint system is malfunctioning.
GWARNING
The air bagsorE mergency Tensioning Devices may either be triggeredu ninten-
tionally or, in the event of an accident, may not be triggered.
There is an increased risk of injury.
XObserve the additionald isplay messages in the multifunction display.
XDrive on carefully.
XContactaqualified specialist workshopa nd have the restraint system checked.
For further information about the restraint system, see (
Ypage4 0).
Engine
Warning/
indicator
lampNSignal type
Possiblec auses/consequences and M
Solutions
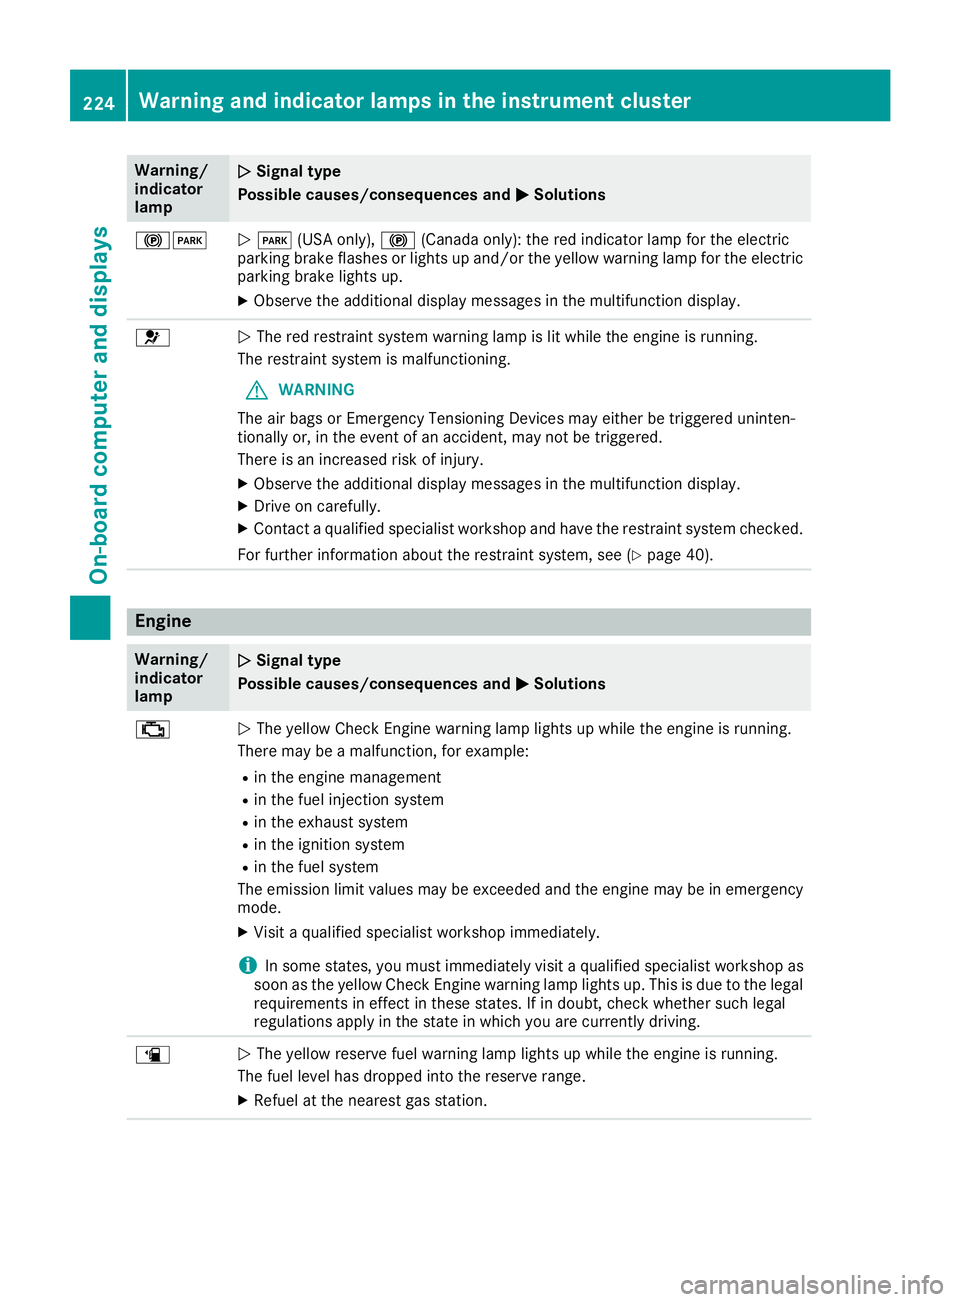
;NThe yellow Check Engine warning lamp lights up while the engine is running.
There may be amalfunction, for example:
Rin the engine management
Rin the fuel injection system
Rin the exhaust system
Rin the ignitio nsystem
Rin the fuel system
The emission limitv alues may be exceededa nd the engine may be in emergency
mode.
XVisitaq ualified specialist workshopi mmediately.
iIn some states, you must immediatel yvisit aqualified specialist workshopa s
soon as the yellow Check Engine warning lamp lights up. This is due to the legal
requirements in effect in these states. If in doubt, check whethers uch legal
regulations apply in the state in which you are currently driving.
æN The yellow reserve fuel warning lamp lights up while the engine is running.
The fuel levelh as dropped into the reserve range.
XRefuel at the neares tgas station.
224Warning and indicator lamps in the instrument cluster
On-board computer and displays
Page 227 of 326
Warning/
indicator
lampNSignal type
Possiblec auses/consequences and M
Solutions
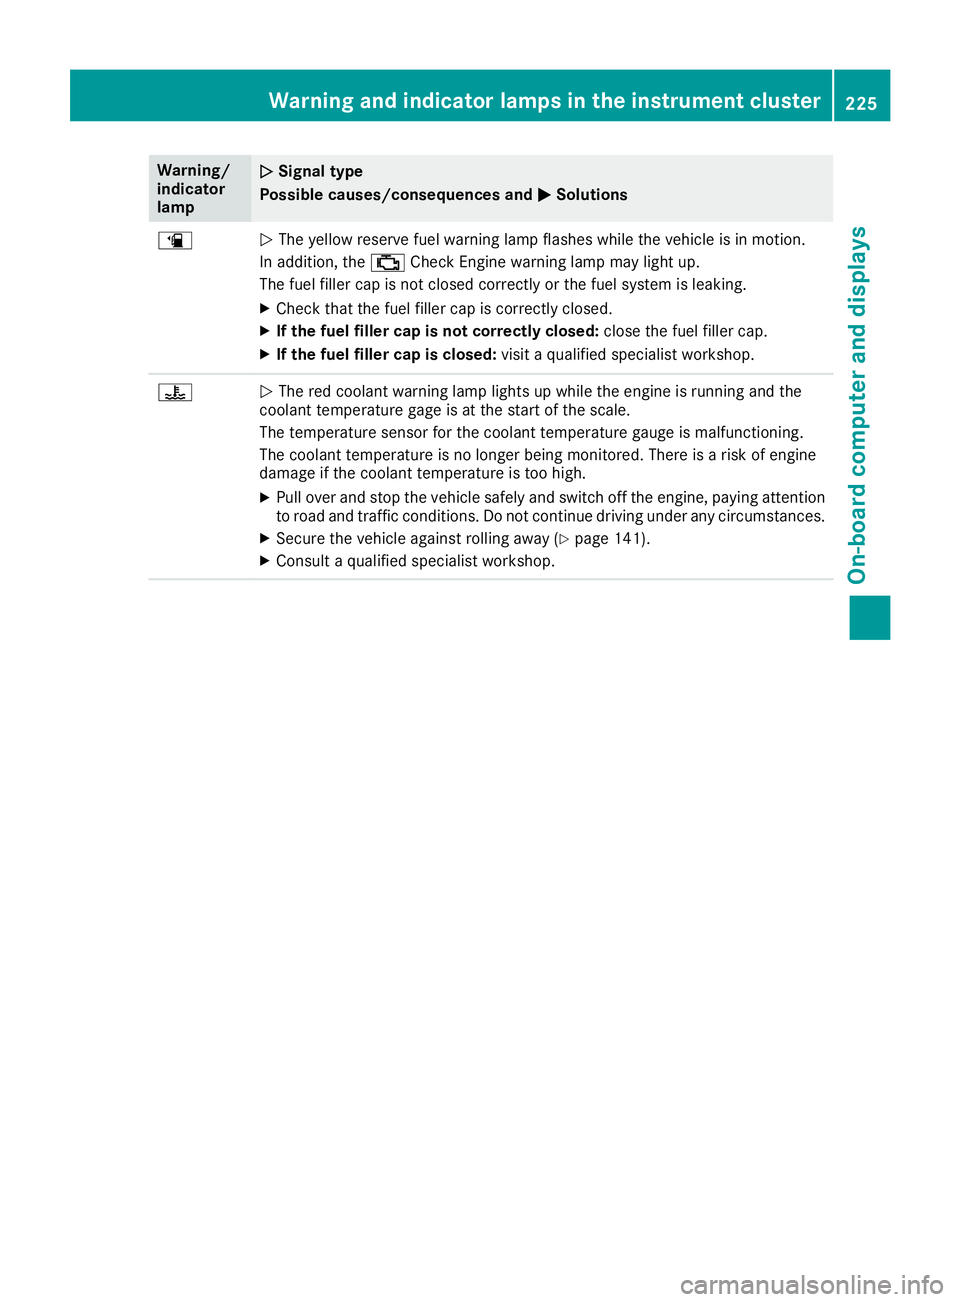
æNThe yellow reserve fuel warning lamp flashes while the vehicleisinm otion.
In addition, the ;Check Engine warning lamp may light up.
The fuel filler cap is not closed correctly or the fuel system is leaking.
XCheck that the fuel filler cap is correctly closed.
XIf the fuel filler cap is not correctly closed: close the fuel filler cap.
XIf the fuel filler cap is closed:visitaqualified specialist workshop.
?NThe red coolant warning lamp lights up while the engine is running and the
coolant temperature gage is at the start of the scale.
The temperature sensor for the coolant temperature gauge is malfunctioning.
The coolant temperature is no longer being monitored.T here isarisk of engine
damage if the coolant temperature is too high.
XPul lover and stop the vehicles afelyand switch off the engine, paying attention
to road and traffic conditions. Do not continue driving under any circumstances.
XSecure the vehiclea gainst rolling away(Ypage141).
XConsult aqualified specialist workshop.
Warning and indicator lamps in the instrument cluster225
On-board computer and displays
Z
Page 300 of 326
CountryRadio type approval number
ne doit pas produire de brouil-
lage, et (2) L'autisatuer de l'ap-
pareil doit accepter tout brouil-
lage radioelectrique subi, meme
si le brouillage est susceptible
d'en compromettre le fonc-
tionnement. WARNING: Changes
or modifications not expressively
approved by thepartyr esponsi-
ble for compliance could void the
users authorityt ooperate the
equipment .The ter m"IC:"b efore
th er adio certification number
onl ysignifies Canada technical
specifications were met.
CanadaIC: 2546A-MW2433A
IC:2546A-GG4 This devic ecom-
plies with part 15 of th eFCC
rules and with licens eexempt
RSS standards of Industry Can-
ada. Operatio nissubject to the
following conditions. (1) This
devic emay not cause harmful
interference, and (2) This device
must accept any interference
received ,includingi nterference
that may cause undesiredo per-
ation. Le present appareil est
conforme d'industrie Canada
applicables aux appereils radio
exemptsdel icense. L'exploita-
tio ne st authorisee aux deux con-
ditionss uivantes.(1). L'appareil
ne doit pas produire de brouil-
lage, et (2) L'autisatuer de l'ap-
pareil doit accepter tout brouil-
lage radioelectrique subi, meme
si le brouillage est susceptible
d'en compromettre le fonc-
tionnement. WARNING: Changes
or modifications not expressively
approved by th epartyr esponsi-
ble for compliance could void the
users authorityt ooperate the
equipment .The ter m"IC:"b efore
th er adio certification number
onl ysignifies Canada technical
specifications were met.
IC: 2546A-MC34MA4
Loading th evehicle
Instruction labels for tires and loads
GWARNING
Overloadedt ires can overheat,c ausing a
blowout.O verloadedt ires can also impair the
steeringa nd driving characteristic sand lead
to brakef ailure. Thereisar isk of accident.
Observe th eload rating of th etires. The load
rating must be at least half of th eGAWR of
your vehicle .Never overload th etires by
exceedingt hemaximum load.
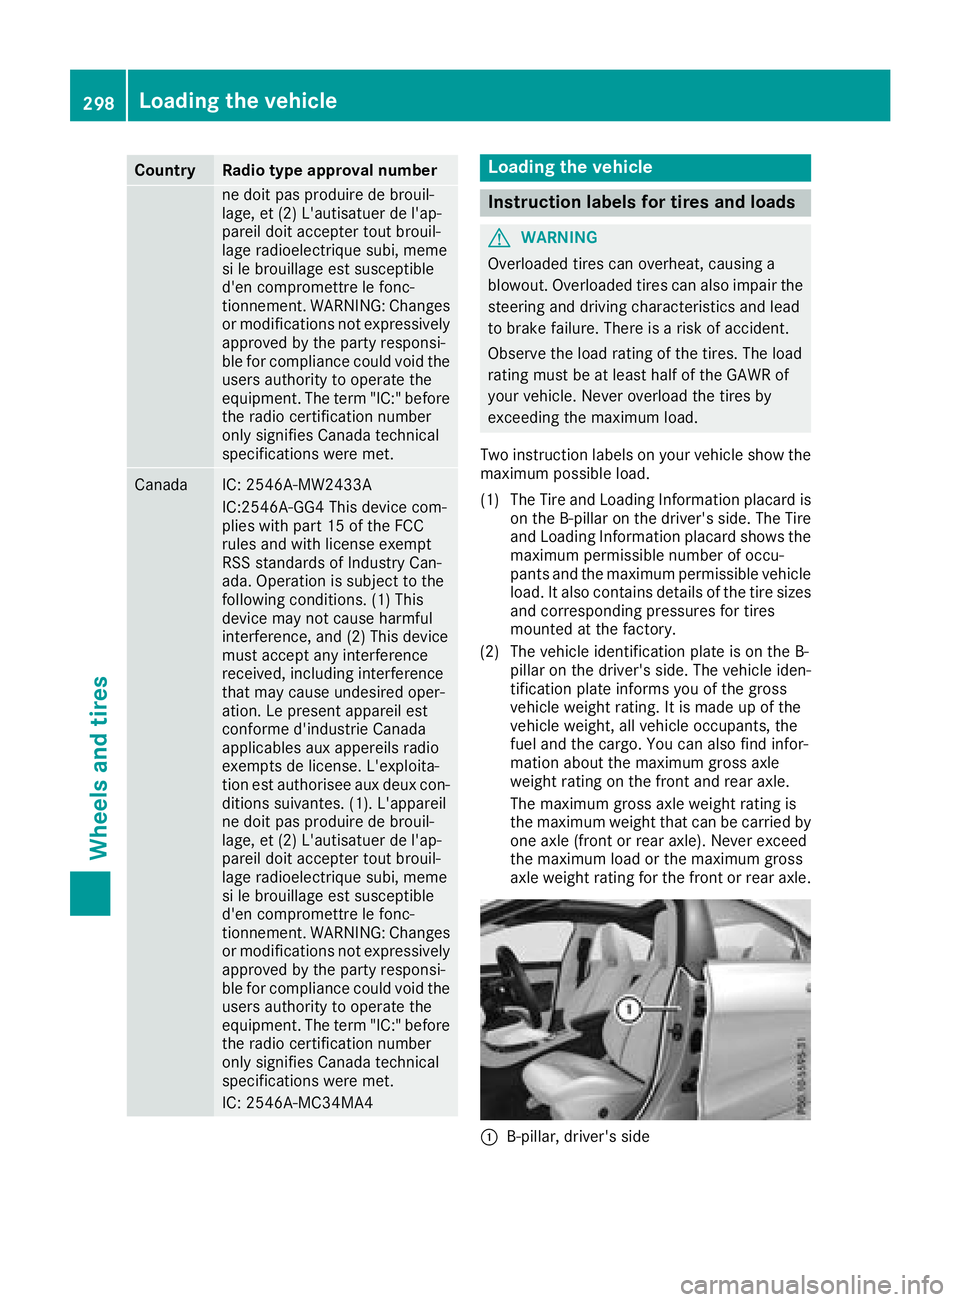
Two instruction labels on your vehicle show the maximum possible load.
(1) The Tire and LoadingI nformation placar dis
on th eB-pillar on th edriver' sside. The Tire
and LoadingI nformation placar dshows the
maximum permissible number of occu-
pant sand th emaximum permissible vehicle
load. It also contain sdetails of th etires izes
and corresponding pressures for tires
mounted at th efactory.
(2) The vehicle identification plateisont heB-
pillar on th edriver' sside. The vehicle iden-
tification platei nformsyou of thegross
vehicle weight rating .Itismade up of the
vehicle weight,a ll vehicle occupants, the
fuel and th ecargo. You can also fin dinfor-
mation about th emaximum gross axle
weight rating on th efront and rear axle.
The maximum gross axle weight rating is
th em aximum weight that can be carried by
one axle (front or rear axle) .Never exceed
th em aximum load or th emaximum gross
axle weight rating for th efront or rear axle.
:B-pillar ,driver' sside
298Loading th evehicle
Wheels and tires
Page 314 of 326
Wheeland tire combinations
General notes
You can ask for information regarding permitted
wheel/tire combinations at an authorized
Mercedes-Benz Center.
You should regularl ycheck the pressure of the
emergency spare wheel, particularly priort o
long trips, and correct the pressure as neces-
sary (
Ypag e290). The valu eonthe wheel is
valid.
!For safety reasons, Mercedes-Benz recom-
mends that you only use tires and wheels
which have been approved by Mercedes-Benz
specifically for you rvehicle.
These tires have been speciall yadapted for
use with the control systems, such as ABS or
ESP
®,a nd are marked as follows:
RMO = Mercedes-Benz Original
RMOE = Mercedes-Benz Original Extended
(tires featuring run-fla tcharacteristics)
RMO1 = Mercedes-Benz Original (only cer-
tain AMG tires)
Mercedes-Benz Original Extended tires may
only be use donwheels that have been spe-
cifically approved by Mercedes-Benz.
Only use tires, wheels or accessories tested
and approved by Mercedes-Benz. Certain
characteristics, e.g. handling, vehiclen oise
emissions or fuel consumption, may other-
wis ebea dversely affected .Inaddition, when
driving with aload, tire dimension variations
coul dcaus ethe tires to come into contact
with the bodywork and axle components. This
coul dresult in damage to the tires or the vehi-
cle.
Mercedes-Benz accepts no liability for dam-
age resulting from the use of tires, wheels or
accessories other than those tested and
approved.
Informatio nontires, wheels and approved
combinations can be obtained from any quali-
fied specialist workshop.
!Retreaded tires are neither tested nor rec-
ommendedbyM ercedes-Benz, since previ-
ous damage cannot alway sbedetected on
retreaded tires. As aresult, Mercedes-Benz
cannot guarantee vehicles afety if retreaded
tires are mounted .Donot mount use dtires if
you have no information abo ut thei
r previous
usage. The recommendedp
ressures for various oper-
ating conditions can be found:
Ron the Tire and Loading Informatio nplacard
on the B-pillar on the driver's side
Rin the tire pressure tabl einthe fuel filler flap
Observe the notes on recommendedt ire pres-
sure sunder various operating conditions
(
Ypag e290).
Check tire pressures regularly,a nd only when
the tires are cold. Comply with the maintenance
recommendations of the tire manufacturer in
the vehicled ocument wallet.
Notes on the vehiclee quipment–alway sequip
the vehicle:
Rwith tires of the same size on agivena xle (left
and right)
Rwith the same type of tire (summer tires,
MOExtended tires, winter tires)
Exception: it is permissible to instal ladiffer-
ent type or make in the event of aflat tire.
Observe the "MOExtended tires (tires with
run-fla tcharacteristics" section (
Ypag e271).
Vehicles equipped with MOExtended tires are
not equipped with aTIREFIT kit at the factory.I t
is therefore recommendedt hat you additionally
equip you rvehiclew ithaTIREFIT kit if you mount
tires that do not feature run-fla tproperties, e.g.
winter tires. ATIREFIT kit may be obtained from
aq ualified specialist workshop.
312Wheela nd tire combinations
Wheels and tires