2018 MERCEDES-BENZ CLA COUPE oil change
[x] Cancel search: oil changePage 263 of 326
ASSYSTPLUS
Service message
The ASSYS TPLUSs ervic einterval display
inform syou of th enexts ervic edue date.
You can fin dinformation on th etypeofs ervice
and servic eintervals in th eMaintenance Book -
let .
You can obtain further information from an
authorize dMercedes-Benz Cente rorat
http://www.mbusa.co m(USAo nly).
iThe ASSYS TPLUSs ervic einterval display
does no tsho wa ny information on th eengine
oil level. Observ ethe note sont heengin eoil
level (
Ypage 258).
The multifunction display shows aservic emes-
sage for several seconds, e.g. :
RServiceAin..d ays
RServic eAdue
RServic eAoverdueby..d ays
Dependin gontheoperating condition softhe
vehicle, th eremaining time or distanc euntil th e
next servic edue dat eisdisplayed.
The lette rA
or B,possibl yinconnectio nwitha
number or another letter, indicates th etypeo f
service. A
standsfor am inor servic eand Bfor a
major service.
You can obtain further information from an
authorize dMercedes-Benz Center.
The ASSYS TPLUSs ervic einterval display does
no ttak eintoa ccoun tany periods of time during
whic hthe battery is disconnected.
Maintainin gthe time-dependen tservic esched-
ule:
XNot edown th eservic edue dat edisplayed in
th em ultifunction display before disconnect -
ing th ebattery.
or
XAfte rreconnecting th ebattery, subtrac tthe
battery disconnection periods from th eser-
vic ed ates hown on th edisplay.
Hiding aservice message
XPress th ea or% buttononthesteering
wheel.
Displaying service messages
XSwitc hont heignition .
XPress th e= or; buttontos elect th e
Serv.menu.
XPress th e9 or: buttontos elect th e
ASSYSTPLU Ssubmen uand confirm by press-
ing th ea button.
The servic edue dat eappear sinthemulti-
function display.
Infor mation abou tService
Resetting th eASSYSTP LUS service
interval display
!If th eASSYSTP LUSs ervic einterval display
has been inadvertentl yreset ,thiss etting can
be correcte dataqualified specialist work-
shop.
Hav eservic eworkc arrie dout as described in
th eM aintenance Booklet .This may otherwise
lead to increased wear and damag etothe
major assemblies or th evehicle.
Aq ualified specialist workshop ,e.g.ana uthor-
ized Mercedes-Benz Center, will reset th e
ASSYS TPLUSs ervic einterval display after th e
servic eworkh as been carrie dout.Y ou can also
obtain further information on maintenance
work, for example.
Special service requirements
The specifie dmaintenance interval takes only
th en orma loperation of th evehicl einto
account. Under arduous operating condition sor
increased load on th evehicle, maintenance
wor km ustbec arriedout mor efrequently, for
example:
Rregular cit ydrivin gwithf requen tintermediat e
stops
Rif th evehicl eisp rimarily used to travel short
distances
Ruse in mountainous terrain or on poor road
surfaces
Rif th eengineiso ften lef tidlin gfor lon gperiods
Rin particularly dust yconditi ons, or if air-recir-
culation mod eisfrequentl yused
In these or similar operating conditions, hav e
th ei nterior filter, engin eair cleaner, engin eoil
and oil filter, for example, changed mor efre-
ASSYST PLUS261
Maintenance and care
Z
Page 268 of 326
XMake sure that the vehicle is atastandstill
and the SmartKey is in key position 2in the
ignition lock.
XOpen the camera cover for cleaning via the
multimedia system (see the separate operat-
ing instructions).
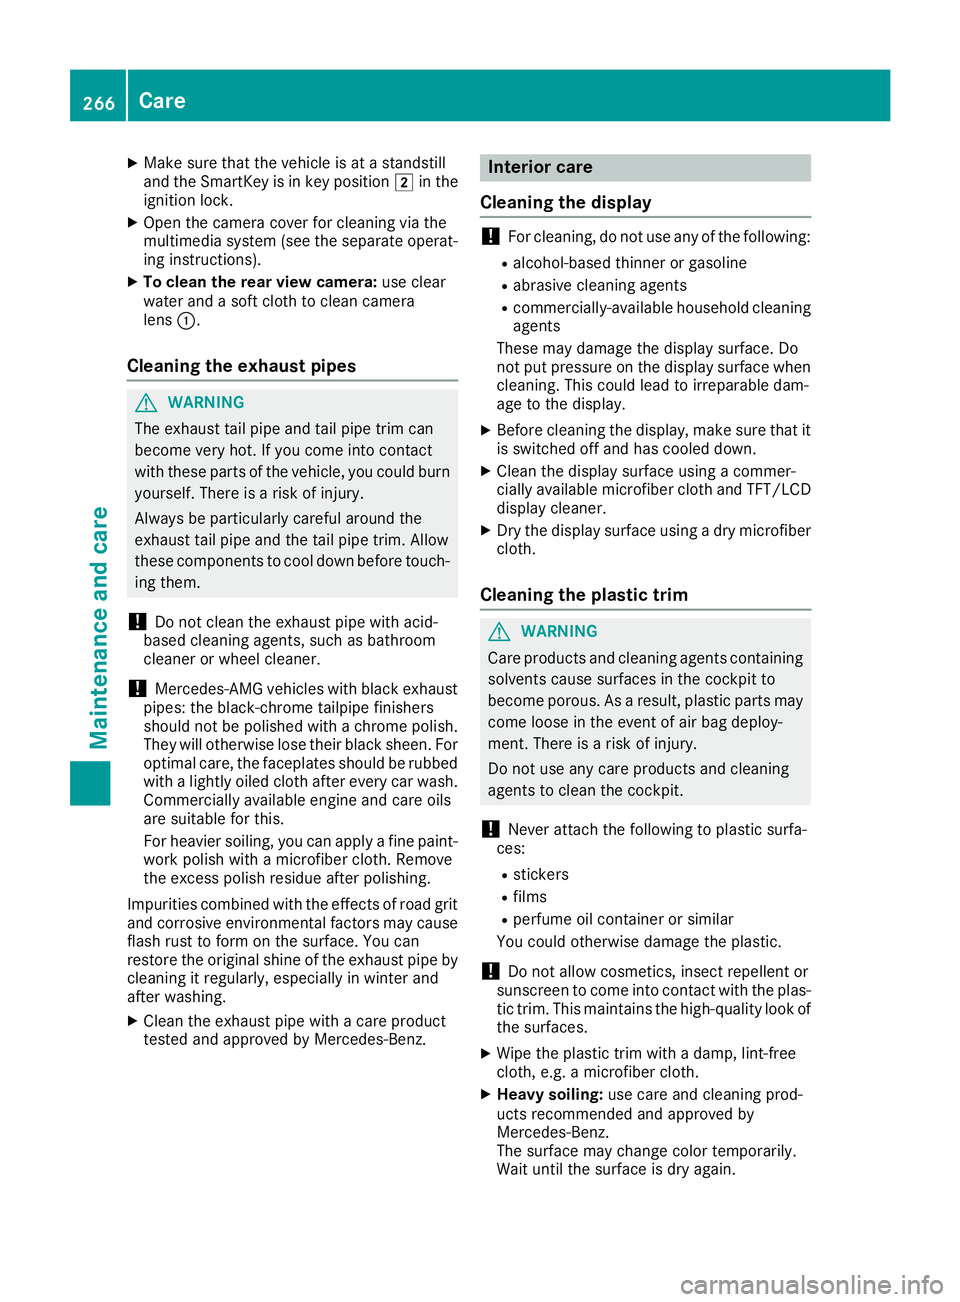
XTo clean the rear view camera: use clear
water and asoft cloth to clean camera
lens :.
Cleaningt he exhaust pipes
GWARNING
The exhaust tail pipe and tail pipe trim can
become very hot. If you come into contact
with these parts of the vehicle, you could burn
yourself. There is arisk of injury.
Always be particularly careful around the
exhaust tail pipe and the tail pipe trim. Allow
these components to cool down before touch-
ing them.
!Do not clean the exhaust pipe with acid-
based cleaning agents, such as bathroom
cleaner or wheel cleaner.
!Mercedes-AMG vehicles with black exhaust
pipes: the black-chrome tailpipe finishers
should not be polished with achrome polish.
They will otherwise lose their black sheen. For
optimal care, the faceplates should be rubbed with alightly oiled cloth after every car wash.
Commercially available engine and care oils
are suitable for this.
For heavier soiling, you can apply afine paint-
work polish with amicrofiber cloth. Remove
the excess polish residue after polishing.
Impurities combined with the effectsofr oad grit
and corrosive environmental factors may cause
flash rust to form on the surface. You can
restore the original shine of the exhaust pipe by
cleaning it regularly,e specially in winter and
after washing.
XClean the exhaust pipe with acare product
tested and approved by Mercedes-Benz.
Interior care
Cleaningt he display
!For cleaning, do not use any of the following:
Ralcohol-based thinner or gasoline
Rabrasive cleaning agents
Rcommercially-availableh ousehold cleaning
agents
These may damage the display surface. Do
not put pressure on the display surface when cleaning. This could lead to irreparable dam-
age to the display.
XBefore cleaning the display,m ake sure that it
is switched off and has cooled down.
XClean the display surface using acommer-
cially available microfiber cloth and TFT/LCD
display cleaner.
XDry the display surface using adry microfiber
cloth.
Cleaningt he plastic trim
GWARNING
Care products and cleaning agents containing solvents cause surfaces in the cockpit to
become porous. As aresult, plastic parts may
come loose in the event of air bag deploy-
ment. There is arisk of injury.
Do not use any care products and cleaning
agents to clean the cockpit.
!Never attach the following to plastic surfa-
ces:
Rstickers
Rfilms
Rperfume oil container or similar
You could otherwise damage the plastic.
!Do not allow cosmetics, insect repellent or
sunscreen to come into contact with the plas-
tic trim. This maintains the high-quality look of
the surfaces.
XWipe the plastic trim with adamp, lint-free
cloth, e.g. amicrofiber cloth.
XHeavy soiling: use care and cleaning prod-
ucts recommended and approved by
Mercedes-Benz.
The surface may change color temporarily.
Wait until the surface is dry again.
266Care
Maintenance and care
Page 310 of 326

Tire-mounting tools should not be used near
the valve. This could damage the electronic
components.
Only have tires changed ataqualified spe-
cialist workshop.
Observe the instructions and safety notes in the
"Changing awheel" section (
Ypage 307).
The wear pattern sonthe front and rear tires
differ, depending on the operating conditions.
Rotate the wheels before aclear wear pattern
has formed on the tires. Frontt ires typically
wear more on the shoulders and the rear tires in
the center.
On vehicles that have the same size front and
rear wheels, you can rotat ethe wheels accord-
ing to the intervals in the tire manufacturer's
warranty book in your vehicle documents. If no
warranty book is available, the tires should be
rotated every 3,000 to 6,000 miles (5,000 to
10,000k m).D ependin gontire wear, this may
be required earlier. Do not change the direction
of wheel rotation.
Clean the contact surfaces of the wheel and the brake disc thoroughly every time awheel is rota-
ted. Check the tire pressure and, if necessary,
restart the tire pressure loss warning system
(Canada only) or the tire pressure monitor (USA
only).
Direction of rotation
Tires with aspecified direction of rotation have
additional benefits ,e.g. if there is arisk of hydro-
planing. These advantages can only be gained if
the tires are installed corresponding to the
direction of rotation.
An arrow on the sidewall of the tire indicates its
correctd irection of rotation.
Storing wheels
Storewheels that are not being used in acool,
dry and preferably dark place. Protectt he tires
from oil, grease, gasoline and diesel.
Mounting awheel
Preparing the vehicle
XStop the vehicle on solid, non-slippery and
level ground.
XApply the electric parking brake manually.
XBring the front wheels into the straight-ahead position.
XShift the transmission to position j.
XSwitch off the engine.
XVehicles without KEYLESS-GO:remove the
SmartKey from the ignition lock.
XVehicles with KEYLESS-GO start-function
or KEYLESS-GO: open the driver's door.
The vehicle electronics are now in position
u.T his is the same as “key removed”.
XVehicles with KEYLESS-GO start-function
or KEYLESS-GO: remove the Start/Stop but-
ton from the ignition lock (
Ypage 122).
XMake sure that the engine cannot be started
via your smartphon e(Ypage 83).
XIf included in the vehicle equipment, remove
the tire-change tool kit from the vehicle.
XSafeguard the vehicle against rolling away
(Ypage 141).
iApart from certain country-specific varia-
tions, the vehicles are not equipped with a
tire-change tool kit. Some tools for changing a
wheel are specific to the vehicle. For more
information on which tools are required to
perform awheel change on your vehicle, con-
sult aqualified specialist workshop.
Necessary tire-changing tools can include, for
example:
RJack
RWheel chock
RLug wrench
308Changing awheel
Wheels and tires
Page 312 of 326

XUsing lug wrench:,loosen the bolts on the
wheel you wish to change by abouto ne full
turn. Do not unscrew the bolts completely.
Jacking points
The jacking points are located just behind the
front wheel housings and just in front of the rear
wheel housings (arrows).
Mercedes-AMG vehicles and vehicles with
AMG Line: to protect the vehicle body, the vehi-
cle has covers installed next to the jacking
points on the outer sills.
Covers, front (example: vehicles with AMG Line)
XMercedes-AMG vehicles and vehicles
with AMG Line: fold cover;upwards.
XTake ratchet wrench Aout of the vehicle tool
kit and place it on the hexagon nut of jack ?
so that the letters AUFare visible.
XPosition jack ?at jacking point =.
XMake sure the foot of the jack is directly
beneath the jacking point.
XTurn ratchet wrench Auntil jack ?sits
completely on jacking point =and the base
of the jack lies evenly on the ground.
XTurn ratchet wrench Auntil the tire is raised
am aximum of 1.2 in (3 cm )from the ground.
Removing awheel
!Do not place wheel bolts in sand or on adirty
surface. The bolt and wheel hub threads could
otherwise be damagedw hen you screw them
in.
XUnscrew the wheel bolts.
XRemove the wheel.
Mounting anew wheel
GWARNING
Oiled or greased wheel bolts or damaged
wheel bolts/hub threads can cause the wheel
310Changing awheel
Wheels and tires
Page 313 of 326
bolts to come loose. Asaresult, you could
lose awheel while driving .There is arisk of
accident.
Never oil or grease wheel bolts. In the event of
damage to the threads, contact aqualified
specialist workshop immediately. Have the
damaged wheel bolts or hub threads
replaced/renewed. Do not continue driving.
GWARNING
If you tighten the wheel bolts or wheel nuts
when the vehicle is raised, the jack could tip
over. There is arisk of injury.
Only tighten the wheel bolts or wheel nuts
when the vehicle is on the ground.
Always pay attention to the instructions and
safety notes in the "Changing awheel" section
(
Ypage 307).
Only use wheel bolts that have been designed
for the wheel and the vehicle. For safety rea-
sons, Mercedes-Benz recommends that you
only use wheel bolts which have been approved for Mercedes-Benz vehicles and the respective
wheel.
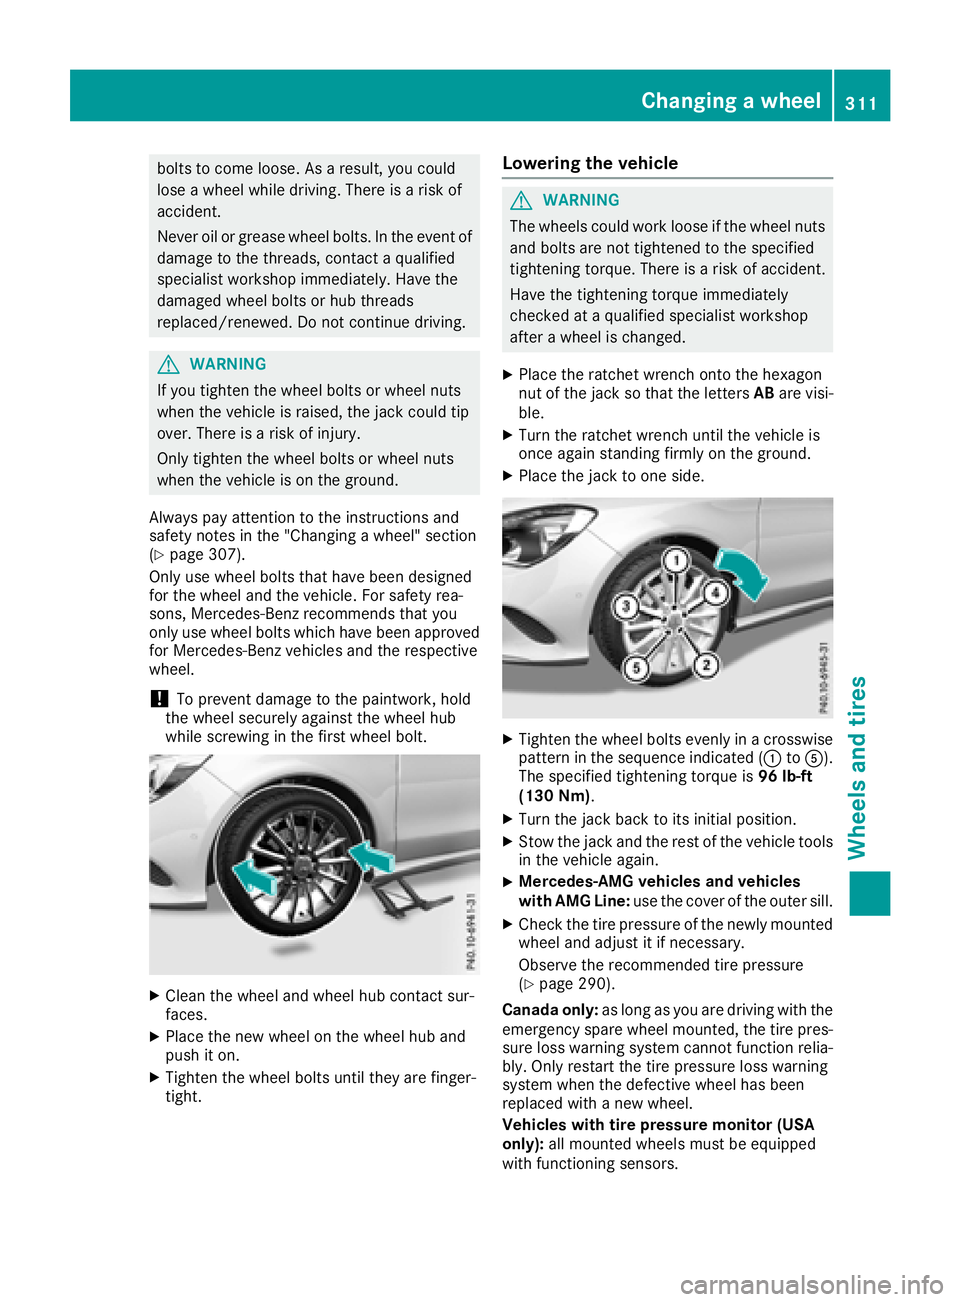
!To preventd amage to the paintwork, hold
the wheel securely against the wheel hub
while screwingint he first wheel bolt.
XClean the wheel and wheel hub contact sur-
faces.
XPlace the new wheel on the wheel hub and
push it on.
XTighten the wheel bolts until they are finger-
tight.
Lowering the vehicle
GWARNING
The wheels could work loose if the wheel nuts and bolts are not tightened to the specified
tightenin gtorque. There is arisk of accident.
Have the tightenin gtorque immediately
checked at aqualified specialist workshop
after awheel is changed.
XPlace the ratchet wrenc hontot he hexagon
nut of the jack so that the letters ABare visi-
ble.
XTurn the ratchet wrenc huntil the vehicle is
onc eagain standing firmly on the ground.
XPlace the jack to one side.
XTighten the wheel bolts evenly in acrosswise
pattern in the sequence indicated (: toA).
The specified tightenin gtorque is 96 lb-ft
(130 Nm) .
XTurn the jack back to its initial position.
XStow the jack and the rest of the vehicle tools
in the vehicle again.
XMercedes-AMG vehicles and vehicles
with AMG Line: use the cover of the outer sill.
XCheck the tire pressure of the newly mounted
wheel and adjust it if necessary.
Observe the recommended tire pressure
(
Ypage 290).
Canadao nly:as long as you are driving with the
emergency spare wheel mounted, the tire pres-
sure loss warning system cannot function relia-
bly. Only restart the tire pressure loss warning
system when the defective wheel has been
replaced with anew wheel.
Vehicles with tir epressure monitor (USA
only): all mounted wheels must be equipped
with functioning sensors.
Changing awheel311
Wheels and tires
Z
Page 319 of 326
Do not mix such fuelswitht he fuel recom-
mended for your vehicle.
!To ensur ethe longevity and full perform-
ance of the engine ,onlyp remium-grade
unleade dgasoline must be used.
If standard unleade dgasoline is unavailable
and yo uhavetor efuelwithu nleade dgasoline
of alower grade ,observe the following pre-
cautions:
ROnlyf illt he fuel tank to half full with regular
unleade dgasoline and fil lthe res twithp re-
mium-grad eunleade dgasoline as soo nas
possible.
RDo not drive at the maximum speed.
RAvoi dsudde nacceleratio nand engine
speeds ove r3,000 rpm.
Yo uw illu sually find informatio nabout the fuel
grade on the fuel pump. If yo ucanno tfind the
labe lont he fuel pump, as kthe gass tationstaff.
iFor furtheri nformation, consul taqualified
specialis tworkshop or visit
http://www.mbusa.com (USA only).
CL A2 50,CLA 250S port, CL A2504MATIC,
CL A2 50Sport 4MATIC: asatemporary meas-
ure, if the recommende dfuelisn ot available,
yo um ayalso us eregular unleade dgasoline with
an octane rating of 88 AKI /93 RON.
All othe rmodels: asatemporary measure, if
the recommende dfuelisn otava
ilable, yo
umay
also us eregular unleade dgasoline with an
octane rating of 87 AKI/91 RON. Thi smay
reduce engine performance and increase fuel
consumption. Avoi ddrivin gatf ullt hrottle and
sudden acceleration. Never refue lusing gaso-
line with alower AKI.
Informatio nonrefueling (
Ypage 139).
Additives
!Operating the engine with fuel additives
adde dlater can lead to engine failure. Do not
mix fuel additive swithf uel. Thisd oesn ot
includ eaddit ivesfor the remova land preven-
tio nofr esidue buildup. gasoline must onl ybe
mixed with additive srecommende dby
Mercedes-Benz. Compl ywitht he instructions
for us eonthe product label. Mor einformation
abou trecommende daddit ivesc an be
obtained froma ny authorizedMercedes-Benz
Center.
Mercedes-Benz recommends thaty ouuseb ran-
de df uels thath avea ddit ives. The fuel quality availabl
einsomecountries may
not be sufficient. Residu ecould buil dupinthe
fuel injectio nsystem as aresult. In such cases,
and in consultation with an authorized
Mercedes-Benz Center, the fuel maybem ixed
with the cleaning additive recommende dby
Mercedes-Benz. Yo umusto bserve the notes
and mi
xing ratio sspecifie dont he container.
Engine oil
General notes
!Do not us eengine oi lorano ilfilter with
specifications deviating fromt hoseexpressly
required for the prescribe dservic eintervals.
Do not change the engine oi loroilfilter in
order to set replacement intervals longe rthan
thos eprescribed. Thi scould otherwis ecause
damage to the engine or exhaust gasa fter-
treatment.
Follo wthe instructions on the servic einterval
displa yfor changing the engine oil. Thi scould
otherwis ecause damage to the engine or
exhaust gasa ftertreatment.
When handling engine oil, observe the important
safety note sonserviceproducts (
Ypage 315).
The engine oils ar ematchedtot he performance
of Mercedes-Benz engine sand servic eintervals.
Yo us houl dtherefore onl yuseengine oils and oil
filters thata reapproved for vehicles with main-
tenance systems.
For alistofa pproved engine oils and oi lfilters,
consul tanauthorize dMercedes-Benz Center.
Or visit the website
http://bevo.mercedes-benz.co m.
The table shows which engine oils have been
approved for your vehicle.
Service products and filling capacities317
Technical data
Z
Page 320 of 326
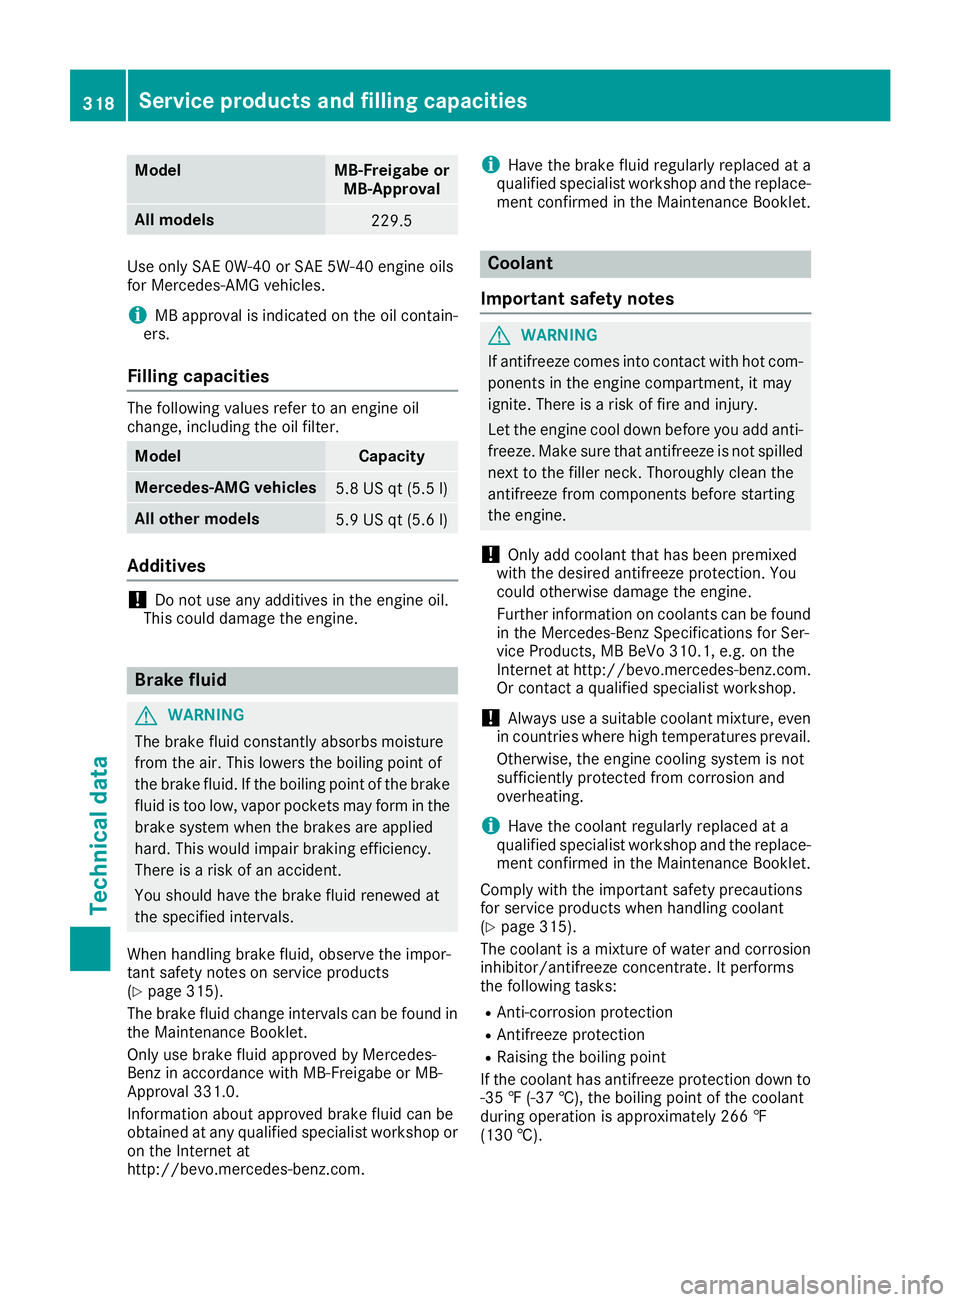
ModelMB-Freigabe orMB-Approval
All models229.5
Use only SAE 0W-40 or SAE 5W-40 engine oils
for Mercedes-AMG vehicles.
iMB approval is indicated on the oil contain-
ers.
Fillingc apacities
The following values refer to an engine oil
change, including the oil filter.
ModelCapacity
Mercedes‑AM Gvehicles5.8 US qt (5.5 l)
All other models5.9 US qt (5.6 l)
Additives
!Do not use any additives in the engine oil.
This could damage the engine.
Brake fluid
GWARNING
The brake flui dconstantly absorbs moisture
from the air. This lowers the boiling point of
the brake fluid. If the boiling point of the brake
flui dist oo low,v aporpockets may form in the
brake system when the brakes are applied
hard. This would impair braking efficiency.
There is arisk of an accident.
You should have the brake flui dreneweda t
the specified intervals.
When handling brake fluid, observe the impor-
tant safety notes on service products
(
Ypag e315).
The brake flui dchange interval scan be found in
the Maintenance Booklet.
Only use brake flui dapproved by Mercedes-
Benz in accordance with MB-Freigabe or MB-
Approval3 31.0.
Information about approved brake flui dcan be
obtained at any qualified specialist workshop or
on the Internet at
http://bevo.mercedes-benz.com.
iHave the brake flui dregularl yreplaced at a
qualified specialist workshop and the replace-
ment confirmed in the Maintenance Booklet.
Coolant
Important safety notes
GWARNING
If antifreeze comes into contact with hot com- ponents in the engine compartment, it may
ignite. There is arisk of fire and injury.
Let the engine cool down before you add anti-
freeze. Make sure that antifreeze is not spilled
next to the filler neck. Thoroughly cleant he
antifreeze from components before starting
the engine.
!Only add coolant that has been premixed
with the desired antifreeze protection. You
coul dotherwise damage the engine.
Further information on coolants can be found
in the Mercedes-Benz Specifications for Ser-
vice Products, MB BeVo 310.1, e.g. on the
Internet at http://bevo.mercedes-benz.com.
Or contact aqualified specialist workshop.
!Always use asuitable coolant mixture, even
in countries where high temperatures prevail.
Otherwise, the engine cooling system is not
sufficiently protected from corrosiona nd
overheating.
iHave the coolant regularl yreplaced at a
qualified specialist workshop and the replace-
ment confirmed in the Maintenance Booklet.
Comply with the important safety precautions
for service products when handling coolant
(
Ypag e315).
The coolant is amixture of water and corrosion
inhibitor/antifreeze concentrate. It performs
the following tasks:
RAnti-corrosion protection
RAntifreeze protection
RRaising the boiling point
If the coolant has antifreeze protection down to -35 ‡(-37 †), the boiling point of the coolant
during operation is approximatel y266 ‡
(130 †).
318Servicep roducts and filling capacities
Technical data