Page 73 of 340

•
Remote Control Key system (where fitted)
—“ Push-button ignition switch (models with Re-
mote Control Key system)” in the “5. Starting
and driving” section
• Oil control system (where fitted)
—“
Oil control system (where fitted for diesel
engine model)” later in this section
• Tyre Pressure information (where fitted)
—“
Tyre Pressure Monitoring System (TPMS)
(where fitted)” in the “5. Starting and driving”
section HOW TO USE THE VEHICLE
INFORMATION DISPLAY
The vehicle information display can be changed us-
ing the and BACK buttons located on the
left side of the steering wheel.
m Back
button
jA
Press the BACK button to return to the previous dis-
play screen or menu level, or to cancel the selection if it is not completed.
m orm Display
scrolling switch
jB
The display scrolling switch can be used in three dif-
ferent ways. Push to scroll up or
to scroll
down through the items in the vehicle information
display. Press jBt oselect an item in the
display, then push or to scroll through the
associated menu options.
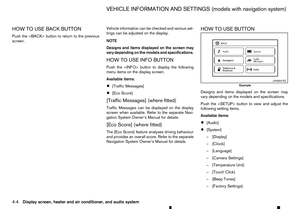
SETTINGS
The settings mode allows you to change the infor-
mation displayed in the vehicle information display:
• [Driver Assistance]
• [Clock]
• [Display Settings]
• [Vehicle Settings]
• [Maintenance]
• [Alert]
• [Tyre Pressures] (where fitted)
• [Units]
• [Language]
• [Factory Reset] NIC3083
Type A
NIC3124
Type B
Instruments and controls2-15
Page 74 of 340
![RENAULT ALASKAN 2017 Owners Manual NOTE
The Settings menu cannot be operated while
driving.
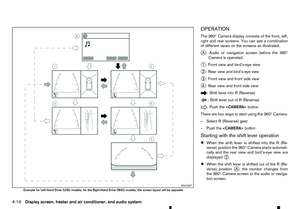
[Driver Assistance]
Use the or switches and the <ENTER> button
to change the status, or turn on or off any of the sys-
tems displayed in the [D RENAULT ALASKAN 2017 Owners Manual NOTE
The Settings menu cannot be operated while
driving.
[Driver Assistance]
Use the or switches and the <ENTER> button
to change the status, or turn on or off any of the sys-
tems displayed in the [D](/manual-img/7/58394/w960_58394-73.png)
NOTE
The Settings menu cannot be operated while
driving.
[Driver Assistance]
Use the or switches and the button
to change the status, or turn on or off any of the sys-
tems displayed in the [Driver Assistance] menu. The
following menu options are available:
[Driving Aids] (where fitted):
The [Driving Aids] option has asub-menu, from
which you can choose whether to turn ONorOFF
the following item:
• [Emergency Brake]
Select this item to enable/disable the Active
Emergency Braking system. For additional infor-
mation see, “Active Emergency Braking system
(where fitted)” in the “5. Starting and driving”
section.
[Parking Aids] (where fitted):
The [Parking Aids] option has asub-menu, from
which you can choose the following:
• [Sensor]
Select this item to enable/disable the parking
sensor (sonar). •
[Volume]
Select this sub-menu to change the parking sen-
sor (sonar) buzzer volume to one of the follow-
ing:
–[
High]
Loudest available volume.
–[ Med.]
Medium volume. (Standard)
–[ Low]
Lowest available volume.
• [Range]
Select this sub-menu to change the parking sen-
sor (sonar) detection range to one of the follow-
ing:
–[
Far]
The parking sensor system will give earlier
notice of objects further away.
–[ Mid.]
The parking sensor system is set to the stan-
dard distance.
–[ Near]
The parking sensor system will only give no-
tice of objects close by. [Clock]
The following sub-menus are available in the clock
menu, depending on the level of equipment of each
vehicle.
• [Set the Clock in NAVI] (where fitted)
The clock needs to be adjusted in the navigation
system and will automatically be synchronised.
See the separately provided Navigation Owner’s
Manual.
• [Set the Clock in Audio] (where fitted)
The clock needs to be adjusted in the audio sys-
tem and will automatically be synchronised.
See “Setting the clock” in the “4. Display screen,
heater and air conditioner, and audio system”
section, or “How to use button” in the
“4. Display screen, heater and air conditioner,
and audio system” section.
• [Set Clock] (where fitted)
Select this sub-menu to adjust the time on the
clock.
• [12Hr/24Hr] (where fitted)
Select this sub-menu to choose the clock format
between 12-hour and 24-hour.
2-16 Instruments and controls
Page 75 of 340
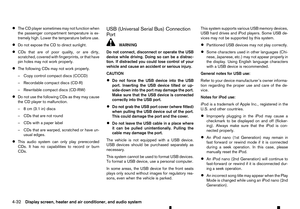
![RENAULT ALASKAN 2017 Owners Manual [Display Settings]
The following sub-menus are available under the
[Display Settings] menu.
• [Contents Selection]
• [Body Colour]
• [ECO Drive Report] (where fitted)
• [Welcome Effect]
[Conte RENAULT ALASKAN 2017 Owners Manual [Display Settings]
The following sub-menus are available under the
[Display Settings] menu.
• [Contents Selection]
• [Body Colour]
• [ECO Drive Report] (where fitted)
• [Welcome Effect]
[Conte](/manual-img/7/58394/w960_58394-74.png)
[Display Settings]
The following sub-menus are available under the
[Display Settings] menu.
• [Contents Selection]
• [Body Colour]
• [ECO Drive Report] (where fitted)
• [Welcome Effect]
[Contents Selection]:
Select this sub-menu to enable/disable the items
that are displayed.
• [Home]
• [Average Speed]
• [Trip]
• [Fuel Economy]
• [Navigation] (where fitted)
• [Audio]
• [Driving Aids] (where fitted)
• [Tyre Pressures] (where fitted)
[Body Colour]:
In this sub-menu you can change the colour of the
vehicle displayed in the vehicle information display. [ECO Drive Report] (where fitted):
There are
2items in the [ECO Drive Report] menu.
• [Display]
Select this item to enable/disable the ECO Drive
Report in the vehicle information display.
• [View History]
Select this sub-menu to show the fuel economy
history, current economy, and the best fuel
economy. See, “ECO drive report” in the
“5. Starting and driving” section.
–[ Back] will return you to the [ECO Drive Re-
port] menu.
–[ Reset] will reset the fuel economy history to
zero.
[Welcome Effect]:
Select this sub-menu to enable/disable the items
described below to ONorOFF.
• [Dial and Pointer]
The indicator needles sweep in the meters when
the engine is started.
• [Display Effect]
The welcome screen display appears when the
ignition is placed in the
ONposition. [Vehicle Settings]
The following sub-menus are available under the
[Vehicle Settings] menu.
•
[Lighting]
• [Turn Indicator]
• [Unlocking]
• [Wipers]
[Lighting] (where fitted):
There are 2items under the Lighting menu.
• [Int. Lamp Timer]
Select this item to enable/disable the interior
lamp timer feature.
The interior lights will be
ONif any door is un-
locked when the interior lamp timer is enabled.
• [Auto Lights]
The automatic lighting system can be set to illu-
minate earlier or later based on the brightness
outside the vehicle. See, “Headlight and turn sig-
nal switch” in the “2. Instruments and controls”
section.
–[
On Earliest]
–[ On Earlier]
–[ Standard]
–[ On Later]
Instruments and controls 2-17
Page 76 of 340
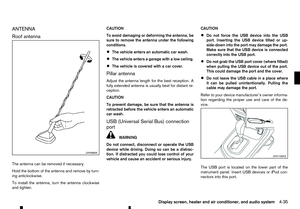
![RENAULT ALASKAN 2017 Owners Manual [Turn Indicator]:
Select this sub-menu to enable/disable the items
described below to ONorOFF.
• [3 Flash On]
Select this sub-menu to enable/disable the [3
Flash On] lane change signal feature. See, RENAULT ALASKAN 2017 Owners Manual [Turn Indicator]:
Select this sub-menu to enable/disable the items
described below to ONorOFF.
• [3 Flash On]
Select this sub-menu to enable/disable the [3
Flash On] lane change signal feature. See,](/manual-img/7/58394/w960_58394-75.png)
[Turn Indicator]:
Select this sub-menu to enable/disable the items
described below to ONorOFF.
• [3 Flash On]
Select this sub-menu to enable/disable the [3
Flash On] lane change signal feature. See, “Turn
signal switch” in the “2. Instruments and
controls” section.
[Unlocking] (where fitted):
Select this sub-menu to enable/disable the items
described below to ONorOFF.
• [I-Key Door Lock]
Select this item to activate/deactivate the request
switch on the door. See, “Doors” in the “3. Pre-
driving checks and adjustments” section.
[Wipers]:
Select this sub-menu to enable/disable the items
described below to ONorOFF.
• [Speed Dependent]
Select this item to activate/deactivate the speed
dependent wiper speed feature. See, “Wiper
and washer switch” in the “2. Instruments and
controls” section.
[Maintenance]
The following sub-menus are available under the
[Maintenance] menu.
• [Service] •
[Filter]
• [Tyre]
• [Other]
[Service] (where fitted):
Select this item to show the remaining distance until
servicing is required.
To reset the service indicator, push and
select [Yes].
The distance to service interval cannot be adjusted
manually. The interval is set automatically.
NOTE
Be sure the distance to service indicator is reset
after servicing. Otherwise, the service indicator
will continue to be displayed.
[Filter] (where fitted):
Select this item to set or reset the distance for re-
placing the oil filter.
The distance can be set from [———](off) to
30.000 km in 500 km increments.
[Tyre]:
Select this item to set or reset the distance for re-
placing the tyres.
The distance can be set from [———](off) to
30.000 km in 500 km increments. [Other]:
Select this item to set or reset
areminder for replac-
ing something other than service, the oil filter, or
tyres.
The distance can be set from [———](off) to
30.000 km in 500 km increments.
[Alert]
The following items are available under the [Alert]
menu.
• [Timer]
• [Navigation] (where fitted)
• [Phone] (where fitted)
• [Mail] (where fitted)
[Timer]:
Select this sub-menu to specify when the [Time for
ad river break?] message activates.
The time can be set from [———](off) to6hours
in increments of 30 minutes.
[Navigation] (where fitted):
Select this item to enable/disable the navigation sys-
tem information in the vehicle information display.
[Phone] (where fitted):
Select this item to enable/disable incoming call in-
formation in the vehicle information display.
[Mail] (where fitted):
Select this item to enable/disable incoming mail in-
formation in the vehicle information display.
2-18 Instruments and controls
Page 77 of 340
![RENAULT ALASKAN 2017 Owners Manual [Tyre Pressures] (where fitted)
The settings in the Tyre pressures] menu are all
related to the Tyre pressure monitoring system
TPMS (where fitted) (see “Tyre Pressure Monitor-
ing System (TPMS) (wh RENAULT ALASKAN 2017 Owners Manual [Tyre Pressures] (where fitted)
The settings in the Tyre pressures] menu are all
related to the Tyre pressure monitoring system
TPMS (where fitted) (see “Tyre Pressure Monitor-
ing System (TPMS) (wh](/manual-img/7/58394/w960_58394-76.png)
[Tyre Pressures] (where fitted)
The settings in the Tyre pressures] menu are all
related to the Tyre pressure monitoring system
TPMS (where fitted) (see “Tyre Pressure Monitor-
ing System (TPMS) (where fitted)” in the “5. Start-
ing and driving” section).
• [Target Front]
• [Target Rear]
• [Tyre Pressure Unit]
• [Calibrate]
[Target Front]:
The [Target Front] tyre pressure is the pressure specified for the front tyres on the tyre placard (see
“Tyre placard” in the “9. Technical information” sec-
tion and “Tyre Pressure Monitoring System (TPMS)
(where fitted)” in the “5. Starting and driving” sec-
tion).
Use the or and the buttons to select
and change the value for the [Target Front] tyre
pressure.
[Target Rear]:
The [Target Rear] tyre pressure is the pressure
specified for the rear tyres on the tyre placard (see
“Tyre placard” in the “9. Technical information” sec-
tion and “Tyre Pressure Monitoring System (TPMS)
(where fitted)” in the “5. Starting and driving” sec- tion). Use the or and the buttons to select
and change the value for the [Target Rear] tyre pres-
sure.
[Tyre Pressure Unit]:
The unit for tyre pressure that displays in the vehicle
information display can be changed to:
• psi
• bar
• kPa
• Kgf/cm
2
Use the or and
the buttons to select
and change the unit. Pressure units conversion table kPa psi bar kgf/cm
2
200 29 2.0 2.0
210 30 2.1 2.1
220 32 2.2 2.2
230 33 2.3 2.3
240 35 2.4 2.4
250 36 2.5 2.5
250 36 2.5 2.5
260 38 2.6 2.6
270 39 2.7 2.7
280 41 2.8 2.8
290 42 2.9 2.9
300 44 3.0 3.0
310 45 3.1 3.1
320 46 3.2 3.2
330 48 3.3 3.3
340 49 3.4 3.4
[Calibrate]:
The tyre pressure is affected by the temperature of
the tyre; the tyre temperature increases when the
vehicle is driven. The TPMS system uses tempera-
ture sensors in the tyres to compensate for changes
in temperature in order to prevent false TPMS warn-
ings.
The [CALIBRATE] function resets the previously
stored temperature value. It is recommended that
this function is performed after the tyre pressures
are adjusted.
Instruments and controls 2-19
Page 78 of 340

See “Tyre Pressure Monitoring System (TPMS)
(where fitted)” in the “5. Starting and driving” sec-
tion.
Use the or and the buttons to start
or cancel the calibration process. While the calibra-
tion process is active, the message: [Resetting tyre
pressure system] will be displayed.
[Units]
The following items are available under the [Units]
menu.
• [Distance/Fuel]
• [Tyre Pressures] (where fitted)
• [Temperature]
[Distance/Fuel]:
The unit for the distance and fuel consumption that
displays in the vehicle information display can be
changed to:
• [km, l/100km]
• [km, km/l]
• [miles, MPG]
[Tyre Pressures] (where fitted):
The unit for tyre pressure that displays in the vehicle
information display can be changed to:
• psi
• bar
• kPa •
Kgf/cm
2
Use the or and
the buttons to select
and change the unit.
[Temperature]:
The temperature that displays in the vehicle informa-
tion display can be changed from:
• °C (Celsius)
• °F (Fahrenheit)
[Language]
The language of the vehicle information display can
be changed to:
• English
• French
• German
• Italian
• Portuguese
• Dutch
• Spanish
• Turkish
• Russian
Use the or and the buttons to select
and change the language of the vehicle information
display. [Factory Reset]
The settings in the vehicle information display can
be reset back to the factory default. To reset the
vehicle information display:
1. Use the or buttons to select [Settings], and
press the button.
2. Select [Factory Reset] using the or buttons
and press the button.
3. Select [Yes] to return all settings back to default by pressing the button.
To cancel the reset operation select [No] or press
the BACK button located on the left side of the
steering wheel.
2-20 Instruments and controls
Page 79 of 340
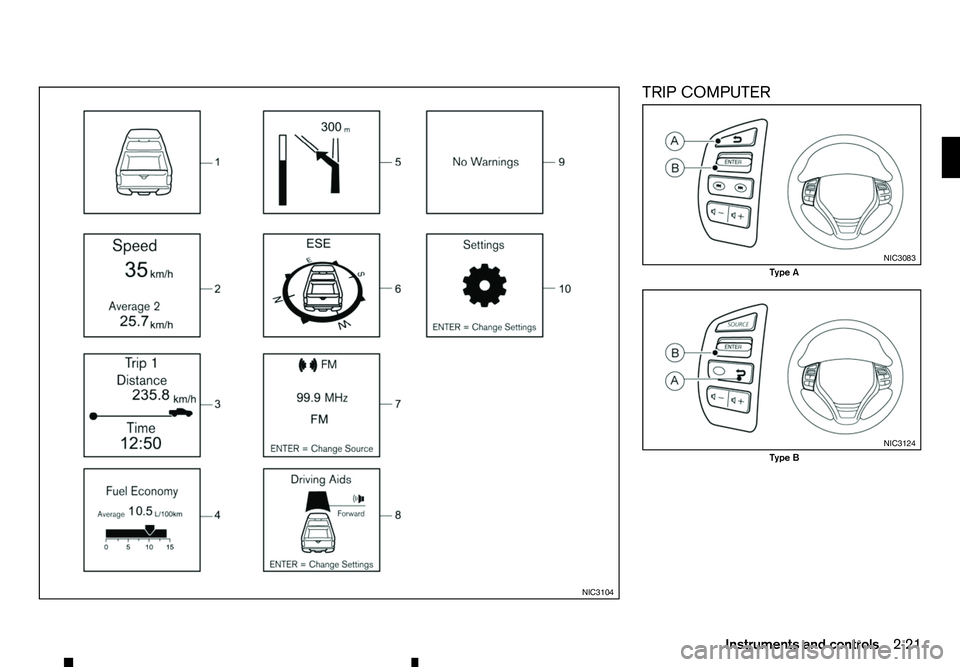
TRIP COMPUTER
NIC3104 NIC3083
Type A
NIC3124
Type B
Instruments and controls 2-21
Page 80 of 340

Switches for the trip computer (where fitted) are
located on the instrument panel on either the left or
right side of the steering column ➀.Too
perate the
trip computer, push the switches as shown above.
Each time the or switch
jBi spushed, the dis-
play will change as follows:
Car view (Home) →Average speed →Elapsed time
and trip odometer →Current and average fuel con-
sumption →Navigation (where fitted) →Compass
(where fitted) →Audio (where fitted) →Driving aids
(where fitted) →Warning check →Settings →Car
view (Home)
When the switch j
Bi spushed and held
for more than 3seconds, the average speed, the
elapsed time, the trip odometer, the current and
average fuel consumption can be reset.
1. Car view [Home]
The Car view [Home] screen can be selected when
the driver does not want see any information on the
trip computer screen. 2. [Speed] and [Average]
The (digital) speed
jAs hows the current speed at
which the vehicle is travelling.
The average speed j
Bs hows the average vehicle
speed since the last reset. Shortly press the
switch to switch between trip 1and 2.
Pressing the switch for longer than 1
second enters the Reset menu.
The display is updated every 30 seconds. The first
30 seconds after areset, the display shows [——]. 3. [Trip]
Trip [Distance]
jA:
The trip odometer mode shows the total distance
the vehicle has been driven since the last reset.
Shortly press the switch to switch be-
tween trip 1and 2. Pressing the switch
for longer than 1second enters the Reset menu.
(The elapsed time is also reset at the same time.)
Elapsed [Time] j
B:
The elapsed time mode shows the time since the
last reset. Shortly press the switch to
switch between trip 1and 2. Pressing the
switch for longer than 1second enters the Reset
menu. (The trip odometer is also reset at the same
time.) NIC3093
Left Hand Drive (LHD) model
NIC2755 NIC2756
2-22 Instruments and controls