2016 SUBARU IMPREZA warning light
[x] Cancel search: warning lightPage 133 of 594

Keys and doors/Alarm system
system will automatically arm and doors
will automatically lock.
&Disarming the system
Perform either of the following procedures.
. Briefly press the disarm button (for less
than 2 seconds) on the access key/remote
transmitter.
. Carry the access key and perform
either of the following procedures (models
with “keyless access with push-button
start system ”).
– Grip the front door handle.
– Press the rear gate opener button
(5-door).
The following door(s) will unlock, an
electronic chirp will sound twice and the
hazard warning flashers will flash twice.
. Driver ’s door: when either of the
following procedures is performed
–Press the disarm button on the
access key/remote transmitter briefly
(for less than 2 seconds).
– Grip the driver ’s door handle (mod-
els with “keyless access with push-
button start system ”).
. Rear gate (5-door): when pressing the
rear gate opener button (models with
“ keyless access with push-button start
system ”)
. All doors: when gripping the front passenger
’s door handle (models with
“keyless access with push-button start
system ”)
The flashing of the security indicator light
will then change slowly (once approxi-
mately every 3 seconds from twice ap-
proximately every 2 seconds), indicating
that the alarm system has been disarmed.
To unlock all other doors and the rear gate
(5-door), briefly press the disarm button a
second time within 5 seconds.
! Emergency disarming
If you cannot disarm the system using the
access key/transmitter (i.e. the transmitter
is lost, broken or the transmitter battery is
too weak), you can disarm the system
without using the access key/remote
transmitter.
The system can be disarmed if you turn
the ignition switch from the “LOCK”/“OFF”
to the “ON”position with a registered key/
access key.
NOTE
For models with “keyless access with
push-button start system” , if the ac-
cess key battery is discharged, perform
the procedure described in “Switching
power” F9-18. In such a case, replace
the battery immediately. Refer to “Re-placing battery of access key”
F11-44.
& Valet mode
When you choose the valet mode, the
alarm system does not operate. In valet
mode, the remote transmitter is used only
for locking and unlocking the doors and
rear gate (5-door) and panic activation.
To enter the valet mode, change the
setting of your vehicle’ s alarm system for
deactivation mode. Refer to “Activating
and deactivating the alarm system” F2-
28. The security indicator light will con-
tinue to flash once every 3 seconds
indicating that the system is in the valet
mode.
To exit valet mode, change the setting of
your vehicle’ s alarm system for activation
mode. Refer to “Activating and deactivat-
ing the alarm system ”F 2-28.
& Passive arming (models
without “keyless access with
push-button start system ”)
! Passive arming mode
When passive arming mode has been
programmed by the dealer, arming of the
system is automatically accomplished
without using the remote transmitter. Note
2-32
Page 135 of 594

Keys and doors/Alarm system
&Tripped sensor identification
The security indicator light flashes when
the alarm system has been triggered.
Also, the number of flashes indicates the
location of unauthorized intrusion or the
severity of impact on the vehicle.
When the ignition switch is turned to the
“ON ”position, the indicator light will light
for 1 second and then flash as follows.
. When a door or the rear gate (5-door)
was opened: 5 times
. When a door or the trunk (4-door) was
opened: 4 times
. When the ignition switch was turned to
the “ON ”position: 3 times
. When a strong impact or multiple
impacts were sensed: twice (only models
with shock sensors (dealer option))
. When a light impact was sensed: once
(only models with shock sensors (dealer
option))
NOTE
Any of the above indicator light flash-
ings will recur each time the ignition
switch is turned to the “ON”position.
Rearming the alarm system cancels the
flashing.
& Shock sensors (dealer op-
tion)
The shock sensors trigger the alarm
system when they sense impacts applied
to the vehicle and when any of their
electric wires are cut. The alarm system
causes the horn to sound and the hazard
warning flashers to flash for a short time
when the sensed impact is weak, but it
warns of a strong impact or multiple
impacts by sounding the horn and flashing
the hazard warning flashers, both lasting
approximately 30 seconds.
If you desire, your SUBARU dealer can
connect them and set them for activation
or deactivation.
NOTE
. The shock sensors are not always
able to sense impacts caused by break-
ing in, and cannot sense an impact that
does not cause vibration (such as
breaking the glass using a rescue
hammer).
. The shock sensors may sense vi-
bration as indicated in the following
examples and trigger the alarm system.
Select the settings of the alarm system
and shock sensors appropriately de-
pending on where you usually park
your vehicle. Examples:
–Vibration from a construction site
– Vibration in a multistory car park
– Vibration from trains
. You can have the sensitivity of the
shock sensors adjusted to your pre-
ference by your SUBARU dealer.
2-34
Page 146 of 594

Ignition switch (models without“keyless
access with push-button start system ”)......... 3-4
LOCK .................................................................. 3-4
ACC.................................................................... 3-5
ON...................................................................... 3-5
START ................................................................ 3-5
Key reminder chime ............................................ 3-5
Ignition switch light (if equipped) ......................... 3-6
Push-button ignition switch (models with
push-button start system) ............................... 3-6
Safety precautions.............................................. 3-6
Operating range for push-button start system ...... 3-6
Switching power ................................................. 3-7
When access key does not operate properly ........ 3-8
Hazard warning flasher....................................... 3-8
Meters and gauges. ............................................. 3-9
Combination meter illumination ........................... 3-9
Canceling the function for meter/gauge needle movement upon turning on the ignition
switch ............................................................... 3-9
Speedometer ...................................................... 3-10
Odometer ........................................................... 3-10
Double trip meter ............................................... 3-11
Tachometer ........................................................ 3-11
Fuel gauge ......................................................... 3-12
ECO gauge (if equipped) .................................... 3-12
Warning and indicator lights ............................. 3-13Initial illumination for system check .................... 3-13
Seatbelt warning light and chime ........................ 3-14
SRS airbag system warning light ........................ 3-15Front passenger
’s frontal airbag ON and OFF
indicators ........................................................ 3-16
CHECK ENGINE warning light/Malfunction indicator light .................................................. 3-16
Coolant temperature low indicator light/Coolant temperature high warning light ......................... 3-17
Charge warning light .......................................... 3-18
Oil pressure warning light .................................. 3-18
Engine low oil level warning light ....................... 3-18
Windshield washer fluid warning light ................ 3-19
AT OIL TEMP warning light (CVT models) ........... 3-19
Low tire pressure warning light (U.S.-spec. models) ........................................................... 3-19
ABS warning light .............................................. 3-21
Brake system warning light (red) ........................ 3-21
Low fuel warning light ....................................... 3-22
Hill start assist warning light/Hill start assist OFF indicator light .................................................. 3-22
Door open warning light .................................... 3-23
All-Wheel Drive warning light (CVT models) ... ..... 3-23
Power steering warning light .............................. 3-23
Vehicle Dynamics Control warning light/Vehicle Dynamics Control operation indicator light .. ..... 3-24
Vehicle Dynamics Control OFF indicator light ..... 3-25
Warning chimes and warning indicator of the keyless access with push-button start system (if
equipped) ........................................................ 3-25
Security indicator light ....................................... 3-30
Select lever/gear position indicator (CVT models) ........................................................... 3-30
Turn signal indicator lights ................................. 3-31
High beam indicator light ................................... 3-31
Instruments and controls
3
Page 147 of 594

Instruments and controls
Cruise control indicator light (if equipped).......... 3-31
Cruise control set indicator light (if equipped) ......................................................... 3-31
Automatic headlight beam leveler warning light (models with HID headlights) ............................ 3-31
Front fog light indicator light (if equipped) .......... 3-31
Headlight indicator light (if equipped) ................. 3-32
Steering responsive fog lights warning indicator/ Steering responsive fog lights OFF indicator
(models with EyeSight system) ......................... 3-32
BSD/RCTA warning indicator (if equipped) .......... 3-32
BSD/RCTA OFF indicator (if equipped) ................ 3-32
Information display (if equipped)...................... 3-32Outside temperature indicator............................ 3-33
Driving information display ................................. 3-33
Clock ................................................................. 3-37
Multi information display (models with type
B combination meter) ..................................... 3-38
Basic operation.................................................. 3-39
Welcome screen and Good-bye screen ............... 3-39
Warning screen .................................................. 3-40
Basic screens .................................................... 3-40
Menu screens .................................................... 3-40
Multi function display ........................................ 3-42Models without multi function display ................. 3-42
Safety precautions ............................................. 3-43
Features ............................................................ 3-43
Locations ........................................................... 3-43
Basic operation .................................................. 3-44
Welcome screen ................................................. 3-44
Date screen ........................................................ 3-44 Ending screen
................................................... 3-45
Self-check screen .............................................. 3-45
Interruption screen ............................................ 3-46
Basic screens .................................................... 3-47
Selection screen ................................................ 3-54
Date and time settings ....................................... 3-57
Image quality and volume settings ..................... 3-64
Screen settings. ................................................. 3-66
Maintenance settings ......................................... 3-74
Driving history registration ................................. 3-77
Car settings ....................................................... 3-78
Initialize ............................................................. 3-86
Light control switch ........................................... 3-89Precautions and tips .......................................... 3-89
Headlights ......................................................... 3-89
High/low beam change (dimmer) ... ..................... 3-91
Headlight flasher ............................................... 3-91
Daytime running light system ............................. 3-92
Turn signal lever................................................ 3-92One-touch lane changer ..................................... 3-93
Illumination brightness control ......................... 3-93
Headlight beam leveler (if equipped) ............... 3-94
Automatic headlight beam leveler (models with
HID headlights) ................................................ 3-94
Fog light switch (if equipped) ........................... 3-94Steering responsive fog lights system (models
with EyeSight system) ..................................... 3-95
Wiper and washer.............................................. 3-96Windshield wiper and washer switches .............. 3-97
Rear window wiper and washer switch –
5-door ............................................................. 3-99
Page 149 of 594

Instruments and controls/Ignition switch (models without“keyless access with push –button start system ”)
Ignition switch (models with-
out “keyless access with
push-button start system ”)
WARNING
. Never turn the ignition switch to
the “LOCK ”position while the
vehicle is being driven or towed
because that will lock the steer-
ing wheel, preventing steering
control. And when the engine is
turned off, it takes a much great-
er effort than usual to steer.
. Before leaving the vehicle, al-
ways remove the key from the
ignition switch for safety and
never allow an unattended child
to remain in the vehicle. Failure
to follow this procedure could
result in injury to a child or
others. Children could operate
the power windows, the moon-
roof or other controls or even
make the vehicle move.
CAUTION
Do not attach a large key holder or
key case to either key. If it banged
against your knees or hands while
you are driving, it could turn the
ignition switch from the “ON”posi-
tion to the “ACC”or “LOCK ”posi-
tion, thereby stopping the engine.
Also, if the key is attached to a key
holder or to a large bunch of other
keys, centrifugal force may act on it
as the vehicle moves, resulting in
unwanted turning of the ignition
switch.
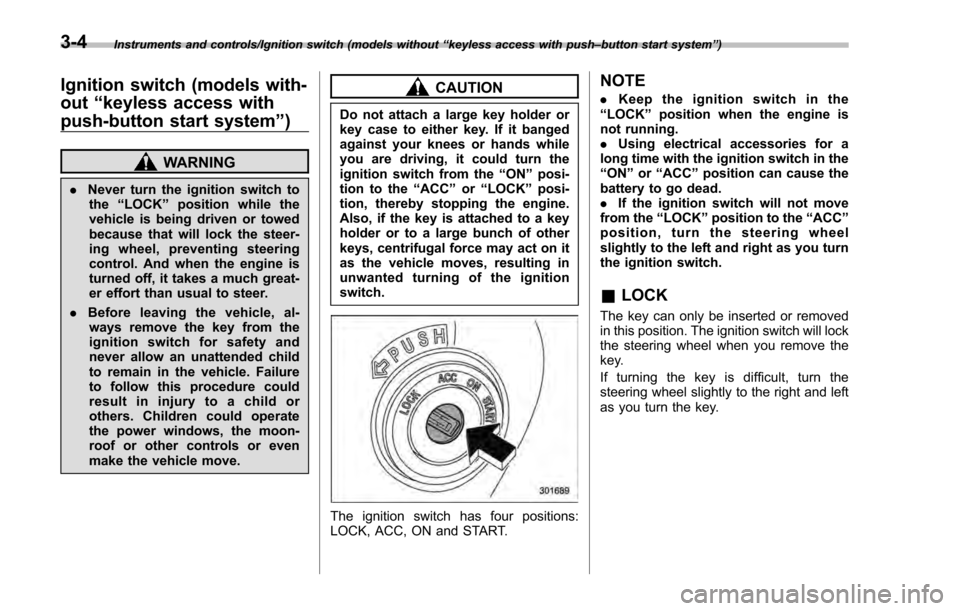
The ignition switch has four positions:
LOCK, ACC, ON and START.
NOTE
. Keep the ignition switch in the
“LOCK ”position when the engine is
not running.
. Using electrical accessories for a
long time with the ignition switch in the
“ON ”or “ACC ”position can cause the
battery to go dead.
. If the ignition switch will not move
from the “LOCK”position to the “ACC”
position, turn the steering wheel
slightly to the left and right as you turn
the ignition switch.
& LOCK
The key can only be inserted or removed
in this position. The ignition switch will lock
the steering wheel when you remove the
key.
If turning the key is difficult, turn the
steering wheel slightly to the right and left
as you turn the key.
3-4
Page 151 of 594

Instruments and controls/Push–button ignition switch (models with push –button start system)
& Ignition switch light (if
equipped)
For easy access to the ignition switch in
the dark, the ignition switch light illumi-
nates when the driver ’s door is opened or
when the driver ’s door is unlocked using
the remote keyless entry transmitter.
The light remains illuminated for several
tens of seconds and then gradually turns
off under the following conditions.
. when the driver ’s door is closed
. when the doors are unlocked using the
remote keyless entry transmitter
The light turns off immediately under the
following conditions.
. when the ignition switch is turned to the
“ ON ”position
. when all doors and the rear gate (5-
door) are locked using the remote keyless
entry transmitter
Push-button ignition switch
(models with push-button
start system)
& Safety precautions
Refer to “Safety precautions” F2-10.
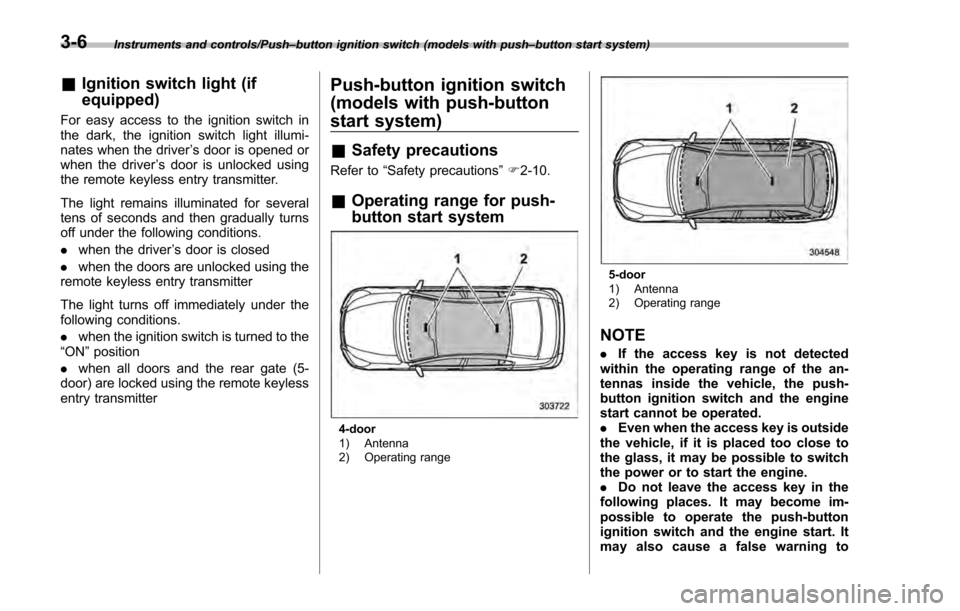
& Operating range for push-
button start system
4-door
1) Antenna
2) Operating range
5-door
1) Antenna
2) Operating range
NOTE
. If the access key is not detected
within the operating range of the an-
tennas inside the vehicle, the push-
button ignition switch and the engine
start cannot be operated.
. Even when the access key is outside
the vehicle, if it is placed too close to
the glass, it may be possible to switch
the power or to start the engine.
. Do not leave the access key in the
following places. It may become im-
possible to operate the push-button
ignition switch and the engine start. It
may also cause a false warning to
3-6
Page 153 of 594

Instruments and controls/Hazard warning flasher
does not operate smoothly, stop
the operation. Contact a
SUBARU dealer immediately.
. If the push-button ignition switch
does not illuminate even when
the instrument panel illumination
is turned on, have the vehicle
inspected at a SUBARU dealer.
. If the vehicle was left in the hot
sun for a long time, the surface of
the push-button ignition switch
may get hot. Be careful not to
burn yourself.
NOTE
. The push-button ignition switch can-
not be switched to “OFF”when the
select lever is in a position other than
“P ”.
. When operating the push-button
ignition switch, firmly press it all the
way.
. If the push-button ignition switch is
pressed quickly, the power may not
turn on or off.
. If the indicator light on the push-
button ignition switch flashes in green
when the push-button ignition switch is
pressed, steering is locked. When this
occurs, press the push-button ignition
switch while turning the steering wheel left and right.
!
Battery drainage prevention func-
tion
When the push-button ignition switch is
left in the “ACC ”or “ON ”position for
approximately 1 hour, the push-button
ignition switch will be automatically
switched to “OFF”to prevent the battery
from going dead. This function is activated
when the select lever is in the “P”position.
& When access key does not
operate properly
Refer to “Access key –if access key does
not operate properly ”F 9-18.
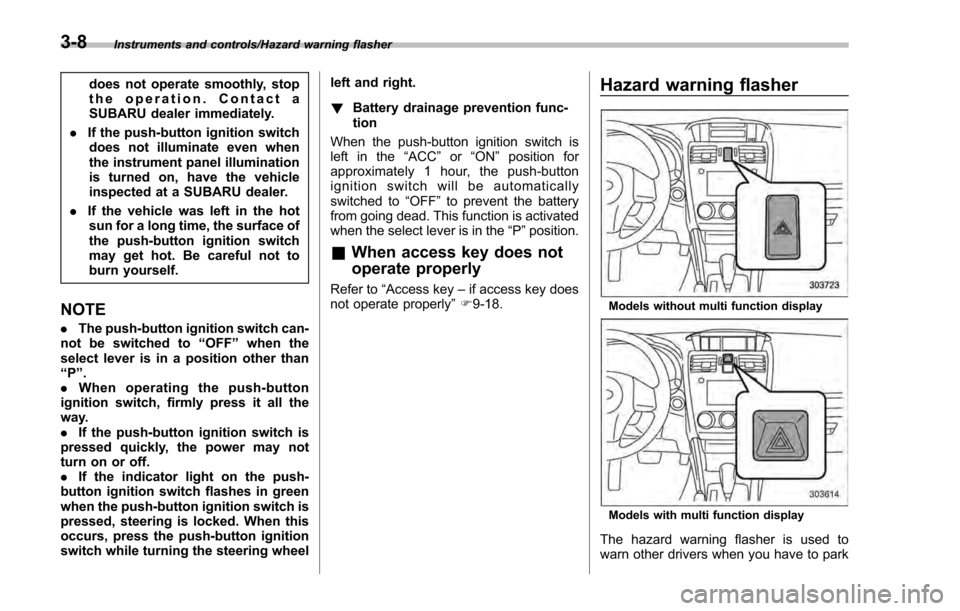
Hazard warning flasher
Models without multi function display
Models with multi function display
The hazard warning flasher is used to
warn other drivers when you have to park
3-8
Page 154 of 594

your vehicle under emergency conditions.
The hazard warning flasher works regard-
less of the position of the ignition switch.
To turn on the hazard warning flasher,
push the hazard warning button on the
instrument panel. To turn off the flasher,
push the button again.
NOTE
When the hazard warning flasher is on,
the turn signals do not work.
Meters and gauges
NOTE
Some of the meters and gauges on the
combination meter use liquid-crystal
displays. You will find their indications
hard to see if you wear polarized
glasses.
&Combination meter illumina-
tion
When the ignition switch is turned to the
“ON ”position, various parts of the combi-
nation meter will illuminate in the following
sequence.
1. Warning lights, indicator lights, meter
needles, gauge needles and liquid crystal
display illuminate.
2. Meter and gauge indications each
show MAX position.
3. Meter and gauge indications each
show MIN position.
4. Regular illumination (for driving) be-
gins.
& Canceling the function for
meter/gauge needle move-
ment upon turning on the
ignition switch
It is possible to activate or deactivate the
movement of the meter needles and
gauge needles that takes place when the
ignition switch is turned to the “ON ”
position.
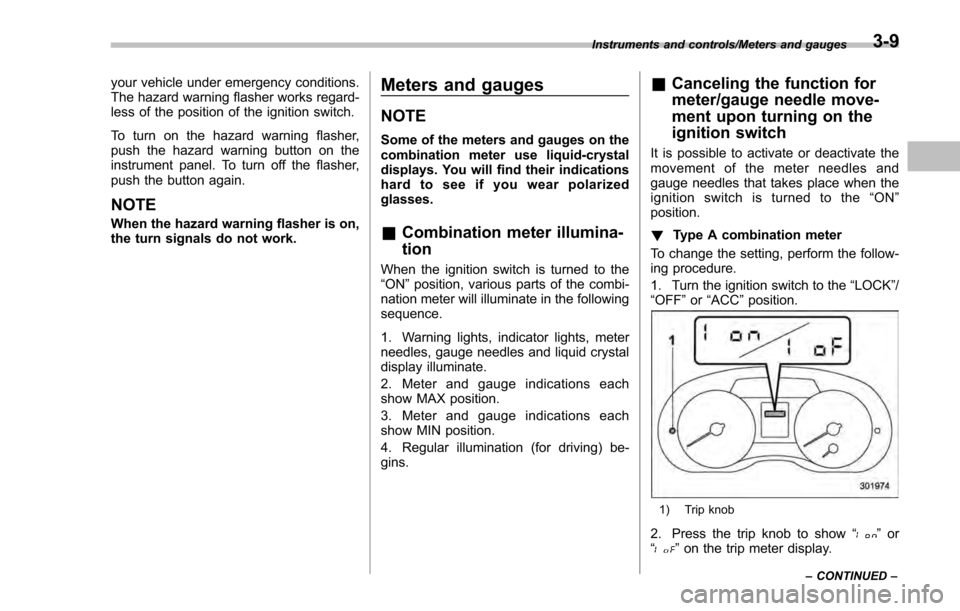
! Type A combination meter
To change the setting, perform the follow-
ing procedure.
1. Turn the ignition switch to the “LOCK”/
“ OFF ”or “ACC ”position.
1) Trip knob
2. Press the trip knob to show “”or
“” on the trip meter display.
Instruments and controls/Meters and gauges
–CONTINUED –3-9