2016 SUBARU IMPREZA warning light
[x] Cancel search: warning lightPage 98 of 594
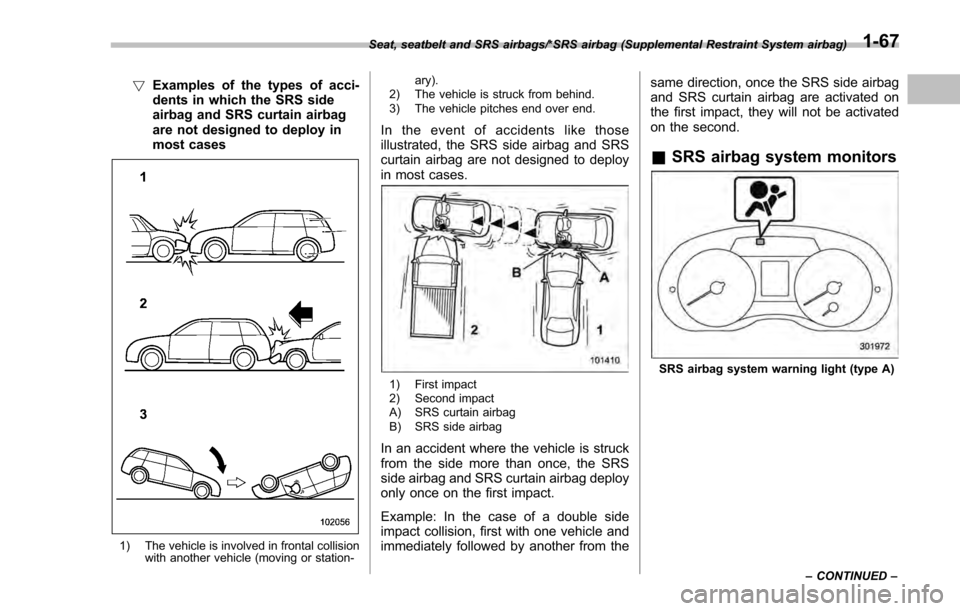
!Examples of the types of acci-
dents in which the SRS side
airbag and SRS curtain airbag
are not designed to deploy in
most cases
1) The vehicle is involved in frontal collision
with another vehicle (moving or station- ary).
2) The vehicle is struck from behind.
3) The vehicle pitches end over end.
In the event of accidents like those
illustrated, the SRS side airbag and SRS
curtain airbag are not designed to deploy
in most cases.
1) First impact
2) Second impact
A) SRS curtain airbag
B) SRS side airbag
In an accident where the vehicle is struck
from the side more than once, the SRS
side airbag and SRS curtain airbag deploy
only once on the first impact.
Example: In the case of a double side
impact collision, first with one vehicle and
immediately followed by another from the same direction, once the SRS side airbag
and SRS curtain airbag are activated on
the first impact, they will not be activated
on the second.
&
SRS airbag system monitors
SRS airbag system warning light (type A)
Seat, seatbelt and SRS airbags/*SRS airbag (Supplemental Restraint System airbag)
–CONTINUED –
1-67
Page 99 of 594
Seat, seatbelt and SRS airbags/*SRS airbag (Supplemental Restraint System airbag)
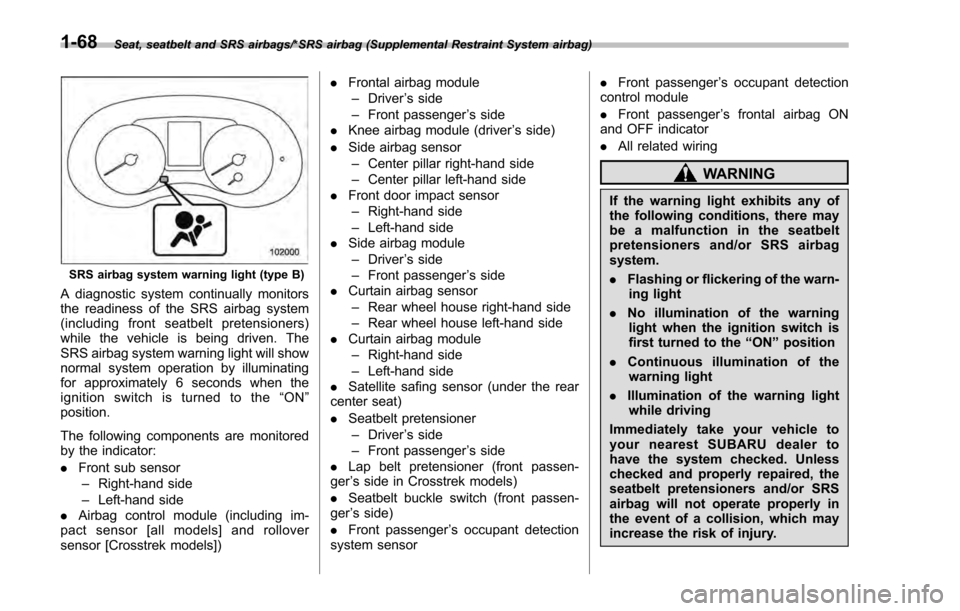
SRS airbag system warning light (type B)
A diagnostic system continually monitors
the readiness of the SRS airbag system
(including front seatbelt pretensioners)
while the vehicle is being driven. The
SRS airbag system warning light will show
normal system operation by illuminating
for approximately 6 seconds when the
ignition switch is turned to the“ON ”
position.
The following components are monitored
by the indicator:
. Front sub sensor
– Right-hand side
– Left-hand side
. Airbag control module (including im-
pact sensor [all models] and rollover
sensor [Crosstrek models]) .
Frontal airbag module
– Driver ’s side
– Front passenger ’s side
. Knee airbag module (driver ’s side)
. Side airbag sensor
– Center pillar right-hand side
– Center pillar left-hand side
. Front door impact sensor
– Right-hand side
– Left-hand side
. Side airbag module
– Driver ’s side
– Front passenger ’s side
. Curtain airbag sensor
– Rear wheel house right-hand side
– Rear wheel house left-hand side
. Curtain airbag module
– Right-hand side
– Left-hand side
. Satellite safing sensor (under the rear
center seat)
. Seatbelt pretensioner
– Driver ’s side
– Front passenger ’s side
. Lap belt pretensioner (front passen-
ger ’s side in Crosstrek models)
. Seatbelt buckle switch (front passen-
ger ’s side)
. Front passenger ’s occupant detection
system sensor .
Front passenger ’s occupant detection
control module
. Front passenger ’s frontal airbag ON
and OFF
indicator
. All related wiring
WARNING
If the warning light exhibits any of
the following conditions, there may
be a malfunction in the seatbelt
pretensioners and/or SRS airbag
system.
.Flashing or flickering of the warn-
ing light
. No illumination of the warning
light when the ignition switch is
first turned to the “ON”position
. Continuous illumination of the
warning light
. Illumination of the warning light
while driving
Immediately take your vehicle to
your nearest SUBARU dealer to
have the system checked. Unless
checked and properly repaired, the
seatbelt pretensioners and/or SRS
airbag will not operate properly in
the event of a collision, which may
increase the risk of injury.
1-68
Page 102 of 594

Keys..................................................................... 2-3Key number plate ................................................ 2-3
Immobilizer.......................................................... 2-3Security indicator light ........................................ 2-4
Key replacement ................................................. 2-4
Certification for immobilizer system ..................... 2-4
Door locks........................................................... 2-5Locking and unlocking from the outside .. ............ 2-5
Locking and unlocking from the inside ................ 2-7
Battery drainage prevention function ................... 2-7
Power door locking switches............................. 2-8Key lock-in prevention function ........................... 2-9
Keyless access with push-button start
system (if equipped) ........................................ 2-9
Safety precautions............................................. 2-10
Locking and unlocking with “keyless access”
entry function. .................................................. 2-13
Selecting audible signal operation ...................... 2-18
Warning chimes and warning indicator ............... 2-18
Disabling keyless access function ...................... 2-18
When access key does not operate properly ....... 2-20
Replacing battery of access key ......................... 2-20
Replacing access key ......................................... 2-20
Certification for keyless access with push-button start system ..................................................... 2-20
PIN Code Access (models with “keyless
access with push-button start system ”)........ 2-21
Registering a PIN code ....................................... 2-22
Unlocking .......................................................... 2-23
Remote keyless entry system ........................... 2-23Locking the doors.............................................. 2-25 Unlocking the doors
.......................................... 2-25
Opening the trunk lid (4-door) .. .......................... 2-25
Unlocking the rear gate (5-door) ......................... 2-25
Vehicle finder function ....................................... 2-25
Sounding a panic alarm ..................................... 2-25
Selecting audible signal operation (models without “keyless access with push-button start
system ”).......................................................... 2-26
Replacing the battery ......................................... 2-26
Replacing lost transmitters ................................ 2-26
Certification for remote keyless entry system ..... 2-26
Alarm system..................................................... 2-27System operation ............................................... 2-28
Activating and deactivating the alarm system ..... 2-28
If you have accidentally triggered the alarm system ............................................................ 2-28
Arming the system ............................................ 2-29
Disarming the system ........................................ 2-32
Valet mode ........................................................ 2-32
Passive arming (models without “keyless access
with push-button start system ”) ....................... 2-32
Tripped sensor identification .............................. 2-34
Shock sensors (dealer option).. .......................... 2-34
Child safety locks.............................................. 2-35
Windows ............................................................. 2-35
Power window operation by driver ..................... 2-35
Power window operation by passengers ............. 2-37
Initialization of power window .. .......................... 2-38
Trunk lid (4-door)............................................... 2-38To open and close the trunk lid from outside . ..... 2-39
To open the trunk lid from inside. ....................... 2-39
Keys and doors
2
Page 105 of 594

Keys and doors/Immobilizer
CAUTION
.Do not place the key under direct
sunlight or anywhere it may
become hot.
. Do not get the key wet. If the key
gets wet, wipe it dry with a cloth
immediately.
NOTE
. To protect your vehicle from theft,
please pay close attention to the fol-
lowing security precautions:
–Never leave your vehicle unat-
tended with its keys inside.
– Before leaving your vehicle,
close all windows and the moon-
roof, and lock the doors and rear
gate.
– Do not leave spare keys or any
record of your key number in the
vehicle.
. The vehicle has a maintenance-free
type immobilizer system.
& Security indicator light
Refer to “Security indicator light ”F 3-30.
& Key replacement
Your key number plate will be required if
you ever need a replacement key made.
Any new key must be registered for use
with your vehicle ’s immobilizer system
before it can be used. The maximum
number of keys that can be registered
for use with one vehicle is as follows.
. Four (models without “keyless access
with push-button start system ”)
. Seven (models with “keyless access
with push-button start system ”)
One key that has already been registered
is required in order to register a new key.
If you lose a key, the lost key ’s ID code still
remains in the memory of the vehicle’ s
immobilizer system. For security reasons,
the lost key ’s ID code should be erased
from the memory. To erase the lost key ’s
ID code, all keys that will be used are
required.
For details about new key registration and
erasing the lost key ’s ID code, contact
your SUBARU dealer.
& Certification for immobilizer
system
. For models with “keyless access
with push-button start system”:
Refer to “Certification for keyless access
with push-button start system ”F 2-20.
. For models without “keyless access
with push-button start system”:
–U.S.-spec. models
FCC ID: MOZRI-38BFH
CAUTION
FCC WARNING
Changes or modifications not ex-
pressly approved by the party re-
sponsible for compliance could void
the user ’s authority to operate the
equipment.
This device complies with part 15 of the
FCC Rules. Operation is subject to the
following two conditions: (1) This de-
vice may not cause harmful interfer-
ence, and (2) this device must accept
any interference received, including
interference that may cause undesired
operation.
2-4
Page 108 of 594
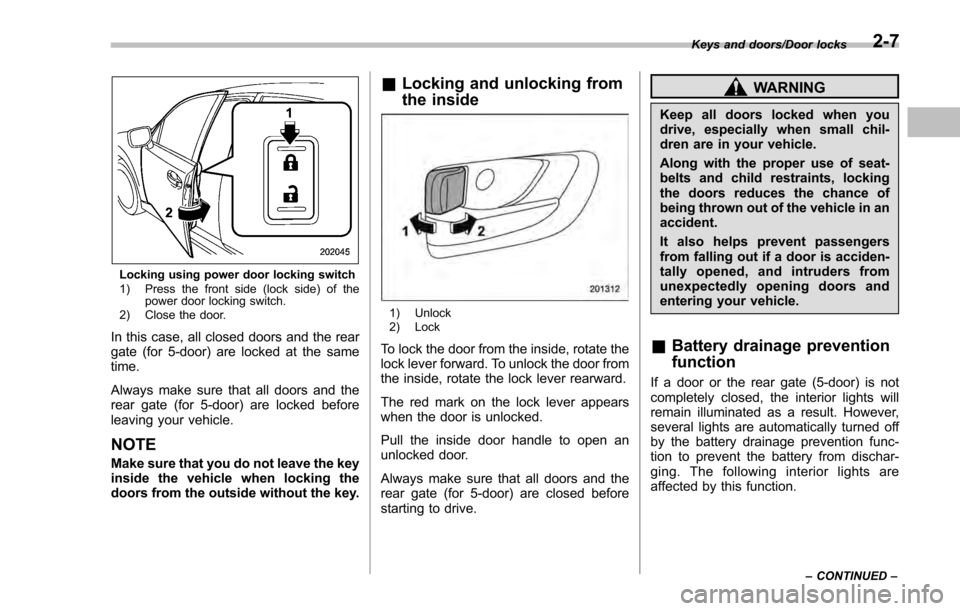
Locking using power door locking switch
1) Press the front side (lock side) of thepower door locking switch.
2) Close the door.
In this case, all closed doors and the rear
gate (for 5-door) are locked at the same
time.
Always make sure that all doors and the
rear gate (for 5-door) are locked before
leaving your vehicle.
NOTE
Make sure that you do not leave the key
inside the vehicle when locking the
doors from the outside without the key.
& Locking and unlocking from
the inside
1) Unlock
2) Lock
To lock the door from the inside, rotate the
lock lever forward. To unlock the door from
the inside, rotate the lock lever rearward.
The red mark on the lock lever appears
when the door is unlocked.
Pull the inside door handle to open an
unlocked door.
Always make sure that all doors and the
rear gate (for 5-door) are closed before
starting to drive.
WARNING
Keep all doors locked when you
drive, especially when small chil-
dren are in your vehicle.
Along with the proper use of seat-
belts and child restraints, locking
the doors reduces the chance of
being thrown out of the vehicle in an
accident.
It also helps prevent passengers
from falling out if a door is acciden-
tally opened, and intruders from
unexpectedly opening doors and
entering your vehicle.
&Battery drainage prevention
function
If a door or the rear gate (5-door) is not
completely closed, the interior lights will
remain illuminated as a result. However,
several lights are automatically turned off
by the battery drainage prevention func-
tion to prevent the battery from dischar-
ging. The following interior lights are
affected by this function.
Keys and doors/Door locks
–CONTINUED –2-7
Page 129 of 594

Keys and doors/Alarm system
&System operation
The alarm system will sound the following
alarms when triggered.
. The vehicle’ s horn will sound for 30
seconds.
. The hazard warning flashers will flash
for 30 seconds.
If any of the doors or the rear gate/trunk lid
remains open after the 30-second period,
the horn will continue to sound for a
maximum of 3 minutes. If the door or the
rear gate/trunk lid is closed while the horn
is sounding, the horn will stop sounding
with a delay of up to 30 seconds.
The alarm is triggered by:
. Opening any of the doors, the rear gate
or trunk lid
. Physical impact to the vehicle, such as
forced entry (only models with shock
sensors (dealer option))
NOTE
The alarm system can be set to trigger
the illumination of the following interior
lights.
. Map lights (models with moonroof)
. Dome light (illuminates only when
the dome light switch is in the “DOOR ”
position)
. Cargo area light (illuminates only when the cargo area light switch is in
the
“DOOR ”position)
The notifications regarding the map
lights, dome light and cargo area light
are deactivated as the factory setting. A
SUBARU dealer can activate the sys-
tem. Contact your SUBARU dealer for
details.
& Activating and deactivating
the alarm system
To change the setting of your vehicle’ s
alarm system for activation or deactiva-
tion, do the following.
1. Disarm the alarm system. Refer to
“Disarming the system” F2-32.
2. Sit in the driver ’s seat and shut all
doors (and the rear gate if your vehicle is a
5-door).
3. Turn the ignition switch to the “ON ”
position.
4. Hold down the REAR (UNLOCK) side
of the driver ’s power door locking switch,
open the driver ’s door within the following
1 second, and wait 10 seconds without
releasing the switch. The setting will then
be changed as follows.
If the system was previously activated:
The odometer/trip meter screen displays
as follows and the horn sounds twice, indicating that the system is now deacti-
vated.
.
“AL oF ”(models with type A combina-
tion meter)
. “ALOF” (models with type B combina-
tion meter)
If the system was previously deacti-
vated:
The odometer/trip meter screen displays
as follows and the horn sounds once,
indicating that the system is now acti-
vated.
. “AL on ”(models with type A combina-
tion meter)
. “ALON” (models with type B combina-
tion meter)
NOTE
You may have the above setting
change done by your SUBARU dealer.
& If you have accidentally trig-
gered the alarm system
! To stop the alarm
Do any of the following operations:
. Press any button on the access key/
remote transmitter.
. Turn the ignition switch to the “ON”
position (models without “keyless access
with push-button start system ”).
2-28
Page 131 of 594
Keys and doors/Alarm system
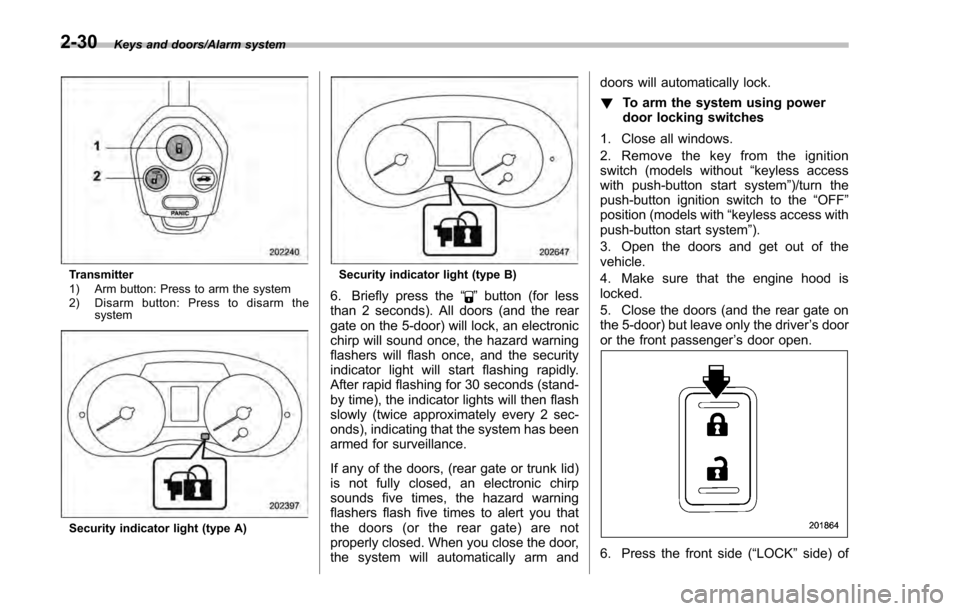
Transmitter
1) Arm button: Press to arm the system
2) Disarm button: Press to disarm thesystem
Security indicator light (type A)
Security indicator light (type B)
6. Briefly press the “”button (for less
than 2 seconds). All doors (and the rear
gate on the 5-door) will lock, an electronic
chirp will sound once, the hazard warning
flashers will flash once, and the security
indicator light will start flashing rapidly.
After rapid flashing for 30 seconds (stand-
by time), the indicator lights will then flash
slowly (twice approximately every 2 sec-
onds), indicating that the system has been
armed for surveillance.
If any of the doors, (rear gate or trunk lid)
is not fully closed, an electronic chirp
sounds five times, the hazard warning
flashers flash five times to alert you that
the doors (or the rear gate) are not
properly closed. When you close the door,
the system will automatically arm and doors will automatically lock.
!
To arm the system using power
door locking switches
1. Close all windows.
2. Remove the key from the ignition
switch (models without “keyless access
with push-button start system ”)/turn the
push-button ignition switch to the “OFF”
position (models with “keyless access with
push-button start system ”).
3. Open the doors and get out of the
vehicle.
4. Make sure that the engine hood is
locked.
5. Close the doors (and the rear gate on
the 5-door) but leave only the driver ’s door
or the front passenger ’s door open.
6. Press the front side (“LOCK” side) of
2-30
Page 132 of 594
the power door locking switch to set the
door locks.
7. Close the door. An electronic chirp will
sound once, the hazard warning flashers
will flash once and the security indicator
light will start flashing rapidly. After rapid
flashing for 30 seconds (standby time), the
indicator lights will then flash slowly (twice
approximately every 2 seconds), indicat-
ing that the system has been armed for
surveillance.
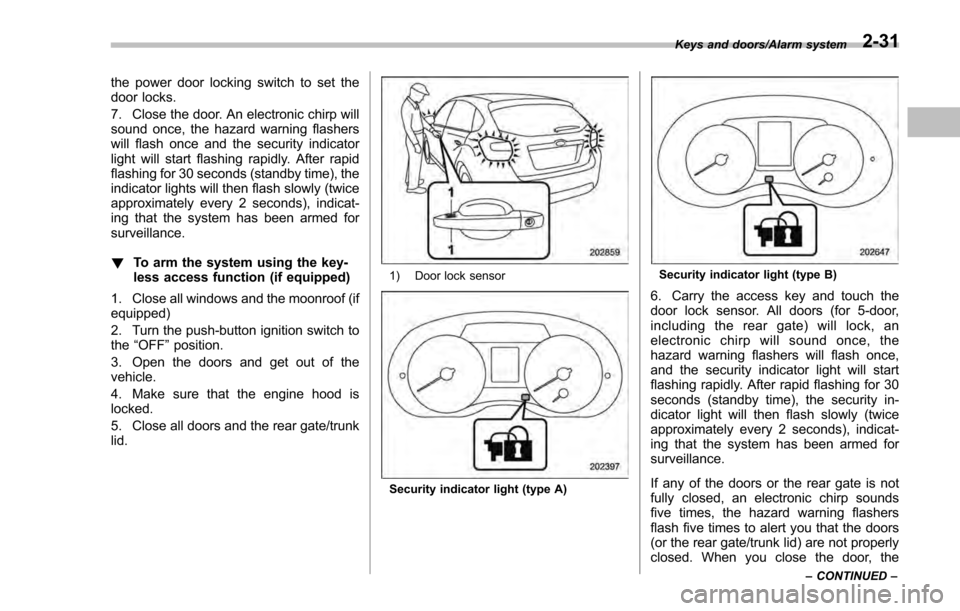
!To arm the system using the key-
less access function (if equipped)
1. Close all windows and the moonroof (if
equipped)
2. Turn the push-button ignition switch to
the “OFF ”position.
3. Open the doors and get out of the
vehicle.
4. Make sure that the engine hood is
locked.
5. Close all doors and the rear gate/trunk
lid.
1) Door lock sensor
Security indicator light (type A)
Security indicator light (type B)
6. Carry the access key and touch the
door lock sensor. All doors (for 5-door,
including the rear gate) will lock, an
electronic chirp will sound once, the
hazard warning flashers will flash once,
and the security indicator light will start
flashing rapidly. After rapid flashing for 30
seconds (standby time), the security in-
dicator light will then flash slowly (twice
approximately every 2 seconds), indicat-
ing that the system has been armed for
surveillance.
If any of the doors or the rear gate is not
fully closed, an electronic chirp sounds
five times, the hazard warning flashers
flash five times to alert you that the doors
(or the rear gate/trunk lid) are not properly
closed. When you close the door, the
Keys and doors/Alarm system
–CONTINUED –2-31