Page 1746 of 3641
EXL-94
< SYMPTOM DIAGNOSIS >
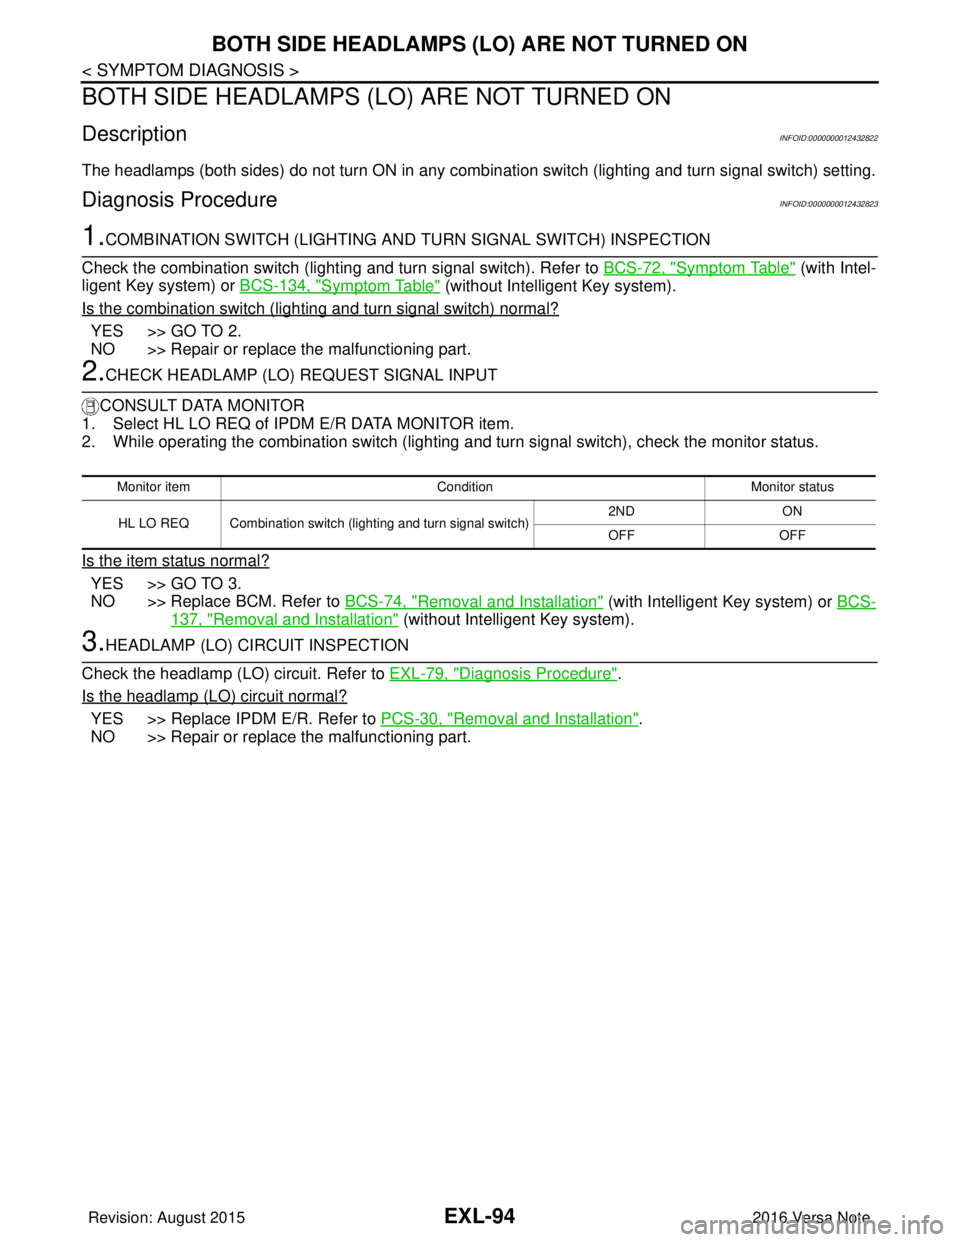
BOTH SIDE HEADLAMPS (LO) ARE NOT TURNED ON
BOTH SIDE HEADLAMPS (LO) ARE NOT TURNED ON
DescriptionINFOID:0000000012432822
The headlamps (both sides) do not turn ON in any combination switch (lighting and turn signal switch) setting.
Diagnosis ProcedureINFOID:0000000012432823
1.COMBINATION SWITCH (LIGHTING AND TURN SIGNAL SWITCH) INSPECTION
Check the combination switch (lighting and turn signal switch). Refer to BCS-72, "
Symptom Table" (with Intel-
ligent Key system) or BCS-134, "
Symptom Table" (without Intelligent Key system).
Is the combination switch (lighting and turn signal switch) normal?
YES >> GO TO 2.
NO >> Repair or replace the malfunctioning part.
2.CHECK HEADLAMP (LO) REQUEST SIGNAL INPUT
CONSULT DATA MONITOR
1. Select HL LO REQ of IPDM E/R DATA MONITOR item.
2. While operating the combination switch (lighting and turn signal switch), check the monitor status.
Is the item status normal?
YES >> GO TO 3.
NO >> Replace BCM. Refer to BCS-74, "
Removal and Installation" (with Intelligent Key system) or BCS-
137, "Removal and Installation" (without Intelligent Key system).
3.HEADLAMP (LO) CIRCUIT INSPECTION
Check the headlamp (LO) circuit. Refer to EXL-79, "
Diagnosis Procedure".
Is the headlamp (LO) circuit normal?
YES >> Replace IPDM E/R. Refer to PCS-30, "Removal and Installation".
NO >> Repair or replace the malfunctioning part.
Monitor item ConditionMonitor status
HL LO REQ Combination switch (lighting and turn signal switch) 2ND
ON
OFF OFF
Revision: August 2015 2016 Versa Note
cardiagn.com
Page 1747 of 3641
PARKING, LICENSE PLATE AND TAIL LAMPS ARE NOT TURNED ON
EXL-95
< SYMPTOM DIAGNOSIS >
C
D E
F
G H
I
J
K
M A
B
EXL
N
O P
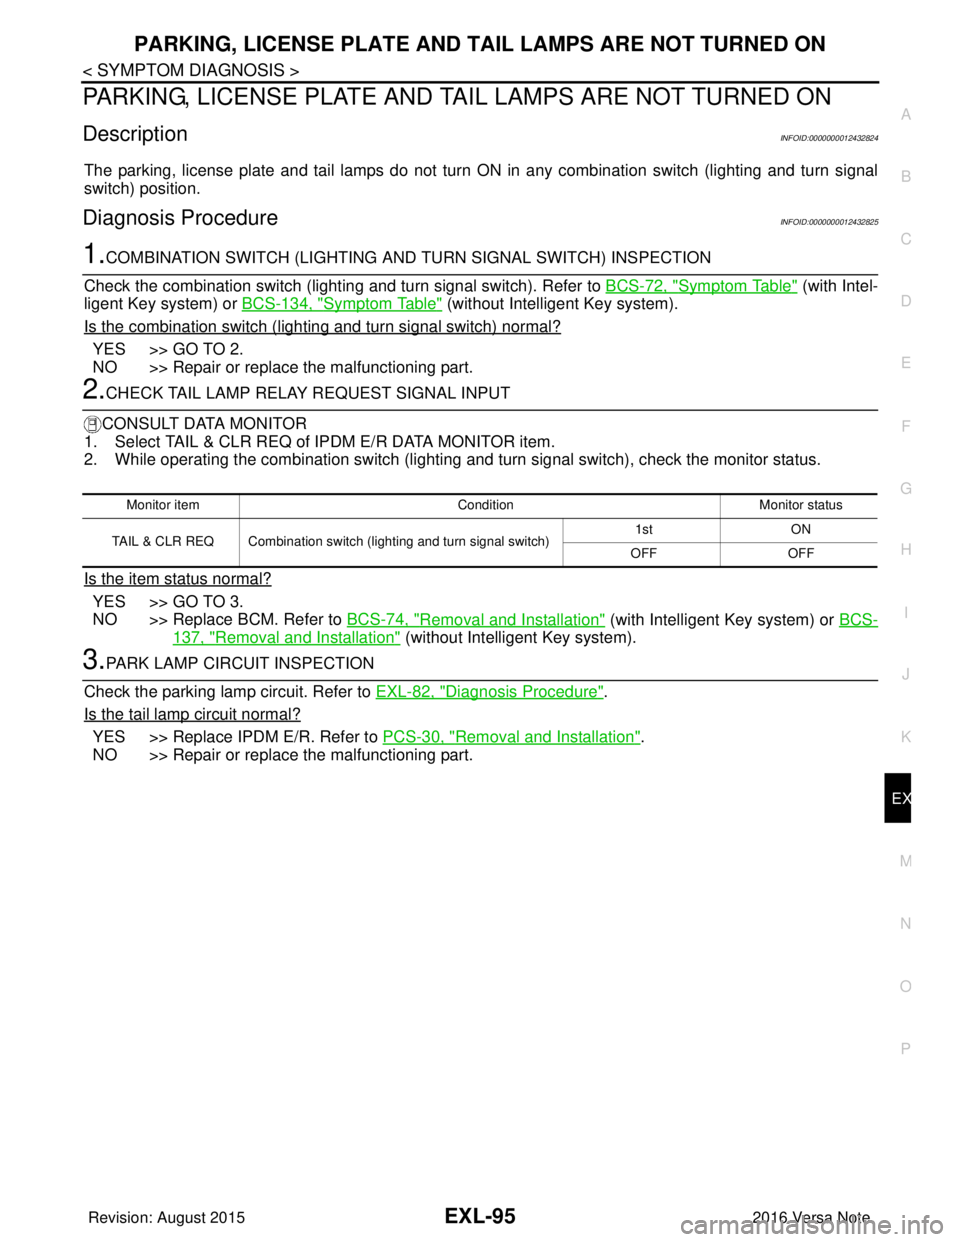
PARKING, LICENSE PLATE AND TA IL LAMPS ARE NOT TURNED ON
DescriptionINFOID:0000000012432824
The parking, license plate and tail lamps do not turn ON in any combination switch (lighting and turn signal
switch) position.
Diagnosis ProcedureINFOID:0000000012432825
1.COMBINATION SWITCH (LIGHTING AND TURN SIGNAL SWITCH) INSPECTION
Check the combination switch (lighti ng and turn signal switch). Refer to BCS-72, "
Symptom Table" (with Intel-
ligent Key system) or BCS-134, "
Symptom Table" (without Intelligent Key system).
Is the combination switch (lighting and turn signal switch) normal?
YES >> GO TO 2.
NO >> Repair or replace the malfunctioning part.
2.CHECK TAIL LAMP RELAY REQUEST SIGNAL INPUT
CONSULT DATA MONITOR
1. Select TAIL & CLR REQ of IPDM E/R DATA MONITOR item.
2. While operating the combination switch (lighting and turn signal switch), check the monitor status.
Is the item status normal?
YES >> GO TO 3.
NO >> Replace BCM. Refer to BCS-74, "
Removal and Installation" (with Intelligent Key system) or BCS-
137, "Removal and Installation" (without Intelligent Key system).
3.PARK LAMP CIRCUIT INSPECTION
Check the parking lamp circuit. Refer to EXL-82, "
Diagnosis Procedure".
Is the tail lamp circuit normal?
YES >> Replace IPDM E/R. Refer to PCS-30, "Removal and Installation".
NO >> Repair or replace the malfunctioning part.
Monitor item ConditionMonitor status
TAIL & CLR REQ Combination switch (lighting and turn signal switch) 1st
ON
OFF OFF
Revision: August 2015 2016 Versa Note
cardiagn.com
Page 1748 of 3641
EXL-96
< SYMPTOM DIAGNOSIS >
BOTH SIDE FRONT FOG LAMPS ARE NOT TURNED ON
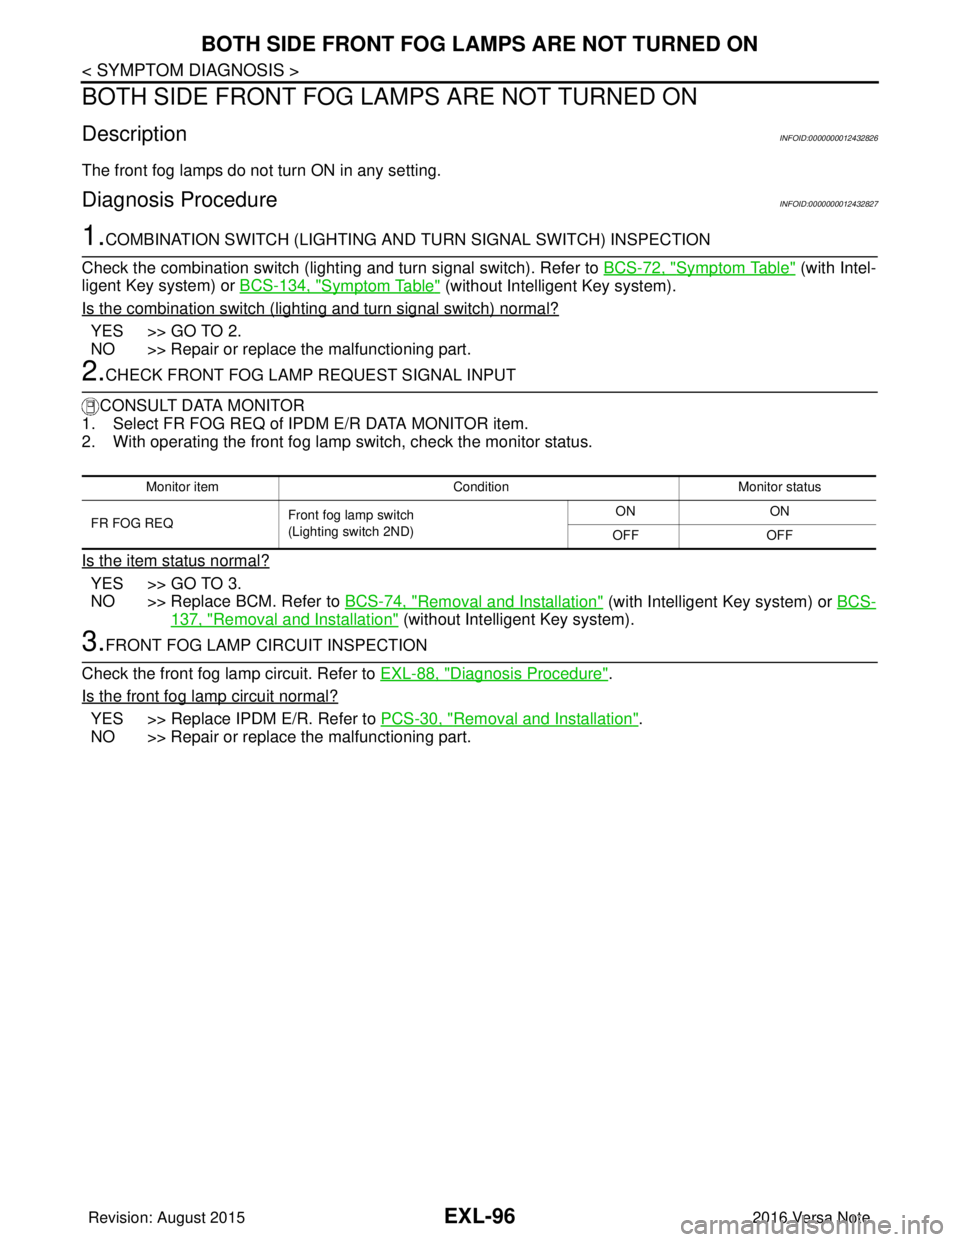
BOTH SIDE FRONT FOG LA MPS ARE NOT TURNED ON
DescriptionINFOID:0000000012432826
The front fog lamps do not turn ON in any setting.
Diagnosis ProcedureINFOID:0000000012432827
1.COMBINATION SWITCH (LIGHTING AND TURN SIGNAL SWITCH) INSPECTION
Check the combination switch (lighting and turn signal switch). Refer to BCS-72, "
Symptom Table" (with Intel-
ligent Key system) or BCS-134, "
Symptom Table" (without Intelligent Key system).
Is the combination switch (lighting and turn signal switch) normal?
YES >> GO TO 2.
NO >> Repair or replace the malfunctioning part.
2.CHECK FRONT FOG LAMP REQUEST SIGNAL INPUT
CONSULT DATA MONITOR
1. Select FR FOG REQ of IPDM E/R DATA MONITOR item.
2. With operating the front fog lamp switch, check the monitor status.
Is the item status normal?
YES >> GO TO 3.
NO >> Replace BCM. Refer to BCS-74, "
Removal and Installation" (with Intelligent Key system) or BCS-
137, "Removal and Installation" (without Intelligent Key system).
3.FRONT FOG LAMP CIRCUIT INSPECTION
Check the front fog lamp circuit. Refer to EXL-88, "
Diagnosis Procedure".
Is the front fog lamp circuit normal?
YES >> Replace IPDM E/R. Refer to PCS-30, "Removal and Installation".
NO >> Repair or replace the malfunctioning part.
Monitor item ConditionMonitor status
FR FOG REQ Front fog lamp switch
(Lighting switch 2ND) ON
ON
OFF OFF
Revision: August 2015 2016 Versa Note
cardiagn.com
Page 1755 of 3641
FRONT COMBINATION LAMPEXL-103
< REMOVAL AND INSTALLATION >
C
DE
F
G H
I
J
K
M A
B
EXL
N
O P
Removal
1. Remove plastic cover.
2. Remove bulb from the front combination lamp.
Installation
Installation is in the reverse order of removal.
CAUTION:
After installing the bulb, install the bulb socket securely for watertightness.
SIDE MARKER LAMP BULB
Removal
1. Rotate bulb socket counterclockwise and remove.
2. Remove the bulb from bulb socket.
Installation
Installation is in the reverse order of removal.
CAUTION:
After installing the bulb, install the bulb socket securely for watertightness.
FRONT TURN SIGNAL/PARKING LAMP BULB
Removal
1. Rotate bulb socket counterclockwise and remove.
2. Remove the bulb from bulb socket.
Installation
Installation is in the reverse order of removal.
CAUTION:
After installing the bulb, install the bulb socket securely for watertightness.
Revision: August 2015
2016 Versa Note
cardiagn.com
Page 1758 of 3641
EXL-106
< REMOVAL AND INSTALLATION >
DOOR MIRROR TURN SIGNAL LAMP
DOOR MIRROR TURN SIGNAL LAMP
Removal and InstallationINFOID:0000000012432838
REMOVAL
1. Remove the door mirror rear finisher. Refer to MIR-18, "Removal and Installation".
2. Remove the screws (A) and door mirror turn signal lamp (1).
3. Disconnect the harness connector from the door mirror turn signal lamp and remove.
INSTALLATION
Installation is in the reverse order of removal.
Bulb ReplacementINFOID:0000000012432839
DOOR MIRROR SIDE TURN SIGNAL LAMP
The door mirror side turn signal lamp bulb is integrated into the door mirror side turn signal lamp and is ser-
viced as an assembly. Refer to EXL-106, "
Removal and Installation".
ALLIA1492ZZ
Revision: August 2015 2016 Versa Note
cardiagn.com
Page 1762 of 3641
EXL-110
< REMOVAL AND INSTALLATION >
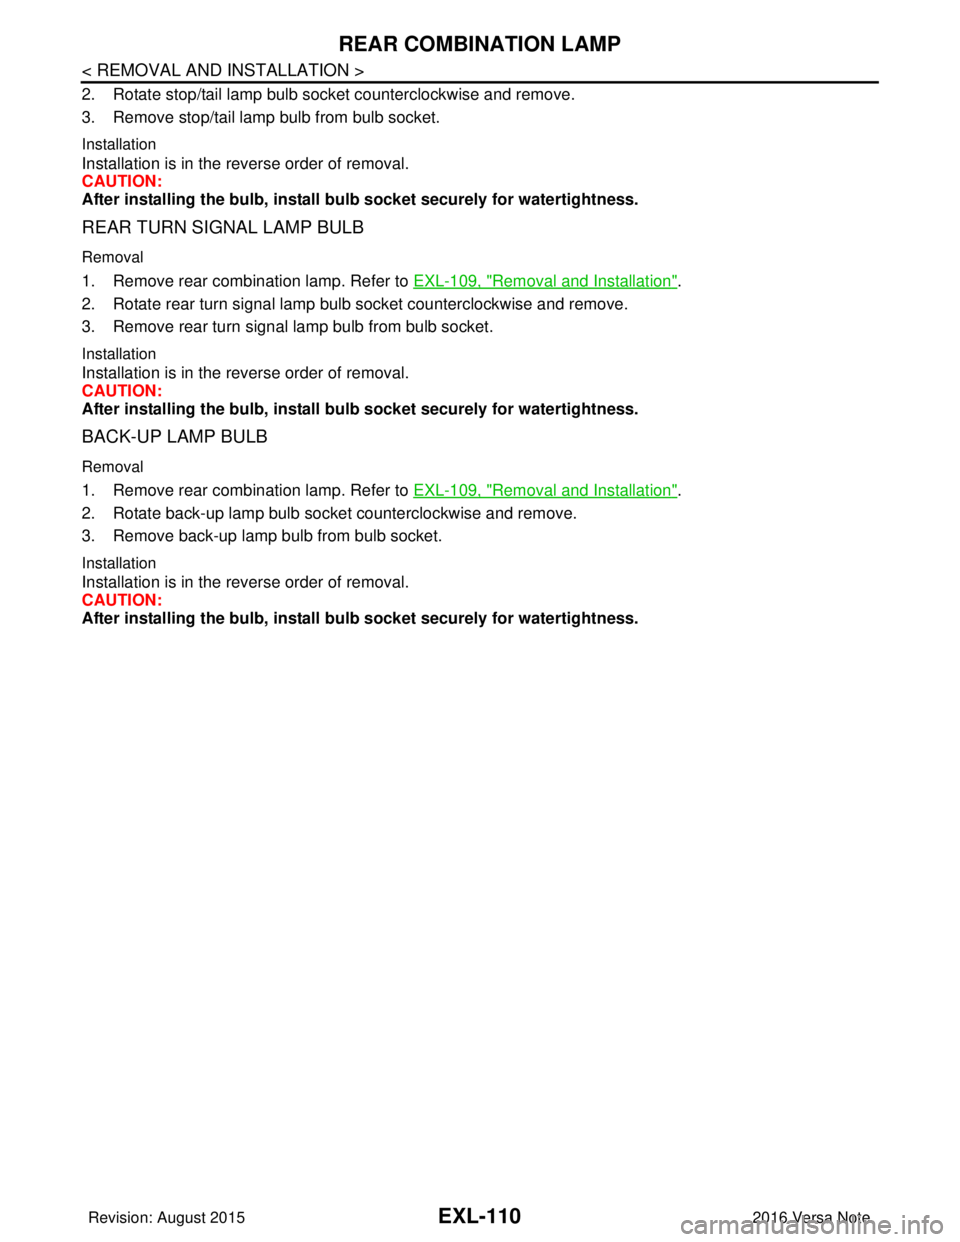
REAR COMBINATION LAMP
2. Rotate stop/tail lamp bulb socket counterclockwise and remove.
3. Remove stop/tail lamp bulb from bulb socket.
Installation
Installation is in the reverse order of removal.
CAUTION:
After installing the bulb, install bulb socket securely for watertightness.
REAR TURN SIGNAL LAMP BULB
Removal
1. Remove rear combination lamp. Refer to EXL-109, "Removal and Installation".
2. Rotate rear turn signal lamp bulb socket counterclockwise and remove.
3. Remove rear turn signal lamp bulb from bulb socket.
Installation
Installation is in the reverse order of removal.
CAUTION:
After installing the bulb, install bu lb socket securely for watertightness.
BACK-UP LAMP BULB
Removal
1. Remove rear combination lamp. Refer to EXL-109, "Removal and Installation".
2. Rotate back-up lamp bulb socket counterclockwise and remove.
3. Remove back-up lamp bulb from bulb socket.
Installation
Installation is in the reverse order of removal.
CAUTION:
After installing the bulb, install bu lb socket securely for watertightness.
Revision: August 2015 2016 Versa Note
cardiagn.com
Page 1765 of 3641
FRONT COMBINATION LAMPEXL-113
< UNIT DISASSEMBLY AND ASSEMBLY >
C
DE
F
G H
I
J
K
M A
B
EXL
N
O P
UNIT DISASSEMBLY AND ASSEMBLY
FRONT COMBINATION LAMP
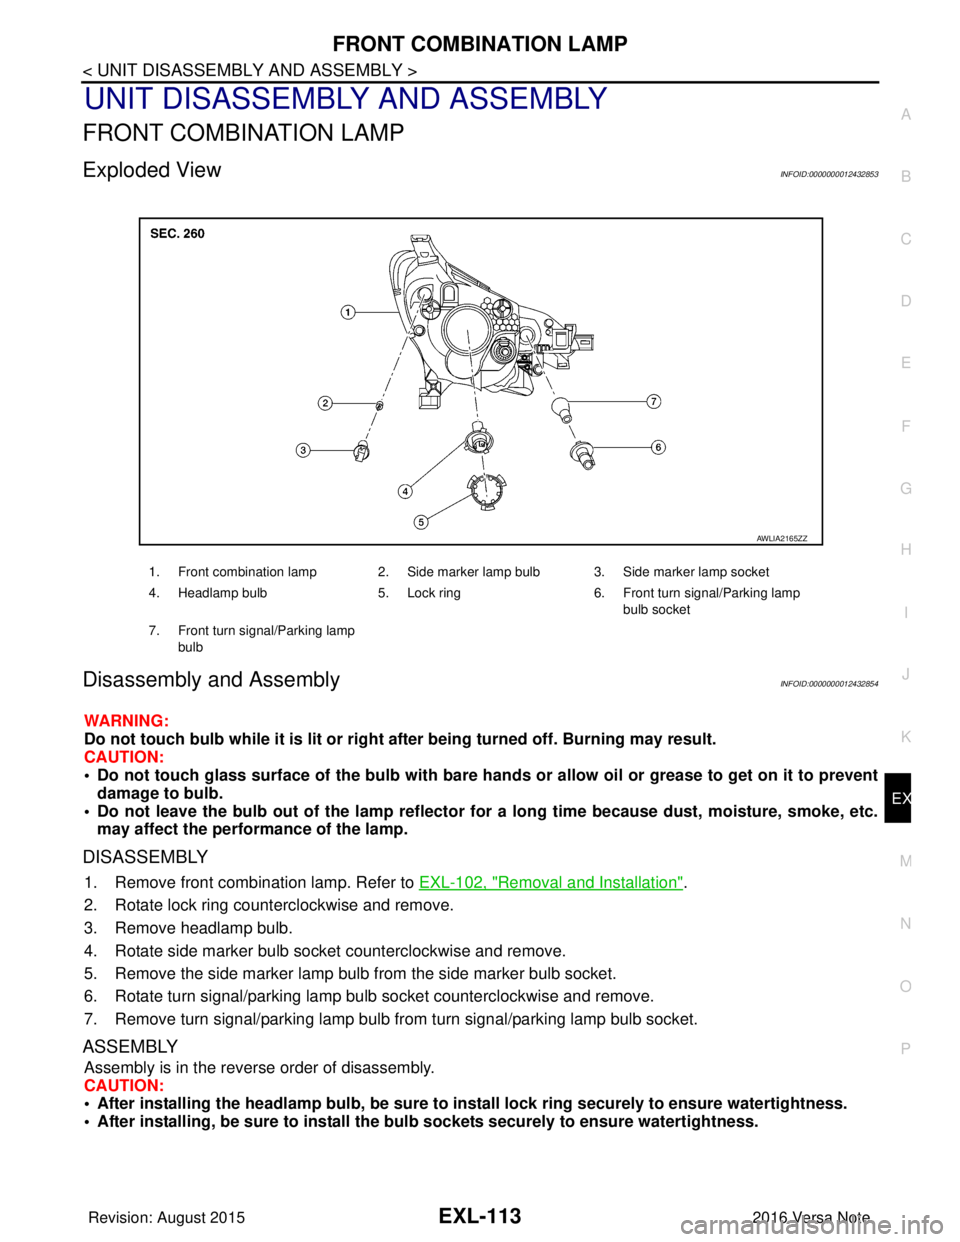
Exploded ViewINFOID:0000000012432853
Disassembly and AssemblyINFOID:0000000012432854
WARNING:
Do not touch bulb while it is lit or right after being turned off. Burning may result.
CAUTION:
• Do not touch glass surface of the bulb with bare hands or allow oil or grease to get on it to prevent damage to bulb.
• Do not leave the bulb out of the lamp reflector for a long time because dust , moisture, smoke, etc.
may affect the performance of the lamp.
DISASSEMBLY
1. Remove front combination lamp. Refer to EXL-102, "Removal and Installation".
2. Rotate lock ring counterclockwise and remove.
3. Remove headlamp bulb.
4. Rotate side marker bulb socket counterclockwise and remove.
5. Remove the side marker lamp bulb from the side marker bulb socket.
6. Rotate turn signal/parking lamp bulb socket counterclockwise and remove.
7. Remove turn signal/parking lamp bulb from turn signal/parking lamp bulb socket.
ASSEMBLY
Assembly is in the reverse order of disassembly.
CAUTION:
• After installing the headlamp bulb, be sure to install lock ring securely to ensure watertightness.
• After installing, be sure to install the bulb sockets securely to ensure watertightness.
1. Front combination lamp 2. Side marker lamp bulb 3. Side marker lamp socket
4. Headlamp bulb 5. Lock ring 6. Front turn signal/Parking lamp
bulb socket
7. Front turn signal/Parking lamp bulb
AWLIA2165ZZ
Revision: August 2015 2016 Versa Note
cardiagn.com
Page 1766 of 3641
EXL-114
< UNIT DISASSEMBLY AND ASSEMBLY >
REAR COMBINATION LAMP
REAR COMBINATION LAMP
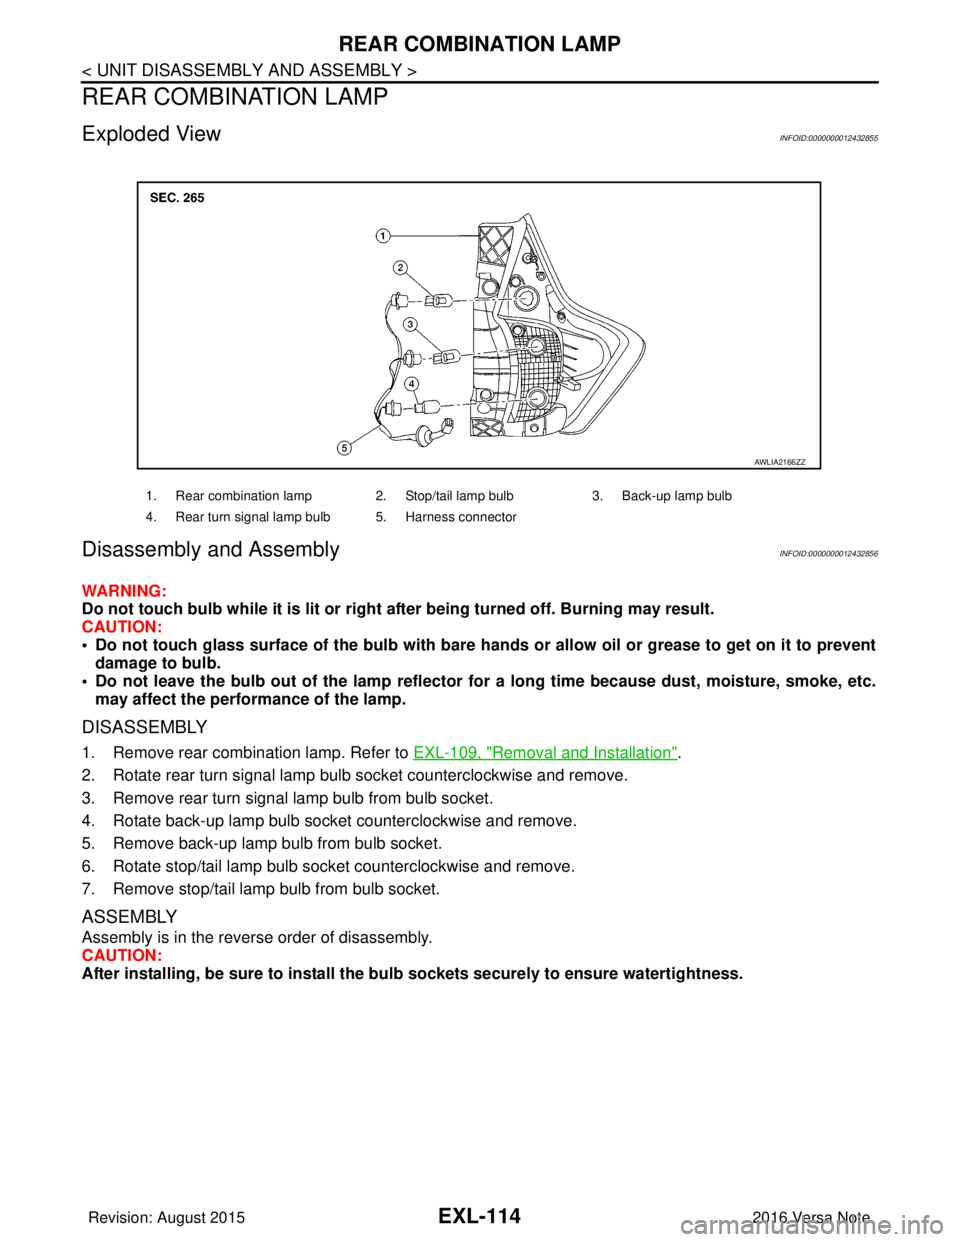
Exploded ViewINFOID:0000000012432855
Disassembly and Assembly INFOID:0000000012432856
WARNING:
Do not touch bulb while it is lit or right after being turned off. Burning may result.
CAUTION:
• Do not touch glass surface of the bulb with bare hands or allow oil or grease to get on it to preventdamage to bulb.
• Do not leave the bulb out of the lamp reflector fo r a long time because dust, moisture, smoke, etc.
may affect the performance of the lamp.
DISASSEMBLY
1. Remove rear combination lamp. Refer to EXL-109, "Removal and Installation".
2. Rotate rear turn signal lamp bulb socket counterclockwise and remove.
3. Remove rear turn signal lamp bulb from bulb socket.
4. Rotate back-up lamp bulb socket counterclockwise and remove.
5. Remove back-up lamp bulb from bulb socket.
6. Rotate stop/tail lamp bulb socket counterclockwise and remove.
7. Remove stop/tail lamp bulb from bulb socket.
ASSEMBLY
Assembly is in the reverse order of disassembly.
CAUTION:
After installing, be sure to install the bu lb sockets securely to ensure watertightness.
1. Rear combination lamp 2. Stop/tail lamp bulb 3. Back-up lamp bulb
4. Rear turn signal lamp bulb 5. Harness connector
AWLIA2166ZZ
Revision: August 2015 2016 Versa Note
cardiagn.com