2016 NISSAN NOTE check engine
[x] Cancel search: check enginePage 580 of 3641
![NISSAN NOTE 2016 Service Repair Manual BRC-132
< SYMPTOM DIAGNOSIS >[VDC/TCS/ABS]
VDC/TCS/ABS
SYMPTOM DIAGNOSIS
VDC/TCS/ABS
Symptom TableINFOID:0000000012430917
If ABS warning lamp and SLIP indicator
lamp turn ON, perform self diagnostic. NISSAN NOTE 2016 Service Repair Manual BRC-132
< SYMPTOM DIAGNOSIS >[VDC/TCS/ABS]
VDC/TCS/ABS
SYMPTOM DIAGNOSIS
VDC/TCS/ABS
Symptom TableINFOID:0000000012430917
If ABS warning lamp and SLIP indicator
lamp turn ON, perform self diagnostic.](/manual-img/5/57363/w960_57363-579.png)
BRC-132
< SYMPTOM DIAGNOSIS >[VDC/TCS/ABS]
VDC/TCS/ABS
SYMPTOM DIAGNOSIS
VDC/TCS/ABS
Symptom TableINFOID:0000000012430917
If ABS warning lamp and SLIP indicator
lamp turn ON, perform self diagnostic.
NOTE:
• 1: The ABS does not operate when the speed is 10 km/h (6 MPH) or less.
• 2: Under the following conditions, ABS is activated and vibration is felt when brake pedal is lightly depressed (just place a foot on it).
However, this is normal:
- When shifting gears
- When driving on slippery road
- During cornering at high speed
- When passing over bumps or grooves [approximately 50 mm (1.97 in) or more]
- When pulling away just after starting engine [at approximately 10 km/h (6 MPH) or higher] Symptom
Check itemReference
Excessive ABS function operation fre-
quency Brake force distribution
BRC-133, "
Diag-
nosis Procedure"Looseness of front and rear axle
Wheel sensor and rotor system
Unexpected pedal reaction Brake pedal stroke
BRC-134, "
Diag-
nosis Procedure"Make sure the braking force is sufficient when the ABS is not operating.
The braking distance is long Check stopping distance when the ABS is not operating. BRC-135, "
Diag-
nosis Procedure"
ABS function does not operate (Note 1) ABS actuator and electric
unit (control unit)BRC-136, "Diag-
nosis Procedure"
Pedal vibration or ABS operation sound
occurs (Note 2)Brake pedal
BRC-137, "Diag-
nosis Procedure"ABS actuator and electric unit (control unit)
Vehicle jerks during VDC/TCS/ABS con-
trol ABS actuator and electric unit (control unit)
BRC-138, "
Diag-
nosis Procedure"TCM
ECM
Revision: August 2015 2016 Versa Note
cardiagn.com
Page 585 of 3641
![NISSAN NOTE 2016 Service Repair Manual PEDAL VIBRATION OR ABS OPERATION SOUND OCCURS
BRC-137
< SYMPTOM DIAGNOSIS > [VDC/TCS/ABS]
C
D
E
G H
I
J
K L
M A
B
BRC
N
O P
PEDAL VIBRATION OR ABS OPERATION SOUND OCCURS
Diagnosis ProcedureINFOID:000 NISSAN NOTE 2016 Service Repair Manual PEDAL VIBRATION OR ABS OPERATION SOUND OCCURS
BRC-137
< SYMPTOM DIAGNOSIS > [VDC/TCS/ABS]
C
D
E
G H
I
J
K L
M A
B
BRC
N
O P
PEDAL VIBRATION OR ABS OPERATION SOUND OCCURS
Diagnosis ProcedureINFOID:000](/manual-img/5/57363/w960_57363-584.png)
PEDAL VIBRATION OR ABS OPERATION SOUND OCCURS
BRC-137
< SYMPTOM DIAGNOSIS > [VDC/TCS/ABS]
C
D
E
G H
I
J
K L
M A
B
BRC
N
O P
PEDAL VIBRATION OR ABS OPERATION SOUND OCCURS
Diagnosis ProcedureINFOID:0000000012430922
CAUTION:
Under the following conditions, ABS is activated an d vibration is felt when brake pedal is lightly
depressed (just place a foot on it). However, this is normal.
• When shifting gears
• When driving on slippery road
• During cornering at high speed
• When passing over bumps or grooves [approximately 50 mm (1.97 in) or more]
• When pulling away just after starting engine [at approximately 10 km/h (6 MPH) or higher]
1.SYMPTOM CHECK 1
Check that there are pedal vibrat ions when the engine is started.
Do symptoms occur?
YES >> GO TO 2.
NO >> Inspect the brake pedal.
2.SYMPTOM CHECK 2
Check that there are ABS operation noises when the engine is started.
Do symptoms occur?
YES >> GO TO 3.
NO >> Perform “Self Diagnostic Result”. Refer to BRC-31, "
CONSULT Function (ABS)".
3.SYMPTOM CHECK 3
Check symptoms when electrical component (headlamps, etc.) switches are operated.
Do symptoms occur?
YES >> Check if there is a radio, antenna, antenna lead wire, or wiring close to the control unit. If there is,
move it farther away.
NO >> Inspection End.
Revision: August 2015 2016 Versa Note
cardiagn.com
Page 587 of 3641
![NISSAN NOTE 2016 Service Repair Manual NORMAL OPERATING CONDITIONBRC-139
< SYMPTOM DIAGNOSIS > [VDC/TCS/ABS]
C
D
E
G H
I
J
K L
M A
B
BRC
N
O P
NORMAL OPERATING CONDITION
DescriptionINFOID:0000000012430924
Symptom Result
Slight vibrations a NISSAN NOTE 2016 Service Repair Manual NORMAL OPERATING CONDITIONBRC-139
< SYMPTOM DIAGNOSIS > [VDC/TCS/ABS]
C
D
E
G H
I
J
K L
M A
B
BRC
N
O P
NORMAL OPERATING CONDITION
DescriptionINFOID:0000000012430924
Symptom Result
Slight vibrations a](/manual-img/5/57363/w960_57363-586.png)
NORMAL OPERATING CONDITIONBRC-139
< SYMPTOM DIAGNOSIS > [VDC/TCS/ABS]
C
D
E
G H
I
J
K L
M A
B
BRC
N
O P
NORMAL OPERATING CONDITION
DescriptionINFOID:0000000012430924
Symptom Result
Slight vibrations are felt on the brake pedal and operation noises occur when VDC, TCS or ABS is activated. This is a normal condi-
tion due to the VDC,
TCS or ABS activation.
Stopping distance is longer than that of vehicles without ABS when the vehicle drives on rough, gravel, or
snow-covered (fresh, deep snow) roads.
The brake pedal moves and generates noises when TCS or VDC is activated due to rapid acceleration or
sharp turn.
The brake pedal vibrates and motor operation noises occur from the engine room after the engine starts and
just after the vehicle starts.
This is normal, and it is
caused by the ABS op-
eration check.
Depending on the road conditions, the driver may experience a sluggish feel in the brake pedal. This is normal, because
TCS places the highest
priority on the optimum
traction (stability).
TCS may activate momentarily if wheel speed changes when driving where road friction coefficient varies,
when downshifting, or when fully depressing accelerator pedal.
The ABS warning lamp and SLIP
indicator lamp may turn ON when the vehicle is subject to strong shaking
or large vibration, such as when the vehicle is rotating on a turntable or located on a ship while the engine
is running. In this case, restart the
engine on a normal
road. If the normal con-
dition is restored, there
is no malfunction. At
that time, erase the self-
diagnostic result memo-
ry.
VDC may not operate normally or th
e ABS warning lamp, and SLIP indicato r lamp may illuminate when driv-
ing on a road that is extremely slanted (e.g., bank in a circuit course).
A malfunction may occur in the yaw rate/side/decel G sensor system when the vehicle turns sharply, such
as during a spin turn, axle turn, or drift driving, while the VDC function is OFF (VDC OFF indicator lamp illu-
minated).
The vehicle speed will not increase even though the accelerator pedal is depressed, when inspecting the
speedometer on a 2-wheel chassis dynamometer. Normal (Deactivate the
VDC/TCS function be-
fore performing an in-
spection on a chassis
dynamometer.)
SLIP indicator lamp may simultaneously turn ON when low tire pressure warning lamp turns ON. This is not a VDC sys-
tem error but results
from characteristic
change of tire.
Revision: August 2015
2016 Versa Note
cardiagn.com
Page 611 of 3641

CHG-16
< BASIC INSPECTION >
DIAGNOSIS AND REPAIR WORKFLOW
>> GO TO 2.
2.STOP POWER GENERATION VOLTAGE VARIABLE CONTROL SYSTEM
Stop the operation of the power generation voltage variabl e control in either of the following procedures.
• After selecting “ENGINE” using CONSULT, set the DUTY value of “ALTERNATOR DUTY” to 0 % by select-
ing “ALTERNATOR DUTY” of “Active Test”. Continue “Active Test” until the end of inspection. (When the
DUTY value is 0 or 100 %, the normal power generation is performed according to the characteristic of the
IC regulator of the generator.)
• Turn the ignition switch OFF, and disconnect the batte ry current sensor connector. [However, DTC (P1550–
P1554) of the engine might remain. After finishing the inspection, connect the battery current sensor connec-
tor and erase the self diagnosis results history of the engine using CONSULT.]
>> GO TO 3.
3.DIAGNOSIS WITH EXP-800 NI OR GR8-1200 NI
Perform the charging system test using Multitasking battery and electrical diagnostic station GR8-1200 NI or
Battery and electrical diagnostic analyzer EXP-800 NI. Refer to the applicable Instruction Manual for proper
testing procedures.
Te s t r e s u l t
NO PROBLEMS>>Charging system is normal and will also show “DIODE RIPPLE” test result.
NO VOLTAGE>>GO TO 4.
LOW VOLTAGE>>GO TO 12.
HIGH VOLTAGE>>GO TO 14.
EXCESSIVE RIPPLE, OPEN PHASE, OPEN DIODE or SHORTED DIODE>>Replace the generator. Refer
to CHG-29, "
Removal and Installation". Perform “DIODE RIPPLE” test again using Multitasking
battery and electrical diagnostic station GR8-1200 NI or Battery and electrical diagnostic analyzer
EXP-800 NI to confirm repair.
4.INSPECTION WITH CHARGE WARNING LAMP (IGNITION SWITCH IS ON)
Turn the ignition switch ON.
Does the charge warning lamp illuminate?
YES >> GO TO 6.
NO >> GO TO 5.
5.“L” TERMINAL CIRCUIT (OPEN) INSPECTION
Check “L” terminal circuit (open). Refer to CHG-24, "
Diagnosis Procedure".
Is the
“L” terminal circuit normal?
YES >> Replace generator. Refer to CHG-29, "Removal and Installation".
NO >> Repair as needed.
6.INSPECTION WITH CHARGE WARNING LAMP (IDLING)
Start the engine and run it at idle.
Does the charge warning lamp turn OFF?
YES >> GO TO 9.
NO >> GO TO 7.
7.“L” TERMINAL CIRCUIT (SHORT) INSPECTION
Check “L” terminal circuit (short). Refer to CHG-26, "
Diagnosis Procedure".
Is the
“L” terminal circuit normal?
YES >> GO TO 8.
NO >> Repair as needed.
8.“S” TERMINAL CIRCUIT INSPECTION
Check “S” terminal circuit. Refer to CHG-27, "
Diagnosis Procedure".
Is the
“S” terminal circuit normal?
YES >> GO TO 10.
Revision: August 2015 2016 Versa Note
cardiagn.com
Page 612 of 3641

CHG
DIAGNOSIS AND REPAIR WORKFLOWCHG-17
< BASIC INSPECTION >
C
DE
F
G H
I
J
K L
B A
O P
N
NO >> Repair as needed.
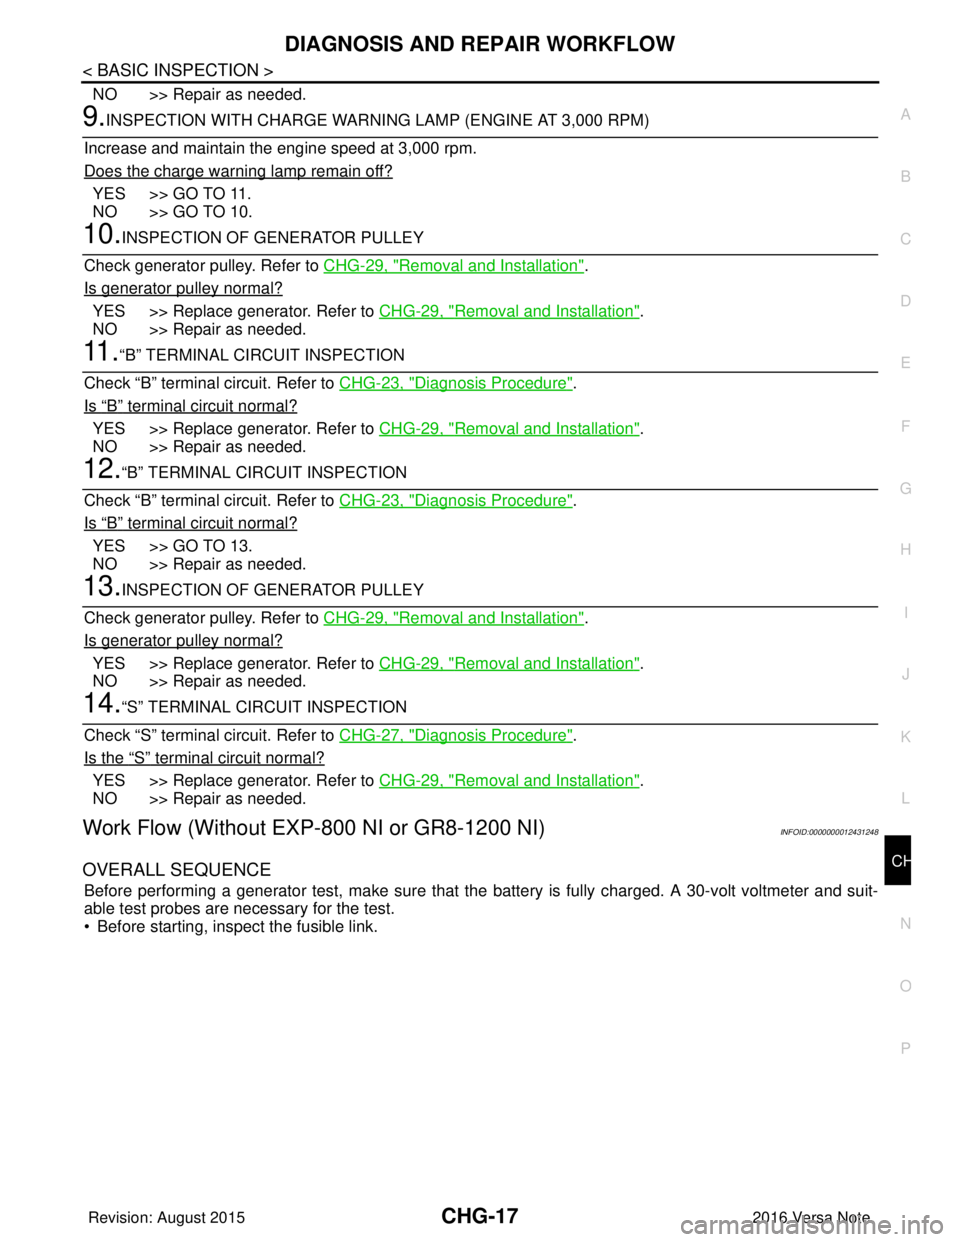
9.INSPECTION WITH CHARGE WARNING LAMP (ENGINE AT 3,000 RPM)
Increase and maintain the engine speed at 3,000 rpm.
Does the charge warning lamp remain off?
YES >> GO TO 11.
NO >> GO TO 10.
10.INSPECTION OF GENERATOR PULLEY
Check generator pulley. Refer to CHG-29, "
Removal and Installation".
Is generator pulley normal?
YES >> Replace generator. Refer to CHG-29, "Removal and Installation".
NO >> Repair as needed.
11 .“B” TERMINAL CIRCUIT INSPECTION
Check “B” terminal circuit. Refer to CHG-23, "
Diagnosis Procedure".
Is
“B” terminal circuit normal?
YES >> Replace generator. Refer to CHG-29, "Removal and Installation".
NO >> Repair as needed.
12.“B” TERMINAL CIRCUIT INSPECTION
Check “B” terminal circuit. Refer to CHG-23, "
Diagnosis Procedure".
Is
“B” terminal circuit normal?
YES >> GO TO 13.
NO >> Repair as needed.
13.INSPECTION OF GENERATOR PULLEY
Check generator pulley. Refer to CHG-29, "
Removal and Installation".
Is generator pulley normal?
YES >> Replace generator. Refer to CHG-29, "Removal and Installation".
NO >> Repair as needed.
14.“S” TERMINAL CIRCUIT INSPECTION
Check “S” terminal circuit. Refer to CHG-27, "
Diagnosis Procedure".
Is the
“S” terminal circuit normal?
YES >> Replace generator. Refer to CHG-29, "Removal and Installation".
NO >> Repair as needed.
Work Flow (Without EXP-800 NI or GR8-1200 NI)INFOID:0000000012431248
OVERALL SEQUENCE
Before performing a generator test, make sure that the battery is fully charged. A 30-volt voltmeter and suit-
able test probes are necessary for the test.
• Before starting, inspect the fusible link.
Revision: August 2015 2016 Versa Note
cardiagn.com
Page 614 of 3641

CHG
DIAGNOSIS AND REPAIR WORKFLOWCHG-19
< BASIC INSPECTION >
C
DE
F
G H
I
J
K L
B A
O P
N
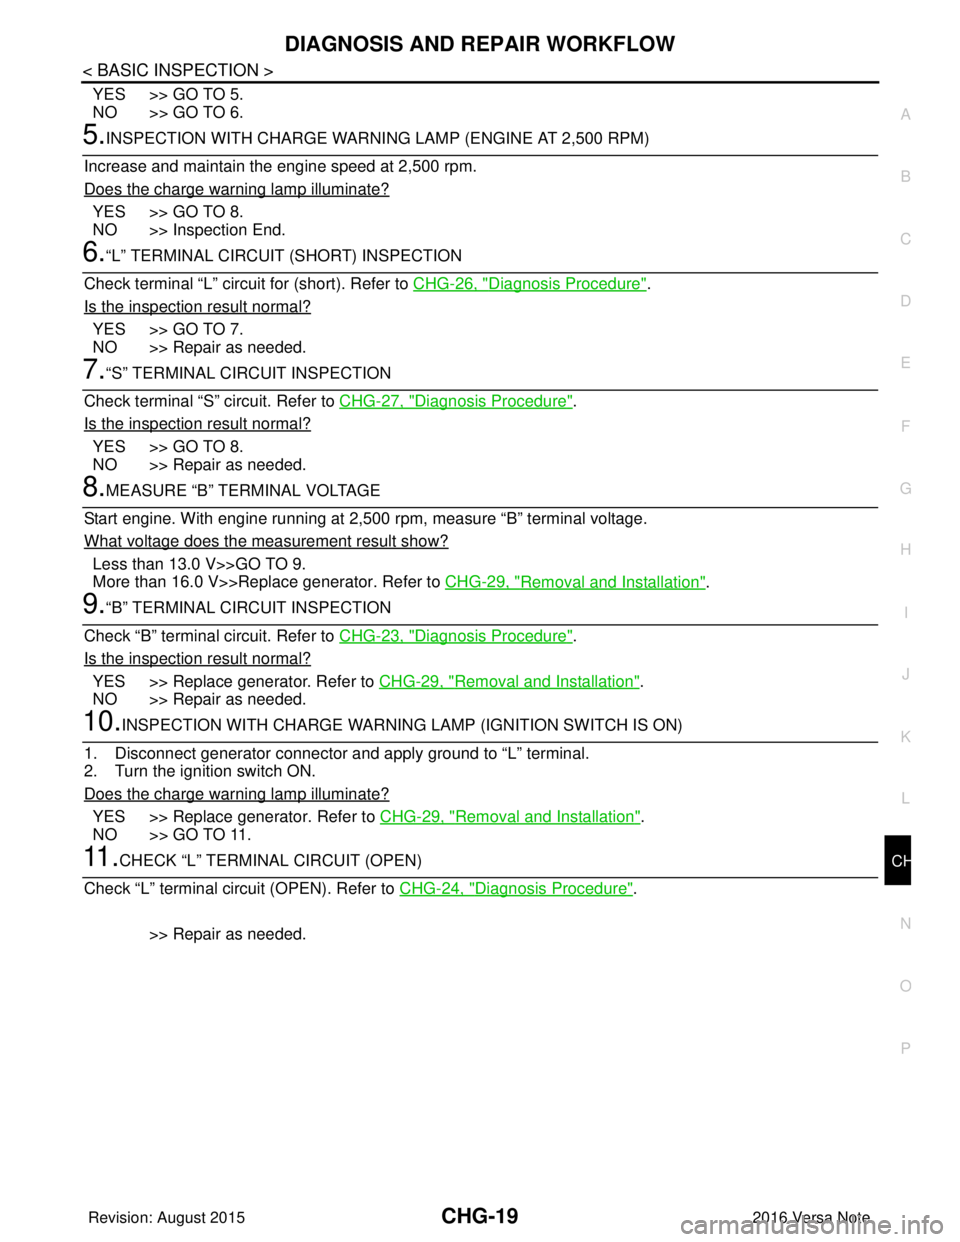
YES >> GO TO 5.
NO >> GO TO 6.
5.INSPECTION WITH CHARGE WARNING LAMP (ENGINE AT 2,500 RPM)
Increase and maintain the engine speed at 2,500 rpm.
Does the charge warning lamp illuminate?
YES >> GO TO 8.
NO >> Inspection End.
6.“L” TERMINAL CIRCUIT (SHORT) INSPECTION
Check terminal “L” circuit for (short). Refer to CHG-26, "
Diagnosis Procedure".
Is the inspection result normal?
YES >> GO TO 7.
NO >> Repair as needed.
7.“S” TERMINAL CIRCUIT INSPECTION
Check terminal “S” circuit. Refer to CHG-27, "
Diagnosis Procedure".
Is the inspection result normal?
YES >> GO TO 8.
NO >> Repair as needed.
8.MEASURE “B” TERMINAL VOLTAGE
Start engine. With engine running at 2,500 rpm, measure “B” terminal voltage.
What voltage does the measurement result show?
Less than 13.0 V>>GO TO 9.
More than 16.0 V>>Replace generator. Refer to CHG-29, "
Removal and Installation".
9.“B” TERMINAL CIRCUIT INSPECTION
Check “B” terminal circuit. Refer to CHG-23, "
Diagnosis Procedure".
Is the inspection result normal?
YES >> Replace generator. Refer to CHG-29, "Removal and Installation".
NO >> Repair as needed.
10.INSPECTION WITH CHARGE WARNING LAMP (IGNITION SWITCH IS ON)
1. Disconnect generator connector and apply ground to “L” terminal.
2. Turn the ignition switch ON.
Does the charge warning lamp illuminate?
YES >> Replace generator. Refer to CHG-29, "Removal and Installation".
NO >> GO TO 11.
11 .CHECK “L” TERMINAL CIRCUIT (OPEN)
Check “L” terminal circuit (OPEN). Refer to CHG-24, "
Diagnosis Procedure".
>> Repair as needed.
Revision: August 2015 2016 Versa Note
cardiagn.com
Page 616 of 3641

CHG
POWER GENERATION VOLTAGE VARIABLE CONTROL SYSTEM OPERATION
INSPECTION
CHG-21
< DTC/CIRCUIT DIAGNOSIS >
C
DE
F
G H
I
J
K L
B A
O P
N
POWER GENERATION VOLTAGE VARI
ABLE CONTROL SYSTEM OPER-
ATION INSPECTION
Diagnosis ProcedureINFOID:0000000012431250
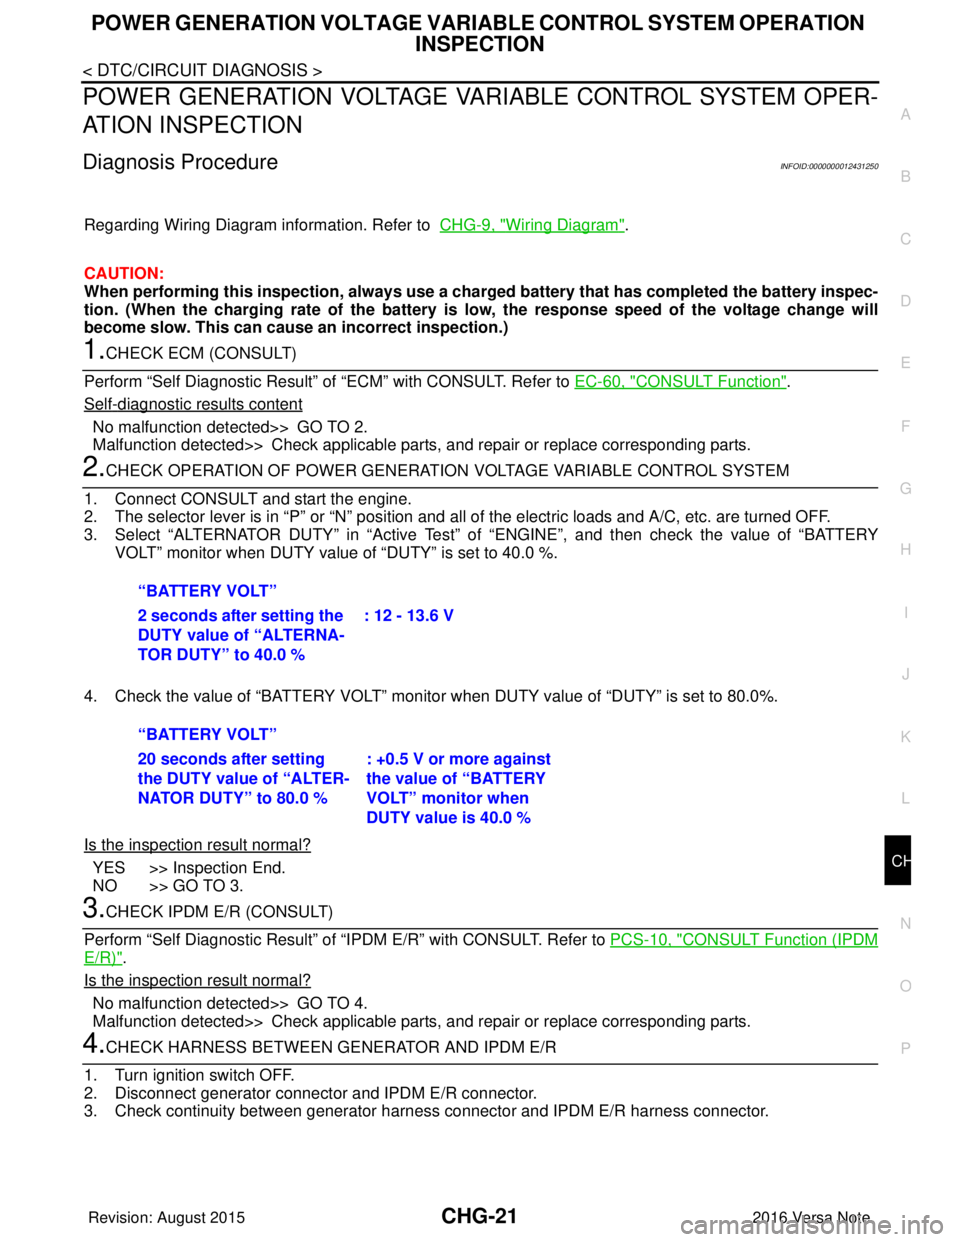
Regarding Wiring Diagram information. Refer to CHG-9, "Wiring Diagram".
CAUTION:
When performing this inspection, always use a charged battery that has completed the battery inspec-
tion. (When the charging rate of the battery is low, the response speed of the voltage change will
become slow. This can cause an incorrect inspection.)
1.CHECK ECM (CONSULT)
Perform “Self Diagnostic Result” of “ECM” with CONSULT. Refer to EC-60, "
CONSULT Function".
Self
-diagnostic results content
No malfunction detected>> GO TO 2.
Malfunction detected>> Check applicable parts, and repair or replace corresponding parts.
2.CHECK OPERATION OF POWER GENERATION VOLTAGE VARIABLE CONTROL SYSTEM
1. Connect CONSULT and start the engine.
2. The selector lever is in “P” or “N” position and a ll of the electric loads and A/C, etc. are turned OFF.
3. Select “ALTERNATOR DUTY” in “Active Test” of “ENGINE”, and then check the value of “BATTERY
VOLT” monitor when DUTY value of “DUTY” is set to 40.0 %.
4. Check the value of “BATTERY VOLT” monitor when DUTY value of “DUTY” is set to 80.0%.
Is the inspection result normal?
YES >> Inspection End.
NO >> GO TO 3.
3.CHECK IPDM E/R (CONSULT)
Perform “Self Diagnostic Result” of “I PDM E/R” with CONSULT. Refer to PCS-10, "
CONSULT Function (IPDM
E/R)".
Is the inspection result normal?
No malfunction detected>> GO TO 4.
Malfunction detected>> Check applicable parts, and repair or replace corresponding parts.
4.CHECK HARNESS BETWEEN GE NERATOR AND IPDM E/R
1. Turn ignition switch OFF.
2. Disconnect generator connector and IPDM E/R connector.
3. Check continuity between generator harne ss connector and IPDM E/R harness connector.
“BATTERY VOLT”
2 seconds after setting the
DUTY value of “ALTERNA-
TOR DUTY” to 40.0 %
: 12 - 13.6 V
“BATTERY VOLT”
20 seconds after setting
the DUTY value of “ALTER-
NATOR DUTY” to 80.0 % : +0.5 V or more against
the value of “BATTERY
VOLT” monitor when
DUTY value is 40.0 %
Revision: August 2015
2016 Versa Note
cardiagn.com
Page 618 of 3641

CHG
B TERMINAL CIRCUITCHG-23
< DTC/CIRCUIT DIAGNOSIS >
C
DE
F
G H
I
J
K L
B A
O P
N
B TERMINAL CIRCUIT
DescriptionINFOID:0000000012431251
“B” terminal circuit supplies power to charge the batte
ry and to operate the vehicles electrical system.
Diagnosis ProcedureINFOID:0000000012431252
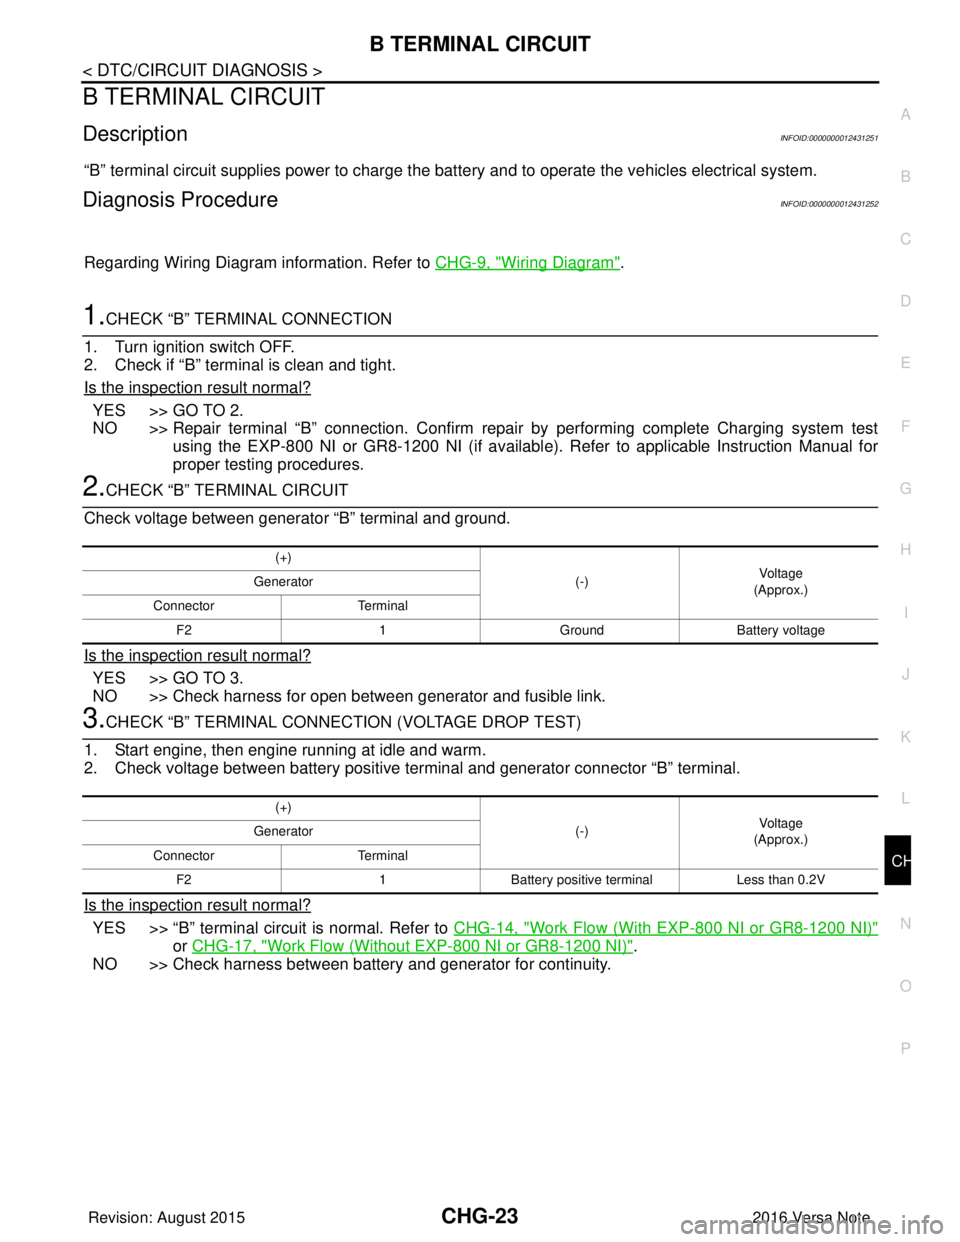
Regarding Wiring Diagram information. Refer to CHG-9, "Wiring Diagram".
1.CHECK “B” TERMINAL CONNECTION
1. Turn ignition switch OFF.
2. Check if “B” terminal is clean and tight.
Is the inspection result normal?
YES >> GO TO 2.
NO >> Repair terminal “B” connection. Confirm repair by performing complete Charging system test using the EXP-800 NI or GR8-1200 NI (if availabl e). Refer to applicable Instruction Manual for
proper testing procedures.
2.CHECK “B” TERMINAL CIRCUIT
Check voltage between generator “B” terminal and ground.
Is the inspection result normal?
YES >> GO TO 3.
NO >> Check harness for open between generator and fusible link.
3.CHECK “B” TERMINAL CONNECT ION (VOLTAGE DROP TEST)
1. Start engine, then engine running at idle and warm.
2. Check voltage between battery positive te rminal and generator connector “B” terminal.
Is the inspection result normal?
YES >> “B” terminal circuit is normal. Refer to CHG-14, "Work Flow (With EXP-800 NI or GR8-1200 NI)"
or CHG-17, "Work Flow (Without EXP-800 NI or GR8-1200 NI)".
NO >> Check harness between battery and generator for continuity.
(+)
(-)Voltage
(Approx.)
Generator
Connector Terminal
F2 1GroundBattery voltage
(+)
(-)Voltage
(Approx.)
Generator
Connector Terminal
F2 1Battery positive terminal Less than 0.2V
Revision: August 2015 2016 Versa Note
cardiagn.com