2016 BMW M4 light
[x] Cancel search: lightPage 151 of 228
▷Do not connect up USB hard drives.▷Do not use the USB audio interface for
charging external devices.
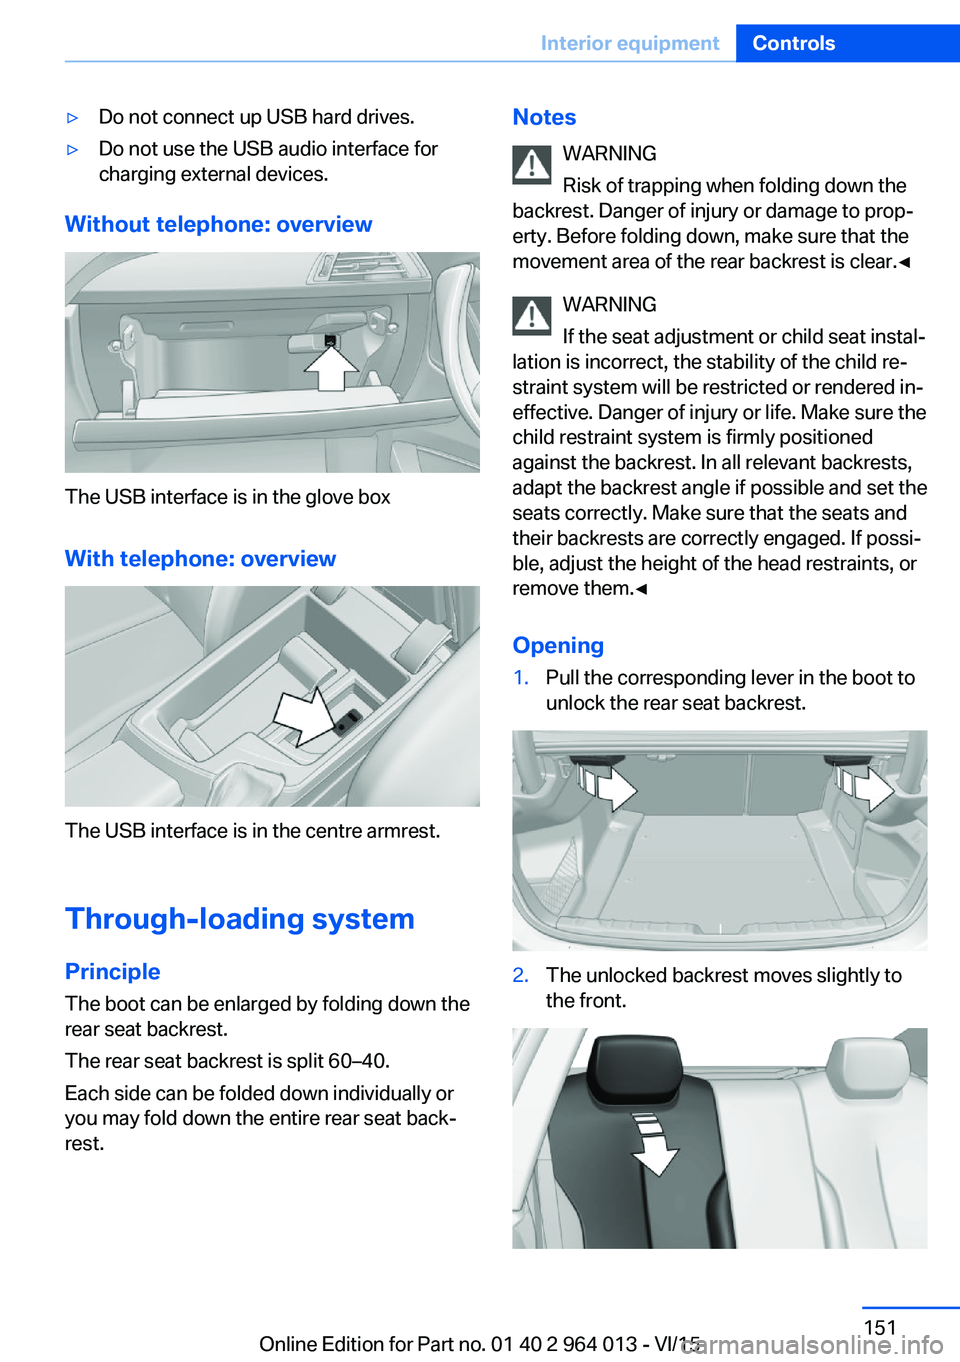
Without telephone: overview
The USB interface is in the glove box
With telephone: overview
The USB interface is in the centre armrest.
Through-loading system PrincipleThe boot can be enlarged by folding down the
rear seat backrest.
The rear seat backrest is split 60–40.
Each side can be folded down individually or
you may fold down the entire rear seat back‐ rest.
Notes
WARNING
Risk of trapping when folding down the
backrest. Danger of injury or damage to prop‐
erty. Before folding down, make sure that the
movement area of the rear backrest is clear.◀
WARNING
If the seat adjustment or child seat instal‐
lation is incorrect, the stability of the child re‐
straint system will be restricted or rendered in‐
effective. Danger of injury or life. Make sure the
child restraint system is firmly positioned
against the backrest. In all relevant backrests,
adapt the backrest angle if possible and set the
seats correctly. Make sure that the seats and
their backrests are correctly engaged. If possi‐
ble, adjust the height of the head restraints, or
remove them.◀
Opening1.Pull the corresponding lever in the boot to
unlock the rear seat backrest.2.The unlocked backrest moves slightly to
the front.Seite 151Interior equipmentControls151
Online Edition for Part no. 01 40 2 964 013 - VI/15
Page 153 of 228
Storage compartmentsVehicle equipmentThis chapter describes all standard, national
and special equipment provided in the model
series. Equipment not available in the vehicle is
therefore also described, for example the se‐
lected special equipment or national version.
This also applies to safety-relevant functions
and systems. Comply with the relevant na‐
tional regulations when using the correspond‐
ing functions and systems.
Notes WARNING
Loose objects in the interior can be
thrown into the interior during the journey, for
example in an accident or during braking and
evasive manoeuvres. Danger of injury. Secure
loose objects in the interior.◀
ATTENTION
Anti-slip mats can damage the dash‐
board. Danger of damage to property. Do not
use anti-slip mats.◀
Storage options The following storage options are located in
the interior:▷Glove box on the passenger side, see
page 153.▷Glove box on the driver's side, see
page 154.▷Without smoker's package: front compart‐
ment, in front of cupholders, see
page 154.▷Storage compartment in the front centre
armrest, see page 154.▷Pockets in the doors, see page 154.▷Nets on the backrests of the front seats.▷Storage compartment between the rear
seats, see page 155.
Glove box
Front passenger's side
Note WARNING
The glove box projects into the interior
when it is opened. Objects in the glove box can
be thrown into the interior during the journey,
for example in an accident or during braking
and evasive manoeuvres. Danger of injury. Im‐
mediately close the glove box after using it.◀
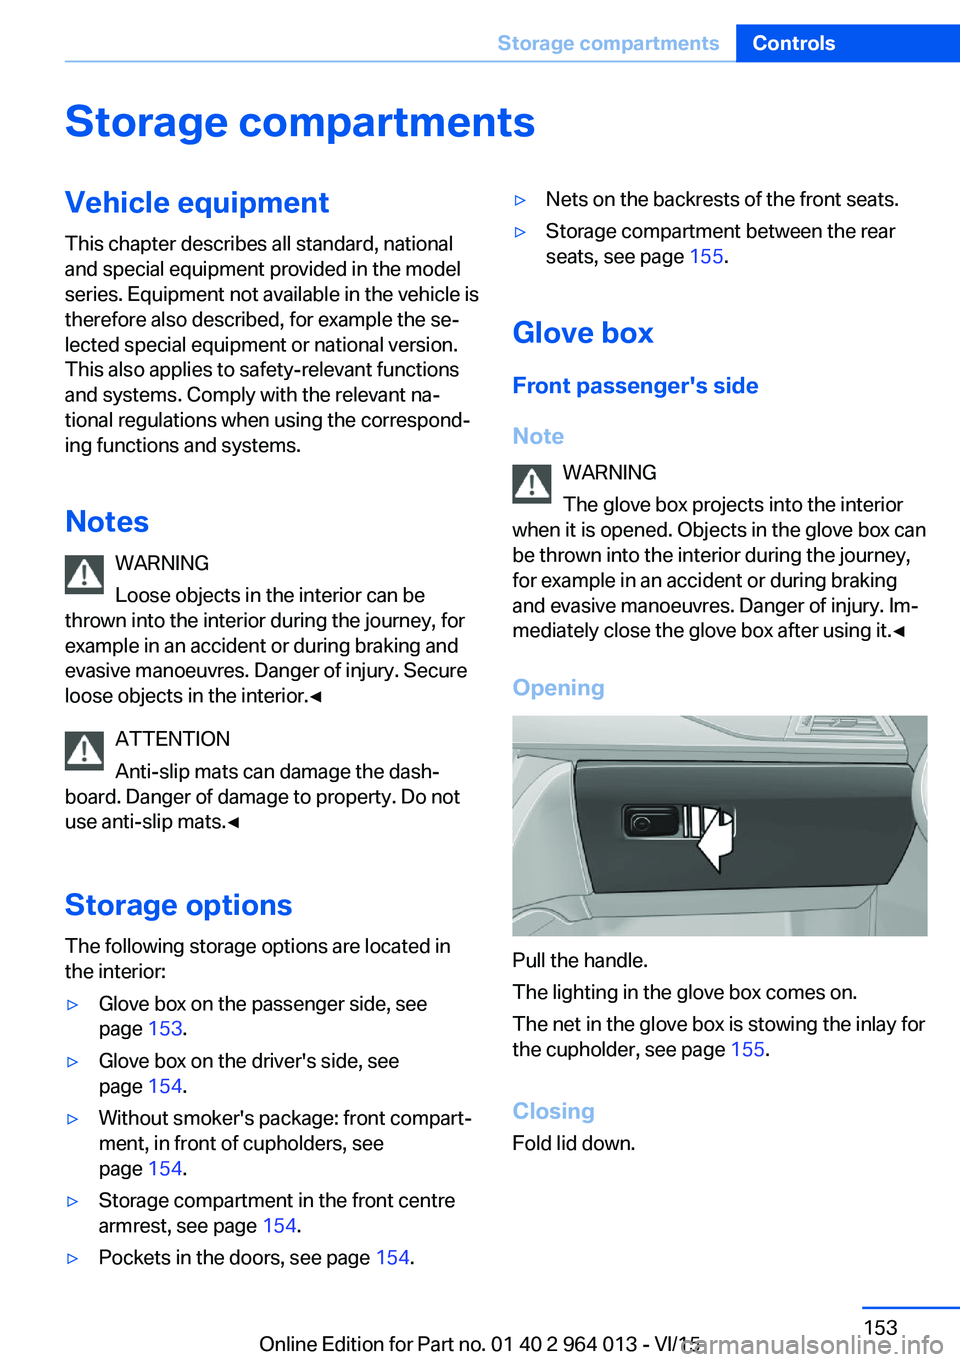
Opening
Pull the handle.
The lighting in the glove box comes on.
The net in the glove box is stowing the inlay for
the cupholder, see page 155.
Closing
Fold lid down.
Seite 153Storage compartmentsControls153
Online Edition for Part no. 01 40 2 964 013 - VI/15
Page 155 of 228
SlidingCentre armrest can be slid in the longitudinal
direction. It engages into the end positions.
Connection for external audio device An external audio device, for ex‐
ample an MP3 player, can be
connected through the AUX-IN
port or the USB audio interface
in the centre armrest.
Storage compartment
between the rear seats
A storage compartment is located between the
rear seats.
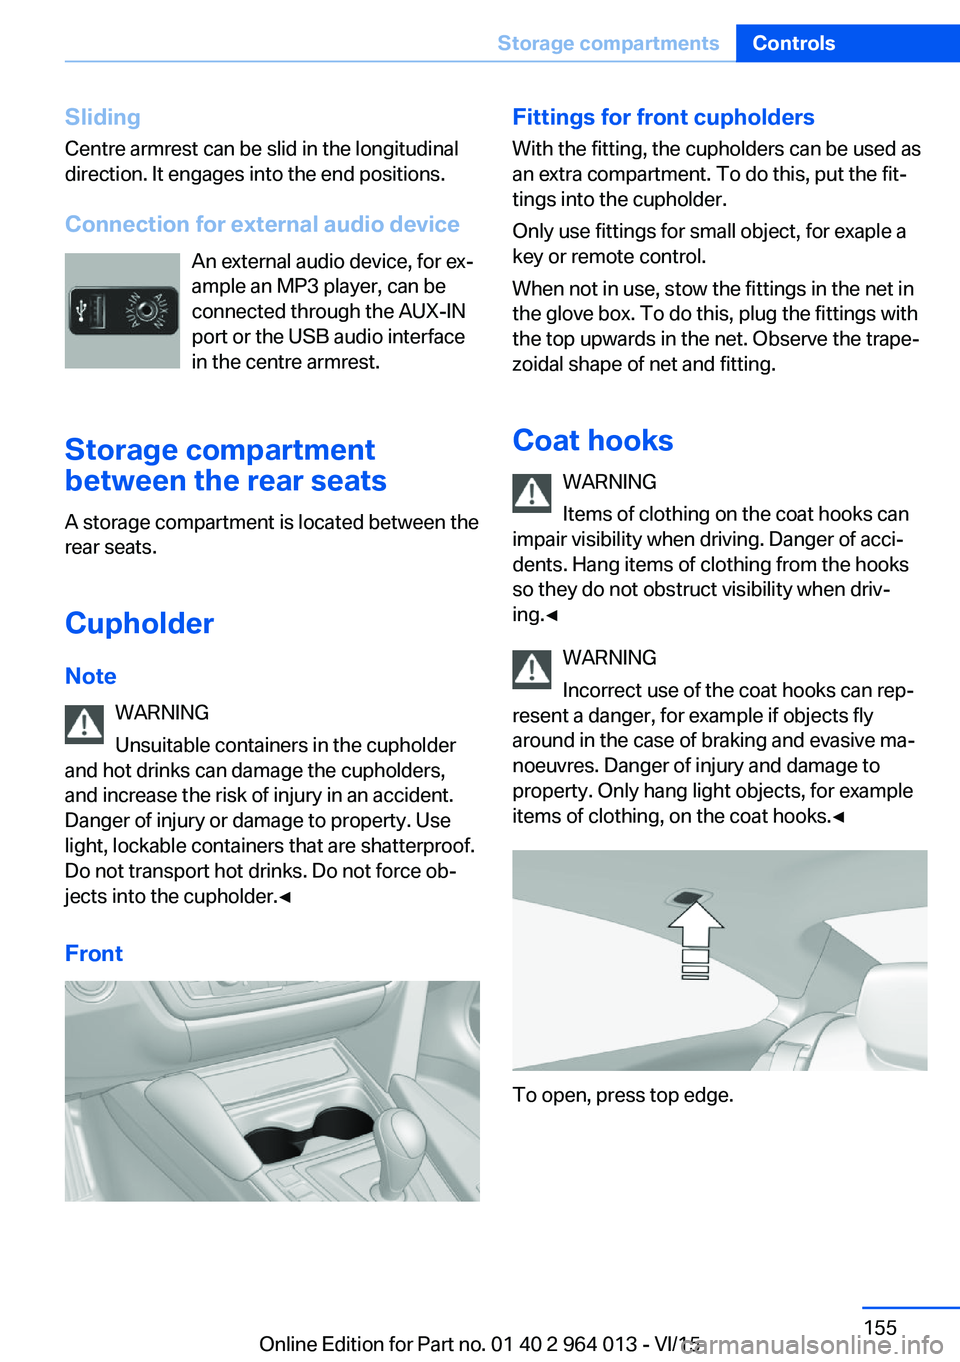
Cupholder
Note WARNING
Unsuitable containers in the cupholder
and hot drinks can damage the cupholders,
and increase the risk of injury in an accident.
Danger of injury or damage to property. Use
light, lockable containers that are shatterproof.
Do not transport hot drinks. Do not force ob‐
jects into the cupholder.◀
FrontFittings for front cupholders
With the fitting, the cupholders can be used as
an extra compartment. To do this, put the fit‐
tings into the cupholder.
Only use fittings for small object, for exaple a
key or remote control.
When not in use, stow the fittings in the net in
the glove box. To do this, plug the fittings with
the top upwards in the net. Observe the trape‐
zoidal shape of net and fitting.
Coat hooks WARNING
Items of clothing on the coat hooks can
impair visibility when driving. Danger of acci‐
dents. Hang items of clothing from the hooks
so they do not obstruct visibility when driv‐
ing.◀
WARNING
Incorrect use of the coat hooks can rep‐
resent a danger, for example if objects fly
around in the case of braking and evasive ma‐
noeuvres. Danger of injury and damage to
property. Only hang light objects, for example items of clothing, on the coat hooks.◀
To open, press top edge.
Seite 155Storage compartmentsControls155
Online Edition for Part no. 01 40 2 964 013 - VI/15
Page 156 of 228
Storage compartments in the
boot
Storage compartment
There is a storage compartment on the left.
On the right-hand side there is a storage com‐
partment for on-board toolkit, see page 193,
and first-aid kit, see page 203.
Net
Smaller objects can be stowed in the net on
the left-hand side.
Bag holders WARNING
Incorrect use of the holders can repre‐
sent a danger, for example if objects fly around
in the case of braking and evasive manoeuvres.
Danger of injury and damage to property. Only
hang light objects, for example shopping bags,
on the holders. Only transport heavy luggage
with suitable means of securing in the boot.◀
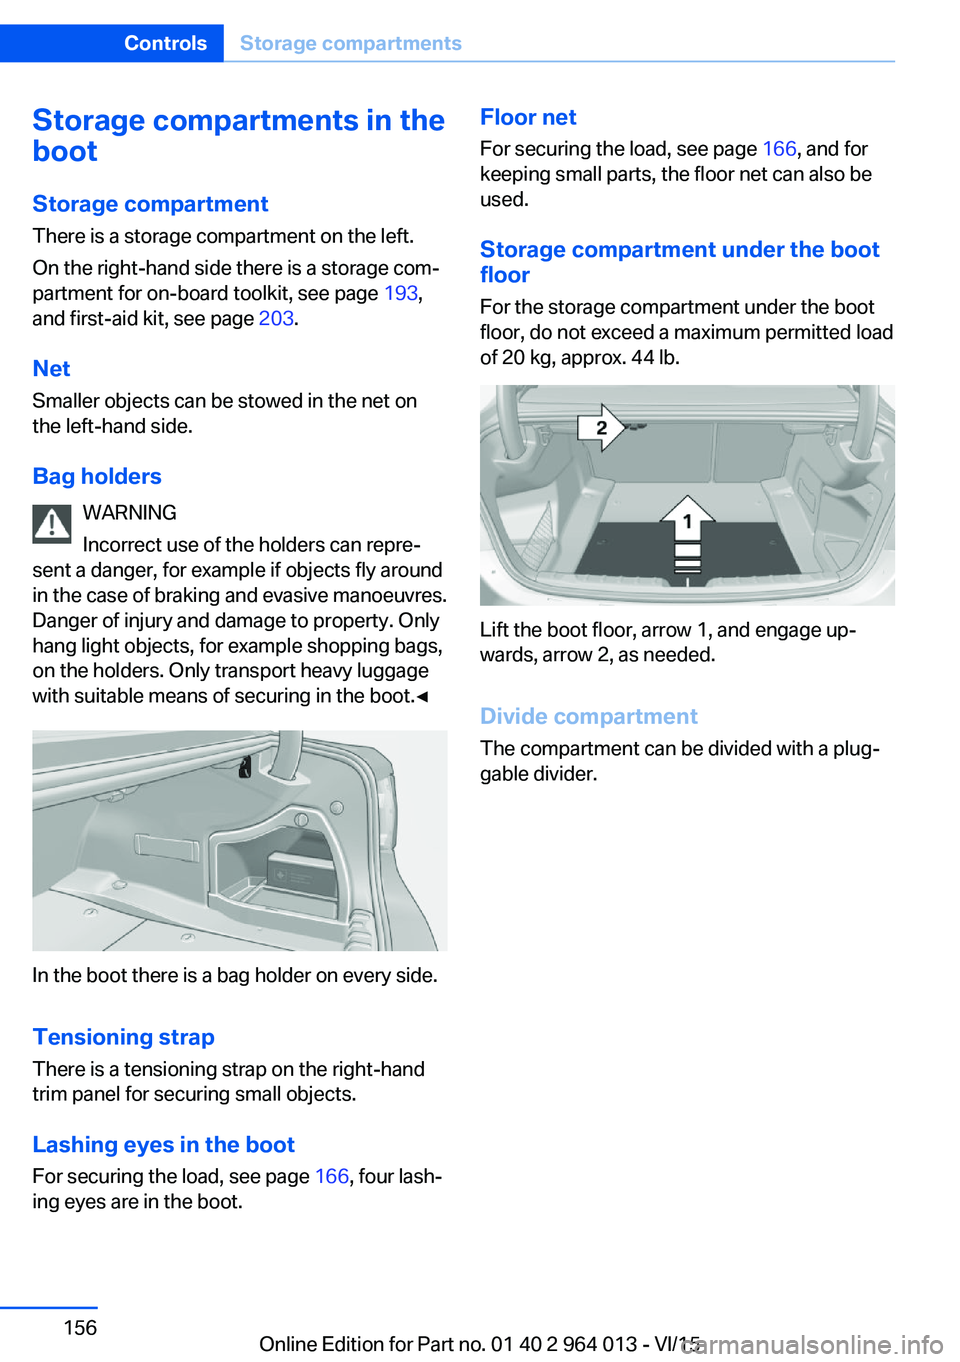
In the boot there is a bag holder on every side.
Tensioning strap
There is a tensioning strap on the right-hand
trim panel for securing small objects.
Lashing eyes in the boot
For securing the load, see page 166, four lash‐
ing eyes are in the boot.
Floor net
For securing the load, see page 166, and for
keeping small parts, the floor net can also be
used.
Storage compartment under the boot
floor
For the storage compartment under the boot
floor, do not exceed a maximum permitted load
of 20 kg, approx. 44 lb.
Lift the boot floor, arrow 1, and engage up‐
wards, arrow 2, as needed.
Divide compartment
The compartment can be divided with a plug‐
gable divider.
Seite 156ControlsStorage compartments156
Online Edition for Part no. 01 40 2 964 013 - VI/15
Page 160 of 228
BMW M4 TechnologyVehicle equipment
This chapter describes all standard, national
and special equipment provided in the model
series. Equipment not available in the vehicle is
therefore also described, for example the se‐
lected special equipment or national version.
This also applies to safety-relevant functions
and systems. Comply with the relevant na‐
tional regulations when using the correspond‐
ing functions and systems.
High performance engine The high performance engine generates a
maximum power of 317 kW and a maximum
torque of 550 Nm from 3 litres of capacity.
With its spontaneous responsiveness, a very
broad usable engine speed range is produced.
The maximum engine speed is electronically regulated at 7,600 rpm. Due to the powerful
engine dynamics, the maximum engine speed
is limited when the vehicle is stationary.
Driving hot During the engine warm-up phase, the high
performance engine runs slightly more roughly
due to the emission control.
When the engine is cold, the exhaust has a
slightly metallic undertone, depending on the
system.
Other information for hot driving: engine speed
counter, see page 84, and engine oil tempera‐
ture, see page 84.
M compound brakes The high performance brake system has venti‐
lated compound brake discs.
Depending on design requirements, function
noises may occur when braking. However, thishas no effect on the performance, operational
safety and stability of the brakes.
Braking correctly
To keep the brake system in optimum condi‐
tion, it is desirable to load them at regular inter‐
vals depending on the nature of the vehicle.
M Carbon ceramic brakes
The high performance braking system has per‐
forated carbon ceramic brake disks and is de‐
signed for racetrack operation.
Depending on the material-specific properties, there can be increased functional noises when
braking, particularly when it is wet, shortly be‐
fore the vehicle comes to a stop. This has no
effect on performance, operational safety and
endurance of the brakes.
Due to the effect of wet and salt spray, for ex‐
ample, after using a car wash, condensation
overnight etc., the braking effect may corre‐
spond to a conventional braking system. This
can be detected as reduced braking effect and
compensated for by higher pedal pressure, as
needed.
Clean brake discs and brake calliper before
washing in an automatic car wash with a steam
sprayer or high pressure cleaner to avoid en‐
crustations and caking, for example, due to salt
crystals with a related stationary period. The cleaning effect of automatic car washes gener‐
ally not sufficient for this in the wheel area.
Also follow the information on this under vehi‐
cle washing, see page 208, and safe braking,
see page 163.Seite 160Driving hintsBMW M4 Technology160
Online Edition for Part no. 01 40 2 964 013 - VI/15
Page 164 of 228
Applying the brakes fully is the most effective
way of braking in situations in which this is
necessary.
The vehicle can be steered. Any obstacles can
be avoided with steering wheel movements
that are as calm as possible.
A pulsing of the brake pedal shows that ABS is
regulating.
In certain braking situations, the perforated
brake disks can cause functional noise. How‐
ever, this has no effect on the efficiency and
operational safety of the brakes.
Objects in the range of movement of
the pedals and in the footwell
WARNING
Objects in the driver's footwell can re‐
strict the pedal travel, or block a pedal that has
been pressed. Danger of accidents. Stow
items in the vehicle so that they are secure and
cannot get into the driver's footwell. Only use
floor mats that have been categorised as ap‐
propriate for the vehicle and that can be fas‐
tened accordingly. Do not use any loose floor
mats, and do not place several floor mats on
top of one another. Make sure that there is suf‐
ficient space for the pedals. Ensure that the
floor mats are securely reattached after having
been removed, for example for cleaning.◀
Wet roads
In damp weather, if road grit has been spread
or there is heavy rain, apply the brakes lightly
every few kilometres/miles.
In doing so, do not obstruct other road users.
The resulting heat dries the brake discs and
pads.
The braking force will be available immediately
if needed.Downhill gradients
WARNING
Even slight, continuous pressure on the
brake pedal can cause overheating, brake pad
wear or even brake system failure. Danger of
accidents. Avoid excessive loads on the
brake.◀
WARNING
When idling or with the engine switched
off, safety-relevant functions are restricted or
no longer available, for example the braking ef‐
fect of the engine or power assistance for the
braking force and steering. Danger of acci‐
dents. Do not drive at idle speed or with the
engine switched off.◀
When driving on long or steep downhill
stretches, use the gear in which the least brak‐
ing is required. Otherwise the brake system
can overheat and braking action is reduced.
Manual gearbox:
The braking effect can be additionally in‐
creased by shifting down, even into first gear, if
applicable.
M double clutch transmission:
The braking action of the engine can be boos‐
ted further by shifting down in sequential
mode, see page 75.
Corrosion of the brake disc Corrosion of the brake discs and contamina‐
tion of the brake pads increase with the
following circumstances:▷Low mileage.▷Extended periods when the vehicle is not
used.▷Infrequent use of the brakes.
Corrosion occurs when the minimum pressure
that must be exerted by the pads during brake
applications to clean the discs is not reached.
Seite 164Driving hintsDriving precautions164
Online Edition for Part no. 01 40 2 964 013 - VI/15
Page 167 of 228
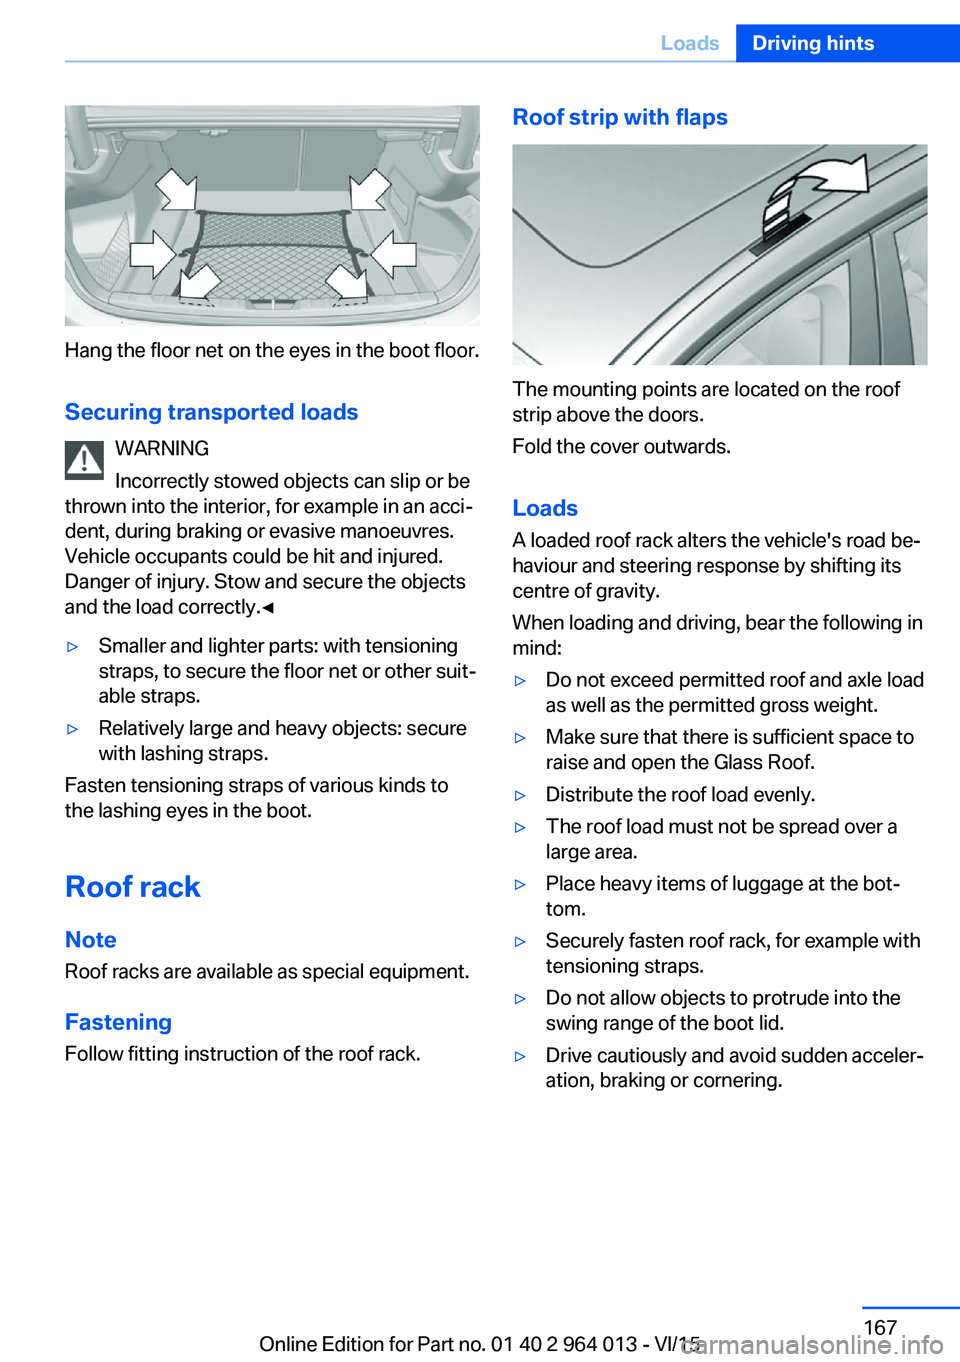
Hang the floor net on the eyes in the boot floor.Securing transported loads WARNING
Incorrectly stowed objects can slip or be
thrown into the interior, for example in an acci‐
dent, during braking or evasive manoeuvres.
Vehicle occupants could be hit and injured.
Danger of injury. Stow and secure the objects
and the load correctly.◀
▷Smaller and lighter parts: with tensioning
straps, to secure the floor net or other suit‐
able straps.▷Relatively large and heavy objects: secure
with lashing straps.
Fasten tensioning straps of various kinds to
the lashing eyes in the boot.
Roof rack Note
Roof racks are available as special equipment.
Fastening Follow fitting instruction of the roof rack.
Roof strip with flaps
The mounting points are located on the roof
strip above the doors.
Fold the cover outwards.
Loads
A loaded roof rack alters the vehicle's road be‐
haviour and steering response by shifting its
centre of gravity.
When loading and driving, bear the following in
mind:
▷Do not exceed permitted roof and axle load
as well as the permitted gross weight.▷Make sure that there is sufficient space to
raise and open the Glass Roof.▷Distribute the roof load evenly.▷The roof load must not be spread over a
large area.▷Place heavy items of luggage at the bot‐
tom.▷Securely fasten roof rack, for example with
tensioning straps.▷Do not allow objects to protrude into the
swing range of the boot lid.▷Drive cautiously and avoid sudden acceler‐
ation, braking or cornering.Seite 167LoadsDriving hints167
Online Edition for Part no. 01 40 2 964 013 - VI/15
Page 169 of 228
Avoid high engine speeds
Basic principle: driving at low engine speeds
reduces fuel consumption and wear.
Use 1st gear to drive off. As from 2nd gear, ac‐
celerate quickly. Avoid high engine speeds and
shift up quickly.
Shift into the highest possible gear when you
have reached the desired speed and drive at a
constant speed with the lowest possible en‐
gine speed.
Pay attention to the shift point indicator in the
vehicle, if fitted, see page 88.
Using overrun mode When approaching a red traffic light, take your
foot off the accelerator and allow the vehicle to
roll.
On downward stretches, take your foot off the
accelerator and allow the vehicle to roll.
The fuel supply is interrupted when coasting.
Switching off engine if
stopping for a relatively long
time
When you stop the vehicle for longer periods,
for example at traffic lights, railway crossings
or in traffic jams, switch off the engine.
Auto Start Stop function
The Auto Start Stop function of your vehicle
shuts off the engine automatically during a
stop.
If the engine is switched off and then started
again, the fuel consumption and emissions are
reduced compared with a permanently running
engine. Savings can be made just by stopping
the engine for a few seconds.
Fuel consumption also depends on other fac‐
tors, such as driving style, road condition,maintenance or environmental factors, for ex‐
ample.
Switching off functions that
are not necessary at the moment
Functions such as seat heating or heated rear
window require a great deal of energy and re‐
duce the range, especially in city traffic and
stop-and-go traffic.
Switch these functions off if they are not re‐
quired.
Having the maintenance
done
Have the vehicle serviced regularly to achieve
optimal economy and lifetime. Have mainte‐
nance carried out by a Service Partner or a
qualified specialist workshop.
Please also see the BMW Maintenance Sys‐
tem, see page 191.Seite 169Saving fuelDriving hints169
Online Edition for Part no. 01 40 2 964 013 - VI/15