2016 BMW M4 wipers
[x] Cancel search: wipersPage 71 of 228

Wiper systemSwitching the wipers on/off and flick-
wiping
General
Do not use wipers with a dry windscreen, oth‐
erwise the wiper blades will wear or become
damaged more quickly.
Notes ATTENTION
If the wipers have frozen on, switching on
can cause the wiper blades to tear and the
wiper motor to overheat. Danger of damage to
property. Defrost the windscreen before
switching on the wipers.◀
WARNING
If the wipers start moving when they are
folded away from the windscreen, this can
damage parts of the vehicle, or trap body parts.
Danger of injury or damage to property. Make
sure that the vehicle is switched off when the
wipers are folded away from the windscreen,
and that the wipers are in contact with the
windscreen when switching on.◀
Switching on
The lever returns to the basic position when
released.
▷Normal wiping speed: press upwards once.
When the vehicle is at a standstill, the wip‐
ers switch to intermittent operation.▷Rapid wiping speed: press upwards twice
or press once beyond the resistance point.
When the vehicle is at a standstill, the wip‐
ers switch to normal speed.
Switching off and flick-wiping
The lever returns to the basic position when
released.
▷Flick-wiping: press downwards once.▷Switching off normal wiping speed: press
downwards once.▷Switching off fast wiping speed: press
downwards twice.
Intermittent mode or rain sensor
Principle Without rain sensor, the interval for the wiper
operation is specified.
The rain sensor automatically controls the
wiper operation depending on the rain inten‐
sity. The sensor is mounted on the wind‐
screen, directly in front of the rear-view mirror.
Seite 71DrivingControls71
Online Edition for Part no. 01 40 2 964 013 - VI/15
Page 72 of 228

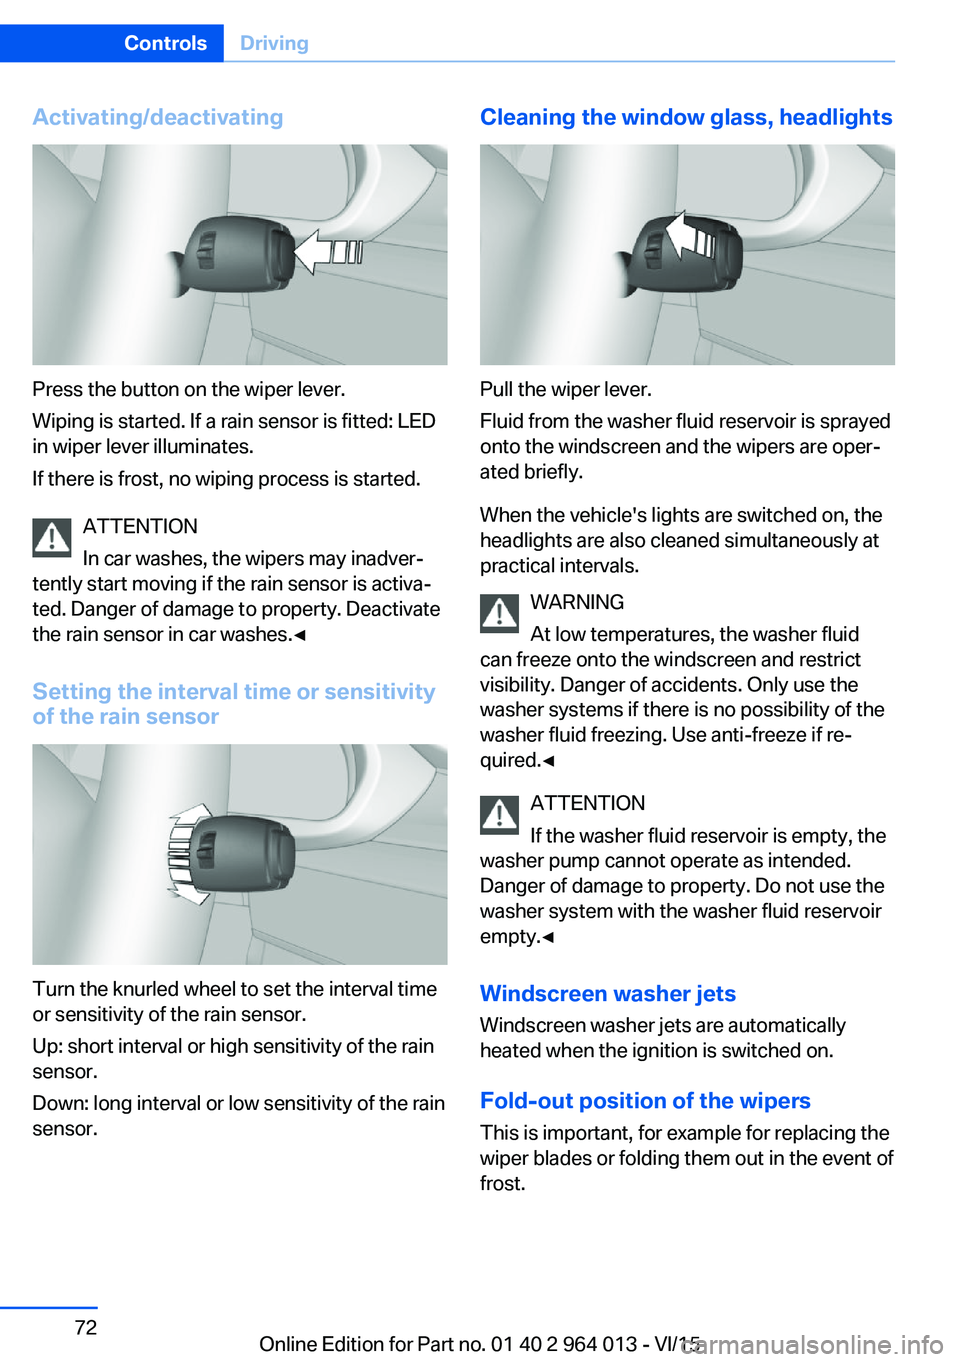
Activating/deactivating
Press the button on the wiper lever.
Wiping is started. If a rain sensor is fitted: LED
in wiper lever illuminates.
If there is frost, no wiping process is started.
ATTENTION
In car washes, the wipers may inadver‐
tently start moving if the rain sensor is activa‐
ted. Danger of damage to property. Deactivate
the rain sensor in car washes.◀
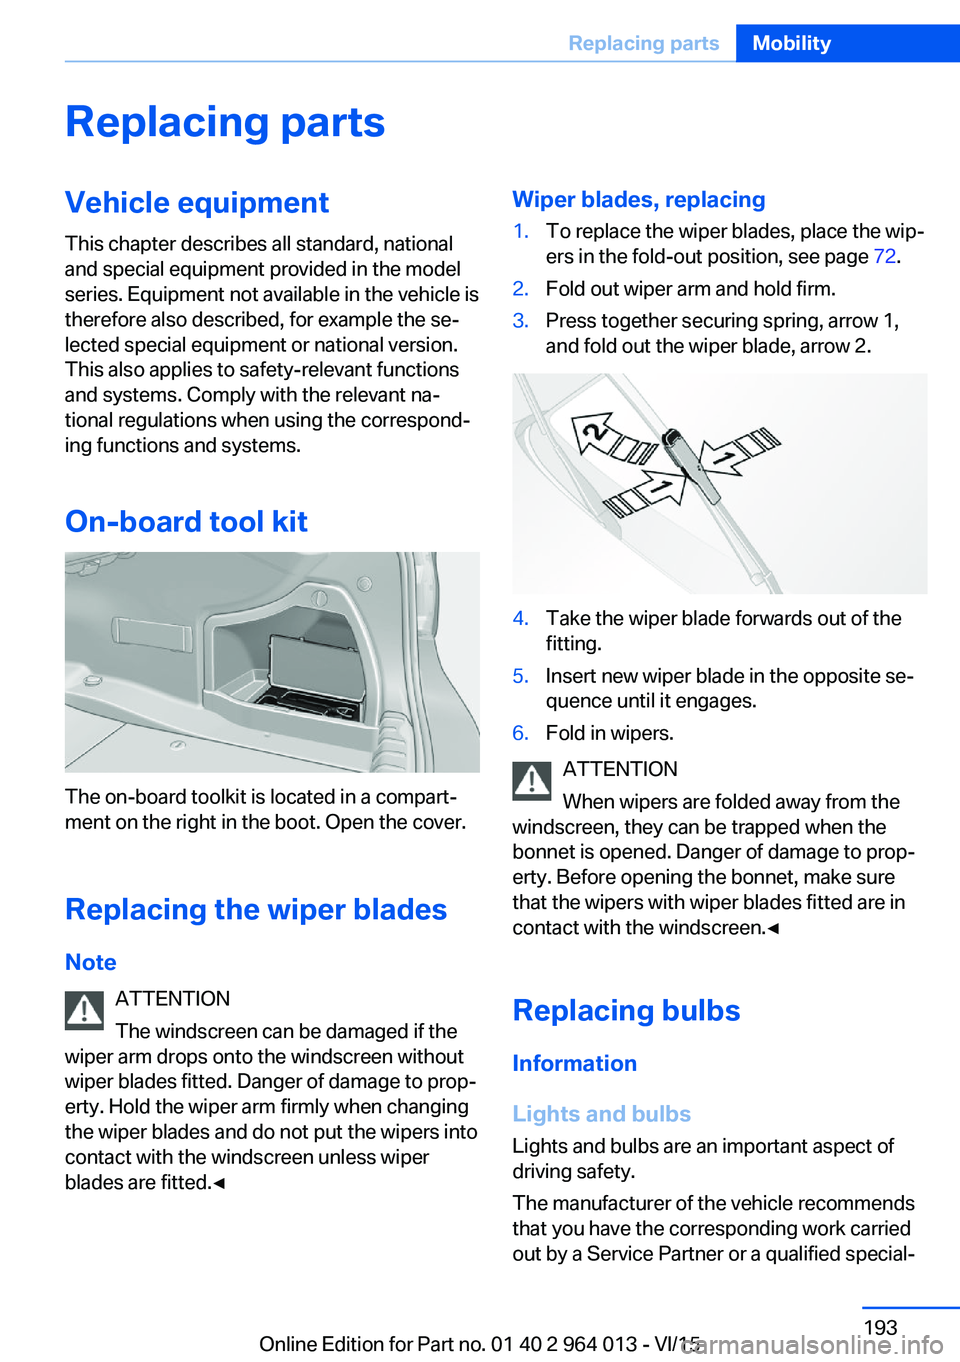
Setting the interval time or sensitivity
of the rain sensor
Turn the knurled wheel to set the interval time
or sensitivity of the rain sensor.
Up: short interval or high sensitivity of the rain
sensor.
Down: long interval or low sensitivity of the rain
sensor.
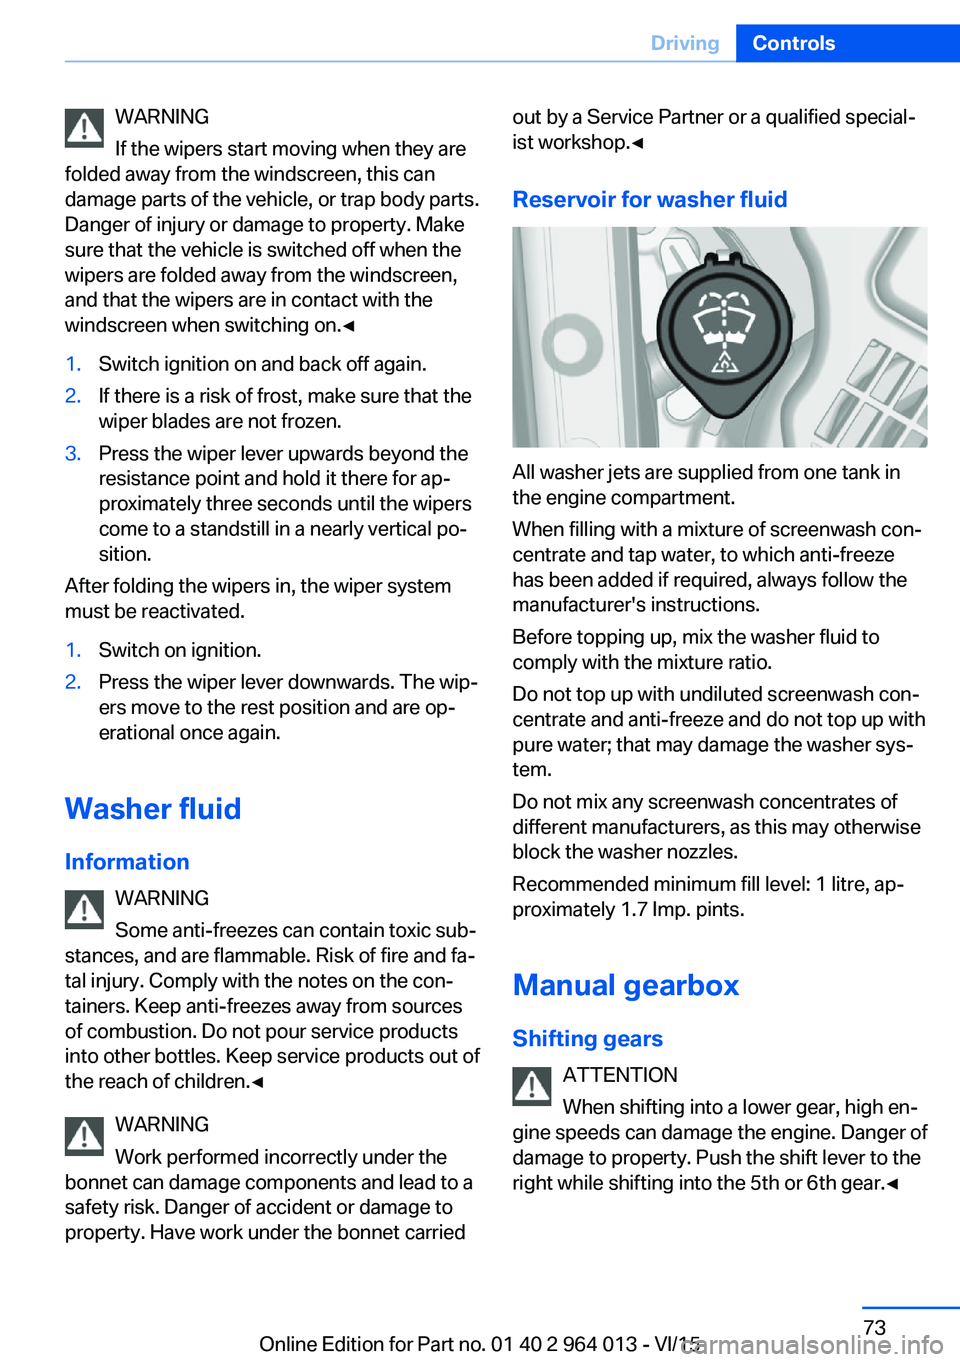
Cleaning the window glass, headlights
Pull the wiper lever.
Fluid from the washer fluid reservoir is sprayed
onto the windscreen and the wipers are oper‐
ated briefly.
When the vehicle's lights are switched on, the
headlights are also cleaned simultaneously at
practical intervals.
WARNING
At low temperatures, the washer fluid
can freeze onto the windscreen and restrict
visibility. Danger of accidents. Only use the
washer systems if there is no possibility of the
washer fluid freezing. Use anti-freeze if re‐
quired.◀
ATTENTION
If the washer fluid reservoir is empty, the
washer pump cannot operate as intended.
Danger of damage to property. Do not use the
washer system with the washer fluid reservoir
empty.◀
Windscreen washer jets
Windscreen washer jets are automatically
heated when the ignition is switched on.
Fold-out position of the wipers
This is important, for example for replacing the
wiper blades or folding them out in the event of
frost.
Seite 72ControlsDriving72
Online Edition for Part no. 01 40 2 964 013 - VI/15
Page 73 of 228

WARNING
If the wipers start moving when they are
folded away from the windscreen, this can
damage parts of the vehicle, or trap body parts.
Danger of injury or damage to property. Make
sure that the vehicle is switched off when the
wipers are folded away from the windscreen,
and that the wipers are in contact with the
windscreen when switching on.◀1.Switch ignition on and back off again.2.If there is a risk of frost, make sure that the
wiper blades are not frozen.3.Press the wiper lever upwards beyond the
resistance point and hold it there for ap‐
proximately three seconds until the wipers
come to a standstill in a nearly vertical po‐
sition.
After folding the wipers in, the wiper system
must be reactivated.
1.Switch on ignition.2.Press the wiper lever downwards. The wip‐
ers move to the rest position and are op‐
erational once again.
Washer fluid
Information WARNING
Some anti-freezes can contain toxic sub‐
stances, and are flammable. Risk of fire and fa‐
tal injury. Comply with the notes on the con‐
tainers. Keep anti-freezes away from sources
of combustion. Do not pour service products
into other bottles. Keep service products out of
the reach of children.◀
WARNING
Work performed incorrectly under the
bonnet can damage components and lead to a
safety risk. Danger of accident or damage to
property. Have work under the bonnet carried
out by a Service Partner or a qualified special‐
ist workshop.◀
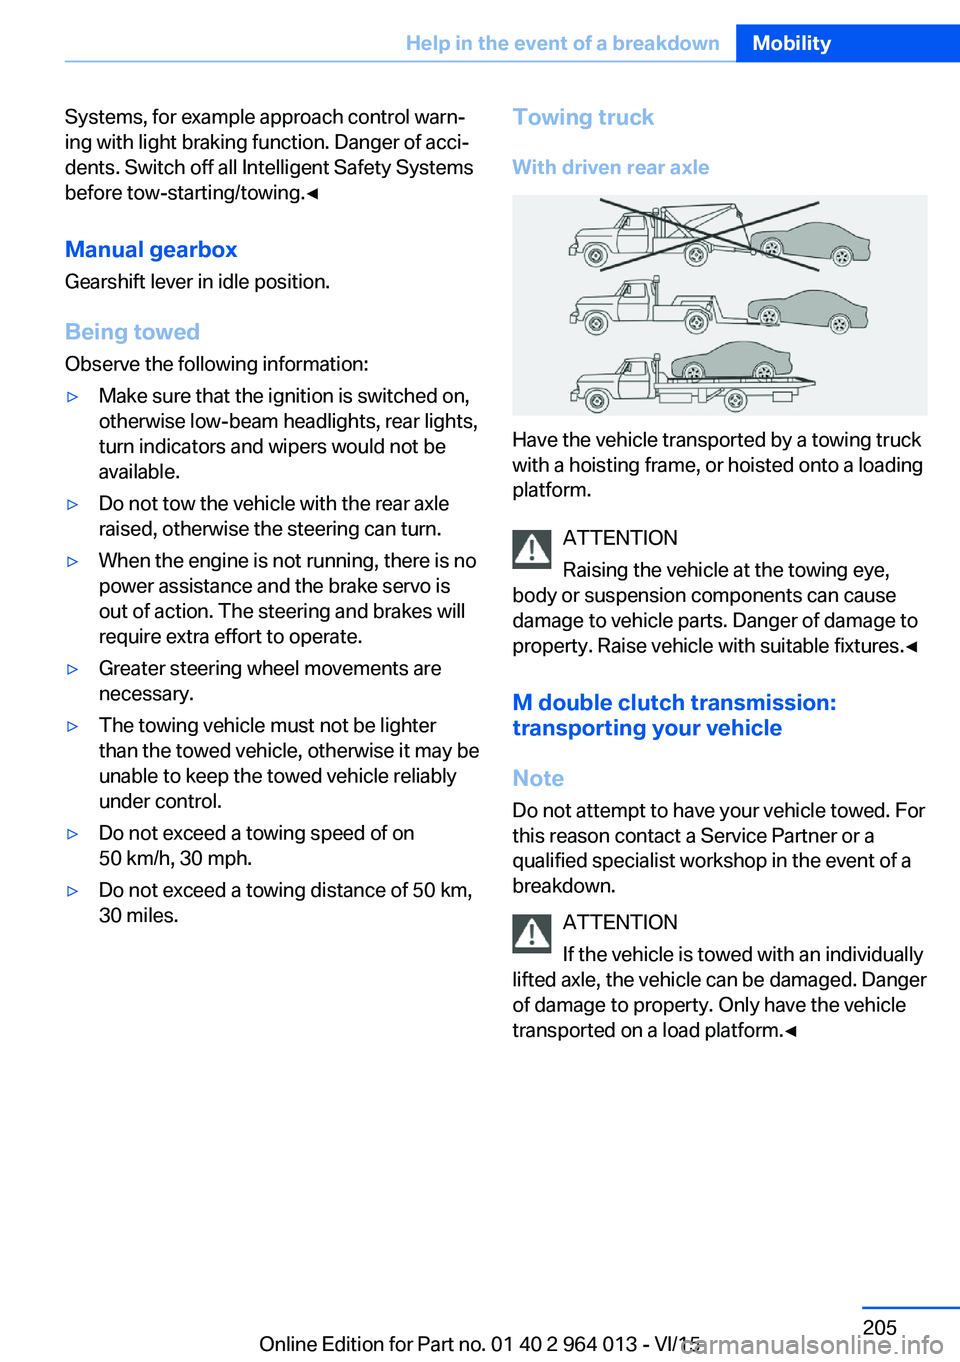
Reservoir for washer fluid
All washer jets are supplied from one tank in
the engine compartment.
When filling with a mixture of screenwash con‐
centrate and tap water, to which anti-freeze
has been added if required, always follow the
manufacturer's instructions.
Before topping up, mix the washer fluid to
comply with the mixture ratio.
Do not top up with undiluted screenwash con‐
centrate and anti-freeze and do not top up with
pure water; that may damage the washer sys‐
tem.
Do not mix any screenwash concentrates of
different manufacturers, as this may otherwise
block the washer nozzles.
Recommended minimum fill level: 1 litre, ap‐
proximately 1.7 Imp. pints.
Manual gearbox
Shifting gears ATTENTION
When shifting into a lower gear, high en‐
gine speeds can damage the engine. Danger of
damage to property. Push the shift lever to the
right while shifting into the 5th or 6th gear.◀
Seite 73DrivingControls73
Online Edition for Part no. 01 40 2 964 013 - VI/15
Page 183 of 228

Bonnet
Notes WARNING
Incorrectly performed work in the engine
compartment can damage components and
lead to a safety risk. Danger of accident or damage to property. Have work in the engine
compartment carried out by a Service Partner
or a qualified specialist workshop.◀
WARNING
The engine compartment contains mov‐
ing components. Certain components can also
move in the engine compartment when the ve‐
hicle is switched off, for example the radiator
fan. Danger of injury. Do not reach into the area
of moving parts. Keep articles of clothing and
hair away from moving parts.◀
ATTENTION
When wipers are folded away from the
windscreen, they can be trapped when the
bonnet is opened. Danger of damage to prop‐
erty. Before opening the bonnet, make sure
that the wipers with wiper blades fitted are in
contact with the windscreen.◀
WARNING
The bonnet has projecting parts on the
inside, for example locking hooks. Danger of
injury. When the bonnet is open, watch out for
projecting parts and keep these areas clear.◀
ATTENTION
When closing, the bonnet must audibly
click into place. Additional pushing can dam‐
age the bonnet. Danger of damage to property.
Open and close the bonnet once more. Avoid
additional pushing.◀WARNING
If the bonnet is not correctly locked, it
can come open during the journey and impair
visibility. Danger of accidents. Stop immedi‐
ately and close the bonnet correctly.◀
WARNING
Parts of the body can become trapped
when opening and closing the bonnet. Danger
of injury. When opening and closing, make
sure that the area of movement of the bonnet
is free.◀
Opening bonnet1.Pull lever, arrow 1.
Bonnet is released.2.After releasing the lever, pull lever again,
arrow 2.
Bonnet is opened.
Indicator and warning lamps With the bonnet unlocked, a Check Control
message is shown.
Seite 183Engine compartmentMobility183
Online Edition for Part no. 01 40 2 964 013 - VI/15
Page 193 of 228

Replacing partsVehicle equipmentThis chapter describes all standard, national
and special equipment provided in the model
series. Equipment not available in the vehicle is
therefore also described, for example the se‐
lected special equipment or national version.
This also applies to safety-relevant functions
and systems. Comply with the relevant na‐
tional regulations when using the correspond‐
ing functions and systems.
On-board tool kit
The on-board toolkit is located in a compart‐
ment on the right in the boot. Open the cover.
Replacing the wiper blades Note ATTENTION
The windscreen can be damaged if the
wiper arm drops onto the windscreen without
wiper blades fitted. Danger of damage to prop‐
erty. Hold the wiper arm firmly when changing
the wiper blades and do not put the wipers into
contact with the windscreen unless wiper
blades are fitted.◀
Wiper blades, replacing1.To replace the wiper blades, place the wip‐
ers in the fold-out position, see page 72.2.Fold out wiper arm and hold firm.3.Press together securing spring, arrow 1,
and fold out the wiper blade, arrow 2.4.Take the wiper blade forwards out of the
fitting.5.Insert new wiper blade in the opposite se‐
quence until it engages.6.Fold in wipers.
ATTENTION
When wipers are folded away from the
windscreen, they can be trapped when the
bonnet is opened. Danger of damage to prop‐
erty. Before opening the bonnet, make sure
that the wipers with wiper blades fitted are in
contact with the windscreen.◀
Replacing bulbs
Information
Lights and bulbs
Lights and bulbs are an important aspect of
driving safety.
The manufacturer of the vehicle recommends
that you have the corresponding work carried
out by a Service Partner or a qualified special‐
Seite 193Replacing partsMobility193
Online Edition for Part no. 01 40 2 964 013 - VI/15
Page 205 of 228

Systems, for example approach control warn‐
ing with light braking function. Danger of acci‐
dents. Switch off all Intelligent Safety Systems
before tow-starting/towing.◀
Manual gearboxGearshift lever in idle position.
Being towed Observe the following information:▷Make sure that the ignition is switched on,
otherwise low-beam headlights, rear lights,
turn indicators and wipers would not be
available.▷Do not tow the vehicle with the rear axle
raised, otherwise the steering can turn.▷When the engine is not running, there is no
power assistance and the brake servo is
out of action. The steering and brakes will
require extra effort to operate.▷Greater steering wheel movements are
necessary.▷The towing vehicle must not be lighter
than the towed vehicle, otherwise it may be
unable to keep the towed vehicle reliably
under control.▷Do not exceed a towing speed of on
50 km/h, 30 mph.▷Do not exceed a towing distance of 50 km,
30 miles.Towing truck
With driven rear axle
Have the vehicle transported by a towing truck
with a hoisting frame, or hoisted onto a loading
platform.
ATTENTION
Raising the vehicle at the towing eye,
body or suspension components can cause
damage to vehicle parts. Danger of damage to
property. Raise vehicle with suitable fixtures.◀
M double clutch transmission:
transporting your vehicle
Note
Do not attempt to have your vehicle towed. For
this reason contact a Service Partner or a
qualified specialist workshop in the event of a
breakdown.
ATTENTION
If the vehicle is towed with an individually
lifted axle, the vehicle can be damaged. Danger
of damage to property. Only have the vehicle
transported on a load platform.◀
Seite 205Help in the event of a breakdownMobility205
Online Edition for Part no. 01 40 2 964 013 - VI/15
Page 208 of 228

General careVehicle equipment
This chapter describes all standard, national
and special equipment provided in the model
series. Equipment not available in the vehicle is
therefore also described, for example the se‐
lected special equipment or national version.
This also applies to safety-relevant functions
and systems. Comply with the relevant na‐
tional regulations when using the correspond‐
ing functions and systems.
Washing the vehicle
General Regularly remove foreign bodied, for example,
leaves, with the bonnet opened in the area be‐
neath with windscreen.
Especially in winter, wash the car more fre‐
quently. Very high levels of dirt and spreading
salt can cause damage to the car.
Steam-jet cleaners and high-pressure
cleaners
Notes ATTENTION
When cleaning with high-pressure clean‐
ers, excessive pressure or excessive tempera‐
tures can damage various components. Dan‐
ger of damage to property. Ensure a sufficient
distance and do not spray for an extended pe‐
riod of time. Comply with the instructions for
the high-pressure cleaner.◀
Distances and temperature▷Maximum temperature: 60 ℃/140 ℉.▷Minimum distance to sensors, cameras,
seals: 30 cm, approx. 12 in.▷Minimum distance to the Glass Roof:
80 cm, approx. 31.5 in.
Automatic car washes.
Notes ATTENTION
Water can penetrate in the window area
due to high pressure washers. Danger of dam‐
age to property. Avoid high pressure wash‐
ers.◀
▷Textile car washes or systems using soft
brushes are preferable, to avoid damage to
the paintwork.▷Make sure the wheels and tyres are not
damaged by the conveying mechanism.▷Fold in the exterior mirrors, as they could
otherwise sustain damage due to the vehi‐
cle's width.▷Deactivate the rain sensor, see page 72, to
avoid unintentional operation of the wipers.▷In some instances, depending on the inte‐
rior movement detector of the alarm sys‐
tem, a false alarm may be triggered. Ob‐
serve the notes on avoiding false alarm,
see page 43.
ATTENTION
Excessively high guide rails in car
washes can damage parts of the body. Danger
of damage to property. Avoid washing bays or
car washes with guide rails more than 10 cm,
approximately 4 in high.◀
Entering a car wash
Follow the below steps so that the vehicle can
be driven into a vehicle wash:
Seite 208MobilityGeneral care208
Online Edition for Part no. 01 40 2 964 013 - VI/15
Page 226 of 228

Warning lamp in the exteriormirror, see Lane Change
Warning 117
Warning messages, see Check control 80
Warning triangle 203
Warranty 7
Washer fluid 73
Washer jets, windows 72
Washing the vehicle 208
Water on roads 163
Weights 215
Welcome lights 99
Welcome light when unlock‐ ing 35
Wheelbase, vehicle 214
Wheel change 199
Wheel replacement 177
Wheels, everything about wheels and tyres 175
Wheels, run flat indicator RPA 109
Width, vehicle 214
Windscreen washer jets 72
Windscreen washing sys‐ tem 71
Windscreen wipers, see Wiper system 71
Winter storage, care and maintenance 211
Winter tyres, right tyres 177
Winter tyres, tread 176
Wiper, fold-out position 72
Wipers 71
Wiper system 71
Wood, care 210
Wordmatch principle, naviga‐ tion 24
Working in the engine com‐ partment 183
X Xenon light, bulb change 194 Y
Your own safety 7 Seite 226ReferenceEverything from A to Z226
Online Edition for Part no. 01 40 2 964 013 - VI/15