Page 177 of 214

COMAND searches all media sources.
X To move the desired folder to the front: turn
the controller.
The track list appears.
X To select the desired track: turn and press
the controller. Searching by genre
X
To select Genres Genresin the category list: turn
and press the controller.
COMAND searches all media sources. A
selection list with Genres Genresand media sour-
ces appears.
X Select the desired Genres
Genres.
A selection list with music tracks from the
selected genre appears.
X Select a music track.
The track is played. The basic menu for the
active media source is shown.
X To exit the selection list: press the 0038
button. Keyword search X
To select Keyword Search Keyword Search in the category
list: turn and press the controller.
The input field appears.
X To select required characters: turn and
press the controller for each letter
(Y page 28).
Entering just part of the name of a track or
artist is enough. The search result then dis-
plays the entire text .
X Select 0054.
The search results are displayed.
The numbers behind the results, as shown
in the example Artists Artists(2/0), represent: 2
results that match the keyword exactly and
0 results that are similar.
X Select one of the results.
Keywords that have already been searched
for are displayed in the "Search history"
without having to enter them completely.
They can be accepted directly and dis-
played in the search result. X
Select one entry, e.g. Artists Artists.
Albums and covers (if available) are shown.
COMAND searches all media sources.
X Select an album.
The tracks are listed. Media search
175Media Z
Page 178 of 214

X
Select a track.
The basic display appears and playback
starts. MEDIA REGISTER
General notes
i Keep your original music files, photos and
video files in a secure location. An error in
COMAND may result in the loss of music
files stored in the MEDIA REGISTER.
Mercedes-Benz is not liable for any loss of
data.
You can store music files, photos or video files
in the MEDIA REGISTER. The memory has a
capacity of 10 GB. Switching on the MEDIA REGISTER
X Press the 00FDbutton repeatedly until the
MEDIA REGISTER is switched on.
Pressing the button repeatedly changes
the operating mode in the following order:
R Disc
Disc;
R Memory Card Memory Card;
R Media Register
Media Register;
R USB 1
USB 1 (vehicles without Media Interface)
R Media Interface 1
Media Interface 1 (vehicles without
Media Interface)
R USB 2
USB 2 (vehicles without Media Interface)
R Media Interface 2
Media Interface 2 (vehicles with
Media Interface) R
Bluetooth Audio Bluetooth Audio;
R Aux Aux .
Playback begins at the point last listened to.
If there are no files, you will see a message to
this effect.
Further options for switching on:
R Using the number keypad: (Y page 165)
R Using the main function bar: (Y page 165)
R Using the device list: (Y page 165)
R Using the 00FDbutton: (Y page 164) MEDIA REGISTER basic display
0043
Status bar
0044 Main function bar
0087 Display for the active data medium
0085 Display of current track in the track list
0083 Artist and album
0084 Media menu bar
006B Numerical time display
006C Graphic time display
006D Additional display area with cover view Copying files to the MEDIA REGISTER
General notes You can copy photos, music files and videos
from the following data mediums:
R
Discs in a CD/DVD changer or a single CD/
DVD drive
R SD memory card 176
MEDIA REGISTERMedia
Page 179 of 214

R
USB storage device
R MP3
i Data can only be copied from an MP3
player if this can be configured as a mass
storage device.
Video files from DVD-V cannot be copied.
While copying, several functions will not be
available. If this is the case, you will see a
message to this effect.
1. Selecting a data medium X
To switch on media mode: keep pressing
the 00FD button until the required media
mode has been switched on.
X Slide 00520064the controller.
The media menu bar appears.
X To select Options
Options: turn and press the con-
troller. X
Select Save Files to Media Register Save Files to Media Register .
The media list appears. A data medium
from which files can be copied is selected
automatically.
i The Save Files to Media Register Save Files to Media Register
function can be accessed from any media
application.
X Select the displayed data medium.
The data medium is loaded.
If the data medium contains files that can
be copied, a selection menu appears. 2. Selecting files
X
To select All AllMedia
Media Files
Files: turn and press
the controller
This command copies all files from the
selected data medium. The symbol for All
All
Media Files
Media Files is filled in. All subsequent
entries have a checkmark 0073beside them.
X Select a folder.
A checkmark 0073next to the folder entry
highlights the selection.
X To select Continue Continue: turn the controller and
press to confirm.
The copying menu appears.
3. Starting the copying process In the example, files are copied from a USB
stick to the MEDIA REGISTER.
X
To select Start Start: press the controller.
i The selection of a target folder is optional.
If there is no target folder given, the
selected files are saved to the main direc-
tory of the Media Register.
X To select Target Folder
Target Folder: turn and press
the controller. MEDIA REGISTER
177Media Z
Page 180 of 214

X
Select a folder.
X Select Continue
Continue.
X To select Start
Start: press the controller.
The copying procedure starts and is shown
in the progress bar.
It may take some time for the copying proc-
ess to be completed, depending on the
amount of data. If there is not enough mem-
ory space, a message to this effect
appears.
i It is possible to change to a different func-
tion (e.g. radio) during the copying proce-
dure. The copying procedure continues in
the background. While the copying proce-
dure is taking place, this is shown by a sym-
bol in the status bar. Once the copying procedure is complete, you
will hear the first track of the copied album.
You can now copy more files to the MEDIA
REGISTER.
X To cancel copying: select Cancel Cancel.
Files are stored in the MEDIA REGISTER up
until the point of cancellation. Renaming/deleting files
X
To switch on Media mode: keep pressing
the 00FD button until the required media
mode has been switched on.
X Slide 00520064the controller.
The media menu bar appears.
X To select Options Options: turn and press the con-
troller.
X Select Manage Media Register
Manage Media Register.
X Select Rename / Delete Files
Rename / Delete Files.
The file list is displayed.
X To highlight the selected files: turn and
press the controller.
X Slide 00520096the controller.
You can select either Edit EditorDelete
Delete . X
To select the Edit
Editfile: turn and press the
controller.
The following entry field appears: 178
MEDIA REGISTERMedia
Page 181 of 214

X
Rename the file.
X To save changes with 0054: turn and press
the controller.
Renaming a file only changes the name.
Depending on whether or not the Show Show
Track Information
Track Information option has been
selected, this change may not be seen in
the main display field.
X To select the Delete
Delete file: press the con-
troller. Deleting all files
! In order to prevent malfunctions, do not
use COMAND during this time.
This function deletes all files from the MEDIA
REGISTER.
X To switch on media mode: keep pressing
the 00FD button until the required media
mode has been switched on.
X Slide 00520064the controller.
The media menu bar appears.
X To select Options
Options: turn and press the con-
troller.
X Select Manage Media Register
Manage Media Register.
X Select Delete All Media Files
Delete All Media Files.
A prompt appears. No Nois highlighted.
If you select Yes
Yes , all files are deleted. If you
select No
No the process is canceled. X
To select Yes
YesorNo
No: turn and press the con-
troller.
The Please Wait... Please Wait... message appears.
The Data
Data Deleted
Deleted message then appears. Calling up memory space info
X To switch on media mode: keep pressing
the 00FD button until the required media
mode has been switched on.
X Slide 00520064the controller.
The media menu bar appears.
X To select Options Options: turn and press the con-
troller.
X Select Manage Media Register
Manage Media Register. X
Select Memory Info
Memory Info. MEDIA REGISTER
179Media Z
Page 182 of 214

Selecting a playback mode
X To switch MEDIA REGISTER on: press the
00FD button repeatedly until the MEDIA
REGISTER is switched on.
X Slide 00520064the controller.
The media menu bar appears.
X To select Options
Options: turn and press the con-
troller. X
Select Playback Mode
Playback Mode.
The options list appears. The 003Bdot indi-
cates the current setting.
X Select the desired option.
The option is switched on. For all options
except Normal Track Sequence
Normal Track Sequence, you will
see a corresponding icon in the main dis-
play.
i The Normal Track Sequence Normal Track Sequence option is
automatically selected when you change
the disc you are currently listening to or
when you select a different medium. If an
option is selected, it remains selected after
COMAND is switched on or off.
The following options are available:
R Normal Track Sequence Normal Track Sequence: the tracks are
played in the normal order (e.g. track 1, 2,
3 etc.).
R Random Medium Random Medium: all the tracks on the
medium are played in random order.
R Random Random Track
TrackList
List: the tracks in the cur-
rently active track list are played in random
order. Bluetooth
®
audio mode Connecting Bluetooth
®
audio devices
Prerequisites X
Activate the Bluetooth ®
function in
COMAND (Y page 42).
Bluetooth ®
audio mode requires a Blue-
tooth ®
-capable audio device.
Check your Bluetooth ®
audio device for the
following (see the Bluetooth ®
audio device's
operating instructions):
R Bluetooth ®
audio profile
The Bluetooth ®
audio device must support
the A2DP and AVRCP Bluetooth ®
audio
profiles.
R Bluetooth ®
visibility
Certain Bluetooth ®
audio devices do not
just require activation of the Bluetooth ®
function. In addition, your device must be
made "visible" to other devices.
R Bluetooth ®
device name
This device name is predetermined but can
usually be changed. To make a clear selec-
tion of the Bluetooth ®
device possible,
Mercedes-Benz recommends that you cus-
tomize the device name (see the Blue-
tooth ®
audio device's operating instruc-
tions).
i A2DP (Advanced AudioDistribution
Profile): Bluetooth ®
audio profile for audio
data transmission
AVRCP (Audio VideoRemote Control
Profile): Bluetooth ®
audio profile for audio
data playback.
i The Bluetooth ®
device must be visible for
authorization. After authorization,
COMAND even finds the Bluetooth ®
device
when it is not visible.
X The Bluetooth ®
function in COMAND must
be activated (Y page 42).180
Bluetooth ®
audio modeMedia
Page 183 of 214

General notes
Before using your Bluetooth
®
audio device
with COMAND for the first time, you will need
to authorize it.
When you authorize a new Bluetooth ®
audio
device, it is connected automatically. Con-
nection involves first searching for a Blue-
tooth ®
audio device and then authorizing it.
You can authorize up to fifteen Bluetooth ®
devices.
i If you authorize a mobile phone that sup-
ports Bluetooth ®
audio, the A2DP and
AVRCP Bluetooth ®
audio profiles are con-
nected automatically.
The mobile phone is then entered:
R in the Bluetooth ®
telephone list
(Y page 105)
R in the Bluetooth ®
device list
(Y page 181)
Mercedes-Benz recommends authorizing a
mobile phone in Bluetooth ®
telephony
(Y page 106).
i If the mobile phone that is connected only
supports two Bluetooth ®
profiles at the
same time, COMAND functions may
behave as follows:
R when connecting to the Internet, play-
back is stopped on the Bluetooth ®
audio
device.
R when starting playback on the Blue-
tooth ®
audio device, the Internet con-
nection is ended. Searching for and authorizing a Blue-
tooth ®
audio device
Switching to Bluetooth ®
audio mode
X Press the 00FDbutton.
X To select Bluetooth Audio
Bluetooth Audio in the menu:
turn and press the controller.
A menu appears. If you see the
No Bluetooth Audio No Bluetooth Audio
Device Connected
Device Connected message, you will
need to authorize the Bluetooth ®
audio
device first.
X To select Options
Optionsin the Bluetooth ®
audio
menu: slide 005200C5and press the controller.
X To select Bluetooth Audio Devices
Bluetooth Audio Devices :
press the controller.
A new menu appears. 0043
Bluetooth ®
audio player within range and
already authorized
0044 Newly detected mobile phone with Blue-
tooth ®
audio mode in range
The Bluetooth ®
device list displays all author-
ized devices, whether they are within range
or not. After a device search, devices which
are within range but not authorized are also
displayed.
Searching for Bluetooth ®
audio
X To select Search for Audio Devices Search for Audio Devices :
press the controller.
A display with text appears. Bluetooth
®
audio mode 181Media Z
Page 184 of 214

X
Select Start Search
Start Search .
COMAND searches for Bluetooth ®
audio
devices within range and adds them to the
Bluetooth ®
device list.
The duration of the search depends on the
number of Bluetooth ®
audio devices within
range and their characteristics.
i With some Bluetooth ®
audio devices,
playback must first be started on the device
itself so that COMAND can play the audio
files. Bluetooth ®
must also be given as a
media output location for the audio device
used.
Authorizing Bluetooth ®
audio
X Select a Bluetooth ®
audio device that has
not yet been authorized from the list: turn
and press the controller.
Authorization starts.
Depending on the Bluetooth ®
audio device
used, you now have two options for con-
tinuing with authorization.
Option 1: entering the passkey
X You can find information on this in the
"Authorizing (registering) a mobile phone"
section (Y page 106).
After successful authorization, the Blue-
tooth ®
audio device is connected and
starts playing.
Option 2: Secure Simple Pairing
i The Bluetooth ®
audio device must sup-
port Bluetooth ®
version 2.1 for connection
via Secure Simple Pairing. COMAND cre-
ates a six-digit code, which is displayed on
both devices that are to be connected
For some Bluetooth ®
audio devices, the
pairing must be confirmed within 10 sec-
onds.
X If the number code displayed on
COMAND and on the Bluetooth ®
audio device is the same, select
Yes
Yes : press the
controller.
If you select Yes
Yes , authorization continues
and the Bluetooth ®
audio device is con-
nected. Playback starts.
If you select No
No, authorization will be can-
celed. External authorization
If COMAND does not find your Bluetooth ®
audio device, this may be due to particular
security settings on your Bluetooth ®
audio
device. In this case, check whether your Blue-
tooth ®
audio device can locate COMAND.
The Bluetooth ®
device name for COMAND is
MB Bluetooth MB Bluetooth .
X Switch on Bluetooth ®
audio mode
(Y page 184).
X To select Options
Options: slide 005200C5and press
the controller.
X To select Bluetooth Audio Devices
Bluetooth Audio Devices :
press the controller.
X To select Connect via Audio Device
Connect via Audio Device :
turn and press the controller. Authorizing
X
Start the authorization on the Bluetooth ®
audio device; see the operating instruc-
tions of the Bluetooth ®
audio device.
After successful authorization, the Blue-
tooth ®
audio device is connected and
starts playing. 182
Bluetooth ®
audio modeMedia
 1
1 2
2 3
3 4
4 5
5 6
6 7
7 8
8 9
9 10
10 11
11 12
12 13
13 14
14 15
15 16
16 17
17 18
18 19
19 20
20 21
21 22
22 23
23 24
24 25
25 26
26 27
27 28
28 29
29 30
30 31
31 32
32 33
33 34
34 35
35 36
36 37
37 38
38 39
39 40
40 41
41 42
42 43
43 44
44 45
45 46
46 47
47 48
48 49
49 50
50 51
51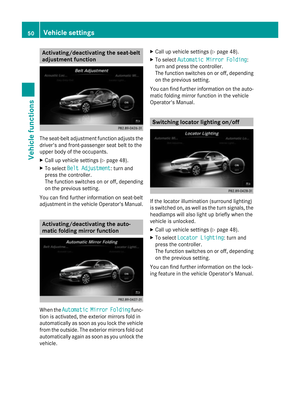 52
52 53
53 54
54 55
55 56
56 57
57 58
58 59
59 60
60 61
61 62
62 63
63 64
64 65
65 66
66 67
67 68
68 69
69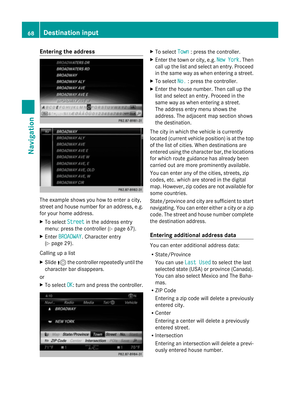 70
70 71
71 72
72 73
73 74
74 75
75 76
76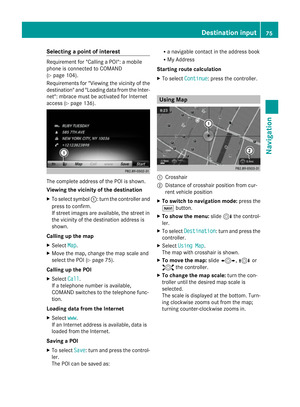 77
77 78
78 79
79 80
80 81
81 82
82 83
83 84
84 85
85 86
86 87
87 88
88 89
89 90
90 91
91 92
92 93
93 94
94 95
95 96
96 97
97 98
98 99
99 100
100 101
101 102
102 103
103 104
104 105
105 106
106 107
107 108
108 109
109 110
110 111
111 112
112 113
113 114
114 115
115 116
116 117
117 118
118 119
119 120
120 121
121 122
122 123
123 124
124 125
125 126
126 127
127 128
128 129
129 130
130 131
131 132
132 133
133 134
134 135
135 136
136 137
137 138
138 139
139 140
140 141
141 142
142 143
143 144
144 145
145 146
146 147
147 148
148 149
149 150
150 151
151 152
152 153
153 154
154 155
155 156
156 157
157 158
158 159
159 160
160 161
161 162
162 163
163 164
164 165
165 166
166 167
167 168
168 169
169 170
170 171
171 172
172 173
173 174
174 175
175 176
176 177
177 178
178 179
179 180
180 181
181 182
182 183
183 184
184 185
185 186
186 187
187 188
188 189
189 190
190 191
191 192
192 193
193 194
194 195
195 196
196 197
197 198
198 199
199 200
200 201
201 202
202 203
203 204
204 205
205 206
206 207
207 208
208 209
209 210
210 211
211 212
212 213
213