Page 49 of 214
Your COMAND equipment
..................48
Vehicle settings .................................. 48
360° camera ....................................... 52
Rear view camera ............................... 53
Climate control settings .....................54
AGILITY SELECT ................................... 58 47Vehicle functions
Page 50 of 214

Your COMAND equipment
These operating instructions describe all
standard and optional equipment available
for your COMAND system at the time of pur-
chase. Country-specific differences are pos-
sible. Please note that your COMAND system
may not be equipped with all the features
described. This also applies to safety-relevant
systems and functions. Therefore, the equip-
ment on your COMAND system may differ
from that in the descriptions and illustrations.
Should you have any questions concerning
equipment and operation, please consult an
authorized Mercedes-Benz Center. Vehicle settings
Calling up vehicle settings
X
Press the 00D4button.
The vehicle menu is displayed.
X To select Vehicle Settings Vehicle Settings : turn and
press the controller.
The Vehicle Settings
Vehicle Settings menu is active.
X To select the desired vehicle setting: turn
and press the controller.
The main area with the setting element is
active.
Selecting a different vehicle setting:
X To activate the menu for selecting the vehi-
cle setting: slide 5the controller.
Exiting the vehicle settings:
X To select 0039: slide 6and press the con-
troller. Ambient lighting
General notes You can set the following for the ambient
lighting:
R
Zone
The zone setting determines the area in
which the brightness setting is to be
applied. If the Complete zone is selected
for longer than 0.5 seconds, the brightness
of the Front zone is adopted for the entire
vehicle.
R Brightness
This setting makes an additional change to
the brightness of the ambient lighting. The
brightness change is only effective for the
selected zone. For this reason, the zone for
which the brightness change is to be active
must be selected first.
R Color
This setting changes the color of the ambi-
ent lighting.
Setting the brightness of the zones X
Call up vehicle settings ( Ypage 48).
X To select Ambient Light: Brightness Ambient Light: Brightness :
turn and press the controller.
The left-hand setting element is active. The
brightness value for the currently selected
zone is displayed.
X Press the controller. 48
Vehicle set
tingsVehicle fun ctions
Page 51 of 214

X
To change the brightness value: turn and
press the controller.
X To select a zone: slide 9and turn the
controller.
You can find further information on the inter-
ior lighting in the vehicle Operator's Manual.
Setting the color i
Once a color is set, it is used for all zones.
The brightness of the color used can be set
separately for each zone.
X Call up vehicle settings (Y page 48).
X To select Ambient Light: Color
Ambient Light: Color: turn
and press the controller.
The setting element is active.
X To select a color: turn the controller.
You can find further information on the inter-
ior lighting in the vehicle Operator's Manual.
Switching the display lighting on/off This display lighting adjustment function is
only available if the vehicle is not equipped
with the "Ambient lighting" package.
X Call up vehicle settings (Y page 48).
X To select Ambient Light: Display
Ambient Light: Display : turn
and press the controller.
The function switches on or off, depending
on the previous setting.
i The brightness can be changed using the
control between the two displays.
You can find further information on the inter-
ior lighting in the vehicle Operator's Manual. Setting the EASY-ENTRY/EXIT feature
The EASY-ENTRY/EXIT feature makes getting
in and out of your vehicle easier.
X
Call up vehicle settings (Y page 48).
X To select Easy Entry/Exit Easy Entry/Exit : turn and
press the controller.
The setting element is active.
X To change the setting: turn the controller. Activating/deactivating the acoustic
locking confirmation
You can also set an audible signal to confirm
that the vehicle has been locked.
X Call up vehicle settings (Y page 48).
X To select Acoustic Lock Feedback Acoustic Lock Feedback : turn
and press the controller.
The function switches on or off, depending
on the previous setting.
You can find further information on the lock-
ing feature in the vehicle Operator's Manual. Vehicle settings
49Vehicle functions
Page 52 of 214

Activating/deactivating the seat-belt
adjustment function The seat-belt adjustment function adjusts the
driver's and front-passenger seat belt to the
upper body of the occupants.
X Call up vehicle settings ( Ypage 48).
X To select Belt Adjustment
Belt Adjustment: turn and
press the controller.
The function switches on or off, depending
on the previous setting.
You can find further information on seat-belt
adjustment in the vehicle Operator's Manual. Activating/deactivating the auto-
matic folding mirror function When the
Automatic Automatic Mirror
MirrorFolding
Folding func-
tion is activated, the exterior mirrors fold in
automatically as soon as you lock the vehicle
from the outside. The exterior mirrors fold out
automatically again as soon as you unlock the
vehicle. X
Call up vehicle settings ( Ypage 48).
X To select Automatic Mirror Folding
Automatic Mirror Folding:
turn and press the controller.
The function switches on or off, depending
on the previous setting.
You can find further information on the auto-
matic folding mirror function in the vehicle
Operator's Manual. Switching locator lighting on/off
If the locator illumination (surround lighting)
is switched on, as well as the turn signals, the
headlamps will also light up briefly when the
vehicle is unlocked.
X
Call up vehicle settings ( Ypage 48).
X To select Locator Lighting Locator Lighting: turn and
press the controller.
The function switches on or off, depending
on the previous setting.
You can find further information on the lock-
ing feature in the vehicle Operator's Manual. 50
Vehicle settingsVehicle functions
Page 53 of 214

Switching the automatic locking fea-
ture on/off When the automatic locking feature is acti-
vated, the vehicle is locked automatically
when the ignition is switched on and the vehi-
cle is traveling faster than walking pace.
X Call up vehicle settings (Y page 48).
X To select Automatic Locking
Automatic Locking: turn and
press the controller.
The function switches on or off, depending
on the previous setting.
You can find further information on the lock-
ing feature in the vehicle Operator's Manual. Setting the delayed switch-off time
Interior lighting delayed switch-off The interior lighting is activated for the dura-
tion of the delayed switch-off time when the
key is removed from the ignition lock. X
Call up vehicle settings (Y page 48).
X To select Interior Lighting Delayed
Interior Lighting Delayed
Switch-off Switch-off: turn and press the controller.
The setting element is active.
X To change the delayed switch-off time: turn
the controller.
You can find further information on the inter-
ior lighting in the vehicle Operator's Manual.
Exterior lighting delayed switch-off The locator illumination (surround lighting) is
activated for the duration of the delayed
switch-off time when the vehicle is unlocked
using the remote control key.
X
Call up vehicle settings (Y page 48).
X To select Exterior Lighting Delayed Exterior Lighting Delayed
Switch-off
Switch-off: turn and press the controller.
The setting element is active.
X To change the delayed switch-off time: turn
the controller.
You can find further information on the lock-
ing feature in the vehicle Operator's Manual. Vehicle settings
51Vehicle functions
Page 54 of 214

Arming/disarming the tow-away
alarm An audible and visual alarm is triggered if your
vehicle's angle of inclination is altered while
the tow-away alarm is armed. This can occur
if the vehicle is jacked up on one side, for
example.
X Call up vehicle settings ( Ypage 48).
X To select Tow-away Alarm
Tow-away Alarm : turn and press
the controller.
The function switches on or off, depending
on the previous setting. Arming/disarming the interior
motion sensor
When the interior motion sensor is armed, a
visual and audible alarm is triggered if move-
ment is detected in the vehicle interior. This
can occur if someone reaches into the vehicle
interior without authorization, for example. X
Call up vehicle settings ( Ypage 48).
X To select Interior Motion Sensor Interior Motion Sensor : turn
and press the controller.
The function switches on or off, depending
on the previous setting. Activating/deactivating the trunk lid
opening height restriction
Activating the trunk lid opening height restric-
tion allows you to avoid bumping the trunk lid
on a low garage ceiling, for example.
X
Call up vehicle settings ( Ypage 48).
X To select Trunk Opening-height Trunk Opening-height
Restriction
Restriction: turn and press the control-
ler.
The function switches on or off, depending
on the previous setting. 360° camera
Important notes
The 360° camera is only an aid. It is not a
replacement for your attention to your imme-
diate surroundings. You are always responsi-
ble for safe maneuvering and parking. Make
sure that no persons or animals are in the
maneuvering range. Overview
The 360° camera surveys the vehicle sur-
roundings and assists you, for example when
parking or at exits with reduced visibility. 52
360° cameraVehicle functions
Page 55 of 214

For further information on the 360° camera,
see the separate vehicle Operator's Manual. Settings for the 360° camera
When you activate this function, the image
from the 360° camera is displayed when you
select reverse gear.
Activating/deactivating using the reverse
gear:
X Press the 00D4button in the center con-
sole.
The vehicle menu is displayed.
X To switch to the menu bar: slide 6the
controller.
X To select Vehicle Vehicle Settings
Settings: turn the con-
troller and press to confirm.
X Select 360° Camera
360° Camera.
X Select Activation by R gear
Activation by R gear .
The function is switched on 0073or off 0053,
depending on the previous status. Displaying the 360° camera image
The 360° camera image can be displayed if:
R your vehicle is equipped with a 360° cam-
era
R COMAND is switched on (Y page 26)
R the 360° Camera
360° Camera function is switched on.
Displaying the image of the 360° camera:
X Press the 00D4button in the center con-
sole.
A menu appears.
X Select 360° Camera
360° Camera.
The 360° camera image appears in split-
screen mode.
You will see the previous view on the display
if you have switched the function on:
R select transmission position P
R the vehicle exceeds a speed of approx.
30 km/h Manually switching the display
X
To select 0039: slide 6and press the con-
troller.
Automatically switching the display:
X You can automatically switch the 360 cam-
era display using reverse gear (Y page 52).
The 360° camera can detect both moving and
stationary objects. If, for example, a pedes-
trian or another vehicle is detected, these
objects are marked with bars. The system is
only able to detect and mark stationary
objects when your vehicle is moving. By con-
trast, stationary objects will always be
detected and marked.
Switching object detection on/off
X To select Object Detection Object Detection in the 360°
camera menu: turn the controller and press
to confirm.
The function is switched on 0073or off 0053,
depending on the previous status.
Opening the camera cover for cleaning
X To select Open OpenCamera
Camera Cover
Coverin the 360°
camera menu: turn the controller and press
to confirm.
The Please Please Wait...
Wait... message appears for
approximately three seconds.
The camera cover opens. The camera cover
closes automatically when you lock the
vehicle or pull away. Rear view camera
The rear view camera is only an aid. It is not
a replacement for your attention to your
immediate surroundings. You are always
responsible for safe maneuvering and park-
ing. When maneuvering or parking, make sure
that there are no persons, animals or objects
in the area in which you are maneuvering. Rear view camera
53Vehicle functions
Page 56 of 214

The image from the rear view camera is
shown in the COMAND display when reverse
gear is engaged if:
R your vehicle is equipped with a rear view
camera
R COMAND is switched on
R the Activation by R gear
Activation by R gear function is
switched on.
As soon as the function is switched on, you
will see the previous view on the display:
R select transmission position P
R after driving forwards a short distance
You can find further information about the
rear view camera in the vehicle Operator's
Manual.
X Switch on COMAND (Y page 26).
X Press the 00D4button in the center con-
sole.
The vehicle menu is displayed.
X Slide 6the controller.
X To select System Settings
System Settings: turn and
press the controller.
X Select Rear View Camera
Rear View Camera.
The Rear View Camera Rear View Camera menu appears.
X Select Activation by R gear
Activation by R gear.
The function is switched on 0073or off 0053,
depending on the previous status.
When you start the vehicle and engage
reverse gear, the camera cover opens auto-
matically if the function is activated. The
area behind the vehicle is shown with guide
lines in the display (see the vehicle Opera-
tor's Manual).
The rear view camera can detect moving and
stationary objects. If, for example, a pedes-
trian or another vehicle is detected, these
objects are marked with bars. The system is
only able to detect and mark stationary
objects when your vehicle is moving. By con-
trast, stationary objects will always be
detected and marked. Switching object detection on/off
X
To select Object Detection
Object Detection in the rear
view camera menu: turn and press the con-
troller.
The function is switched on 0073or off 0053,
depending on the previous status.
Opening the camera cover for cleaning
X To select Open Camera Cover Open Camera Cover in the rear
view camera menu: turn and press the con-
troller.
The Please Please Wait...
Wait... message appears for
approximately three seconds.
The camera cover opens. The camera cover
closes automatically when you lock the
vehicle or pull away. Climate control settings
Basic settings of the climate control
bar
Climate control bar You can set the climate control functions
directly in the climate control bar and change
them in the climate control menu.
0043
Adjusts temperature, airflow and air dis-
tribution, left, as well as displaying the
current setting
0044 Calls up the climate control menu and dis-
plays the current cooling and airflow set-
ting
0087 Adjusts temperature, airflow and air dis-
tribution, right, as well as displaying the
current setting 54
Climate control settingsVehicle functions
 1
1 2
2 3
3 4
4 5
5 6
6 7
7 8
8 9
9 10
10 11
11 12
12 13
13 14
14 15
15 16
16 17
17 18
18 19
19 20
20 21
21 22
22 23
23 24
24 25
25 26
26 27
27 28
28 29
29 30
30 31
31 32
32 33
33 34
34 35
35 36
36 37
37 38
38 39
39 40
40 41
41 42
42 43
43 44
44 45
45 46
46 47
47 48
48 49
49 50
50 51
51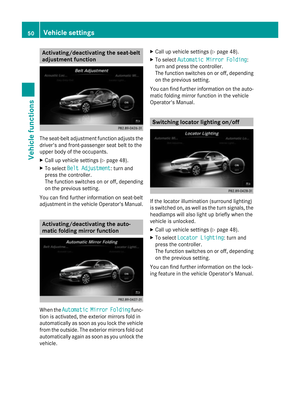 52
52 53
53 54
54 55
55 56
56 57
57 58
58 59
59 60
60 61
61 62
62 63
63 64
64 65
65 66
66 67
67 68
68 69
69 70
70 71
71 72
72 73
73 74
74 75
75 76
76 77
77 78
78 79
79 80
80 81
81 82
82 83
83 84
84 85
85 86
86 87
87 88
88 89
89 90
90 91
91 92
92 93
93 94
94 95
95 96
96 97
97 98
98 99
99 100
100 101
101 102
102 103
103 104
104 105
105 106
106 107
107 108
108 109
109 110
110 111
111 112
112 113
113 114
114 115
115 116
116 117
117 118
118 119
119 120
120 121
121 122
122 123
123 124
124 125
125 126
126 127
127 128
128 129
129 130
130 131
131 132
132 133
133 134
134 135
135 136
136 137
137 138
138 139
139 140
140 141
141 142
142 143
143 144
144 145
145 146
146 147
147 148
148 149
149 150
150 151
151 152
152 153
153 154
154 155
155 156
156 157
157 158
158 159
159 160
160 161
161 162
162 163
163 164
164 165
165 166
166 167
167 168
168 169
169 170
170 171
171 172
172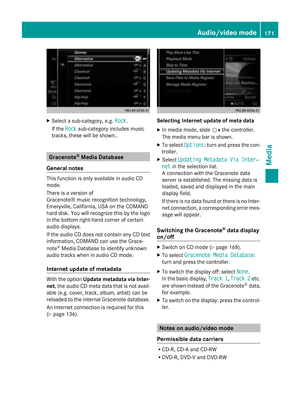 173
173 174
174 175
175 176
176 177
177 178
178 179
179 180
180 181
181 182
182 183
183 184
184 185
185 186
186 187
187 188
188 189
189 190
190 191
191 192
192 193
193 194
194 195
195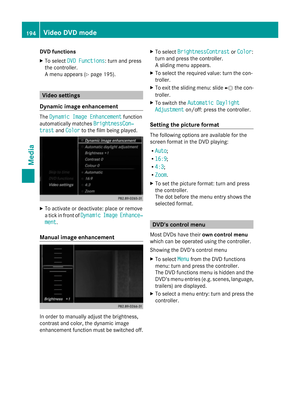 196
196 197
197 198
198 199
199 200
200 201
201 202
202 203
203 204
204 205
205 206
206 207
207 208
208 209
209 210
210 211
211 212
212 213
213