Page 89 of 214

X
To switch to navigation mode: press the
00BE button.
X To show the menu: slide6the control-
ler.
X To select Traffic
Traffic: turn and press the con-
troller.
If satellite signals cannot be received or
there are no traffic reports, you will see a
message to this effect.
X To close the report: press the controller.
Traffic symbol information 0043
Affected roads with indication of direction
0044 Symbol for report type, e.g. traffic flow
message
X To switch to navigation mode: press the
00BE button.
X To show the menu: slide6the control-
ler.
X To select Traffic
Traffic: turn and press the con-
troller.
X To select Traffic
Traffic Symbol
Symbol Information Information:
turn and press the controller.
The map appears and shows the available
traffic information as icons. The first traffic
information is highlighted.
X To highlight other traffic symbols, select
Next
Next orPrevious Previous.
X To move the map: selectMap
Map.
You can move the map to enable further
traffic information to be displayed. You can have the traffic report relevant to a
traffic icon shown.
X
To select Details Details: turn and press the con-
troller.
The report shows the following information:
R State/province, road and display of the
affected direction
R Section of the road to which the traffic
report applies
R Traffic icon and traffic report
X To close the detailed display: press the
0038 button.
Displaying reports on the route The function is only available while route guid-
ance is active. It shows the available traffic
reports affecting the current route.
If there are no reports for the route or the
function is not supported in the selected lan-
guage: the
Messages On Route Messages On Route menu item
is gray and cannot be selected. Real-time traffic reports
87Navigation Z
Page 90 of 214

X
To switch to navigation mode: press the
00BE button.
X To show the menu: slide6the control-
ler.
X To select Traffic
Traffic: turn and press the con-
troller.
X To select Messages On Route
Messages On Route: turn and
press the controller.
The traffic report window appears. Several
traffic reports may be available for the cal-
culated route, marked for example by 1/3.
The report shows the following information:
R State/province, road and display of the
affected direction
R Section of the road to which the traffic
report applies
R Traffic icon and traffic report
X To display the next/previous traffic
report: turn the controller.
X To close the display: press the0038but-
ton.
Displaying all traffic reports X
To switch to navigation mode: press the
00BE button.
X To show the menu: slide6the control-
ler.
X To select Traffic Traffic: turn and press the con-
troller.
X To select All Messages
All Messages: turn and press
the controller.
A list is shown containing all roads, areas
or regions affected by traffic reports. Roads, areas or regions not on the route
also appear in the list.
X To select the road, area or region: turn
the controller and press to confirm.
The traffic report is displayed (Y page 87).
There may be several traffic reports for the
affected road.
X To close the display: press the0038but-
ton.
Settings for the display on the map You can switch these displays on/off on the
map:
R
Incidents
R Speed & Flow
R Free Flow
X To switch to navigation mode: press the
00BE button.
X To show the menu: slide6the control-
ler.
X To select Traffic Traffic: turn and press the con-
troller.
X To select Traffic
Traffic Information
Information On
OnMap
Map:
turn and press the controller.
X Select Incidents
Incidents ,Speed
Speed &
&Flow
Flow orFree
Free
Flow
Flow.
The display is on 0073or off 0053. Reading out traffic reports on the
route
Introduction The read-aloud function is only available while
route guidance is active. It reads out traffic
reports affecting the current route.
You can select from the following text reader
properties:
R Language (Y page 42)
R Text reader speed (Y page 38)
You can start the text reader function man-
ually or set it to automatic. 88
Real-time traffic reportsNavigation
Page 91 of 214

Starting the text reader function man-
ually X
To switch to navigation mode: press the
00BE button.
X To show the menu: slide6the control-
ler.
X To select Traffic
Traffic: turn and press the con-
troller.
X Select Read Out All Messages on
Read Out All Messages on
Route
Route.
COMAND reads out the reports in
sequence.
If no reports are available for the route, the
Read
Read Out OutAll
AllMessages
Messages on
onRoute
Route menu
item is gray and cannot be selected.
X To cancel the read-aloud function: select
Cancel Read-Aloud Function
Cancel Read-Aloud Function.
COMAND reads out the current report and
then exits the read-aloud function.
Automatic read-aloud function X
To switch to navigation mode: press the
00BE button.
X To show the menu: slide6the control-
ler.
X To select Traffic Traffic: turn and press the con-
troller.
X Select Read Traffic Announcements
Read Traffic Announcements
Automatically
Automatically.
Depending on the previous state, switch
the option on 0073or off 0053. Recalculating the route dynamically
The Dynamic Traffic Route
Dynamic Traffic Route route type
takes into account all of the traffic reports it
receives for the current route when calculat-
ing the route (Y page 64).
If you have selected Dynamic Traffic
Dynamic Traffic
Route Route as the route type, COMAND guides you
to your destination along the updated route. Storing destinations
General notes
If a route to a destination has been calculated,
COMAND saves the destination to the last
destinations memory. If the memory is full,
COMAND overwrites the oldest destination.
When you save the current vehicle position or
a crosshair position, this position is stored in
the "Last destinations" memory.
You can permanently save destinations in the
address book. For instance, this is possible
immediately after entering an address or sav-
ing it in the "Last destinations" memory. Storing the destination in the address
book
The example shows a POI.
X
To select Save Save: turn and press the control-
ler.
A menu appears.
X New contact: selectAs New Contact As New Contact.
If the address book already contains con-
tacts, the entry Add to Contact Add to Contact is also
available.
X Select Not Classified
Not Classified, Home
HomeorWork
Work.
An input menu shows the destination
address.
X Enter a surname and first name. Character
entry (Y page 28).
X To select OK OK: turn and press the controller.
You will see the message Saving Suc‐
Saving Suc‐
cessful
cessful. The destination address is saved
in the address book as a navigable contact. Storing destinations
89Navigation Z
Page 92 of 214

(Y page 117).
X Press the controller.
You will see the Savin")
X
To add to a contact: selectAdd to Con‐
Add to Con‐
tact
tact.
The address book appears.
X Search for the address book entry (contact)
(Y page 117).
X Press the controller.
You will see the Saving
Saving Successful Successful mes-
sage. The destination address is allocated
to a contact in the address book.
Telephone numbers are not transferred to
the telephone number fields of the address
book. After selecting the destination
address from the address book for naviga-
tion, the associated telephone number will
be displayed.
If the contact already has two destination
addresses, a prompt will appear asking if a
destination address should be overwritten.
X Select Yes
Yes orNo No.
If you select Yes
Yes, a list showing both des-
tination addresses appears.
X To select the destination address: turn and
press the controller.
The destination address is overwritten. Saving the current vehicle position
X To switch to navigation mode: press the
00CB button.
X To show the menu: slide6the control-
ler.
X To select Position
Position: turn and press the
controller.
X Select Save
Save.
The current vehicle position is saved in
"Last destinations". Saving the crosshair position
X To switch to navigation mode: press the
00CB button.
X To display the crosshair: press the con-
troller. X
Move the map to the desired position
(Y page 64).
X To show the menu: press the controller.
X To select Position
Position: turn and press the
controller.
X Select Save Save.
The crosshair position is saved in the last
destinations. Editing the last destinations
X
To switch to navigation mode: press the
00CB button.
X To show the menu: slide6the control-
ler.
X To select Destination Destination: turn and press the
controller.
X Select From Previous Destinations
From Previous Destinations .
The "Last destinations" memory appears.
X To save the destination: select the desti-
nation.
X Storing the destination in the address book
(Y page 89).
X To view the details: while in the "Last des-
tinations" memory, turn the controller and
highlight the entry.
X Slide 00520096the controller.
A menu appears.
X To select Details Details: press the controller.
i The destination address can be changed
if desired. For instance, a different street or
house number can be selected. 90
Storing destinationsNavigation
Page 93 of 214

X
To delete one or all destinations: while
in the "Last destinations" memory, turn the
controller and highlight the entry.
X Slide 00520096the controller.
A menu appears.
X To select Delete
Delete orDelete All
Delete All : turn and
press the controller.
A prompt appears.
X Select Yes
Yes orNo No.
Selecting Yes
Yesdeletes the selected desti-
nation or all destinations. Map functions
General notes
Company logos displayed on the map are
trademarks of the respective companies and
used solely for the purpose of indicating the
locations of these companies. The use of such
logos on the map does not indicate approval
of, support of or advertising by these compa-
nies for the navigation system itself. Map settings
Setting the map scale Requirement: the map is in full screen mode,
the menu is faded out (Y page 63).
The lower left-hand section of the map shows
the currently set map scale and compass nee-
dle.
Right-hand-drive vehicles: the currently set
map scale and compass needle are displayed
in the lower right-hand section of the map.
Displaying the map in full screen mode
X To hide the menu: press the 0038button.
or
X Slide the controller to the center of the map
and press to confirm. X
To set the map scale: as soon as you turn
the controller, the scale bar appears on the
bottom of the display.
X Turn the controller until the needle points
to the desired map scale.
Once you are finished selecting a map
scale, the new map scale will be shown.
i Alternatively, you can carry out this oper-
ation using the touchpad (Y page 21).
Selecting map orientation X
To switch to navigation mode: press the
00CB button.
X To show the menu: slide6the control-
ler.
X To select Options Options: turn and press the con-
troller.
X Select Map Orientation
Map Orientation.
The 003Bdot indicates the current setting.
X Turn and press the controller.
The map orientation is set.
i Alternatively, you can carry out this oper-
ation using the touchpad (Y page 21). Map functions
91Navigation Z
Page 94 of 214

The image is an example of the 3D map dis-
play with crosshair. Map orien-
tation Explanation
North Up North Up 005B
The map view is displayed
so that north is always up. Heading
Heading
Up Up ¤
The map view is aligned
to the direction of travel. The
direction of travel is always
at the top; the red tip of the
symbol points north. 3-D Map 3-D Map ¤
The map view is aligned
to the direction of travel. The
map displays a 3D oblique
view with elevation; the red
tip of the symbol points
north. Selecting map content
The following settings are available:
R
Point of interest symbols on the map
POIs can be displayed as symbols in the
map display. POIs include, for example, gas
stations, hotels and restaurants.
R Text Information On Map
At the bottom of the display, you can spec-
ify whether to display geo-coordinates or
not to display text information for the street
you are currently on.
R Highway information
The following can be displayed during route
guidance:
-the nearest gas stations and rest stops
- rest areas and highway exits
- and their immediate distances from the
vehicle's current position
R Next crossroads
If route guidance is not active, the next
crossroads can be displayed at the upper
edge of the display.
R Map version The number of the map data version is
shown. Information about new versions of
the digital map can be obtained from an
authorized Mercedes-Benz Center.
Selecting POI symbols on the map
X To switch to navigation mode: press the
00CB button.
X To show the menu: slide6the control-
ler.
X To select Options Options: turn and press the con-
troller.
X Select Map Content
Map Content.
X Select POI Symbols On Map
POI Symbols On Map.
The 003Bdot indicates the current setting.
X Turn and press the controller.
Default Symbols
Default Symbols shows symbols of pre-
defined categories in the map.
Custom Symbols Custom Symbols allows symbols to be
selected from other/all available catego-
ries.
i Alternatively, you can carry out this oper-
ation using the touchpad (Y page 21). X
Turn and press the controller.
You have the option of selecting symbols
to be displayed 0073or not displayed 0053on
the map.
The list shows all symbols that are contained
on the digital map across all countries. How-
ever, not all points of interest are available in
all countries. As a result, certain point of
interest symbols may not be displayed on the
map, even if the symbol display is switched
on. 92
Map functionsNavigation
Page 95 of 214

Selecting text information on the map
X To switch to navigation mode: press the
00CB button.
X To show the menu: slide6the control-
ler.
X To select Options
Options: turn and press the con-
troller.
X Select Map Content
Map Content.
X Select Text Information On Map
Text Information On Map.
The 003Bdot indicates the current setting.
X Turn and press the controller.
Current Street Current Street shows the current street
at the bottom of the display.
Geo-coordinates
Geo-coordinates shows the longitude
and latitude, elevation and number of sat-
ellites received.
X Turn and press the controller.
i The elevation shown may deviate from the
actual elevation.
i Alternatively, you can carry out this oper-
ation using the touchpad (Y page 21).
Switching highway information on/off
X To switch to navigation mode: press the
00CB button.
X To show the menu: slide6the control-
ler.
X To select Options
Options: turn and press the con-
troller.
X Select Map Content
Map Content.
X Select Highway Information Highway Information.
Switch the display in the map on 0073or off
0053. Further information (Y page 81).
i Alternatively, you can carry out this oper-
ation using the touchpad (Y page 21).
Displaying the next crossroads
X To switch to navigation mode: press the
00CB button.
X To show the menu: slide6the control-
ler.
X To select Options
Options: turn and press the con-
troller. X
Select Map Content
Map Content.
X Select Next Intersecting Street
Next Intersecting Street.
Switch the display in the map on 0073or off
0053.
Showing the map version
X To switch to navigation mode: press the
00CB button.
X To show the menu: slide6the control-
ler.
X To select Options Options: turn and press the con-
troller.
X Select Map Content Map Content.
X Select Map Version Map Version.
Information on the current map version is
shown.
i Alternatively, you can carry out this oper-
ation using the touchpad (Y page 21).
Rotating the 3D map You can use this function to explore the vicin-
ity of the destination in a 3D view. The func-
tion is available in all map scales.
X
To switch to navigation mode: press the
00BE button.
X To show the menu: slide6the control-
ler.
X To select Position Position: turn and press the
controller.
X Select 3D Map Rotation
3D Map Rotation.
X Turn the controller to change to the 3D map
perspective.
i Alternatively, you can carry out this oper-
ation using the touchpad (Y page 21). Map functions
93Navigation Z
Page 96 of 214
Map display
Displaying the navigation map COMAND displays the navigation map and
globe satellite images. This allows for a real-
istic map display fre")
Additional functions:
R
Moving the map (Y page 64)Map display
Displaying the navigation map COMAND displays the navigation map and
globe satellite images. This allows for a real-
istic map display free from distortion in all
map scales.
Other functions:
R Moving the map (Y page 64)
R Changing the map scale (Y page 91)
Building images In small map scales (20 m, 50 m), important
buildings are depicted realistically on the
map; other buildings are shown as models.
Elevation model Cities located in mountainous regions are
realistically depicted using elevation model-
ing. Country-specific information
You can call up information on the traffic con-
ditions in the country you are currently driving
in via the COMAND Internet and online func-
tion.
The availability of information is country-
dependent. Information can include maxi-
mum speeds, driving with low-beam head-
lamps or legal alcohol limits, for example.
X To switch to navigation mode: press the
00BE button.
X To show the menu: slide6the control-
ler.
X To select Position Position: turn and press the
controller.
X Select Country Information
Country Information.
When the online connection has been
established, the available country informa-
tion appears.
i Alternatively you can call up this function
using the touchpad (Y page 21).
X To return to navigation: press the0038
button. Avoiding an area
General information COMAND enables you to avoid areas you do
not wish to drive through.
If you activate or deactivate a route block
while route guidance is active, COMAND will
calculate a new route. If you activate or deac-
tivate a route block while route guidance is
inactive, COMAND will use the new setting for
the next route guidance.
The calculated route may include an area to
be avoided if:
R
your destination is located in such an area.
R there is no alternative route of comparable
length available 94
Map functionsNavigation
 1
1 2
2 3
3 4
4 5
5 6
6 7
7 8
8 9
9 10
10 11
11 12
12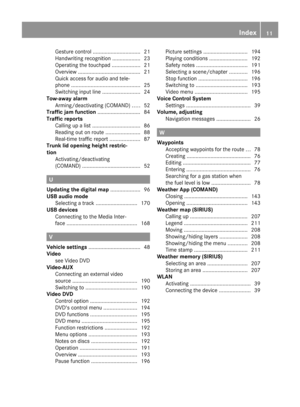 13
13 14
14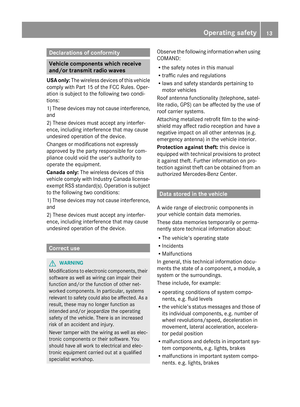 15
15 16
16 17
17 18
18 19
19 20
20 21
21 22
22 23
23 24
24 25
25 26
26 27
27 28
28 29
29 30
30 31
31 32
32 33
33 34
34 35
35 36
36 37
37 38
38 39
39 40
40 41
41 42
42 43
43 44
44 45
45 46
46 47
47 48
48 49
49 50
50 51
51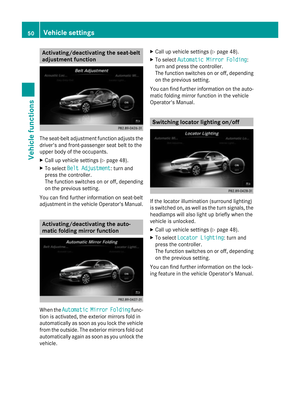 52
52 53
53 54
54 55
55 56
56 57
57 58
58 59
59 60
60 61
61 62
62 63
63 64
64 65
65 66
66 67
67 68
68 69
69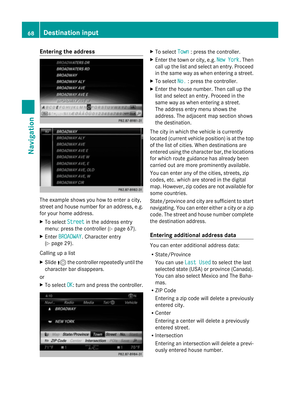 70
70 71
71 72
72 73
73 74
74 75
75 76
76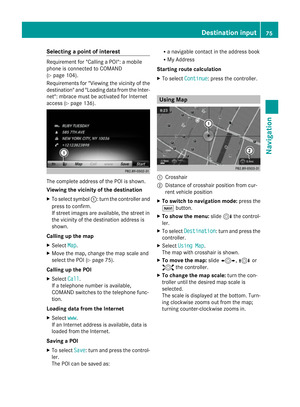 77
77 78
78 79
79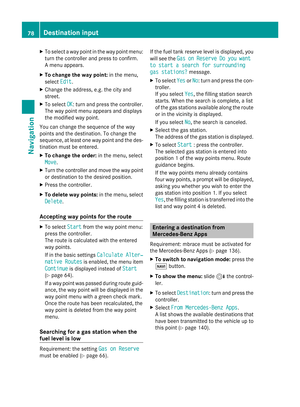 80
80 81
81 82
82 83
83 84
84 85
85 86
86 87
87 88
88 89
89 90
90 91
91 92
92 93
93 94
94 95
95 96
96 97
97 98
98 99
99 100
100 101
101 102
102 103
103 104
104 105
105 106
106 107
107 108
108 109
109 110
110 111
111 112
112 113
113 114
114 115
115 116
116 117
117 118
118 119
119 120
120 121
121 122
122 123
123 124
124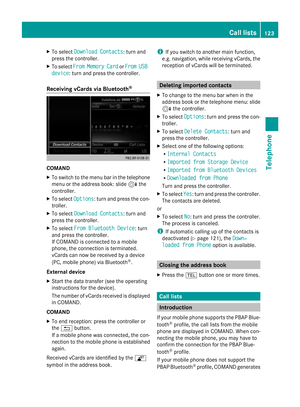 125
125 126
126 127
127 128
128 129
129 130
130 131
131 132
132 133
133 134
134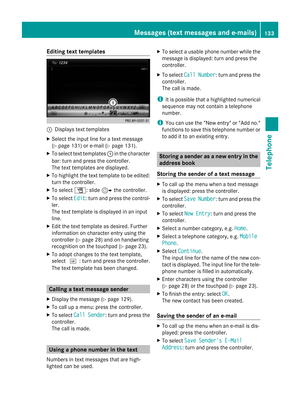 135
135 136
136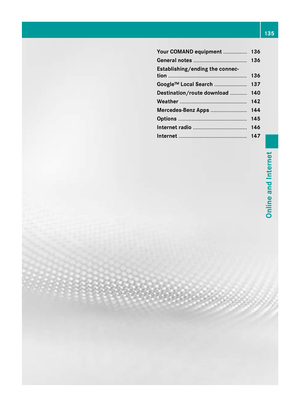 137
137 138
138 139
139 140
140 141
141 142
142 143
143 144
144 145
145 146
146 147
147 148
148 149
149 150
150 151
151 152
152 153
153 154
154 155
155 156
156 157
157 158
158 159
159 160
160 161
161 162
162 163
163 164
164 165
165 166
166 167
167 168
168 169
169 170
170 171
171 172
172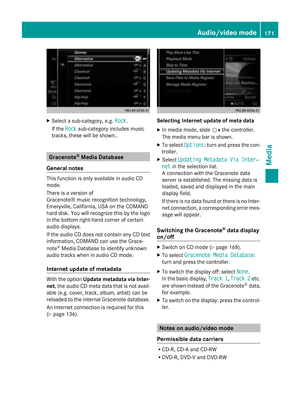 173
173 174
174 175
175 176
176 177
177 178
178 179
179 180
180 181
181 182
182 183
183 184
184 185
185 186
186 187
187 188
188 189
189 190
190 191
191 192
192 193
193 194
194 195
195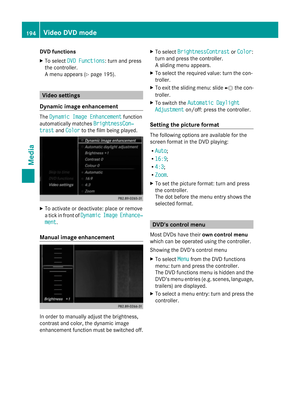 196
196 197
197 198
198 199
199 200
200 201
201 202
202 203
203 204
204 205
205 206
206 207
207 208
208 209
209 210
210 211
211 212
212 213
213