Page 49 of 177

Navigation49
as new destination, see "Entering
and selecting the home address"
below.
The menu options Options, Route ,
and Cancel Route are described in
the "Guidance" chapter 3 65.
Using menus with keypads for address input When using the various options for
address input, you often need to enter
address data using menus with
keypads.
The keypads use an intelligent
spelling function, which excludes
nonexistent letter or number
combinations.
The use of menus with keypads will
be described below by the example of
entering a city name:
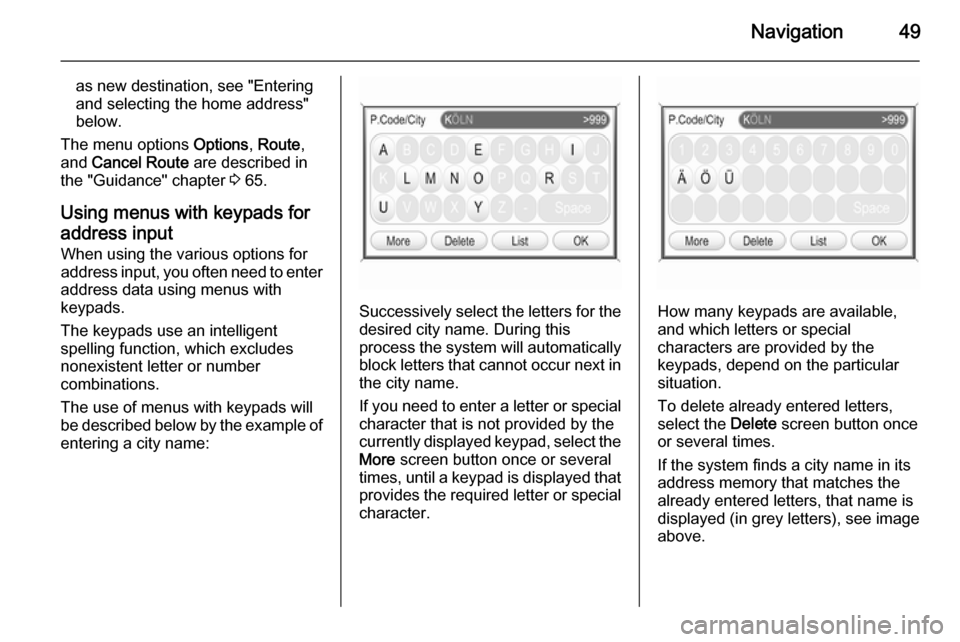
Successively select the letters for the desired city name. During this
process the system will automatically
block letters that cannot occur next in the city name.
If you need to enter a letter or special character that is not provided by the
currently displayed keypad, select the More screen button once or several
times, until a keypad is displayed that
provides the required letter or special character.How many keypads are available,
and which letters or special
characters are provided by the
keypads, depend on the particular situation.
To delete already entered letters,
select the Delete screen button once
or several times.
If the system finds a city name in its
address memory that matches the
already entered letters, that name is
displayed (in grey letters), see image
above.
Page 50 of 177

50Navigation
In case the displayed city name is the
one you are searching for, you can
select the OK screen button to directly
add that city name to your destination
address.
The number in the menu's top right
corner shows, how many city names
starting with the entered letters were
found in the system's address
memory. If that number exceeds 999, "> 999" is displayed, see image
above.
With entering further letters, the
number of city names matching the
entered letters will decrease.
As soon as the number of matching
city names is equal or less than 5, a
list with the matching city names is automatically displayed.
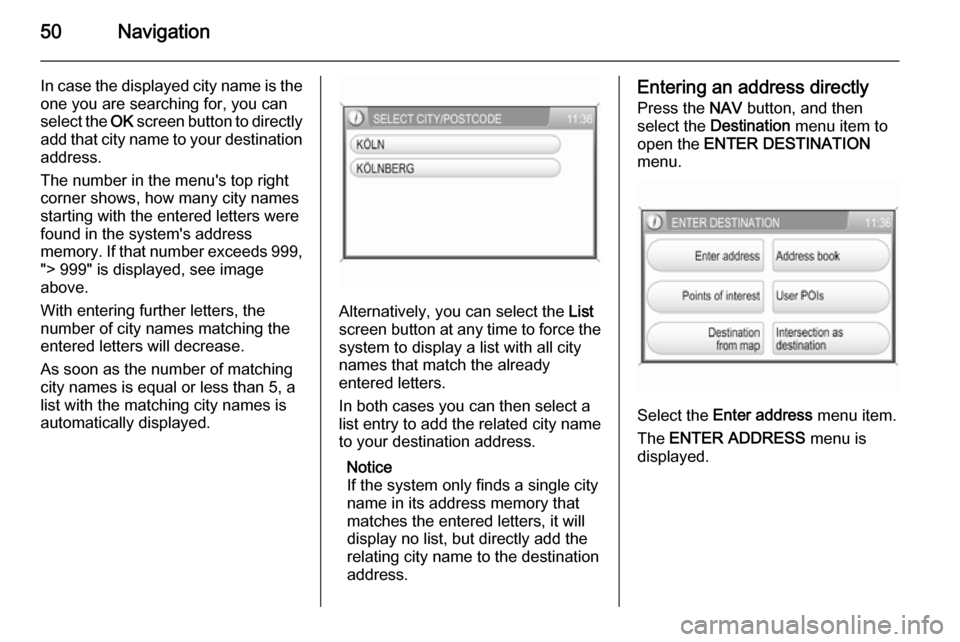
Alternatively, you can select the List
screen button at any time to force the
system to display a list with all city
names that match the already
entered letters.
In both cases you can then select a
list entry to add the related city name
to your destination address.
Notice
If the system only finds a single city name in its address memory that
matches the entered letters, it will
display no list, but directly add the
relating city name to the destination address.
Entering an address directly
Press the NAV button, and then
select the Destination menu item to
open the ENTER DESTINATION
menu.
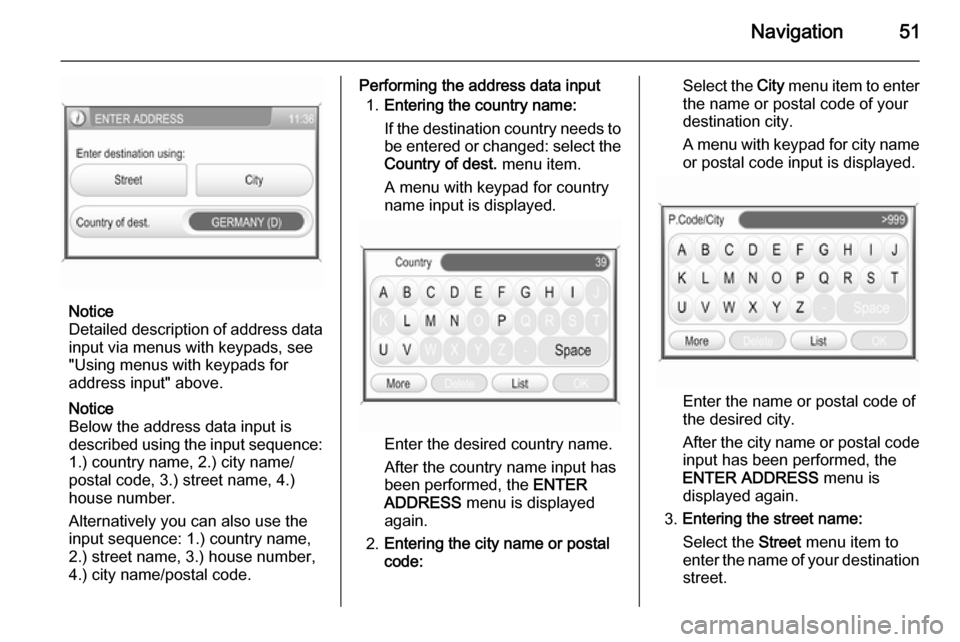
Select the Enter address menu item.
The ENTER ADDRESS menu is
displayed.
Page 51 of 177

Navigation51
Notice
Detailed description of address data
input via menus with keypads, see
"Using menus with keypads for
address input" above.
Notice
Below the address data input is
described using the input sequence:
1.) country name, 2.) city name/ postal code, 3.) street name, 4.)
house number.
Alternatively you can also use the
input sequence: 1.) country name,
2.) street name, 3.) house number,
4.) city name/postal code.
Performing the address data input
1. Entering the country name:
If the destination country needs to be entered or changed: select the
Country of dest. menu item.
A menu with keypad for country
name input is displayed.
Enter the desired country name.
After the country name input has
been performed, the ENTER
ADDRESS menu is displayed
again.
2. Entering the city name or postal
code:
Select the City menu item to enter
the name or postal code of your
destination city.
A menu with keypad for city name or postal code input is displayed.
Enter the name or postal code ofthe desired city.
After the city name or postal code
input has been performed, the
ENTER ADDRESS menu is
displayed again.
3. Entering the street name:
Select the Street menu item to
enter the name of your destination
street.
Page 52 of 177

52Navigation
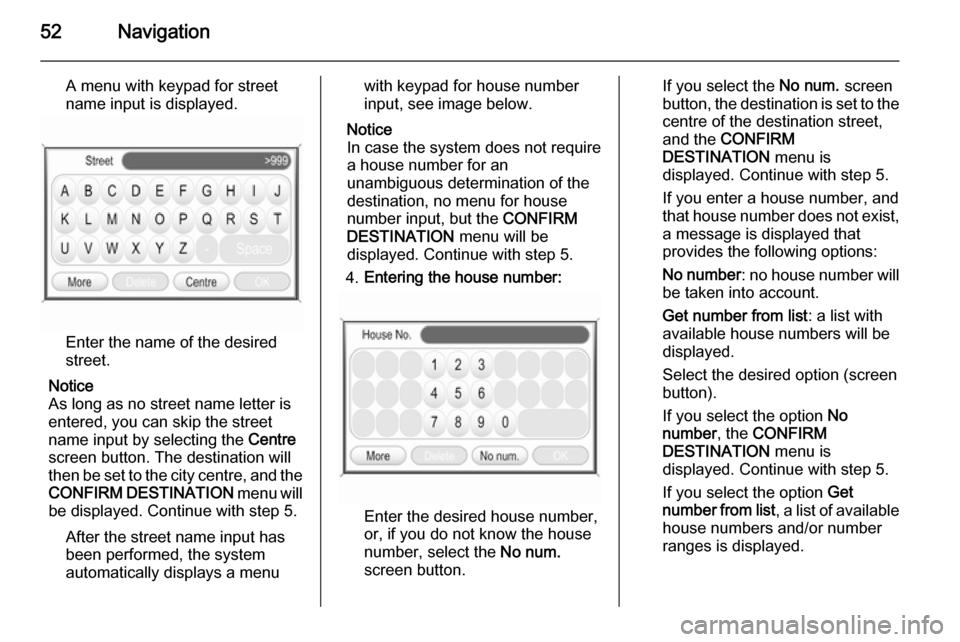
A menu with keypad for street
name input is displayed.
Enter the name of the desired
street.
Notice
As long as no street name letter is
entered, you can skip the street
name input by selecting the Centre
screen button. The destination will
then be set to the city centre, and the
CONFIRM DESTINATION menu will
be displayed. Continue with step 5.
After the street name input has
been performed, the system
automatically displays a menu
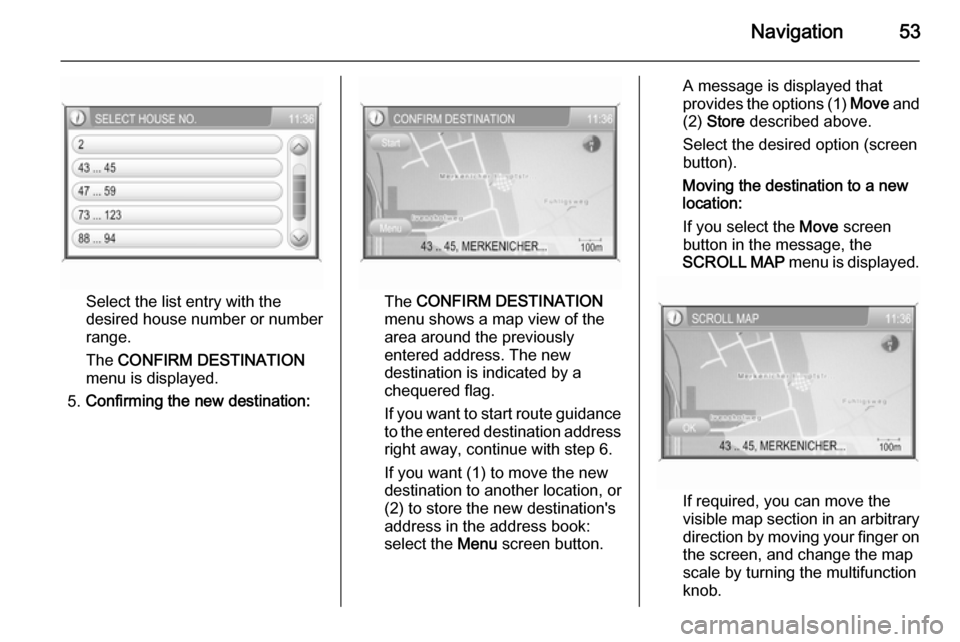
with keypad for house number
input, see image below.
Notice
In case the system does not require
a house number for an
unambiguous determination of the
destination, no menu for house
number input, but the CONFIRM
DESTINATION menu will be
displayed. Continue with step 5.
4. Entering the house number:
Enter the desired house number,
or, if you do not know the house
number, select the No num.
screen button.
If you select the No num. screen
button, the destination is set to the
centre of the destination street,
and the CONFIRM
DESTINATION menu is
displayed. Continue with step 5.
If you enter a house number, and
that house number does not exist, a message is displayed that
provides the following options:
No number : no house number will
be taken into account.
Get number from list : a list with
available house numbers will be
displayed.
Select the desired option (screen
button).
If you select the option No
number , the CONFIRM
DESTINATION menu is
displayed. Continue with step 5.
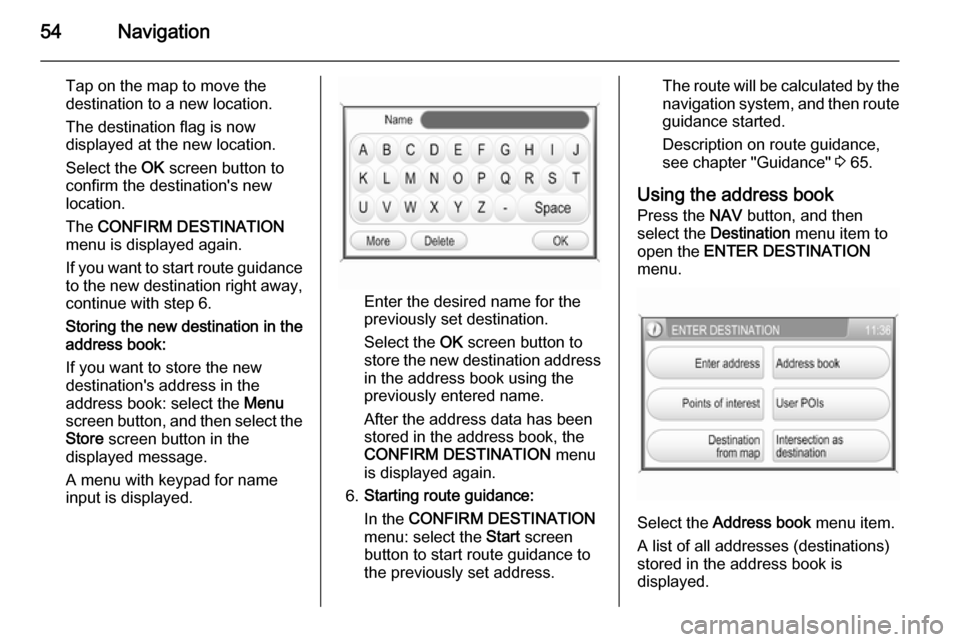
If you select the option Get
number from list , a list of available
house numbers and/or number
ranges is displayed.
Page 53 of 177

Navigation53
Select the list entry with the
desired house number or number
range.
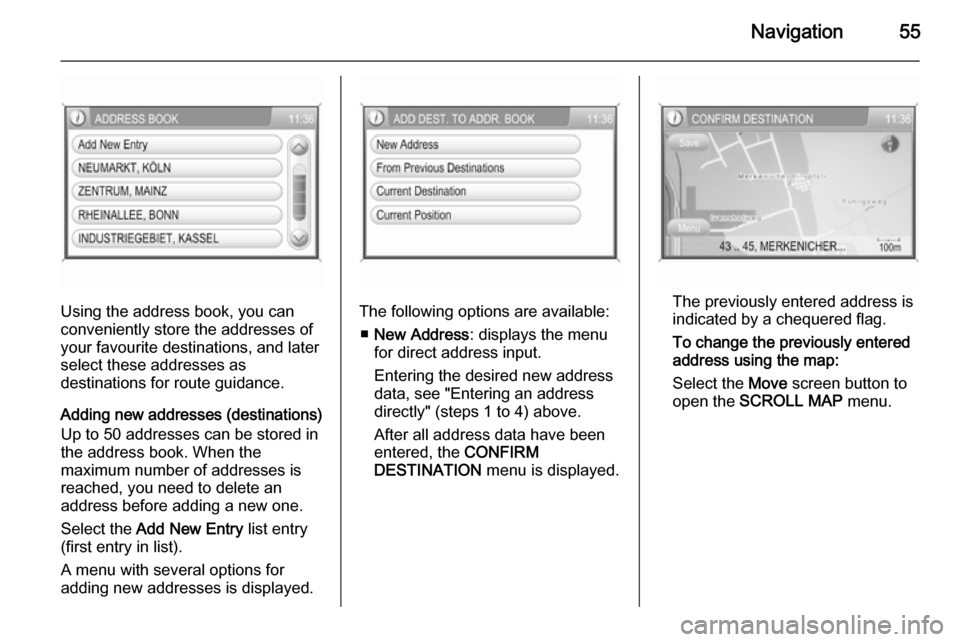
The CONFIRM DESTINATION
menu is displayed.
5. Confirming the new destination:The CONFIRM DESTINATION
menu shows a map view of the
area around the previously
entered address. The new
destination is indicated by a
chequered flag.
If you want to start route guidance
to the entered destination address right away, continue with step 6.
If you want (1) to move the new
destination to another location, or (2) to store the new destination's
address in the address book:
select the Menu screen button.
A message is displayed that
provides the options (1) Move and
(2) Store described above.
Select the desired option (screen
button).
Moving the destination to a new
location:
If you select the Move screen
button in the message, the SCROLL MAP menu is displayed.
If required, you can move the
visible map section in an arbitrary direction by moving your finger on
the screen, and change the map
scale by turning the multifunction
knob.
Page 54 of 177

54Navigation
Tap on the map to move the
destination to a new location.
The destination flag is now
displayed at the new location.
Select the OK screen button to
confirm the destination's new
location.
The CONFIRM DESTINATION
menu is displayed again.
If you want to start route guidance
to the new destination right away, continue with step 6.
Storing the new destination in the
address book:
If you want to store the new
destination's address in the address book: select the Menu
screen button, and then select the
Store screen button in the
displayed message.
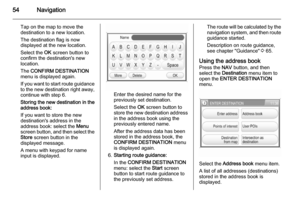
A menu with keypad for name
input is displayed.
Enter the desired name for the
previously set destination.
Select the OK screen button to
store the new destination address in the address book using the
previously entered name.
After the address data has been
stored in the address book, the
CONFIRM DESTINATION menu
is displayed again.
6. Starting route guidance:
In the CONFIRM DESTINATION
menu: select the Start screen
button to start route guidance to
the previously set address.
The route will be calculated by the
navigation system, and then route guidance started.
Description on route guidance,
see chapter "Guidance" 3 65.
Using the address book Press the NAV button, and then
select the Destination menu item to
open the ENTER DESTINATION
menu.
Select the Address book
menu item.
A list of all addresses (destinations)
stored in the address book is
displayed.
Page 55 of 177
Navigation55
Using the address book, you can
conveniently store the addresses of your favourite destinations, and later
select these addresses as
destinations for route guidance.
Adding new addresses (destinations) Up to 50 addresses can be stored in
the address book. When the
maximum number of addresses is
reached, you need to delete an
address before adding a new one.
Select the Add New Entry list entry
(first entry in list).
A menu with several options for adding new addresses is displayed.The following options are available:
■ New Address : displays the menu
for direct address input.
Entering the desired new address
data, see "Entering an address
directly" (steps 1 to 4) above.
After all address data have been
entered, the CONFIRM
DESTINATION menu is displayed.The previously entered address is
indicated by a chequered flag.
To change the previously entered
address using the map:
Select the Move screen button to
open the SCROLL MAP menu.
Page 56 of 177

56Navigation
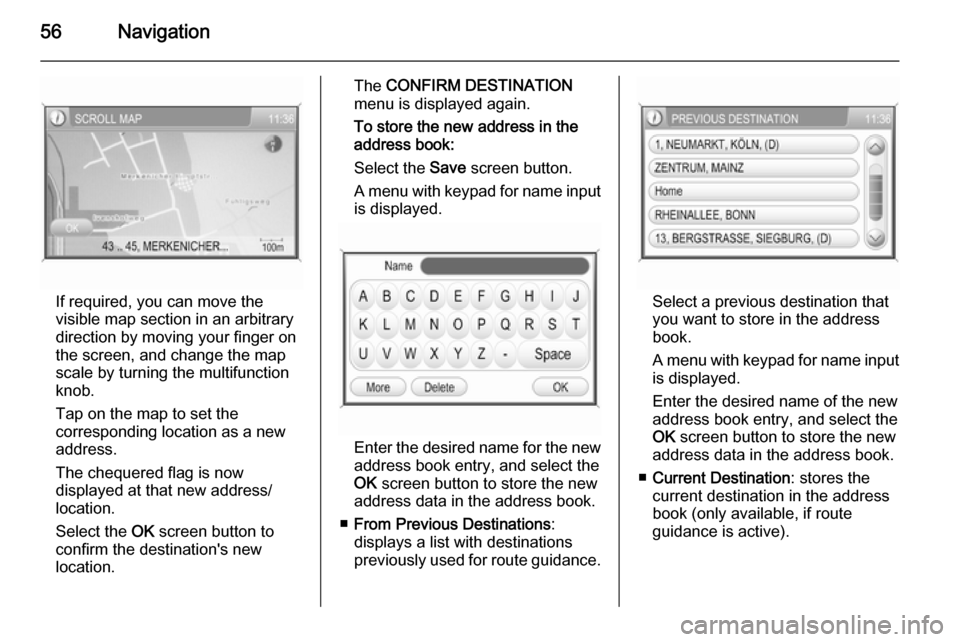
If required, you can move the
visible map section in an arbitrary direction by moving your finger on
the screen, and change the map
scale by turning the multifunction
knob.
Tap on the map to set the
corresponding location as a new
address.
The chequered flag is now
displayed at that new address/ location.
Select the OK screen button to
confirm the destination's new
location.
The CONFIRM DESTINATION
menu is displayed again.
To store the new address in the
address book:
Select the Save screen button.
A menu with keypad for name input
is displayed.
Enter the desired name for the new
address book entry, and select the
OK screen button to store the new
address data in the address book.
■ From Previous Destinations :
displays a list with destinations previously used for route guidance.
Select a previous destination thatyou want to store in the addressbook.
A menu with keypad for name input
is displayed.
Enter the desired name of the new
address book entry, and select the
OK screen button to store the new
address data in the address book.
■ Current Destination : stores the
current destination in the address
book (only available, if route
guidance is active).