2014.5 VAUXHALL CORSA light
[x] Cancel search: lightPage 14 of 177
14Introduction
The corresponding system function is
activated, or a message is displayed, or a submenu with further options is
displayed.With multifunction knob: 1. Turn the multifunction knob clockwise or anti-clockwise to
select a screen button or menu
item.
The currently selected screen
button or menu item is
highlighted.
2. Press the multifunction knob to activate the selected screen
button or menu item.
The corresponding system
function is activated or a message
is displayed or a submenu with
further options is displayed.
Notice
In the audio and phone main menus, see example below, the screen
buttons at the bottom of the menus
can only be selected/activated via
the touch screen not via the
multifunction knob.
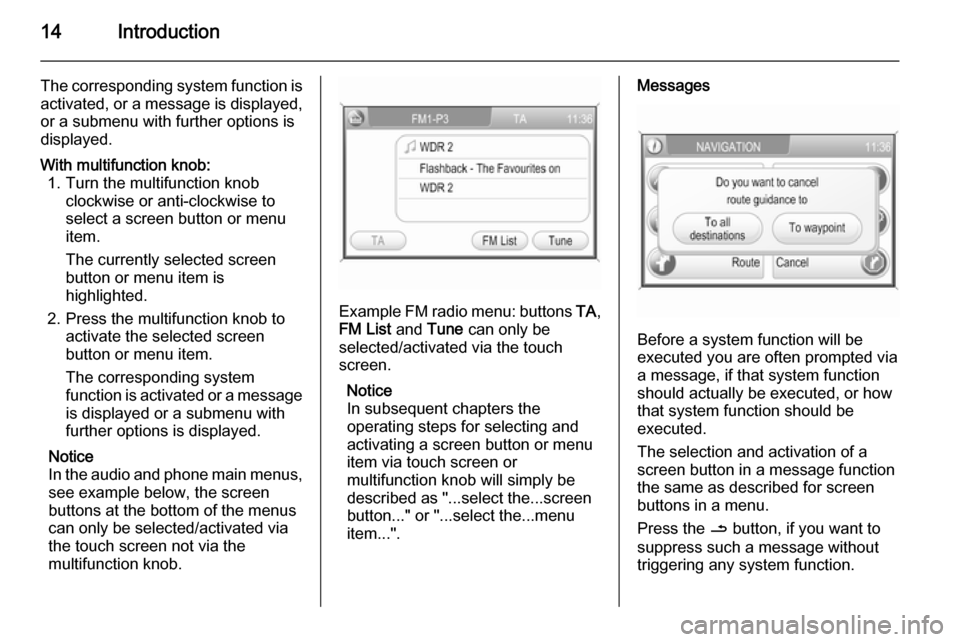
Example FM radio menu: buttons TA,
FM List and Tune can only be
selected/activated via the touch
screen.
Notice
In subsequent chapters the
operating steps for selecting and
activating a screen button or menu
item via touch screen or
multifunction knob will simply be
described as "...select the...screen
button..." or "...select the...menu
item...".
Messages
Before a system function will be
executed you are often prompted via
a message, if that system function
should actually be executed, or how
that system function should be
executed.
The selection and activation of a
screen button in a message function
the same as described for screen
buttons in a menu.
Press the / button, if you want to
suppress such a message without
triggering any system function.
Page 15 of 177
Introduction15
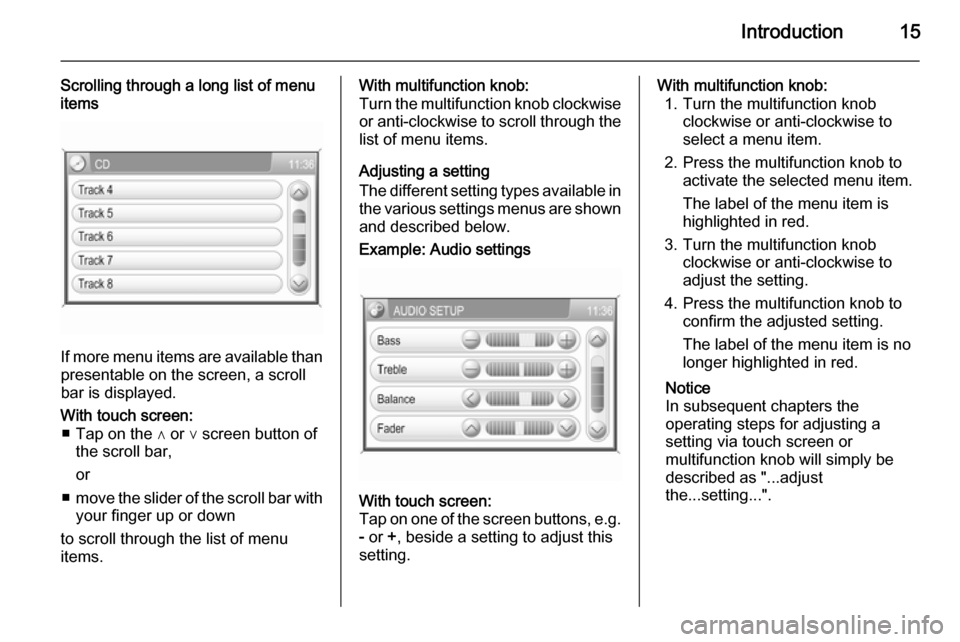
Scrolling through a long list of menu
items
If more menu items are available than
presentable on the screen, a scroll
bar is displayed.
With touch screen: ■ Tap on the ∧ or ∨ screen button of the scroll bar,
or
■ move the slider of the scroll bar with
your finger up or down
to scroll through the list of menu
items.With multifunction knob:
Turn the multifunction knob clockwise or anti-clockwise to scroll through the
list of menu items.
Adjusting a setting
The different setting types available in the various settings menus are shownand described below.Example: Audio settingsWith touch screen:
Tap on one of the screen buttons, e.g.
- or +, beside a setting to adjust this
setting.With multifunction knob: 1. Turn the multifunction knob clockwise or anti-clockwise to
select a menu item.
2. Press the multifunction knob to activate the selected menu item.
The label of the menu item is
highlighted in red.
3. Turn the multifunction knob clockwise or anti-clockwise to
adjust the setting.
4. Press the multifunction knob to confirm the adjusted setting.
The label of the menu item is no
longer highlighted in red.
Notice
In subsequent chapters the
operating steps for adjusting a
setting via touch screen or
multifunction knob will simply be
described as "...adjust
the...setting...".
Page 19 of 177
Introduction19
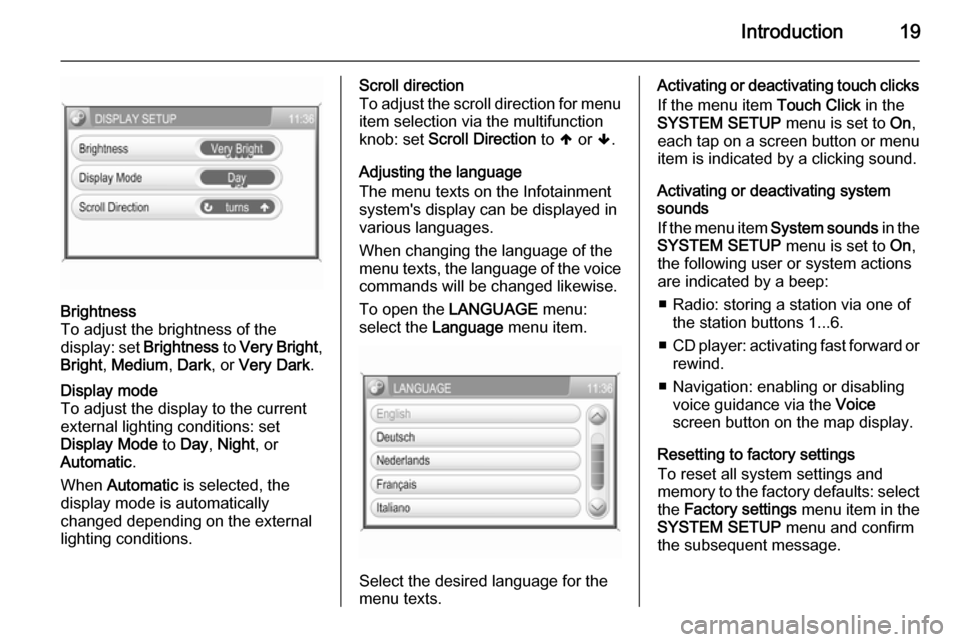
Brightness
To adjust the brightness of the
display: set Brightness to Very Bright ,
Bright , Medium , Dark , or Very Dark .Display mode
To adjust the display to the currentexternal lighting conditions: set
Display Mode to Day , Night , or
Automatic .
When Automatic is selected, the
display mode is automatically changed depending on the external
lighting conditions.Scroll direction
To adjust the scroll direction for menu
item selection via the multifunction
knob: set Scroll Direction to [ or ].
Adjusting the language
The menu texts on the Infotainment
system's display can be displayed in
various languages.
When changing the language of the
menu texts, the language of the voice commands will be changed likewise.
To open the LANGUAGE menu:
select the Language menu item.
Select the desired language for the
menu texts.
Activating or deactivating touch clicks
If the menu item Touch Click in the
SYSTEM SETUP menu is set to On,
each tap on a screen button or menu
item is indicated by a clicking sound.
Activating or deactivating system
sounds
If the menu item System sounds in the
SYSTEM SETUP menu is set to On,
the following user or system actions
are indicated by a beep:
■ Radio: storing a station via one of the station buttons 1...6.
■ CD player: activating fast forward or
rewind.
■ Navigation: enabling or disabling voice guidance via the Voice
screen button on the map display.
Resetting to factory settings
To reset all system settings and
memory to the factory defaults: select
the Factory settings menu item in the
SYSTEM SETUP menu and confirm
the subsequent message.
Page 22 of 177

22Radio
The list entry of the currently played
FM station is highlighted in red.
If a station is stored on one of the
station buttons 1...6, the
corresponding waveband name and
the button number are displayed in
the list, e.g. FM1-P3.
Select the list entry of the FM station
to be played.
Notice
The dual tuner of the Infotainment
system continuously updates the FM
station list in the background.
This ensures that, e.g., the station
list always contains the FM stations
that can be received in the local area during a long motorway journey.
As the automatic updating takes a certain amount of time, not all
stations that can be received may be
available at once in the station list at a sudden change in reception area.
Station buttons 1...6
In each waveband (AM, FM1 and
FM2) six radio stations can be stored
on the station buttons 1...6.
Storing a station 1. Select the desired waveband.
2. Tune to the desired station or select it from the FM station list.
3. Press and hold one of the station buttons until you hear a beep.
The corresponding button
number, e.g. P3, is displayed
beside the waveband name in the
top line of the menu.
The currently received radio station is stored and can be retrieved via the
station button in future.Notice
If no beep can be heard when storing
a station, system sounds are
deactivated. Activation of system
sounds 3 11.
Retrieving a station
Select the desired waveband and
then briefly press a station button to
retrieve the corresponding radio
station.
Radio data system (RDS) The RDS is a system through which
encoded digital information is
transmitted in addition to the normal
FM radio broadcasts. The RDS
provides information services such as station name, traffic information and
radio text.
RDS Regional mode At certain times some RDS stations
broadcast regionally different
programmes on different frequencies.
The Infotainment system always
tunes into the best receivable
frequency of the currently played RDS station.
Page 26 of 177
26CD Player
■ Dirt and liquids on CDs can smearthe lens of the audio player inside
the device and cause faults.
■ Protect CDs from heat and direct sunlight.
■ The following restrictions apply for the data stored on an MP3/WMA
CD:
Maximum folder/playlist number:
200.
Maximum file/song number: 800.
At least 8 folders in depth hierarchy are supported.
WMA files with Digital Rights
Management (DRM) from online music shops cannot be played.
WMA files can only be played back
safely if they were created with
Windows Media Player version 9 or later.
Applicable playlist
extensions: .m3u, .pls, .wpl.Playlist entries must be in the form
of relative paths.
■ This chapter deals only with playing
MP3 files since the operation for
MP3 and WMA files is identical.
When a CD with WMA files is
loaded MP3 related menus are displayed.
Usage Notice
Within the CD player menus you can only use the touch screen to select/
activate the screen buttons at the
bottom of the menus.
Starting CD replay Push an audio or MP3 CD with the
labelled side upward into the CD slot
until it is pulled in.
CD replay starts automatically and
the CD or CD MP3 menu is displayed.
If the inserted CD was already played before in the CD player, CD replay
starts with the track last played.
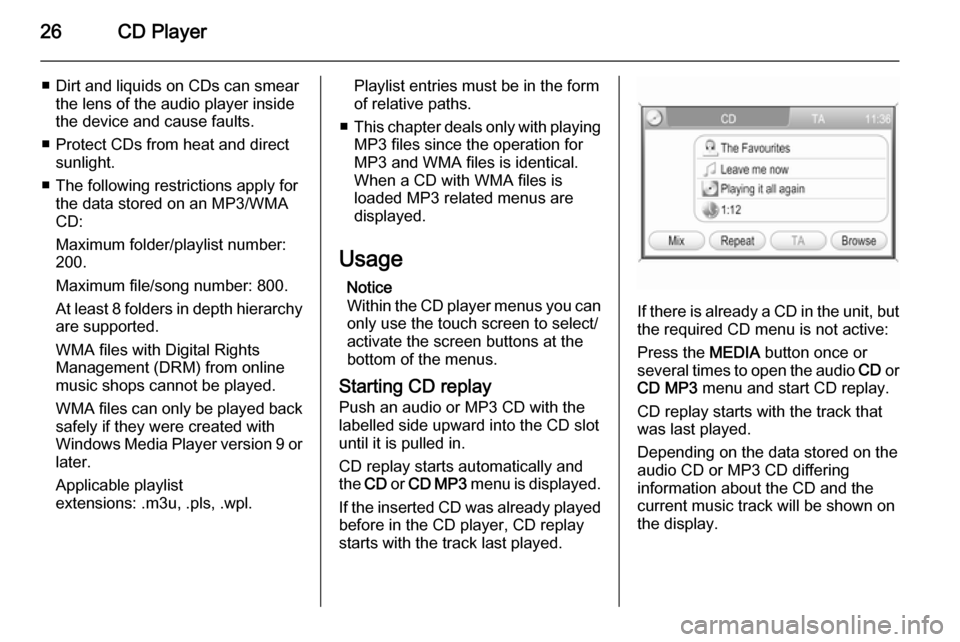
If there is already a CD in the unit, but the required CD menu is not active:
Press the MEDIA button once or
several times to open the audio CD or
CD MP3 menu and start CD replay.
CD replay starts with the track that
was last played.
Depending on the data stored on the
audio CD or MP3 CD differing
information about the CD and the
current music track will be shown on
the display.
Page 27 of 177
CD Player27
If the normal CD replay mode is active
(no mix or repeat mode activated, see
below): replay starts with the first
track on the CD again, after all tracks on the CD have been played.
Notice
Folders and playlists stored on an
MP3 CD are treated equally by the
CD player.
The descriptions below regarding
folders on an MP3 CD also apply to
playlists.
Pausing CD replay To pause replay of the inserted CD:turn the volume to zero.
To restart CD replay: turn the volume on again.
Selecting a track
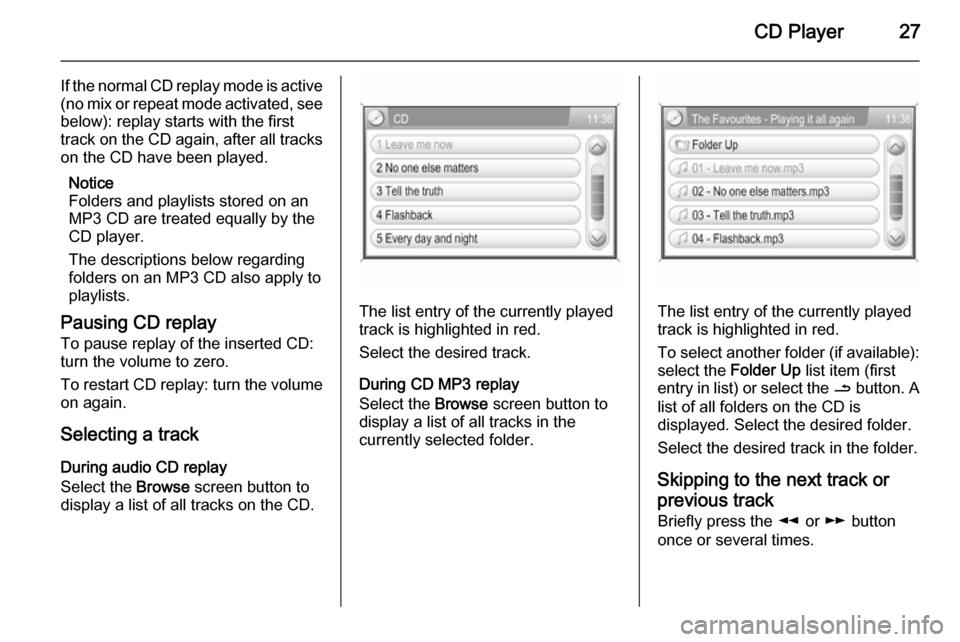
During audio CD replay
Select the Browse screen button to
display a list of all tracks on the CD.
The list entry of the currently played
track is highlighted in red.
Select the desired track.
During CD MP3 replay
Select the Browse screen button to
display a list of all tracks in the
currently selected folder.The list entry of the currently played
track is highlighted in red.
To select another folder (if available): select the Folder Up list item (first
entry in list) or select the / button. A
list of all folders on the CD is
displayed. Select the desired folder.
Select the desired track in the folder.
Skipping to the next track orprevious track Briefly press the l or m button
once or several times.
Page 68 of 177
68Navigation
To show all available information on aparticular route list item: select that
list item.
Controlling route guidance via
the TRAFFIC MESSAGES
menu
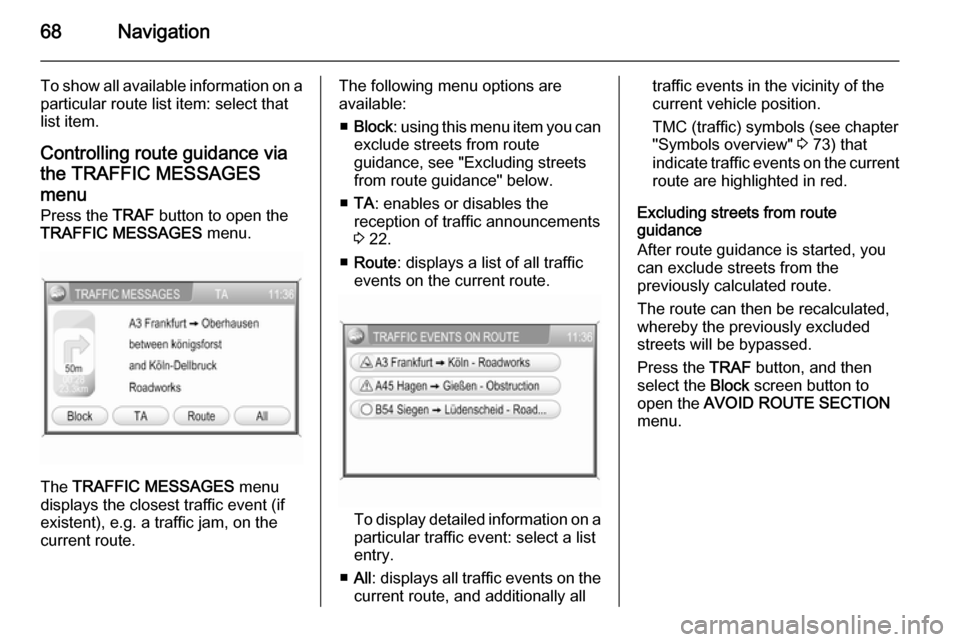
Press the TRAF button to open the
TRAFFIC MESSAGES menu.
The TRAFFIC MESSAGES menu
displays the closest traffic event (if
existent), e.g. a traffic jam, on the
current route.
The following menu options are
available:
■ Block : using this menu item you can
exclude streets from route
guidance, see "Excluding streets
from route guidance" below.
■ TA : enables or disables the
reception of traffic announcements
3 22.
■ Route : displays a list of all traffic
events on the current route.
To display detailed information on a
particular traffic event: select a list
entry.
■ All : displays all traffic events on the
current route, and additionally all
traffic events in the vicinity of the current vehicle position.
TMC (traffic) symbols (see chapter
"Symbols overview" 3 73) that
indicate traffic events on the current route are highlighted in red.
Excluding streets from route
guidance
After route guidance is started, you can exclude streets from the
previously calculated route.
The route can then be recalculated,
whereby the previously excluded
streets will be bypassed.
Press the TRAF button, and then
select the Block screen button to
open the AVOID ROUTE SECTION
menu.
Page 72 of 177
72Navigation
Important information on SD card
handlingCaution
Never attempt to use an SD card
that has been cracked, deformed
or repaired using adhesive tape.
Doing so may damage the
equipment.
■ Handle the SD card with care. Never touch the metal contacts.
■ Do not use any conventional cleaner, benzine, thinner, or
antistatic spray.
■ If you need to clean the SD card, use a soft cloth.
■ Do not bend the SD card. Do not use any SD card that is bent or
cracked.
■ Do not put any sticker or write anything on either surface.
■ Do not store the SD card in locations exposed to direct
sunlight, or in high temperatures or
humidity.
■ Always place the SD card in its storage case, when not in use.
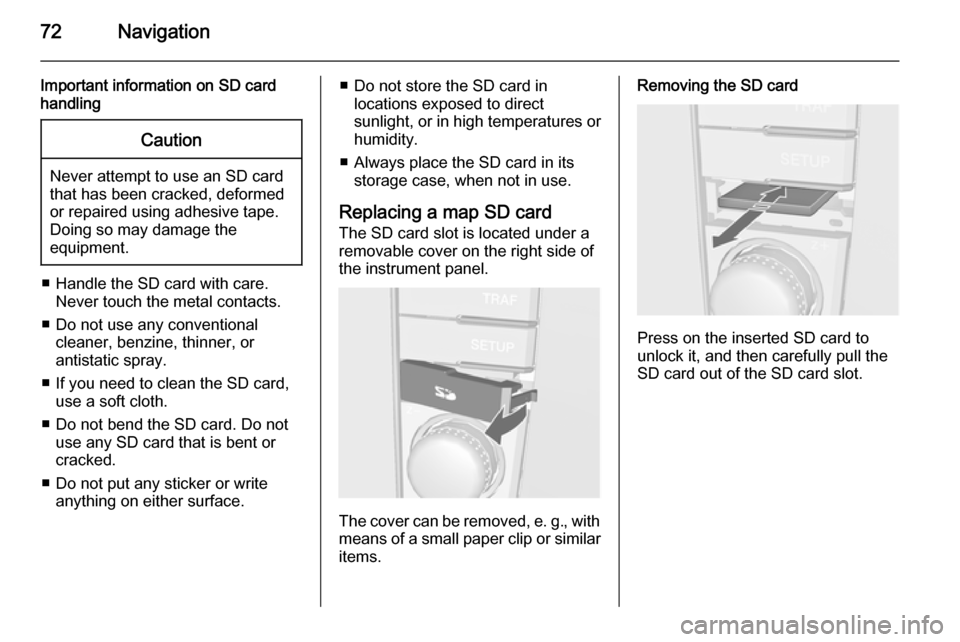
Replacing a map SD card
The SD card slot is located under a
removable cover on the right side of
the instrument panel.
The cover can be removed, e. g., with means of a small paper clip or similar
items.
Removing the SD card
Press on the inserted SD card to
unlock it, and then carefully pull the
SD card out of the SD card slot.