Page 49 of 219
Switching on the side lights on both sides ›Turn the light switch » Fig. 21 on page 41 to the position and lock the vehicle.
Note
■
The parking light can only be activated if the ignition is switched off.■If the right or left turn signal light has been switched on and the ignition is
switched off, the parking light is not automatically switched on.
Interior lights
Introduction
This chapter contains information on the following subjects:
Interior lighting - version 1
46
Interior lighting - version 2
46
Illuminated storage compartment on the passenger side
47
Luggage compartment light
47
Interior lighting - version 1
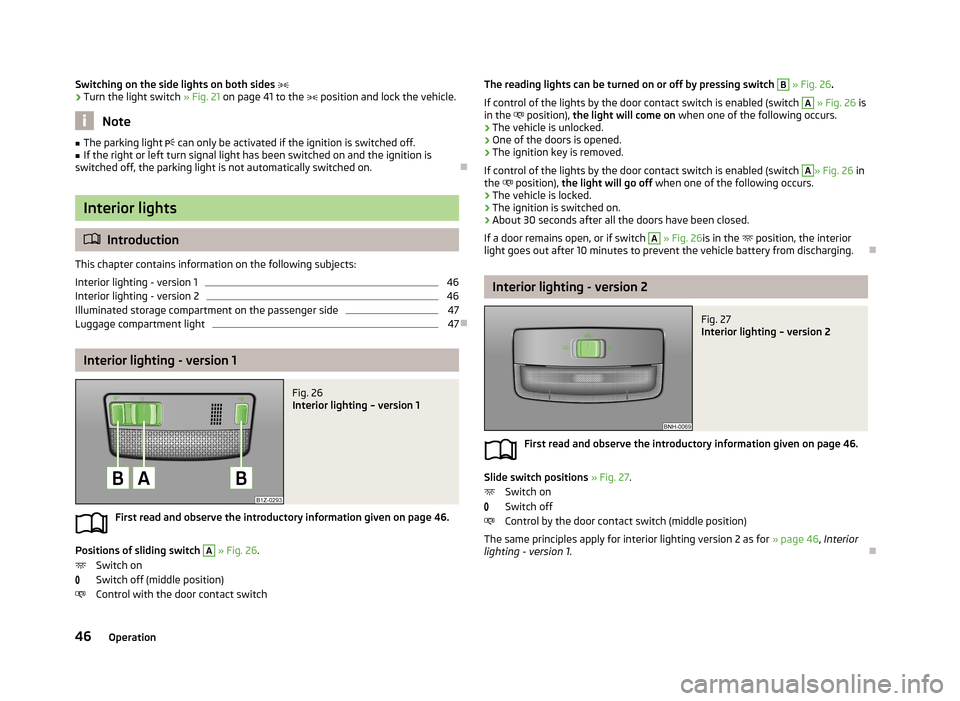
Fig. 26
Interior lighting – version 1
First read and observe the introductory information given on page 46.
Positions of sliding switch
A
» Fig. 26 .
Switch on
Switch off (middle position)
Control with the door contact switch
The reading lights can be turned on or off by pressing switch B » Fig. 26 .
If control of the lights by the door contact switch is enabled (switch A
» Fig. 26 is
in the position), the light will come on when one of the following occurs.
› The vehicle is unlocked.
› One of the doors is opened.
› The ignition key is removed.
If control of the lights by the door contact switch is enabled (switch
A
» Fig. 26 in
the position), the light will go off when one of the following occurs.
› The vehicle is locked.
› The ignition is switched on.
› About 30 seconds after all the doors have been closed.
If a door remains open, or if switch
A
» Fig. 26 is in the
position, the interior
light goes out after 10 minutes to prevent the vehicle battery from discharging.
Interior lighting - version 2
Fig. 27
Interior lighting – version 2
First read and observe the introductory information given on page 46.
Slide switch positions » Fig. 27 .
Switch on
Switch off
Control by the door contact switch (middle position)
The same principles apply for interior lighting version 2 as for » page 46, Interior
lighting - version 1 .
46Operation
Page 50 of 219
Illuminated storage compartment on the passenger sideFirst read and observe the introductory information given on page 46.›
When opening the flap of the storage compartment on the front passenger side
the lighting in the storage compartment comes on.
›
The light switches on automatically when the parking light is switched on and
goes out when the flap is closed.
Luggage compartment light
First read and observe the introductory information given on page 46.
The light comes on automatically when the boot lid is opened. If the tailgate re-
mains open for more than 10 minutes, the luggage compartment light switches
off automatically.
Visibility
Introduction
This chapter contains information on the following subjects:
Rear window heater
47
Sun visors
48
sunshade
48
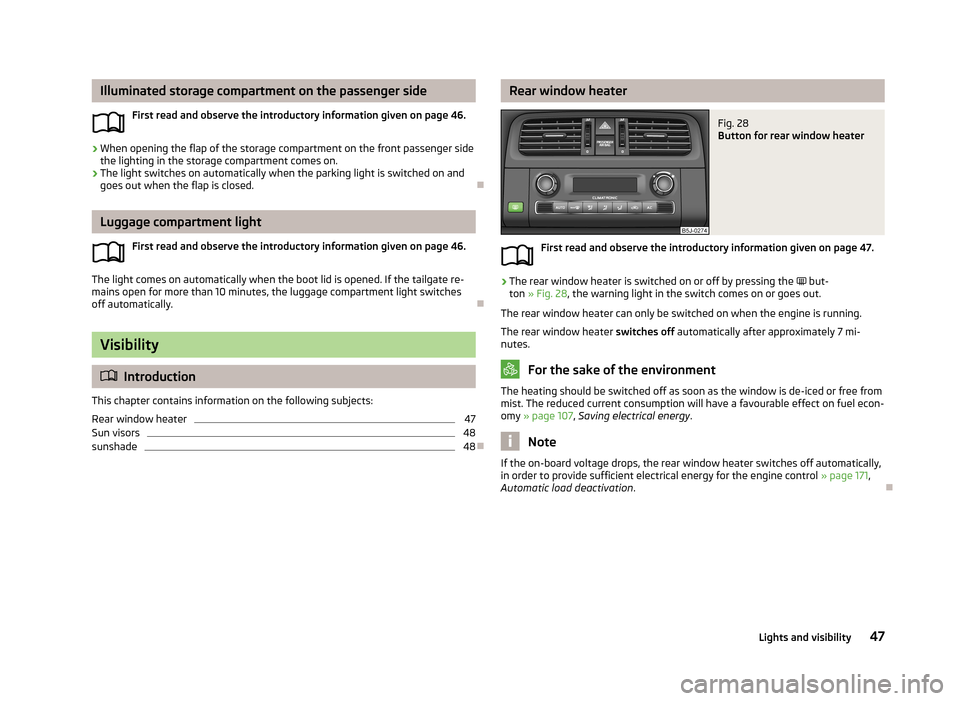
Rear window heaterFig. 28
Button for rear window heater
First read and observe the introductory information given on page 47.
›
The rear window heater is switched on or off by pressing the
but-
ton » Fig. 28 , the warning light in the switch comes on or goes out.
The rear window heater can only be switched on when the engine is running. The rear window heater switches off automatically after approximately 7 mi-
nutes.
For the sake of the environment
The heating should be switched off as soon as the window is de-iced or free from
mist. The reduced current consumption will have a favourable effect on fuel econ-
omy » page 107 , Saving electrical energy .
Note
If the on-board voltage drops, the rear window heater switches off automatically,
in order to provide sufficient electrical energy for the engine control » page 171,
Automatic load deactivation .
47Lights and visibility
Page 51 of 219
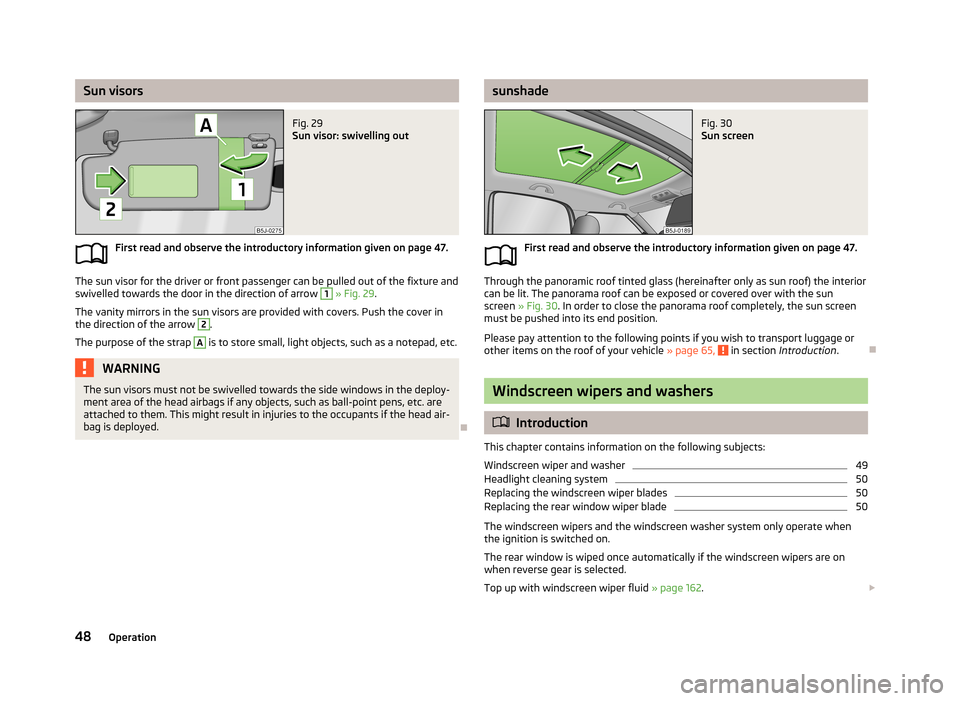
Sun visorsFig. 29
Sun visor: swivelling out
First read and observe the introductory information given on page 47.
The sun visor for the driver or front passenger can be pulled out of the fixture and
swivelled towards the door in the direction of arrow
1
» Fig. 29 .
The vanity mirrors in the sun visors are provided with covers. Push the cover in the direction of the arrow
2
.
The purpose of the strap
A
is to store small, light objects, such as a notepad, etc.
WARNINGThe sun visors must not be swivelled towards the side windows in the deploy-
ment area of the head airbags if any objects, such as ball-point pens, etc. are attached to them. This might result in injuries to the occupants if the head air-
bag is deployed.
sunshadeFig. 30
Sun screen
First read and observe the introductory information given on page 47.
Through the panoramic roof tinted glass (hereinafter only as sun roof) the interior can be lit. The panorama roof can be exposed or covered over with the sun
screen » Fig. 30 . In order to close the panorama roof completely, the sun screen
must be pushed into its end position.
Please pay attention to the following points if you wish to transport luggage or other items on the roof of your vehicle » page 65,
in section Introduction .
Windscreen wipers and washers
Introduction
This chapter contains information on the following subjects:
Windscreen wiper and washer
49
Headlight cleaning system
50
Replacing the windscreen wiper blades
50
Replacing the rear window wiper blade
50
The windscreen wipers and the windscreen washer system only operate when
the ignition is switched on.
The rear window is wiped once automatically if the windscreen wipers are on when reverse gear is selected.
Top up with windscreen wiper fluid » page 162.
48Operation
Page 52 of 219
WARNING■Properly maintained windscreen wiper blades are essential for clear visibility
and safe driving » page 50.■
Do not use the windscreen washer system at low temperatures, without
heating the windscreen beforehand. Otherwise the window cleaner could
freeze on the windscreen and restrict the view to the front.
■
Replace the windscreen wiper blades once or twice a year for safety rea-
sons. These can be purchased from a ŠKODA Partner.
CAUTION
■ In cold temperatures and during the winter, check before the journey or before
switching on the ignition that the wiper blades are not frozen to the windscreen. If the windscreen wipers are switched on when the blades are frozen to the
windscreen, this may damage both the blades and windscreen wiper motor!■
If the ignition is switched off while the windscreen wipers are switched on, the
windscreen wipers will continue wiping in the same mode after the ignition is
turned back on. The windscreen wipers could freeze up in cold temperatures be- tween the time the ignition was turned off and when it was turned back on again.
■
Carefully detach frozen wiper blades from the front or rear window.
■
Remove snow and ice from the windscreen wipers before driving.
■
If the windscreen wipers are handled carelessly, there is a risk of damage to the
windscreen.
Note
■ The windscreen washer nozzles for the windscreen are heated when the en-
gine is running and the outside temperature is less than approx. +10 °C.■
The content of the windscreen washer fluid reservoir is 3.5 litres. On vehicles
fitted with the headlight cleaning system, the volume is around 5.4 litres.
■
The wiper blades should be cleaned on a regular basis with a windscreen clean-
er to avoid any smears. The wiper blades should be cleaned with a sponge or
cloth if they are heavily soiled by insect residues, for example.
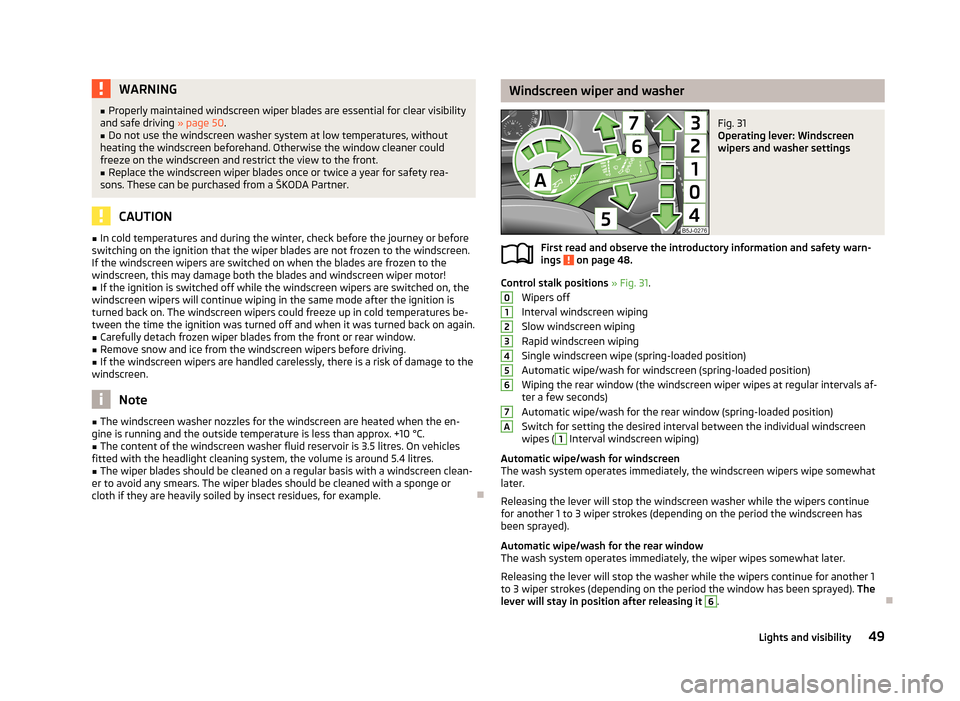
Windscreen wiper and washerFig. 31
Operating lever: Windscreen
wipers and washer settings
First read and observe the introductory information and safety warn-
ings on page 48.
Control stalk positions » Fig. 31 .
Wipers off
Interval windscreen wiping Slow windscreen wiping
Rapid windscreen wiping
Single windscreen wipe (spring-loaded position)
Automatic wipe/wash for windscreen (spring-loaded position) Wiping the rear window (the windscreen wiper wipes at regular intervals af- ter a few seconds)
Automatic wipe/wash for the rear window (spring-loaded position)
Switch for setting the desired interval between the individual windscreen wipes (
1
Interval windscreen wiping)
Automatic wipe/wash for windscreen
The wash system operates immediately, the windscreen wipers wipe somewhat
later.
Releasing the lever will stop the windscreen washer while the wipers continue
for another 1 to 3 wiper strokes (depending on the period the windscreen has
been sprayed).
Automatic wipe/wash for the rear window The wash system operates immediately, the wiper wipes somewhat later.
Releasing the lever will stop the washer while the wipers continue for another 1
to 3 wiper strokes (depending on the period the window has been sprayed). The
lever will stay in position after releasing it
6
.
01234567A49Lights and visibility
Page 53 of 219
Headlight cleaning systemFirst read and observe the introductory information and safety warn-
ings
on page 48.
The headlights are sprayed briefly if the low beam or main beam are switched on
and the windscreen wiper stalk is pulled to position
5
» Fig. 31 on page 49. To
clean the headlights, the windshield is also sprayed after every five squirts.
You should remove stubborn dirt (such as insect residues) from the headlight len-
ses at regular intervals, for example when refuelling. The following guidelines
must be observed » page 153, Headlight lenses .
To ensure the proper operation of the cleaning system during the winter, any
snow should be removed from the washer nozzle fixtures and ice should be
cleared with a de-icing spray.
CAUTION
Never remove the nozzles from the headlight cleaning system by hand – there is
risk of damage.
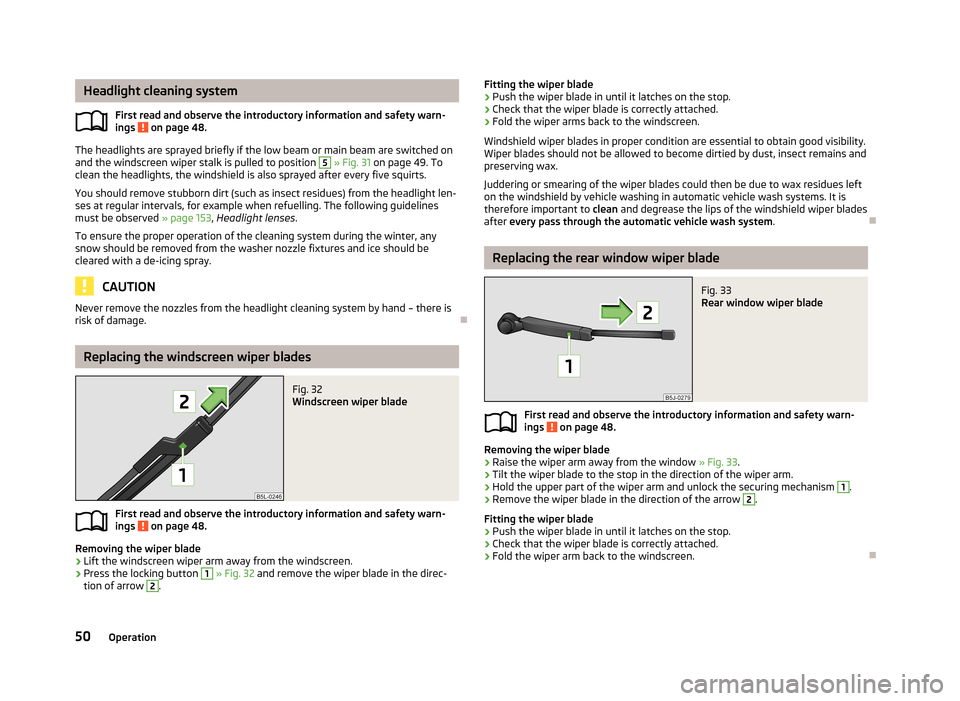
Replacing the windscreen wiper blades
Fig. 32
Windscreen wiper blade
First read and observe the introductory information and safety warn- ings on page 48.
Removing the wiper blade
›
Lift the windscreen wiper arm away from the windscreen.
›
Press the locking button
1
» Fig. 32 and remove the wiper blade in the direc-
tion of arrow
2
.
Fitting the wiper blade›Push the wiper blade in until it latches on the stop.›
Check that the wiper blade is correctly attached.
›
Fold the wiper arms back to the windscreen.
Windshield wiper blades in proper condition are essential to obtain good visibility.
Wiper blades should not be allowed to become dirtied by dust, insect remains and
preserving wax.
Juddering or smearing of the wiper blades could then be due to wax residues left on the windshield by vehicle washing in automatic vehicle wash systems. It is
therefore important to clean and degrease the lips of the windshield wiper blades
after every pass through the automatic vehicle wash system .
Replacing the rear window wiper blade
Fig. 33
Rear window wiper blade
First read and observe the introductory information and safety warn-
ings on page 48.
Removing the wiper blade
›
Raise the wiper arm away from the window » Fig. 33.
›
Tilt the wiper blade to the stop in the direction of the wiper arm.
›
Hold the upper part of the wiper arm and unlock the securing mechanism
1
.
›
Remove the wiper blade in the direction of the arrow
2
.
Fitting the wiper blade
›
Push the wiper blade in until it latches on the stop.
›
Check that the wiper blade is correctly attached.
›
Fold the wiper arm back to the windscreen.
50Operation
Page 54 of 219
Rear window
Introduction
This chapter contains information on the following subjects:
Manually dimmed rear-view mirror
51
Exterior mirrors
51WARNING■ Make sure that the mirror is not covered by ice, snow, condensation or other
objects.■
Convex (curved outward) or aspheric exterior mirrors increase the field of vi-
sion. They do, however, make objects appear smaller in the mirror. These mir-
rors are therefore only of limited use for estimating distances to the following vehicles.
■
Whenever possible use the interior mirror for estimating the distances to
the following vehicles.
Manually dimmed rear-view mirror
First read and observe the introductory information and safety warn-ings
on page 51.
Basic setting
›
Pull the lever on the lower edge of the mirror away from the windscreen.
Dimming mirror
›
Push the lever on the lower edge of the mirror towards the windscreen.
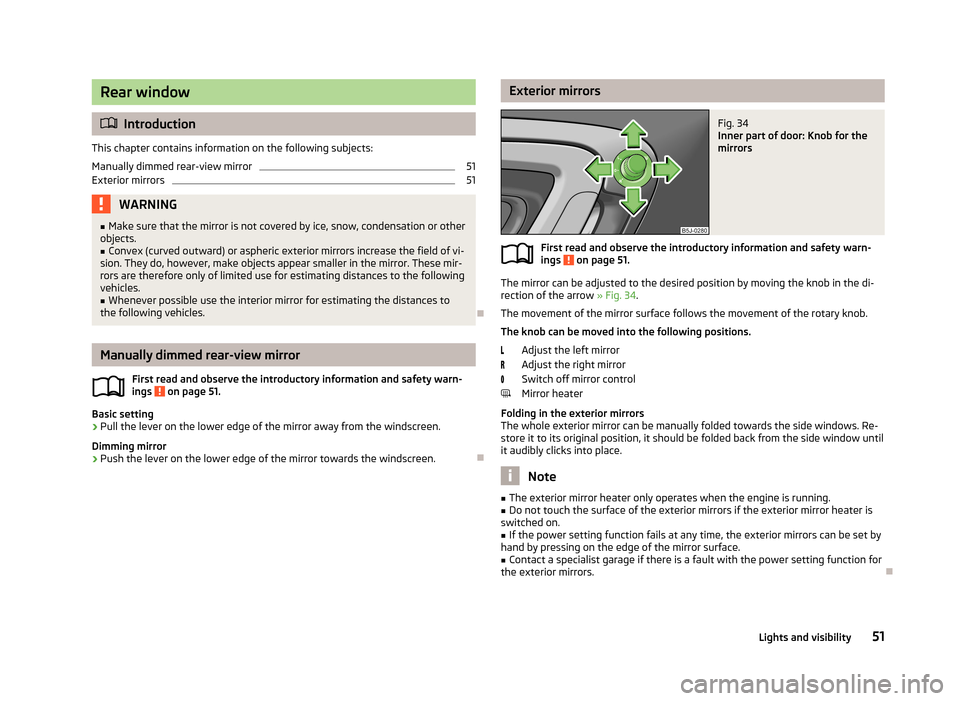
Exterior mirrorsFig. 34
Inner part of door: Knob for the
mirrors
First read and observe the introductory information and safety warn-
ings on page 51.
The mirror can be adjusted to the desired position by moving the knob in the di-
rection of the arrow » Fig. 34.
The movement of the mirror surface follows the movement of the rotary knob.
The knob can be moved into the following positions.
Adjust the left mirror
Adjust the right mirror
Switch off mirror control
Mirror heater
Folding in the exterior mirrors
The whole exterior mirror can be manually folded towards the side windows. Re- store it to its original position, it should be folded back from the side window until
it audibly clicks into place.
Note
■ The exterior mirror heater only operates when the engine is running.■Do not touch the surface of the exterior mirrors if the exterior mirror heater is
switched on.■
If the power setting function fails at any time, the exterior mirrors can be set by
hand by pressing on the edge of the mirror surface.
■
Contact a specialist garage if there is a fault with the power setting function for
the exterior mirrors.
51Lights and visibility
Page 55 of 219
Seats and stowing
Front seats
Introduction
This chapter contains information on the following subjects:
Adjusting the front seats
53
Front seat heating
53
The driver's seat should be adjusted in such a way that the pedals can be fully
pressed to the floor with slightly bent legs.
The seat backrest on the driver's seat should be adjusted in such a way that the
upper point of the steering wheel can be easily reached with slightly bent arms.
Correct adjustment of the seats is particularly important:
› for safely and quickly reaching the controls;
› for a relaxed body position that reduces fatigue;
› for achieving maximum protection from the seat belts and the airbag system.
WARNINGGeneral information■Caution when adjusting the seat! You may suffer injuries or bruises as a re-
sult of adjusting the seat without paying proper attention.■
The seat backrests must not be tilted too far back when driving, as this will
impair the function of the seat belts and of the airbag system – risk of injury!
■
Never carry more people than the number of seats in the vehicle.
■
Each occupant must correctly fasten the seat belt belonging to the seat.
Children must be fastened » page 139, Transporting children safely with a
suitable restraint system.
■
The front seats and head restraints must be adjusted to match the body
size at all times and the seat belt must always be fastened properly to provide
the most effective levels of protection to the passengers.
■
Do not carry any objects on the front passenger seat except objects de-
signed for this purpose (e.g. child seat) – risk of accident!
WARNINGInformation for the driver■Only adjust the driver's seat when the vehicle is stationary – risk of accident!■
Maintain a distance of at least 25 cm to the steering wheel. Not maintaining
this minimum distance will mean that the airbag system will not be able to
properly protect you – hazard!
■
Ensure that there are no objects in the driver's footwell, as these may get
caught in the pedal apparatus when driving or braking. You would then no
longer be able to operate the clutch, brake or acceleration pedals.
WARNINGInformation for the front seat passenger■Maintain a distance of at least 25 cm from the dash panel. Not maintaining
this minimum distance will mean that the airbag system will not be able to
properly protect you - there is a risk that you could be killed.■
Always keep your feet in the footwell when the car is being driven - never
place your feet on the instrument panel, out of the window or on the seats.
You will be exposed to increased risk of injury if it becomes necessary to apply
the brakes or in the event of an accident. You may suffer fatal injuries when
an airbag is deployed if you have adopted an incorrect seating position.
Note
After a certain time, play can develop within the adjustment mechanism of the
backrest angle.
52Operation
Page 56 of 219
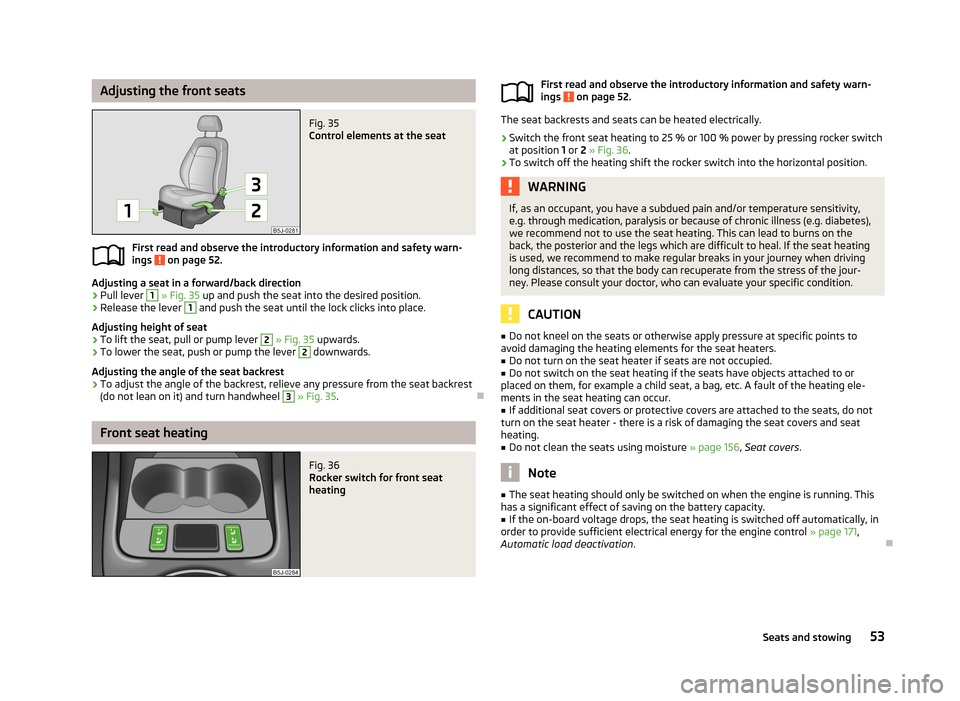
Adjusting the front seatsFig. 35
Control elements at the seat
First read and observe the introductory information and safety warn-
ings on page 52.
Adjusting a seat in a forward/back direction
›
Pull lever
1
» Fig. 35 up and push the seat into the desired position.
›
Release the lever
1
and push the seat until the lock clicks into place.
Adjusting height of seat
›
To lift the seat, pull or pump lever
2
» Fig. 35 upwards.
›
To lower the seat, push or pump the lever
2
downwards.
Adjusting the angle of the seat backrest
›
To adjust the angle of the backrest, relieve any pressure from the seat backrest
(do not lean on it) and turn handwheel
3
» Fig. 35 .
Front seat heating
Fig. 36
Rocker switch for front seat
heatingFirst read and observe the introductory information and safety warn-
ings on page 52.
The seat backrests and seats can be heated electrically.
›
Switch the front seat heating to 25 % or 100 % power by pressing rocker switch
at position 1 or 2 » Fig. 36 .
›
To switch off the heating shift the rocker switch into the horizontal position.
WARNINGIf, as an occupant, you have a subdued pain and/or temperature sensitivity,
e.g. through medication, paralysis or because of chronic illness (e.g. diabetes),
we recommend not to use the seat heating. This can lead to burns on the
back, the posterior and the legs which are difficult to heal. If the seat heating
is used, we recommend to make regular breaks in your journey when driving
long distances, so that the body can recuperate from the stress of the jour- ney. Please consult your doctor, who can evaluate your specific condition.
CAUTION
■ Do not kneel on the seats or otherwise apply pressure at specific points to
avoid damaging the heating elements for the seat heaters.■
Do not turn on the seat heater if seats are not occupied.
■
Do not switch on the seat heating if the seats have objects attached to or
placed on them, for example a child seat, a bag, etc. A fault of the heating ele- ments in the seat heating can occur.
■
If additional seat covers or protective covers are attached to the seats, do not
turn on the seat heater - there is a risk of damaging the seat covers and seat
heating.
■
Do not clean the seats using moisture » page 156, Seat covers .
Note
■
The seat heating should only be switched on when the engine is running. This
has a significant effect of saving on the battery capacity.■
If the on-board voltage drops, the seat heating is switched off automatically, in
order to provide sufficient electrical energy for the engine control » page 171,
Automatic load deactivation .
53Seats and stowing
 1
1 2
2 3
3 4
4 5
5 6
6 7
7 8
8 9
9 10
10 11
11 12
12 13
13 14
14 15
15 16
16 17
17 18
18 19
19 20
20 21
21 22
22 23
23 24
24 25
25 26
26 27
27 28
28 29
29 30
30 31
31 32
32 33
33 34
34 35
35 36
36 37
37 38
38 39
39 40
40 41
41 42
42 43
43 44
44 45
45 46
46 47
47 48
48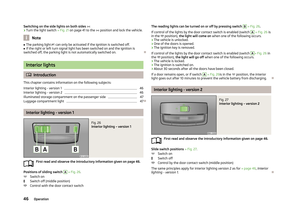 49
49 50
50 51
51 52
52 53
53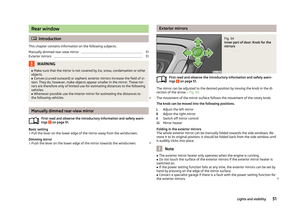 54
54 55
55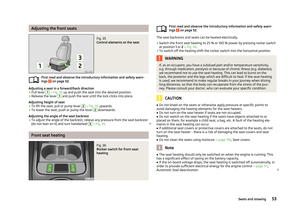 56
56 57
57 58
58 59
59 60
60 61
61 62
62 63
63 64
64 65
65 66
66 67
67 68
68 69
69 70
70 71
71 72
72 73
73 74
74 75
75 76
76 77
77 78
78 79
79 80
80 81
81 82
82 83
83 84
84 85
85 86
86 87
87 88
88 89
89 90
90 91
91 92
92 93
93 94
94 95
95 96
96 97
97 98
98 99
99 100
100 101
101 102
102 103
103 104
104 105
105 106
106 107
107 108
108 109
109 110
110 111
111 112
112 113
113 114
114 115
115 116
116 117
117 118
118 119
119 120
120 121
121 122
122 123
123 124
124 125
125 126
126 127
127 128
128 129
129 130
130 131
131 132
132 133
133 134
134 135
135 136
136 137
137 138
138 139
139 140
140 141
141 142
142 143
143 144
144 145
145 146
146 147
147 148
148 149
149 150
150 151
151 152
152 153
153 154
154 155
155 156
156 157
157 158
158 159
159 160
160 161
161 162
162 163
163 164
164 165
165 166
166 167
167 168
168 169
169 170
170 171
171 172
172 173
173 174
174 175
175 176
176 177
177 178
178 179
179 180
180 181
181 182
182 183
183 184
184 185
185 186
186 187
187 188
188 189
189 190
190 191
191 192
192 193
193 194
194 195
195 196
196 197
197 198
198 199
199 200
200 201
201 202
202 203
203 204
204 205
205 206
206 207
207 208
208 209
209 210
210 211
211 212
212 213
213 214
214 215
215 216
216 217
217 218
218


