2013 MERCEDES-BENZ SL-CLASS ROADSTER change time
[x] Cancel search: change timePage 339 of 572
X
To show the menu: press W the COMAND
controller.
X Select Traffic by turning cVd the
COMAND controller and press W to
confirm.
X Select Read out all messages on
route and press W to confirm.
COMAND reads out the reports in
sequence.
i If there are no reports for the route, the
Read out
all messages on route menu
item is shown in gray and cannot be
selected.
X To switch off the read-aloud function:
select Cancel Read-Aloud
Function and
press W to confirm or press the 8
button.
COMAND reads out the current report and
then exits the read-aloud function.
Automatic read-aloud function
X To switch to navigation mode: press the
Ø function button.
X To show the menu: press
W
the COMAND
controller.
X Select Navi by sliding ZV and turning
cVd the COMAND controller and press
W to confirm.
X Select Read Traffic Messages
Automatically and press W to confirm.
Depending on the previous state, switch
the option on O or off ª.
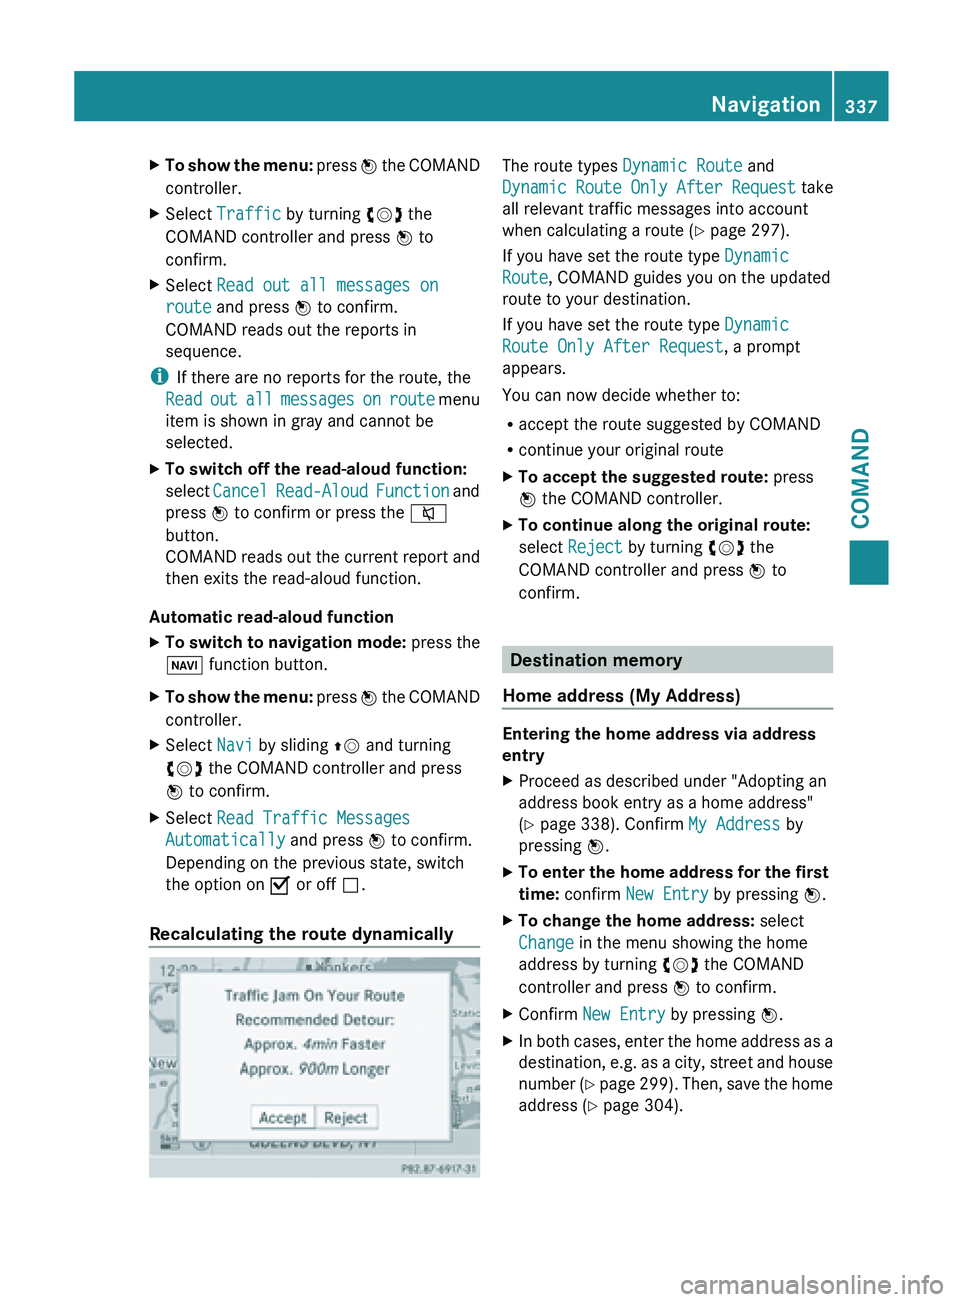
Recalculating the route dynamically The route types
Dynamic Route and
Dynamic Route
Only After Request take
all relevant traffic messages into account
when calculating a route ( Y page 297).
If you have set the route type Dynamic
Route, COMAND guides you on the updated
route to your destination.
If you have set the route type Dynamic
Route Only After Request, a prompt
appears.
You can now decide whether to:
R accept the route suggested by COMAND
R continue your original route
X To accept the suggested route: press
W the COMAND controller.
X To continue along the original route:
select Reject by turning cVd the
COMAND controller and press W to
confirm. Destination memory
Home address (My Address) Entering the home address via address
entry
X
Proceed as described under "Adopting an
address book entry as a home address"
(Y page 338). Confirm My Address by
pressing W.
X To enter the home address for the first
time: confirm New Entry by pressing W.
X To change the home address: select
Change in the menu showing the home
address by turning cVd the COMAND
controller and press W to confirm.
X Confirm New Entry by pressing W.
X In both cases, enter the home address as a
destination, e.g.
as a city, street and house
number (Y page 299). Then, save the home
address ( Y page 304). Navigation
337
COMAND Z
Page 340 of 572
Adopting an address book entry as a
home address
X
To switch on navigation mode: press the
Ø function button.
X To show the menu:
press W
the COMAND
controller.
X Select Dest. in the navigation system
menu bar by turning cVd the COMAND
controller and pressing W to confirm.
X Select From Memory and press W to
confirm.
You will see the destination memory list
either with the character bar (option 1) or
as a selection list (option 2).
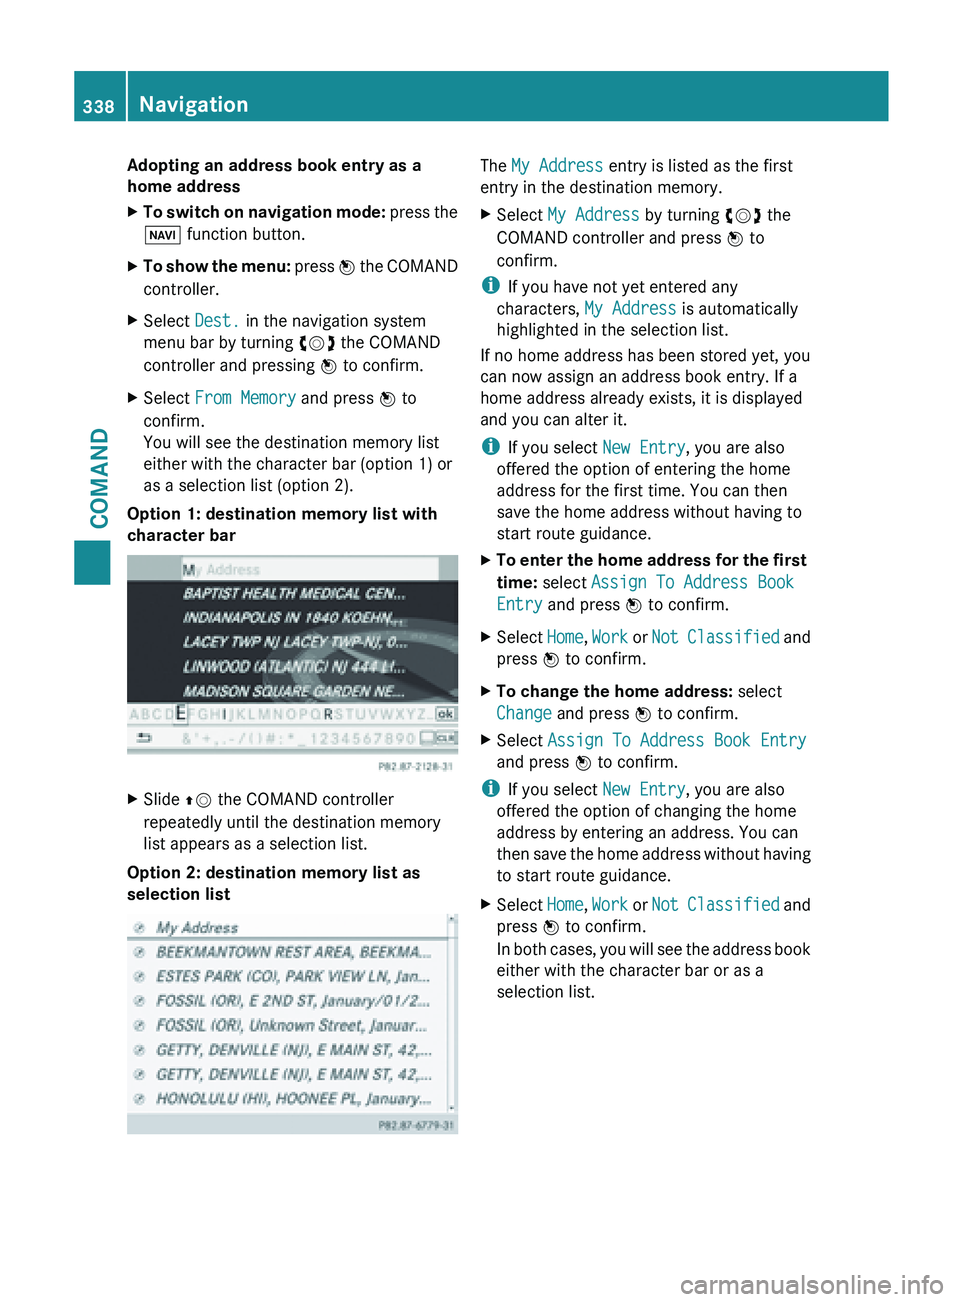
Option 1: destination memory list with
character bar X
Slide ZV the COMAND controller
repeatedly until the destination memory
list appears as a selection list.
Option 2: destination memory list as
selection list The My Address entry is listed as the first
entry in the destination memory.
X
Select My Address by turning cVd the
COMAND controller and press W to
confirm.
i If you have not yet entered any
characters, My Address is automatically
highlighted in the selection list.
If no home address has been stored yet, you
can now assign an address book entry. If a
home address already exists, it is displayed
and you can alter it.
i If you select New Entry, you are also
offered the option of entering the home
address for the first time. You can then
save the home address without having to
start route guidance.
X To
enter the home address for the first
time: select Assign To Address Book
Entry and press W to confirm.
X Select Home, Work or
Not
Classified and
press W to confirm.
X To change the home address: select
Change and press W to confirm.
X Select Assign To Address Book Entry
and press W to confirm.
i If you select New Entry, you are also
offered the option of changing the home
address by entering an address. You can
then save
the home address without having
to start route guidance.
X Select Home, Work or Not
Classified and
press W to confirm.
In both cases, you will see the address book
either with the character bar or as a
selection list. 338
Navigation
COMAND
Page 347 of 572
X
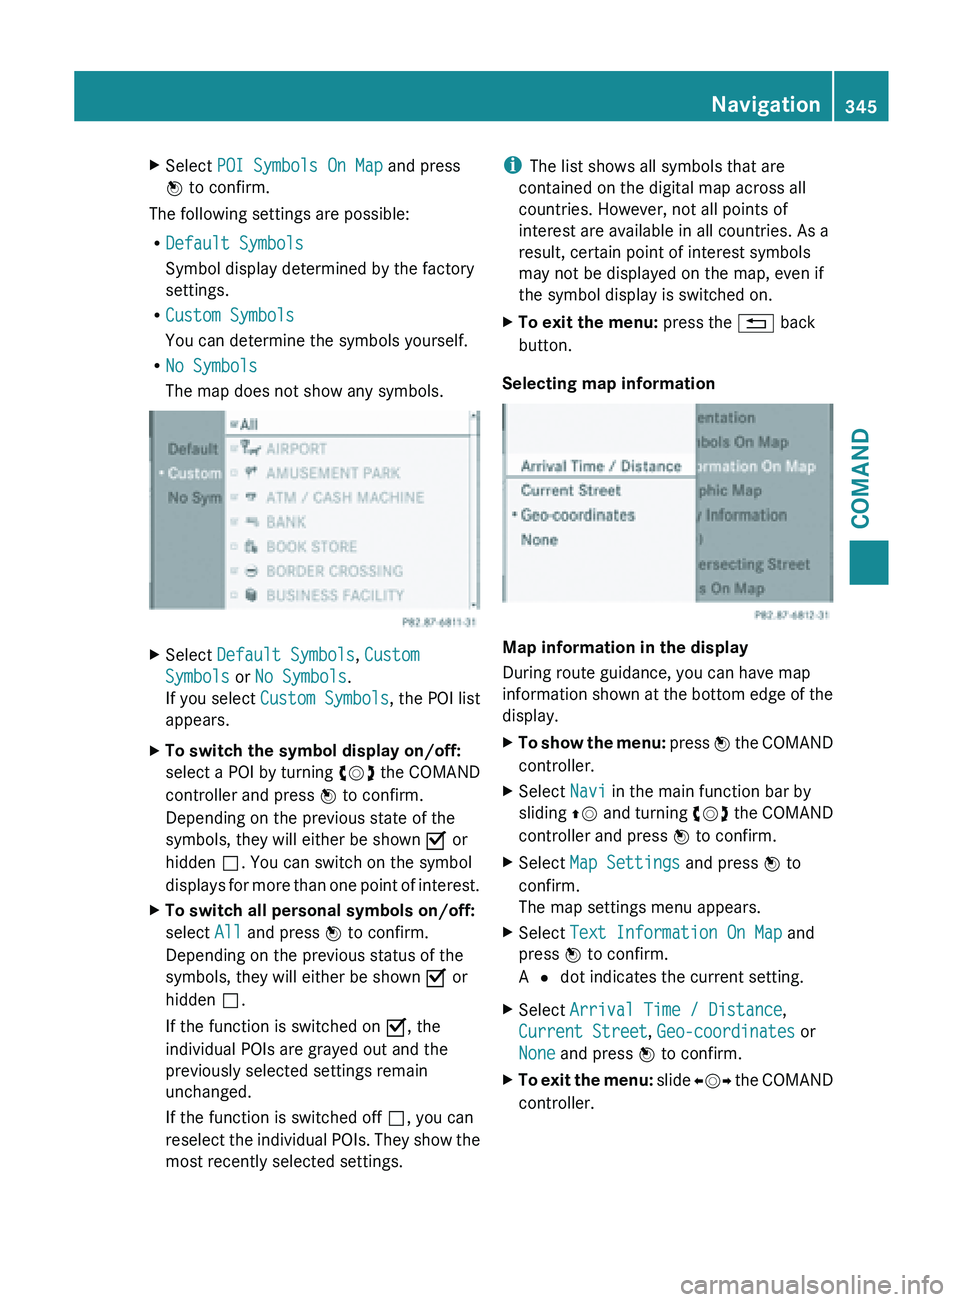
Select POI Symbols On Map and press
W to confirm.
The following settings are possible:
R Default Symbols
Symbol display determined by the factory
settings.
R Custom Symbols
You can determine the symbols yourself.
R No Symbols
The map does not show any symbols. X
Select Default Symbols, Custom
Symbols or No Symbols.
If you select Custom Symbols , the POI list
appears.
X To switch the symbol display on/off:
select a
POI by turning cVd the COMAND
controller and press W to confirm.
Depending on the previous state of the
symbols, they will either be shown O or
hidden ª. You can switch on the symbol
displays for more than one point of interest.
X To switch all personal symbols on/off:
select All and press W to confirm.
Depending on the previous status of the
symbols, they will either be shown O or
hidden ª.
If the function is switched on O, the
individual POIs are grayed out and the
previously selected settings remain
unchanged.
If the function is switched off ª, you can
reselect the
individual POIs. They show the
most recently selected settings. i
The list shows all symbols that are
contained on the digital map across all
countries. However, not all points of
interest are available in all countries. As a
result, certain point of interest symbols
may not be displayed on the map, even if
the symbol display is switched on.
X To exit the menu: press the % back
button.
Selecting map information Map information in the display
During route guidance, you can have map
information
shown
at the bottom edge of the
display.
X To show the menu: press W
the COMAND
controller.
X Select Navi in the main function bar by
sliding ZV and
turning cVd the COMAND
controller and press W to confirm.
X Select Map Settings and press W to
confirm.
The map settings menu appears.
X Select Text Information On Map and
press W to confirm.
A # dot indicates the current setting.
X Select Arrival Time / Distance,
Current Street, Geo-coordinates or
None and press W to confirm.
X To exit the menu: slide
XVY
the COMAND
controller. Navigation
345
COMAND Z
Page 355 of 572
Updating the digital map
Introduction
The digital maps generated by the map
software become outdated in the same way
as conventional road maps. Optimal route
guidance can only be provided by
the
navigation
system in conjunction with the
most up-to-date map software.
Information about new versions of the digital
map can be obtained from an authorized
Mercedes-Benz Center. You can have the
digital map updated there with a DVD, or you
can update it yourself.
Updating process G
WARNING
Never leave the engine running in an enclosed
space. The exhaust gases contain carbon
monoxide. Inhaling
exhaust gases constitutes
a health hazard and could lead to loss of
consciousness or even death.
i The update process can take a long time
(over an hour), depending on the size of the
digital map. During this time, you will only
be able to switch on radio mode and to
accept incoming calls. The update will be
completed more quickly if the vehicle is
stationary.
If you start the update with the engine
switched off and the starter battery has
insufficient power, COMAND may
automatically switch off. This protects the
battery. If this occurs, restart the update
with the engine running.
X Insert the DVD:
R
in the single DVD drive (Y page 421)
R in the DVD changer (
Y page 421)
COMAND checks whether the digital map
on the DVD is compatible with the
navigation system and system software.
A prompt then appears asking if you want
to install the database. Versions of the
database currently installed and the database that is to be installed are
displayed.
X Select Yes or No and press W to confirm.
After selecting Yes, an activation code
must be
entered when installing a database
for the first time. You will receive the
activation code when you buy the
navigation DVD.
If you select No, the process will be
canceled.
X Enter the activation code.
After entering the activation code
correctly, COMAND starts updating the
digital map. Once the update is finished,
you will see a message.
X To confirm the message: press W the
COMAND controller.
X Take the DVD out of the slot.
While the update is running, you will see a
message to this effect and a progress bar.
The navigation system is not operational
until the update is complete.
i You cannot eject the DVD during the
update. If you switch off COMAND during
the update, the update is interrupted. It
then continues from where it was
interrupted when the system is restarted.
COMAND may
prompt you to change the DVD
during the update.
X Press the V (for DVD changer) or
8 (for single DVD drive) load/eject
button.
X Take the DVD out of the slot.
X Insert the requested DVD.
Once the update has been successfully
completed, you will see a message to this
effect.
X To confirm the message: press W the
COMAND controller.
X Take the DVD out of the slot.
The update is complete.
If the
update is not successfully completed,
you will see a message that the map update
is not possible. Navigation
353
COMAND Z
Page 361 of 572
This visibility is for restricted periods of
time on some mobile phones.
R Bluetooth ®
device name
Every Bluetooth ®
device has its own
Bluetooth ®
device
name. This device name
is freely definable, but can be identical for
all devices from the same manufacturer. It
is therefore recommended that you change
this name so that you can easily recognize
your mobile phone (see the mobile phone
operating instructions).
i Not all mobile phones available on the
market are equally suitable. You can obtain
more detailed information about suitable
mobile phones and about connecting
Bluetooth ®
-capable mobile phones to
COMAND on the Internet at
http://www.mbusa-mobile.com.
Alternatively, call the Mercedes-Benz
Customer Assistance Center at
1-800-FOR-MERCedes (1-800-367-6372)
(for USA) or Customer Relations at
1-800-387-0100 (for Canada).
i Some displays (e.g. the signal strength)
depend on the supported version of the
Hands-Free Profile.
Connecting a mobile phone General information
Before using your mobile phone with
COMAND for the first time, you will need to:
R
search for it (Y page 359) and then
R authorize (register) it ( Y page 360).
When you
authorize a new mobile phone, it is
connected automatically.
You can authorize up to 15 mobile phones. If the mobile phone supports PBAP (Phone
Book Access Profile) and MAP (Message
Access Profile), the following contacts and
messages are downloaded into COMAND
when connecting:
R
phone book
R call lists
R text messages
Further information on the conditions for
connecting (Y
page 358).
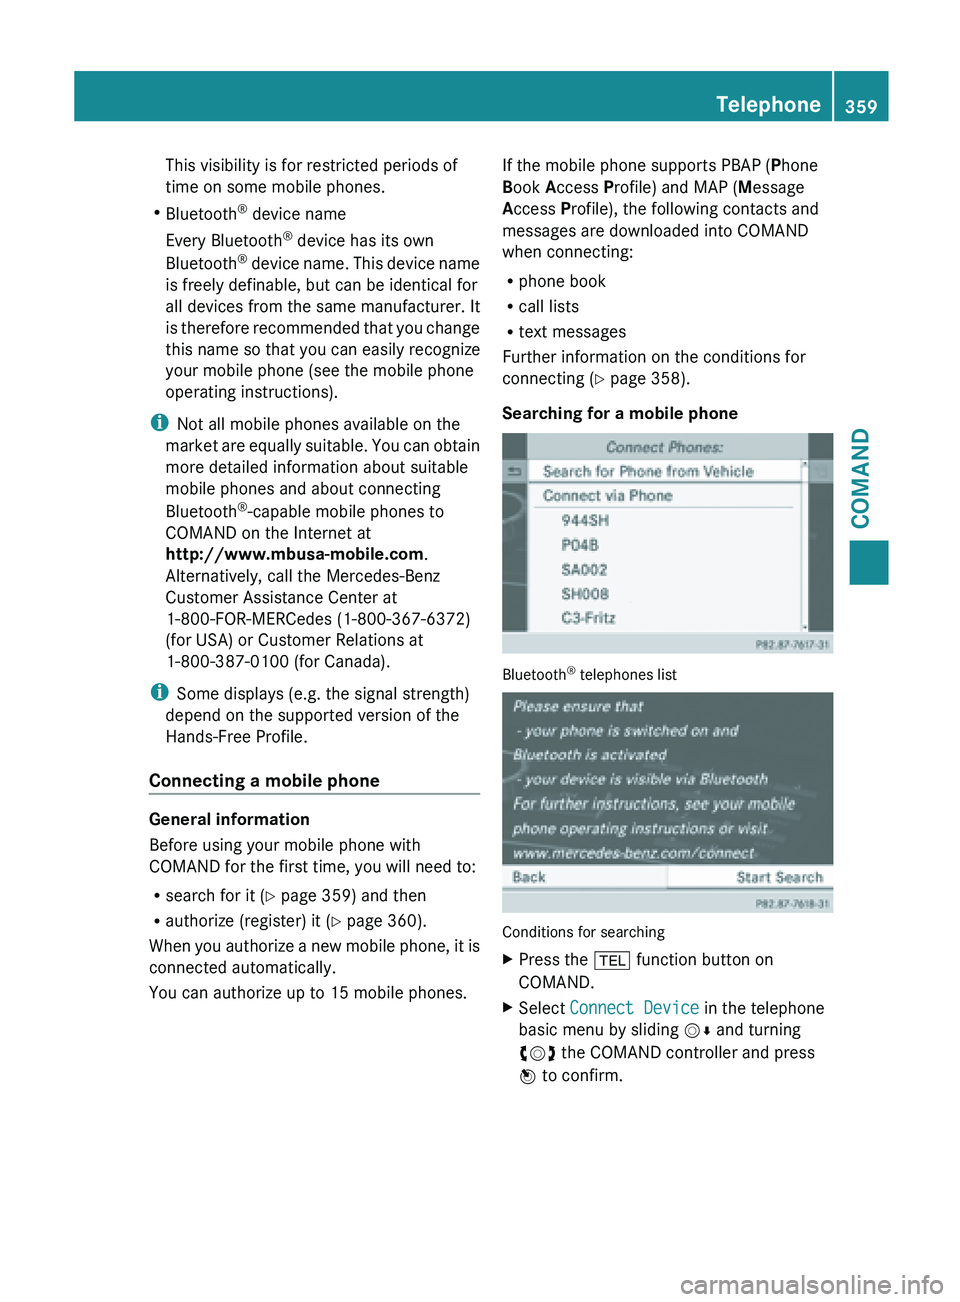
Searching for a mobile phone Bluetooth
®
telephones list Conditions for searching
X
Press the % function button on
COMAND.
X Select Connect Device in the telephone
basic menu by sliding VÆ and turning
cVd the COMAND controller and press
W to confirm. Telephone
359
COMAND Z
Page 371 of 572
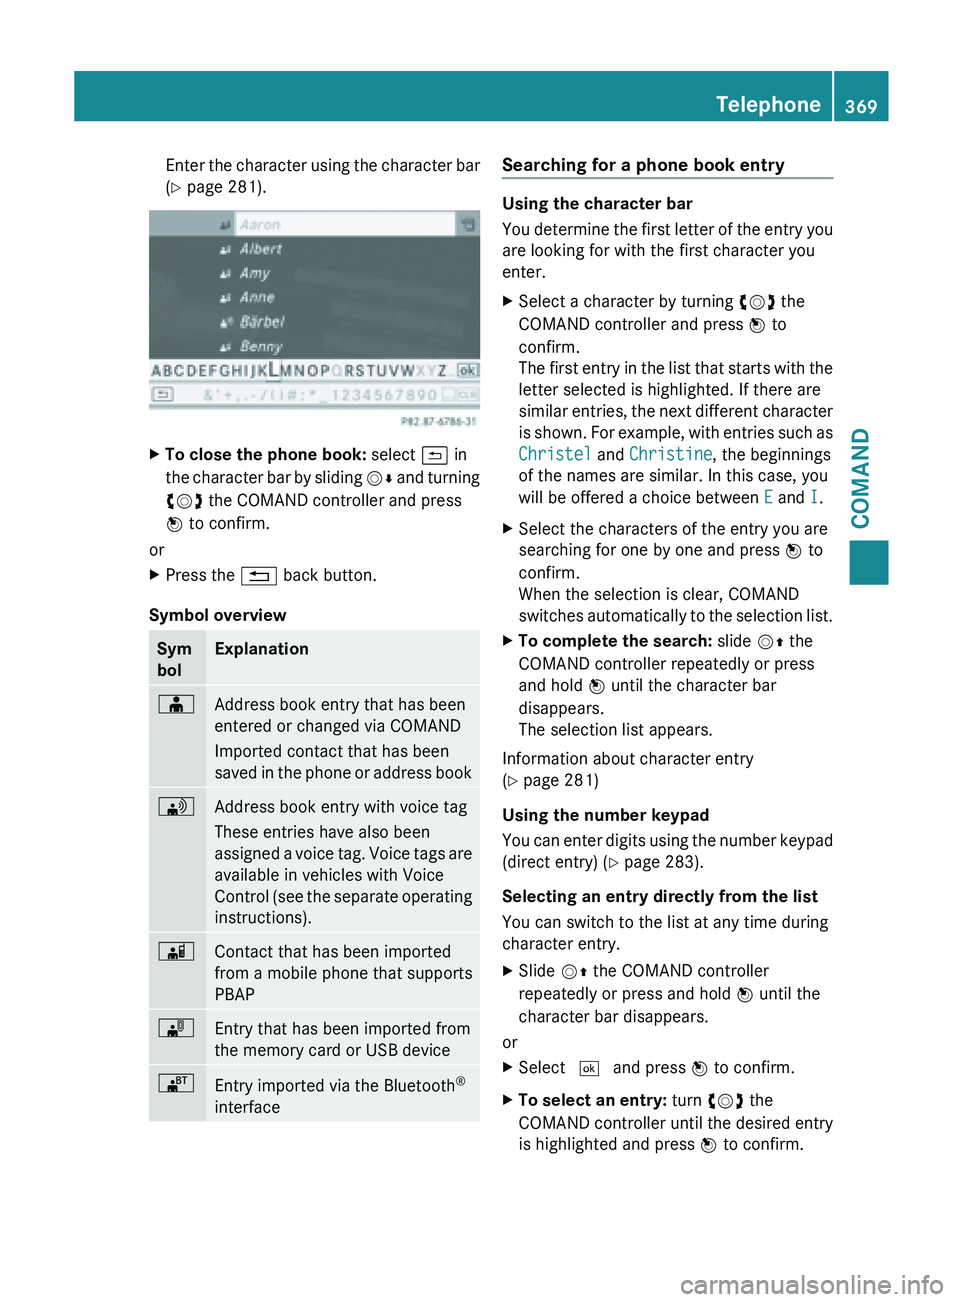
Enter the character using the character bar
(Y page 281).
X
To close the phone book: select & in
the character
bar by sliding VÆ and turning
cVd the COMAND controller and press
W to confirm.
or
X Press the % back button.
Symbol overview Sym
bol Explanation
Æ
Address book entry that has been
entered or changed via COMAND
Imported contact that has been
saved
in
the phone or address book \
Address book entry with voice tag
These entries have also been
assigned
a
voice tag. Voice tags are
available in vehicles with Voice
Control (see the separate operating
instructions). Ã
Contact that has been imported
from a mobile phone that supports
PBAP
¯
Entry that has been imported from
the memory card or USB device
®
Entry imported via the Bluetooth
®
interface Searching for a phone book entry
Using the character bar
You
determine
the first letter of the entry you
are looking for with the first character you
enter.
X Select a character by turning cVd the
COMAND controller and press W to
confirm.
The first
entry in the list that starts with the
letter selected is highlighted. If there are
similar entries, the next different character
is shown. For example, with entries such as
Christel and Christine, the beginnings
of the names are similar. In this case, you
will be offered a choice between E and I.
X Select the characters of the entry you are
searching for one by one and press W to
confirm.
When the selection is clear, COMAND
switches automatically
to the selection list.
X To complete the search: slide VZ the
COMAND controller repeatedly or press
and hold W until the character bar
disappears.
The selection list appears.
Information about character entry
(Y page 281)
Using the number keypad
You can
enter digits using the number keypad
(direct entry) (Y page 283).
Selecting an entry directly from the list
You can switch to the list at any time during
character entry.
X Slide VZ the COMAND controller
repeatedly or press and hold W until the
character bar disappears.
or
X Select ¬ and press W to confirm.
X To select an entry: turn cVd the
COMAND controller
until the desired entry
is highlighted and press W to confirm. Telephone
369
COMAND Z
Page 395 of 572
Activating/deactivating the weather
display
Activating
X
Select the ® icon in the main function bar
by sliding ZV and turning cVd the
COMAND controller and press W to
confirm.
The carousel view appears.
X Turn cVd the COMAND controller until
COMAND is brought to the front and press
W to confirm.
The carousel view for COMAND appears. X
Turn cVd the COMAND controller until
Weather is brought to the front and press
W to confirm.
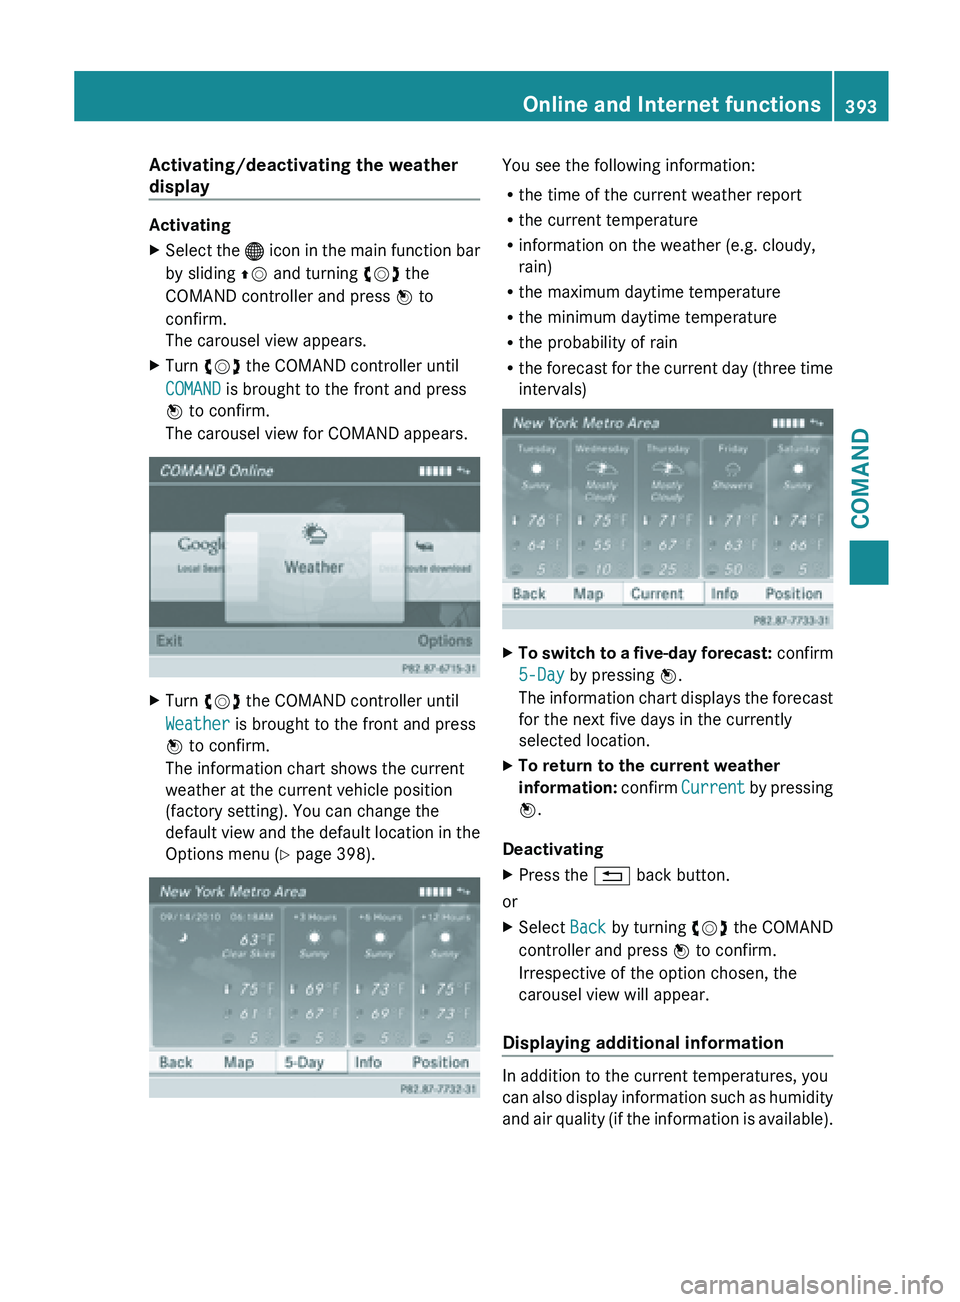
The information chart shows the current
weather at the current vehicle position
(factory setting). You can change the
default view
and the default location in the
Options menu (Y page 398). You see the following information:
R
the time of the current weather report
R the current temperature
R information on the weather (e.g. cloudy,
rain)
R the maximum daytime temperature
R the minimum daytime temperature
R the probability of rain
R the forecast
for the current day (three time
intervals) X
To switch to a five-day forecast: confirm
5-Day by pressing W.
The information
chart displays the forecast
for the next five days in the currently
selected location.
X To return to the current weather
information: confirm
Current
by pressing
W.
Deactivating
X Press the % back button.
or
X Select Back by turning cVd the COMAND
controller and press W to confirm.
Irrespective of the option chosen, the
carousel view will appear.
Displaying additional information In addition to the current temperatures, you
can
also
display information such as humidity
and air quality (if the information is available). Online and Internet functions
393
COMAND Z
Page 398 of 572
X
To change the map scale: as soon as you
turn cVd the COMAND controller, the
scale bar appears.
X Turn cVd until the desired scale is set.
i The data is downloaded again from the
server for these functions. This can delay
the display of the weather map.
Showing/hiding the
menu in the weather
map
X To show: press W
the COMAND controller
in the weather map.
X To hide: slide up ZV the COMAND
controller.
Switching to the weather information
display in the map
X Display the menu on the weather map
(Y page 396).
X Select View by turning cVd the COMAND
controller and press W to confirm. Weather
characteristic Display on the map
Hazard Icons Displays warnings,
calling up legend
(Y page 396)
Radar Map Displays the rain radar as
a colored area on the
map, calling up legend
(Y page 396)
Atmospheric
Pressure Displays air pressure
with isobars and as a
colored area on the map
Temperatures Displays the
temperatures
Cloud Cover Displays the clouds
Winds Displays wind direction
with an arrow and wind
speed with coloring i
The hazard icon display is preset in the
factory. This presetting can be changed in
the Options menu (Y page 398).
X Select a weather characteristic by turning
cVd the COMAND controller and press
W to confirm.
The # dot indicates which weather
characteristic is
currently displayed on the
map. You can select one weather
characteristic at a time.
Legend
X Display the menu on the weather map
(Y page 396).
X Select View by turning cVd the COMAND
controller and press W to confirm.
X Select Legend and press W to confirm.
The legend
is displayed in accordance with
the currently selected weather
characteristic.
X To return to the information chart:
display the menu in the weather map
(Y page 396)
X Select Display Weather and press W to
confirm.
Memory functions Storing a location in the memory
You can save locations that are called up
frequently in ten preset positions (0, 1 – 9).
X
Select the location ( Y page 394).
X Press and hold a number key.
When the location is saved, the number of
the selected
preset comes before the name
of the place in the caption.
Selecting a location from the memory
X Quick select: when the weather display
(COMAND) is switched on and an entry is
available, press a number key, e.g. l.
The information
chart appears and displays
the weather information. 396
Online and Internet functions
COMAND