Page 65 of 190
 SPEEDOMETER (SPEED
INDICATOR)
Indicator J shows the speed of the car.
REV COUNTER
Light C shows the engine revs.
FUEL LEVEL GAUGE
Gauge G shows the amount of fuel in
the tank.
The switching on of the")
SPEEDOMETER (SPEED
INDICATOR)
Indicator J shows the speed of the car.
REV COUNTER
Light C shows the engine revs.
FUEL LEVEL GAUGE
Gauge G shows the amount of fuel in
the tank.
The switching on of the
digital
warning light indicates that 4–5 litres of
fuel are left in the tank; in this situation,
refuel as soon as possible.
Do not travel with the fuel tank almost
empty: any gaps in fuel delivery could
damage the catalytic converter.
ENGINE COOLANT
TEMPERATURE
INDICATOR
Indicator A shows the temperature of
the engine coolant and starts supplying
indications when the fluid temperature
exceeds approximately 50°C.
The
digital warning light may switch
on (together with a message on the
display) to indicate that the coolant
temperature is too high; in this case,
stop the engine and contact a
dedicated Alfa Romeo Dealership. GEAR SHIFT INDICATOR
The GSI (Gear Shift Indicator) system
advises the driver to change gear
through a specific indication E fig. 59
on the instrument panel.
Through the GSI, the driver is notified
that changing gear will allow a
reduction in fuel consumption.
Therefore, for driving oriented towards
reducing fuel consumption, it is
advisable to stick to “Natural” or “All
Weather” mode and to follow the
suggestions of the Gear Shift Indicator,
where traffic conditions permit.
When the (
) icon is displayed on the
instrument panel, the GSI suggests
switching to a higher gear, while when
the (
) icon is displayed, the GSI
suggests changing to a lower gear.
IMPORTANT The GSI is not active
when the transmission is operating in
AUTO mode.
IMPORTANT The indication in the
instrument panel remains on until the
driver shifts gear or the driving
conditions go back to a situation where
gearshifting is not required to improve
consumption.
SETUP MENUCONTROL BUTTONS
SET/
: press briefly to access the
menu and/or go to next screen or
confirm the selection. Hold down to
return to the standard screen fig. 61.
: to scroll up through the displayed
screen and the related options or to
increase the displayed value.: to scroll down through the
displayed menu and the related options
or to decrease the value displayed.
IMPORTANT The
and
buttons
activate different functions according to
the following situations:
❒ within the menu, they allow you to
scroll up and down through the
options;
61
A0L0125
62
KNOWING THE INSTRUMENT PANEL
24-9-2013 11:49 Pagina 62
Page 66 of 190
 ❒during setting operations, they
increase or decrease the displayed
value;
❒ outside of the menu, they permit the
adjustment of the control panel
brightness.
MENU
The menu comprises a series of
op")
❒during setting operations, they
increase or decrease the displayed
value;
❒ outside of the menu, they permit the
adjustment of the control panel
brightness.
MENU
The menu comprises a series of
options which can be selected using
the
and
buttons to access the
different selection and setting (Setup)
operations indicated below.
Some options have a submenu. The
menu can be activated by briefly
pressing the SET/
button.
The menu comprises the following
options:
❒ MENU
❒ SPEED BEEP
❒ TRIP B ACTIVATION/DATA
❒ SET TIME
❒ SET DATE
❒ AUTOCLOSE (for versions/markets,
where provided)
❒ MEASUREMENT UNIT
❒ LANGUAGE
❒ BUZZER VOLUME ❒
BELT BUZZER/BEEP (may only be
displayed after the SBR system is
deactivated by the dedicated Alfa
Romeo Dealership)
❒ SERVICE
❒ AIRBAG/PASSENGER BAG
❒ DAYTIME RUNNING LIGHTS (for
versions/markets, where provided)
❒ EXIT MENU
Selecting an option from
the main menu without a
submenu:
❒ press the SET/
button briefly to
select the main menu setting you
wish to change;
❒ press buttons
or
(with single
presses) to select the new setting;
❒ press the SET/
button briefly to
save the new setting and go back to
the previous main menu option.
Selecting an option from
the main menu with a
submenu:
❒ briefly press the SET/
button to
display the first submenu option;
❒ press buttons
or
(with single
presses) to scroll through all the
submenu options; ❒
briefly press the SET/
button to
select the displayed submenu option
and to open the relevant settings
menu;
❒ press buttons
or
(with single
presses) to select a new setting for
this submenu option;
❒ press the SET/
button briefly to
save the new setting and go back to
the previous submenu option.
63
24-9-2013 11:49 Pagina 63
Page 67 of 190
 MENU OPTIONSMenu
This option allows you to access the
Setup Menu.
Press the
or
button to select the
various Menu options. Hold down
the SET/
button to return to the
standard screen.
Speed warning (Spe")
MENU OPTIONSMenu
This option allows you to access the
Setup Menu.
Press the
or
button to select the
various Menu options. Hold down
the SET/
button to return to the
standard screen.
Speed warning (Speed
limit)
With this function is possible to set the
car speed limit ("km/h" or "mph");
when this limit is exceeded the driver is
alerted.
To set the desired speed limit, proceed
as follows:
❒ briefly press the SET/
button, the
display will show the wording "Speed
warning";
❒ press button
or
to select speed
limit activation ("On") or deactivation
("Off");
❒ if the function is on, press
or
to
select the desired speed limit and
then press SET/
to confirm. IMPORTANT Setting is possible
between 30 and 200 km/h, or 20 and
125 mph, according to the previously
set unit. See the "Measurement unit
(Measurement unit adjustment)"
paragraph described below. The setting
will increase/decrease by 5 units each
time button
/
is pressed. Hold
down the
/
button to
automatically increase/decrease the
setting rapidly. Complete the
adjustment with single presses of the
button when you approach the desired
value.
Briefly press the SET/
button to go
back to the menu screen or hold the
button down to go back to the
standard screen without saving.
To cancel the setting, proceed as
follows:
❒ press the SET/
button briefly to
make the display flash "On";
❒ press the
button to make the
display flash "Off";
❒ briefly press the SET/
button to
go back to the menu screen or hold
the button down to go back to the
standard screen without saving. Activation/Trip B data
(Trip B enablement)
This function may be used to activate
("On") or deactivate ("Off") the Trip B
(partial trip) display. For further
information see “Trip computer”.
Proceed as follows to switch the
function on and off:
❒
press the SET/
button briefly to
make the display flash "On" or "Off"
according to what was previously set;
❒ press
or
to make your choice;
❒ briefly press the SET/
button
to go back to the menu screen or
hold the button down to go back to
the standard screen without saving.
Time adjustment (Clock
adjustment)
This function enables to set the clock
through two submenus: "Time" and
"Format".
To carry out the adjustment, proceed as
follows:
❒ briefly press the SET/button and
two submenus ("Time" and "Format")
will be displayed;
❒ press the
or
button to switch
between the two submenus;
64
KNOWING THE INSTRUMENT PANEL
24-9-2013 11:49 Pagina 64
Page 68 of 190
 ❒once the submenu to be modified
has been selected, briefly press
the SET/
button;
❒ when the “Time” submenu is entered,
by briefly pressing SET/
the
\"hours\" flash on the display;
❒")
❒once the submenu to be modified
has been selected, briefly press
the SET/
button;
❒ when the “Time” submenu is entered,
by briefly pressing SET/
the
"hours" flash on the display;
❒ press the
or
button to make the
adjustment;
❒ briefly press the SET/
button,
which makes the display flash the
"minutes";
❒ press the button
or
to make the
adjustment.
IMPORTANT The setting will increase or
decrease by one unit each time the
button
or
is pressed. Hold down
the button to increase/decrease the
setting rapidly and automatically.
Complete the adjustment with single
presses of the button when you
approach the desired value.
❒ When the "Format" submenu is
entered, by briefly pressing the SET/
button the display mode flashes
on the display;
❒ press the
or
button to select
"12h" or "24h" mode. When you have made the required
settings, briefly press the SET/
button to go back to the submenu
screen or hold the button down to go
back to the main menu screen without
saving.
Hold down the SET/
button again
to go back to the standard screen or to
the main menu according to the menu
options where you are in.
Set date (Setting the
date)
This function allows updating of the
date (year - month - day).
To carry out the adjustment, proceed as
follows:
❒ press button SET/briefly. The
"year" flashes on the display;
❒ press the
or
button to make the
adjustment;
❒ press button SET/
briefly. The
"month" flashes on the display;
❒ press the
or
button to make the
adjustment;
❒ press button SET/
briefly. The
"day" flashes on the display;
❒ press the
or
button to make the
adjustment; IMPORTANT The setting will increase or
decrease by one unit each time the
button
or
is pressed. Hold down
the button to increase/decrease the
setting rapidly and automatically.
Complete the adjustment with single
presses of the button when you
approach the desired value.
Briefly press the SET/
button to go
back to the menu screen or hold the
button down to go back to the
standard screen without saving.
Autoclose (Automatic
central locking with car
running)
(for versions/markets, where provided)
When activated ("On"), this function
locks the doors automatically when the
vehicle speed exceeds 20 km/h.
Proceed as follows to activate or
deactivate this function:
❒ press button SET/briefly. "On"
or "Off" flash on the display,
according to what has been
previously set;
❒ press
or
to make your choice;
❒ press the SET/
button briefly
to go back to the submenu screen or
hold the button down to go back to
the main menu screen without
saving;
65
24-9-2013 11:49 Pagina 65
Page 69 of 190
 ❒hold down the SET/
button
again to go back to the standard
screen or to the main menu
according to the menu options where
you are in.
Unit of measurement
(Setting the unit of
measurement)
With this")
❒hold down the SET/
button
again to go back to the standard
screen or to the main menu
according to the menu options where
you are in.
Unit of measurement
(Setting the unit of
measurement)
With this function it is possible to set
the unit of measurement using three
submenus: "Distances", "Consumption"
and "Temperature".
To set the desired unit of measurement,
proceed as follows:
❒ press button SET/briefly. The
display will show the three
submenus;
❒ press button
or
to scroll
through the three submenus;
❒ once the submenu to be modified
has been selected, briefly press
the SET/
button;
❒ if the "Distances" submenu is
selected and the SET/
button is
pressed briefly, the display shows
"km" or "mi" depending on the
previous setting;
❒ press
or
to make your choice; ❒
if the "Consumption" submenu is
selected and the SET/
button
is pressed briefly, the display shows
"km/l", "l/100km" or "mpg"
depending on the previous setting. If
the measurement unit set for
"Distances" is "km", the display
allows the measurement unit ("km/l"
or "l/100km") for Consumption to
be set. If the measurement unit set
for "Distances" is "mi", the display will
show Consumption in "mpg";
❒ press
or
to make your choice;
❒ if the "Temperature" submenu is
selected and the SET/
button is
pressed briefly, the display shows
"°C" or "°F" depending on the
previous setting;
❒ press
or
to make your choice;
When you have made the required
settings, briefly press the SET/
button to go back to the submenu
screen or hold the button down to go
back to the main menu screen without
saving.
Hold down the SET/
button again
to go back to the standard screen or to
the main menu according to the menu
options where you are in. Language (Language
selection)
Display messages can be shown in
different languages: Italian, English,
German, Portuguese, Spanish, French,
US English, Mexican Spanish, Russian
and Chinese.
To set the desired language proceed as
follows:
❒
press button SET/
briefly. The
“language” set previously flashes
on the display;
❒ press
or
to make your choice;
❒ briefly press the SET/
button
to go back to the menu screen or
hold the button down to go back to
the standard screen without saving.
Warnings volume
(Adjusting the
failure/warning buzzer
volume)
With this function the volume of the
buzzer which accompanies the display
of failure/warning can be adjusted
according to 8 levels.
To set the desired volume proceed as
follows:
❒ press button SET/
briefly. The
volume “level” set previously flashes
on the display;
66
KNOWING THE INSTRUMENT PANEL
24-9-2013 11:49 Pagina 66
Page 70 of 190
 ❒press the
or
button to make the
adjustment;
❒ briefly press the SET/
button to
go back to the menu screen or hold
the button down to go back to the
standard screen without saving.
Belt reminder (")
❒press the
or
button to make the
adjustment;
❒ briefly press the SET/
button to
go back to the menu screen or hold
the button down to go back to the
standard screen without saving.
Belt reminder (Buzzer
reactivation for SBR
indication)
(for versions/markets, where provided)
This function can be displayed only
after a dedicated Alfa Romeo
Dealership has deactivated the SBR
system (see "SBR system" paragraph in
the "Safety" chapter).
Service (Scheduled
servicing)
With this function it is possible to view
information on mileage or time intervals
for servicing.
To consult this information, proceed as
follows:
❒ press button SET/
briefly. The
display shows the service interval
in kilometres (km) or miles (mi)
according to the previous setting (see
the "Unit of measurement (Setting
the unit of measurement)"
paragraph); ❒
briefly press the SET/
button to
go back to the menu screen or hold
the button down to go back to the
standard screen.
IMPORTANT The “Scheduled Servicing
Plan” includes car maintenance at
fixed intervals, refer to the
"Maintenance and care" chapter. The
"Service" function is automatically
displayed, along with thewarning
light coming on, with key at MAR-ON -
starting from 2,000 km (or equivalent
value in miles) before these deadlines
and is activated again every 200 km (or
equivalent value in miles). Below 200
km servicing indications are more
frequent. The indication will appear in
kilometres or miles according to the
"Unit of measurement" settings. In
addition, when the vehicle mileage is
close to a scheduled servicing ("service
coupon"), and the key is turned to
MAR-ON, the
warning light will
appear on the display along with the
word "Service" and followed by the
number of kilometres or miles left
before vehicle servicing. Contact a
dedicated Alfa Romeo Dealership. The
operations in the “Scheduled Servicing
Plan” will be performed and the
message will be reset. Passenger airbags
(Activation/Deactivation
of passenger's side
front airbag)
This function is used to activate/
deactivate the front passenger's airbag.
Proceed as follows:
❒
press the SET/
button and, after
the message (Bag pass: Off) (to
deactivate) or (Bag pass: On) (to
activate) is displayed by pressing
buttons "
"or"
", press the SET/
button again;
❒ a confirmation request message will
appear on the display;
❒ by pressing the
or
buttons
select "Yes" (to confirm activation/
deactivation) or "No" (to cancel);
❒ press the SET/
button briefly, a
message confirming the selection
will be displayed and you will go back
to the menu screen, or hold the
button down to go back to the
standard screen without saving. The
warning light
in the instrument
panel switches on.
67
24-9-2013 11:49 Pagina 67
Page 71 of 190
 Daytime running lights
(DRL)
(for versions/markets, where provided)
With this function is possible to turn the
daytime running lights on and off.
Proceed as follows to activate or
deactivate this func")
Daytime running lights
(DRL)
(for versions/markets, where provided)
With this function is possible to turn the
daytime running lights on and off.
Proceed as follows to activate or
deactivate this function:
❒press button SET/
briefly. "On"
or "Off" flash on the display,
according to what has been
previously set;
❒ press
or
to make your choice;
❒ press the SET/
button briefly
to go back to the submenu screen or
hold the button down to go back to
the main menu screen without
saving;
❒ hold down the SET/
button
again to go back to the standard
screen or to the main menu
according to the menu options where
you are in. Exit Menu
This is the last function that closes the
cycle of settings listed in the menu
screen.
Briefly press the SET/
button to go
back to the standard screen without
saving.
Press the
button to return to the first
menu option.
TRIP COMPUTER
IN BRIEF
The Trip computer is used to display
information on car operation when
the key is turned to MAR-ON.
This function is characterised by two
separate records, called "Trip A"
and "Trip B", where the car's
"complete missions" (journeys) are
recorded in a reciprocally
independent manner.
Both records can be reset: i.e. start
of a new journey.
“Trip A” is used to display the values
relating to:
❒ Range
❒ Distance travelled
❒ Average consumption
❒ Instant consumption
❒ Average speed
❒ Trip time (driving time).
“Trip B” is used to display the values
relating to:
❒ Distance travelled B
❒ Average consumption B
68
KNOWING THE INSTRUMENT PANEL
24-9-2013 11:49 Pagina 68
Page 72 of 190
 ❒Average speed B
❒ Trip time B (driving time).
“Trip B” may be disabled (see \"Trip B
Activation/Data (Trip B enablement)\"
paragraph). The “Range” and “Instant
consumption\" va")
❒Average speed B
❒ Trip time B (driving time).
“Trip B” may be disabled (see "Trip B
Activation/Data (Trip B enablement)"
paragraph). The “Range” and “Instant
consumption" values cannot be reset.
VALUES DISPLAYED
Range
This indicates the approximate distance
that can still be travelled with the fuel
in the tank, assuming that driving style
remains unvaried.
The display will show the reading “- - -
-” when the following events take place:
❒ range value lower than 50 km (or 30
mi)
❒ car parked with engine running for a
long period.
IMPORTANT The range value variation
can be affected by several factors:
driving style, type of route (motorway,
urban, mountain roads, etc.), conditions
of use (load, tyre pressures, etc.). Trip
planning must therefore take the above
into account. Distance travelled
This value shows the distance covered
from the start of the new journey.
Average consumption
This value shows the approximate
average fuel consumption from the start
of the new journey.
Instant consumption
This value shows the instant fuel
consumption. The value is constantly
updated. The display will show “----”
if the car is parked with the engine
running.
Average speed
This value shows the car's average
speed based on the overall time
elapsed since the start of the new
journey.
Trip time
Time elapsed since the start of the new
journey.
Indications on display
Each time a value is selected, the
following information is shown:
❒
the word “Trip” (or “Trip A” or “Trip B”)
(A fig. 62);
❒ name, value and unit of measure of
the selected value (e.g. "Range 520
km") (B fig. 62).
After a few seconds, the name of the
selected value is replaced by the
corresponding icon (see example fig.
63).
TRIP RESET button
The TRIP RESET button is located on
the right stalk fig. 64. With the ignition
key at MAR-ON, it allows you to view
the values described previously and
also reset them to begin a new journey:
❒ brief press: display various values;
62
A0L0122
69
24-9-2013 11:49 Pagina 69
 1
1 2
2 3
3 4
4 5
5 6
6 7
7 8
8 9
9 10
10 11
11 12
12 13
13 14
14 15
15 16
16 17
17 18
18 19
19 20
20 21
21 22
22 23
23 24
24 25
25 26
26 27
27 28
28 29
29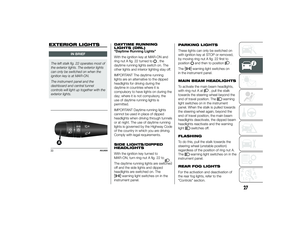 30
30 31
31 32
32 33
33 34
34 35
35 36
36 37
37 38
38 39
39 40
40 41
41 42
42 43
43 44
44 45
45 46
46 47
47 48
48 49
49 50
50 51
51 52
52 53
53 54
54 55
55 56
56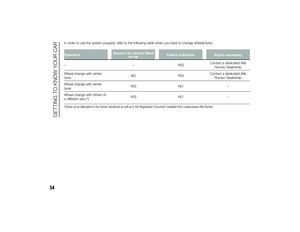 57
57 58
58 59
59 60
60 61
61 62
62 63
63 64
64 65
65 66
66 67
67 68
68 69
69 70
70 71
71 72
72 73
73 74
74 75
75 76
76 77
77 78
78 79
79 80
80 81
81 82
82 83
83 84
84 85
85 86
86 87
87 88
88 89
89 90
90 91
91 92
92 93
93 94
94 95
95 96
96 97
97 98
98 99
99 100
100 101
101 102
102 103
103 104
104 105
105 106
106 107
107 108
108 109
109 110
110 111
111 112
112 113
113 114
114 115
115 116
116 117
117 118
118 119
119 120
120 121
121 122
122 123
123 124
124 125
125 126
126 127
127 128
128 129
129 130
130 131
131 132
132 133
133 134
134 135
135 136
136 137
137 138
138 139
139 140
140 141
141 142
142 143
143 144
144 145
145 146
146 147
147 148
148 149
149 150
150 151
151 152
152 153
153 154
154 155
155 156
156 157
157 158
158 159
159 160
160 161
161 162
162 163
163 164
164 165
165 166
166 167
167 168
168 169
169 170
170 171
171 172
172 173
173 174
174 175
175 176
176 177
177 178
178 179
179 180
180 181
181 182
182 183
183 184
184 185
185 186
186 187
187 188
188 189
189