2013 Alfa Romeo 4C Owner handbook (in English)
-
 1
1 -
 2
2 -
 3
3 -
 4
4 -
 5
5 -
 6
6 -
 7
7 -
 8
8 -
 9
9 -
 10
10 -
 11
11 -
 12
12 -
 13
13 -
 14
14 -
 15
15 -
 16
16 -
 17
17 -
 18
18 -
 19
19 -
 20
20 -
 21
21 -
 22
22 -
 23
23 -
 24
24 -
 25
25 -
 26
26 -
 27
27 -
 28
28 -
 29
29 -
 30
30 -
 31
31 -
 32
32 -
 33
33 -
 34
34 -
 35
35 -
 36
36 -
 37
37 -
 38
38 -
 39
39 -
 40
40 -
 41
41 -
 42
42 -
 43
43 -
 44
44 -
 45
45 -
 46
46 -
 47
47 -
 48
48 -
 49
49 -
 50
50 -
 51
51 -
 52
52 -
 53
53 -
 54
54 -
 55
55 -
 56
56 -
 57
57 -
 58
58 -
 59
59 -
 60
60 -
 61
61 -
 62
62 -
 63
63 -
 64
64 -
 65
65 -
 66
66 -
 67
67 -
 68
68 -
 69
69 -
 70
70 -
 71
71 -
 72
72 -
 73
73 -
 74
74 -
 75
75 -
 76
76 -
 77
77 -
 78
78 -
 79
79 -
 80
80 -
 81
81 -
 82
82 -
 83
83 -
 84
84 -
 85
85 -
 86
86 -
 87
87 -
 88
88 -
 89
89 -
 90
90 -
 91
91 -
 92
92 -
 93
93 -
 94
94 -
 95
95 -
 96
96 -
 97
97 -
 98
98 -
 99
99 -
 100
100 -
 101
101 -
 102
102 -
 103
103 -
 104
104 -
 105
105 -
 106
106 -
 107
107 -
 108
108 -
 109
109 -
 110
110 -
 111
111 -
 112
112 -
 113
113 -
 114
114 -
 115
115 -
 116
116 -
 117
117 -
 118
118 -
 119
119 -
 120
120 -
 121
121 -
 122
122 -
 123
123 -
 124
124 -
 125
125 -
 126
126 -
 127
127 -
 128
128 -
 129
129 -
 130
130 -
 131
131 -
 132
132 -
 133
133 -
 134
134 -
 135
135 -
 136
136 -
 137
137 -
 138
138 -
 139
139 -
 140
140 -
 141
141 -
 142
142 -
 143
143 -
 144
144 -
 145
145 -
 146
146 -
 147
147 -
 148
148 -
 149
149 -
 150
150 -
 151
151 -
 152
152 -
 153
153 -
 154
154 -
 155
155 -
 156
156 -
 157
157 -
 158
158 -
 159
159 -
 160
160 -
 161
161 -
 162
162 -
 163
163 -
 164
164 -
 165
165 -
 166
166 -
 167
167 -
 168
168 -
 169
169 -
 170
170 -
 171
171 -
 172
172 -
 173
173 -
 174
174 -
 175
175 -
 176
176 -
 177
177 -
 178
178 -
 179
179 -
 180
180 -
 181
181 -
 182
182 -
 183
183 -
 184
184 -
 185
185 -
 186
186 -
 187
187 -
 188
188 -
 189
189
 The device cannot be engaged in 1st or
reverse gear: it is advisable to engage
it in 5th gear or higher.
When travelling downhill with the device
engaged, the car may slightly exceed
the stored speed.")
 14) 15)
Automatic deactivation
The device is automatically switched off
in the following cases:
❒if the ABS or ESC systems intervene;
❒ with the car speed below the set
limit;
❒ in the event of")
 CONTROLSHAZARD WARNING
LIGHTS
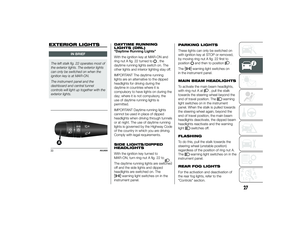
Operation
Press switch A fig. 26 to switch the
lights on/off.
Warning lights
and
on the panel
are lit up when the hazard warning
lights are on.
16)
REAR FOG LIGHT
Operati")
 After a collision, turn the ignition key to
STOP to prevent the battery from
running down.
To restore the correct operation of the
car, proceed as follows:
❒bring the left exterior light control
sta")
 ODDMENTS POCKET
(for versions/markets, where provided)
It is located under the dashboard, in
front of the passenger side seat, in the
point shown in fig. 32.POWER SOCKET
This is located on the central")
 ASHTRAY
(for versions/markets, where provided)
This is a removable spring-loaded
plastic container B fig. 35 located on
the central tunnel.
19)
CUP HOLDER
(for versions/markets, where provided)
Cup ho")
 DOORSCENTRAL DOOR
LOCKING/UNLOCKING
Locking doors from the
outside
With the doors closed, press thebutton on the key or turn the metal
insert (located inside the key) in the
door lock.
LED A fig. 38 o")
 ❒introduce the metal insert of the
ignition key in the front door pawl;
or
❒ pull the internal door handle.
Door opening/closing
mechanism initialisation
If the battery is disconnected or the
prot")