Page 65 of 157

Visual parking system
Fig. 67
Screen display of the visual
parking system
The visual parking system is shown in the screen of the multifunctional device
Move & Fun .
Switching on the screen display of the visual parking system
When the ignition and the multifunction device Move & Fun are both on, the visu-
al parking system is switched on by shifting into reverse gear.
An obstacle appearing in the collision zone is shown as an orange-coloured
segment » Fig. 67 Do not drive the vehicle!
An area without detected obstacles is shown as a transparent segment.
An obstacle in the sensor range which lies outside of the collision area is
shown by the light-blue segment.
A region behind the detected obstacle is shown with the dark-blue segment.
Switching off the screen display of the visual parking system
The screen display can be switched off as follows.
› By tapping the function key
in the screen of the multifunction de-
vice » Fig. 67.
› By shifting out of reverse.
› By turning off the ignition. WARNING
Concentrate fully at all times on your driving! As the driver you are fully re-
sponsible for the operation of your vehicle. Only use the system so that you
are in full control of your vehicle in every traffic situation - risk of accident! A
B
C
D Note
■ The visual parking system is shown in the screen of the multifunction device
Move & Fun
within a few seconds of shifting into reverse gear.
■ More information about the mobile multifunction device Move & Fun can be
found in the digital operating manual in the device » page 72, Multifunction de-
vice Move & Fun. Ð Cruise control system (CCS)
ä
Introduction
This chapter contains information on the following subjects:
Storing a speed 64
Changing a stored speed 64
Switching off the cruise control system temporarily 64
Switching off the cruise control system completely 65
The cruise control system (CCS) maintains a constant speed, more than 30 km/h
(20
mph), once it has been set, without you having to depress the accelerator
pedal. This is only possible within the range which is permitted by the power out-
put and braking power of the engine.
The warning light illuminates in the instrument cluster when the cruise control
system is activated. WARNING
■ For safety reasons, the cruise control system must not be used in dense
traffic or on unfavourable road surfaces (such as icy roads, slippery roads,
loose gravel) – risk of accident! ■ The saved speed may only be resumed if it is not too high for the current
traffic conditions. ■ Always switch off the cruise control system after use to prevent uninten-
tional use of the system. £
63
Starting-off and Driving
Page 66 of 157
 when the cruise control system is switched on! Otherwise
the engine can rev up unintent")
CAUTION
■ Always depress the clutch pedal if switching to the neutral position (vehicle
with a manual gearbox) when the cruise control system is switched on! Otherwise
the engine can rev up unintentionally.
■ The cruise control system is not able to maintain a constant speed when driving
in areas with steeper gradients. The weight of the vehicle increases the speed at
which it travels. Therefore, shift to a lower gear in good time or slow the vehicle
down by applying the foot brake. Note
It is not possible on vehicles fitted with an automatic gearbox to switch on the
cruise control system if the selector lever is in the position N or R.ÐStoring a speed
Fig. 68
Turn signal and main beam lever:
Rocker switch and switch of the
cruise control system
First read and observe the introductory information and safety warn-
ings on page 63.
Storing a speed
› Turn the switch A
» Fig. 68
into the ON position.
› After the desired speed has been reached, press the rocker button B
into the
SET position.
After you have released the rocker button B
out of the position SET
, the speed
you have just stored is maintained at a constant speed without having to depress
the accelerator. Ð
ä Changing a stored speed
First read and observe the introductory information and safety warn-
ings on page 63.
Increasing the speed with the accelerator
› Depress the accelerator to increase the speed.
› Release the accelerator to reduce the speed back down to the preset speed.
However, if the saved speed is exceeded by more than 10
km/h for a period of
more than 5 minutes by depressing the accelerator, the stored speed is deleted
from the memory. You have to re-store the desired speed.
Increasing the speed with the rocker button B
›
Press the rocker button B
» Fig. 68
on page 64 into the RES position.
› The speed will increase continuously, if the rocker button is pressed and held in
the RES position. Release the rocker button once the desired speed is reached.
The set speed is then stored in the memory.
Decreasing the speed
› The stored speed can be
reduced by pressing the rocker button B
» Fig. 68 on
page 64
into the position SET.
› The speed will decrease continuously, if the rocker button is pressed and held
in the SET position. Release the rocker button once the desired speed is
reached. The set speed is then stored in the memory.
› If the rocker button is released at a speed of less than 30 km/h, the speed is
not stored and the memory is erased. The speed must then be stored again by
pressing the rocker button B
in the position SET after increasing the speed of
the vehicle to more than 30
km/h.
The speed can also be reduced by depressing the brake pedal, which temporarily
deactivates the system. Ð Switching off the cruise control system temporarily
First read and observe the introductory information and safety warn-
ings on page 63.
The cruise control system is
temporarily switched off
by pressing the switch A
» Fig. 68
on page 64 » page 64 into the spring-tensioned position CANCEL or
by depressing the brake or clutch pedal.
The set speed remains stored in the memory. £
ä
ä
64 Using the system
Page 67 of 157

Briefly press the rocker button B
into the position RES
to resume the stored
speed after the clutch or brake pedal is released. ÐSwitching off the cruise control system completely
First read and observe the introductory information and safety warn-
ings on page 63.
›
Turn the switch A
» Fig. 68
on page 64 » page 64 into the OFF position. ÐSTART/STOP
Fig. 69
Button for the START-STOP sys-
tem
The START-STOP system helps you to save fuel while at the same time reducing
harmful exhaust emissions and CO 2 emissions.
The function is automatically activated each time the ignition is switched on.
In the start-stop mode, the engine automatically switches to the vehicle's idle
phase, e.g. when stopped at traffic lights.
Information regarding the current state of the
START-STOP system is indicated in
the display of the instrument cluster.
Automatic engine shut down (stop phase)
› Stop the vehicle (where necessary, apply the handbrake).
› Take the vehicle out of gear.
› Release the clutch pedal.
Automatic renewed engine restart (start phase).
› Depress the clutch pedal.
ä
Switching the START-STOP system on and off
The START/STOP
system can be switched on/off by pressing the button » Fig. 69.
When start-stop mode is deactivated, the warning light in the button lights up.
If the vehicle is in the stop phase when manually switching off the system, the
engine starts immediately.
The START-STOP system is very complex. Some of the procedures are hard to
check without servicing. The general conditions for the proper functioning of the
START-STOP system are listed in the following overview.
Conditions for the automatic engine shut down (stop phase)
› The gearshift lever is in Neutral.
› The clutch pedal is not depressed.
› The driver has fastened the seat belt.
› The driver's door is closed.
› The bonnet is closed.
› The vehicle is at a standstill.
› The engine is at operating temperature.
› The charge state of the vehicle battery is sufficient.
› The stationary vehicle is not on a steep slope or a steep downhill section.
› The engine speed is less than 1 200 rpm.
› The temperature of the vehicle battery is not too low or too high.
› There is sufficient pressure in the braking system.
› The difference between the outdoor- and the set temperature in the interior is
not too great.
› The vehicle speed since the last time the engine was switched off was greater
than 3 km/h.
› The front wheels are not turned excessively (the steering angle is less than 3/4
of a steering wheel revolution).
Conditions for an automatic restart (start phase)
› The clutch is depressed.
› The max./min. temperature is set.
› The defrost function for the windscreen is switched on.
› A high blower stage has been selected.
› The START STOP button is pressed.
Conditions for an automatic restart without driver intervention
› The vehicle moves at a speed of more than 3 km/h.
› The difference between the outdoor- and the set temperature in the interior is
too great.
› The charge state of the vehicle battery is not sufficient.
› There is insufficient pressure in the braking system.
£
65
Starting-off and Driving
Page 68 of 157

WARNING
■ The brake servo unit and power steering only operate if the engine is run-
ning.
■ Never let the vehicle roll with the engine switched off. CAUTION
If the START-STOP system is used at very high outside temperatures over a very
long period of time, the vehicle battery can be damaged. Note
■ Changes to the outdoor temperature can have an effect on the internal temper-
ature of the vehicle battery even after several hours. If the vehicle remains out-
doors for a long time in minus temperatures or in direct sunlight, it can take sev-
eral hours until the internal temperature of the vehicle battery reaches a suitable
temperature for proper operation of the
START STOP system.
■ In some instances it may be necessary to start the engine manually with the ig-
nition key (e.g. when the seat belt is not inserted or the driver's door is opened in
Stop mode for more than approx. 30 seconds). ÐCity Safe Drive
ä
Introduction Fig. 70
Laser sensor/detection range This chapter contains information on the following subjects:
Switching the
City Safe Drive on and off 67
Laser sensor 68
Special driving situations 68
The City Safe Drive system uses the laser sensor » Fig. 70 – to take readings
about the traffic situation in front of the vehicle at a range of around 10 metres (11
yards) » Fig. 70 – in a vehicle speed range of 5 - -30
km/h (3 - -19 mph).
If the driver does not respond to an imminent collision, the City Safe Drive system
can automatically apply the brakes to the vehicle to prevent a possible collision.
If the City Safe Drive system is currently slowing the vehicle down automatically,
the warning light will flash quickly .
Automatic braking interventions can be terminated by pressing the clutch, accel-
erator or by moving the steering wheel.
If the City Safe Drive system is not currently available, or if there is a system fault,
the warning light will flash slowly .
The following conditions cause the City Safe Drive system to become not availa-
ble.
› Taking bends tightly.
› When fully pressing down the accelerator pedal.
› When the City Safe Drive system function is switched off/faulty.
› When the laser sensor is dirty, concealed or has overheated.
» page 68
› In the event of snow, heavy rain or fog.
› When vehicles are travelling side by side.
› When vehicles are crossing.
› When vehicles are approaching in the same lane.
› When the vehicles are very dirty and have a low level of reflection.
› With high levels of dust. WARNING
■ The
City Safe Drive system cannot exceed physical and system-defined lim-
its. The added convenience of the City Safe Drive system must never give you
a reason to takes risks with regard safety. The driver is always the one re-
sponsible for braking in time.
■ The City Safe Drive system cannot prevent accidents and injuries by itself. £
66 Using the system
Page 69 of 157

■ The City Safe Drive system can carry out unexpected braking interventions
in complex driving situations, e.g. when vehicles scrape past each other.
■ Taking the City Safe Dr")
WARNING (Continued)
■ The City Safe Drive system can carry out unexpected braking interventions
in complex driving situations, e.g. when vehicles scrape past each other.
■ Taking the City Safe Drive system into account in one's own driving behav-
iour can lead to accidents and serious injuries. The
City Safe Drive system is
not a substitute for the driver's attention. ■ Always adapt your speed and safety distance to the vehicle ahead to the
visibility, weather, road and traffic conditions.
■ The laser beam from the laser sensor can cause serious eye injuries.
■ Never use optical devices, e.g. a range-finder camera or magnifying glass to
look into the laser sensor.
■ The laser beam can also be active when the City Safe Drive system is
switched off or is not available. The laser beam is not visible to the human
eye.
■ The City Safe Drive system cannot detect persons, animals, or crossing vehi-
cles or approaching vehicles in the same lane.
■ The City Safe Drive system cannot exceed physical and system-defined lim-
its. For instance, responses from the
City Save Drive system can happen late
or unexpectedly from the driver's perspective. Always stay attentive and take
control when required. CAUTION
If the vehicle starts to roll after the City Safe Drive system is triggered, use the
foot pedal to break. Note
■ When replacing the windscreen wiper blades, only use windscreen blades ap-
proved by ŠKODA. ■ Do not paint the laser sensor range on the windscreen. Do not cover it up with
stickers or similar. ■ Remove any snow with a hand-held brush and we recommend you remove any
ice with a solvent-free deicing spray. ■ Keep the laser sensor range free of dirt and ice at all times.
■ If the laser sensor range on the windscreen has scratches, cracks, etc, replace
the windscreen. Only use windscreens approved by
ŠKODA. Carrying out repairs
to the windscreen are not permissible. ■
A damaged windscreen in the area of the laser sensor can lead to a failure of
the City Safe Drive
system.
■ Repairing the laser sensor requires specialist expertise. We recommend an au-
thorised
ŠKODA Service partner. Ð Switching the City Safe Drive on and off
Fig. 71
Lower part of the centre con-
sole: Button for the City Safe
Drive system
First read and observe the introductory information and safety warn-
ings on page 66.
Switching on the City Safe Drive
The City Safe Drive
system is automatically switched on after turning on the igni-
tion.
Switching the City Safe Drive system on and off again
The City Safe Drive system is switched off by pressing the button » Fig. 71 in the
front centre console.
When the City Safe Drive system is switched off while the vehicle is travelling at a
speed between 5–30 km/h (3–19 mph), the warning light will light up in the
instrument cluster display.
You can switch on the City Safe Drive system again with the button » Fig. 71. The
warning light lights up for around 5 seconds in the instrument cluster dis-
play.
The City Safe Drive system must be switched off in the following cases.
› When the vehicle is being towed away.
› When the vehicle is driven though an automatic car wash.
› When the vehicle is on a rolling test bench.
› When the laser sensor is faulty.
› After force is applied to the laser sensor.
› When driving off-road (overhanging branches).
£
ä
67
Starting-off and Driving
Page 70 of 157

›
When objects are extending into the area above the bonnet, e.g. when a rood
load sticks out far ahead.
› When the windscreen is damaged in the region of the laser sensor. ÐLaser sensor
First read and observe the introductory information and safety warn-
ings on page 66.
Possible impairment of the laser sensor
If the functioning of the laser sensor is impaired by e.g. heavy rain, snow or slush,
the
City Safe Drivesystem will temporarily shut down. The warning light flashes
slowly in the instrument cluster display.
If the laser sensor is no longer impaired, the City Safe Drive system will automati-
cally switch back to ready. The warning light goes out. ÐSpecial driving situations
Fig. 72
Vehicle in the range of a curve/motorcycles driving ahead outside of
the laser sensor range
ä Fig. 73
Other vehicles changing lanes
First read and observe the introductory information and safety warn-
ings on page 66.
The following and similar situations require special attention of the driver:
Driving around a bend
When driving into or out of
“protracted” bends, it is possible for the laser sensor
to respond to a vehicle in the adjacent lane » Fig. 72 - causing it to apply the
brakes to your vehicle.
Narrow vehicles or vehicles travelling side by side
Narrow vehicles or vehicles travelling side by side are not detected by the laser
sensor until they are in the range of the sensor » Fig. 72 - . This is especially
true for narrow vehicles, such as motorcycles.
Other vehicles changing lanes
Vehicles which move into your lane close to your vehicle can trigger an unexpec-
ted braking of the City Save Drive system » Fig. 73 .Ð ä
68 Using the system
Page 71 of 157

Automatic gearbox
Automatic gearbox AGB
ä
Introduction
This chapter contains information on the following subjects:
Introductory information 69
Starting-off and driving 69
Selector lever positions 70
Manual gearshift (Tiptronic) 70
Kickdown function 71
Dynamic shift programme 71
Operational faults 71
WARNING
■ Do not depress the accelerator if changing the position of the selector lever
when the vehicle is stationary and the engine is running – risk of accident!
■ Never move the selector lever into position R or when driving - risk of an ac-
cident!
■ When the engine is running and the vehicle is stationary, it is necessary to
hold the car with the brake pedal in all the positions of the selector lever (ex-
cept P and N) since the power transmission is never completely interrupted,
also not when the engine is idling – the vehicle creeps.
■ The selector lever must be placed into position N and the handbrake firmly
applied before the bonnet can be opened and work on the running engine can
be completed - risk of accident! The safety guidelines must always be ob-
served » page 108 , Engine compartment .
■ If stopping on a hill (downhill gradient), never try to maintain the vehicle sta-
tionary with the gear engaged by means of the
“accelerator pedal”, i.e. by let-
ting the clutch slip. This can lead to overheating of the clutch, and subse-
quently to the clutch burning out. The vehicle can roll backward - risk of acci-
dent!
■ If you have to stop on a slope, depress and hold the brake pedal to prevent
the vehicle from rolling back.
■ On a smooth or slippery road surface using the kickdown function can cause
the driven wheels to spin – risk of skidding!
■ Always firmly apply the handbrake before leaving the vehicle! Ð Introductory information
First read and observe the introductory information and safety warn-
ings on page 69.
Shifting up and down through the gears is performed automatically. However, the
gearbox can also be switched into Tiptronic mode M. This mode makes it possible
for you to also shift gears manually » page 70.
The engine can only be left on in position N, when the brake pedal is depressed
.
When parking on a level road surface, it suffices to engage selector lever position
N. When parking on a slope, the handbrake should be applied firmly before the
park position N is selected.
If the selector lever position N is accidentally selected while driving, it is first nec-
essary to release pressure on the accelerator pedal and wait for the idling speed
of the engine to be reached before the selector lever can be engaged in the drive
position. Note
If the N symbol flashes next to the selector lever, engage the selector lever posi-
tion N. Ð Starting-off and driving
First read and observe the introductory information and safety warn-
ings on page 69.
Starting off
›
Firmly depress and hold the brake pedal.
› Press the selector lever towards the left in the spring-tensioned position in the
direction of the arrow » Fig. 74 on page 70 and insert into position D.
› Release the brake pedal and accelerate.
Stop
› The selector lever position
N does not have to be selected when stopping for a
short time, such as at a cross roads. It is sufficient to hold the vehicle stationary
using the foot brake. The engine can, however, be allowed just to idle.
Parking
› Depress the brake pedal.
› Firmly apply the handbrake.
£
ä
ä
69
Automatic gearbox
Page 72 of 157

›
Move the selector lever to the right in the direction of the arrow
» Fig. 74 on
page 70 into position N. ÐSelector lever positions
Fig. 74
Selector lever
First read and observe the introductory information and safety warn-
ings on page 69.
N
– Neutral
The transmission is in Neutral in this position.
The brake pedal must be depressed to move the selector lever out of the posi-
tion N into position D or R when the vehicle is stationary and the ignition is
switched on. R
– Reverse gear
Reverse gear must only be engaged when the vehicle is stationary and the en-
gine is idling.
The brake pedal must be depressed before setting into position R from position
N.
When the ignition is switched on and the selector lever is in position R, the re-
verse lights will come on. D
– Position for driving forward (normal programme)
When the selector lever is in this position, the forward gears are automatically
shifted up and down in line with the engine load, vehicle speed and dynamic shift
programme.
The brake pedal must be depressed before setting into position D from position
N.
ä
Under certain circumstances (e.g. when driving in mountainous regions) it may be
beneficial to select the manual shift programme » page 70 for a short time in
order to adapt the gearbox ratios manually to the driving situations. M
- Manual gearshift (Tiptronic)
Further information » page 70. Ð Manual gearshift (Tiptronic)
Fig. 75
Selector lever: manual shifting/instrument cluster: engaged gear
First read and observe the introductory information and safety warn-
ings on page 69.
Tiptronic mode makes it possible to manually shift gears on the selector lever.
Switching to manual shifting when the vehicle is stationary
›
Depress the brake pedal.
› Press the selector lever twice to the left in the spring-tensioned position.
Switching to manual shifting during driving
› Press the selector lever towards the left in the spring-tensioned position in the
direction of the arrow and insert into position M. The selector lever position you
have engaged appears in the display of the instrument cluster 1
» Fig. 75
.
Shifting up gears
› Press the selector lever fowards
» Fig. 75 +
.
Shifting down gears
› Press the selector lever backwards
» Fig. 75 -
.
When accelerating, the gearbox automatically shifts up into the higher gear just
before the maximum permissible engine speed is reached. £
ä
70 Using the system
 1
1 2
2 3
3 4
4 5
5 6
6 7
7 8
8 9
9 10
10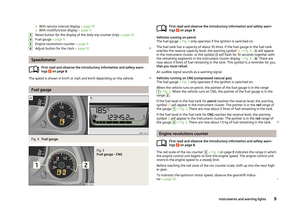 11
11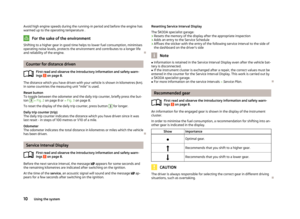 12
12 13
13 14
14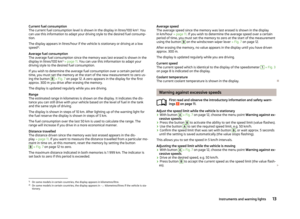 15
15 16
16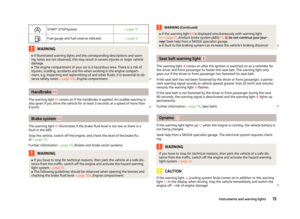 17
17 18
18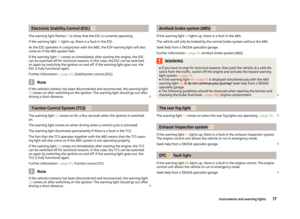 19
19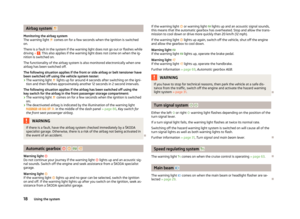 20
20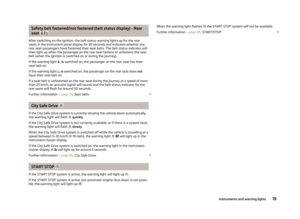 21
21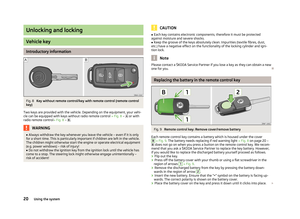 22
22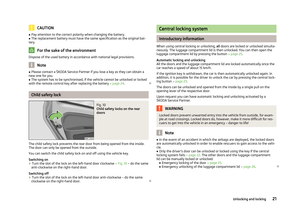 23
23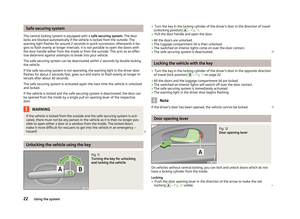 24
24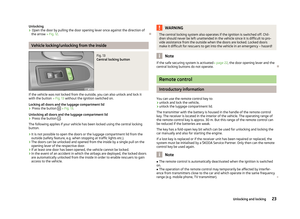 25
25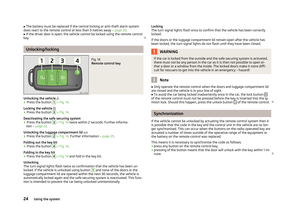 26
26 27
27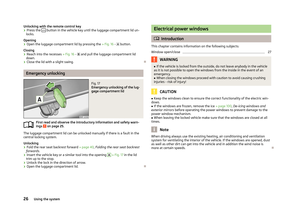 28
28 29
29 30
30 31
31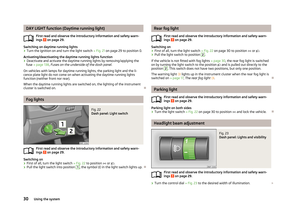 32
32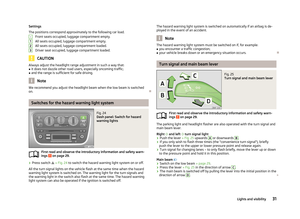 33
33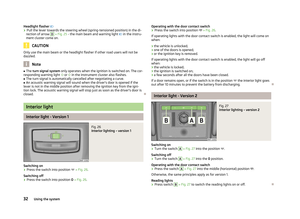 34
34 35
35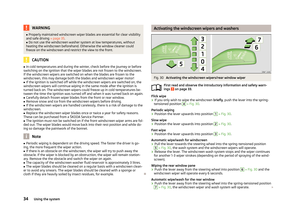 36
36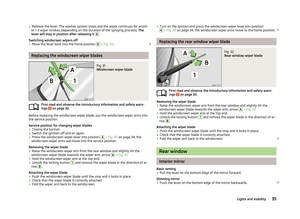 37
37 38
38 39
39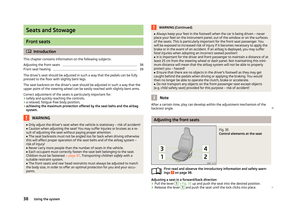 40
40 41
41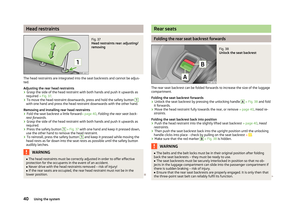 42
42 43
43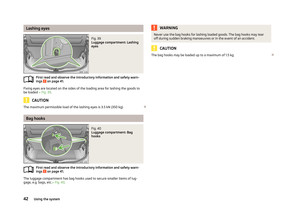 44
44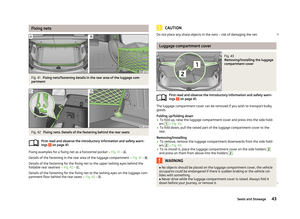 45
45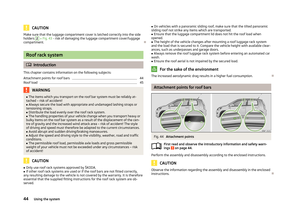 46
46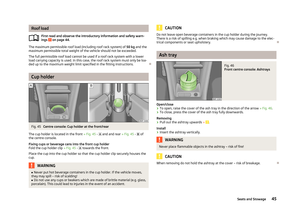 47
47 48
48 49
49 50
50 51
51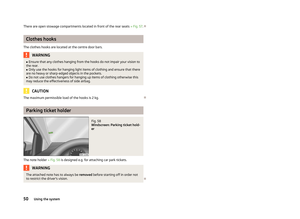 52
52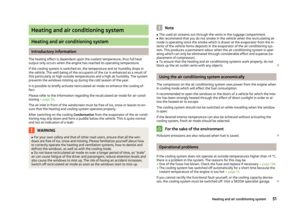 53
53 54
54 55
55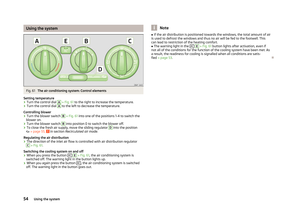 56
56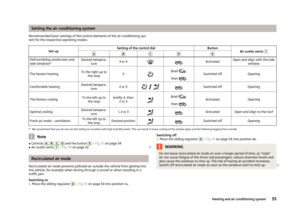 57
57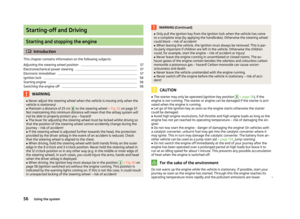 58
58 59
59 60
60 61
61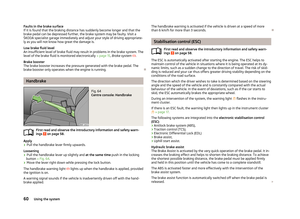 62
62 63
63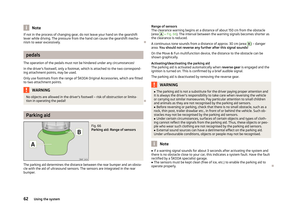 64
64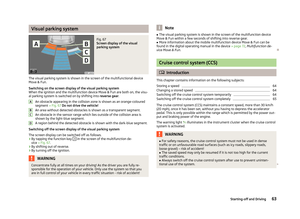 65
65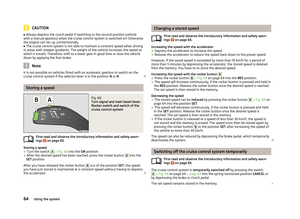 66
66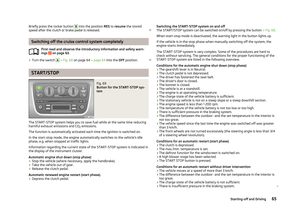 67
67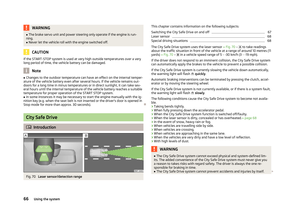 68
68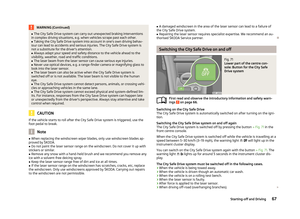 69
69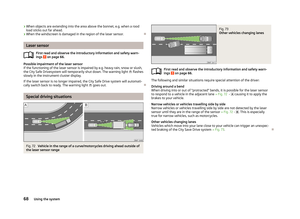 70
70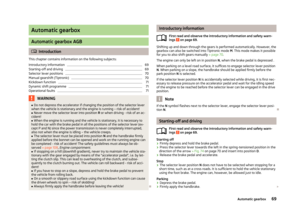 71
71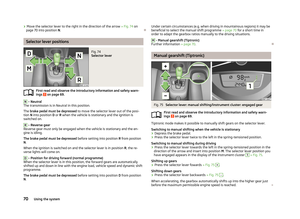 72
72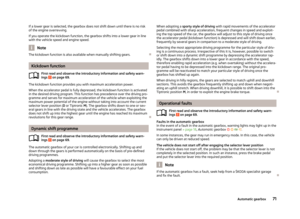 73
73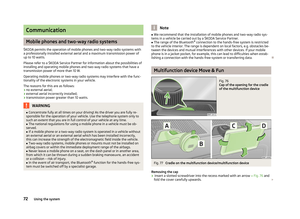 74
74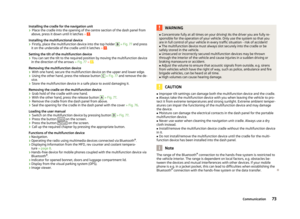 75
75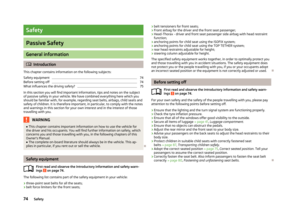 76
76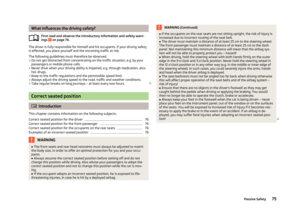 77
77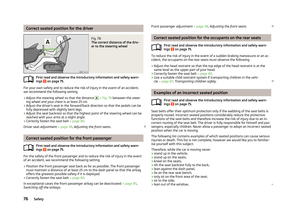 78
78 79
79 80
80 81
81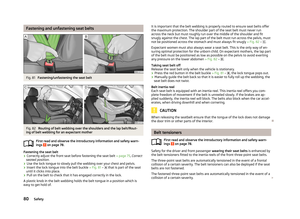 82
82 83
83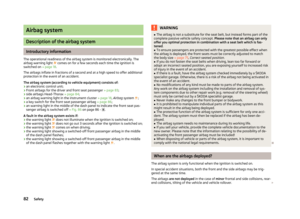 84
84 85
85 86
86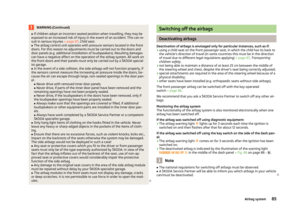 87
87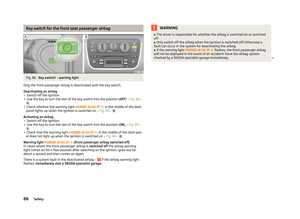 88
88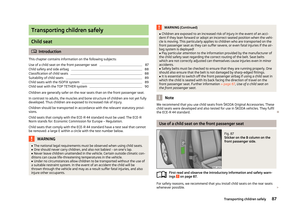 89
89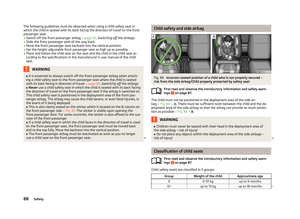 90
90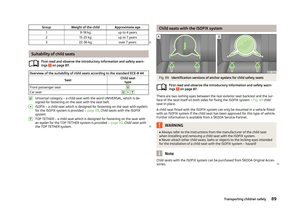 91
91 92
92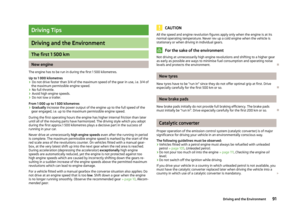 93
93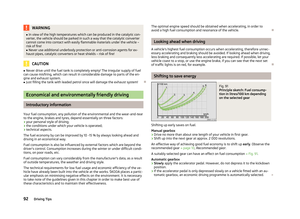 94
94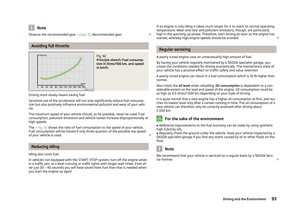 95
95 96
96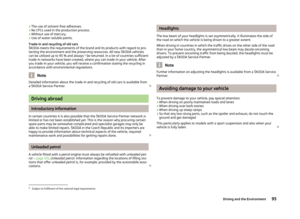 97
97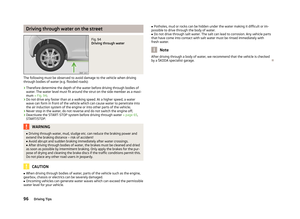 98
98 99
99 100
100 101
101 102
102 103
103 104
104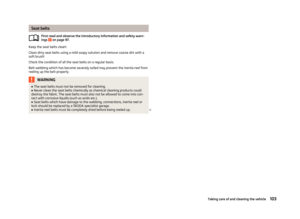 105
105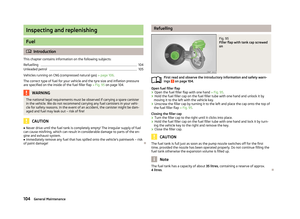 106
106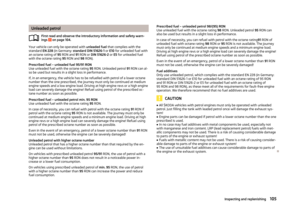 107
107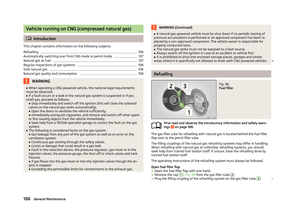 108
108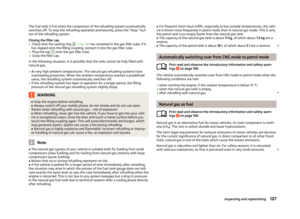 109
109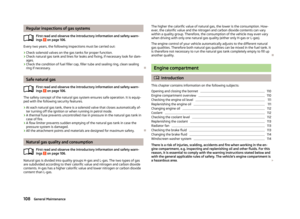 110
110 111
111 112
112 113
113 114
114 115
115 116
116 117
117 118
118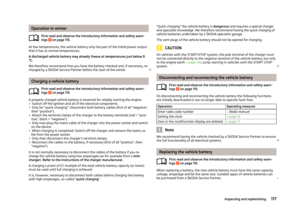 119
119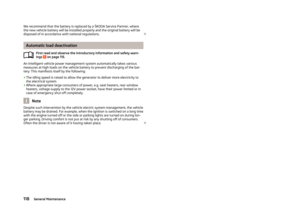 120
120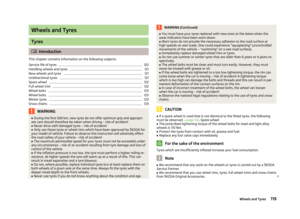 121
121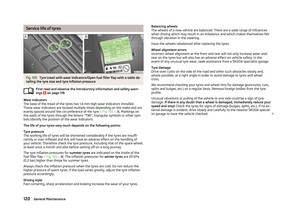 122
122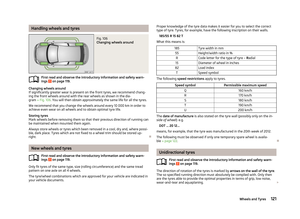 123
123 124
124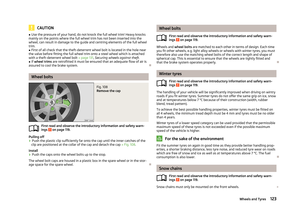 125
125 126
126 127
127 128
128 129
129 130
130 131
131 132
132 133
133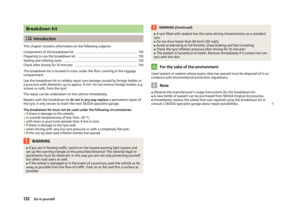 134
134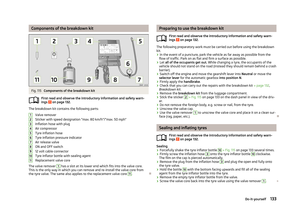 135
135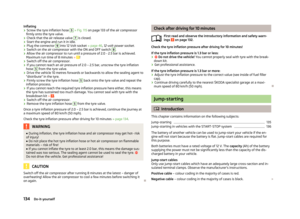 136
136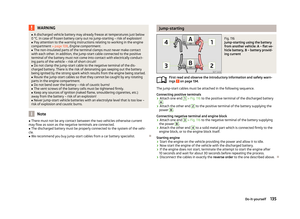 137
137 138
138 139
139 140
140 141
141 142
142 143
143 144
144 145
145 146
146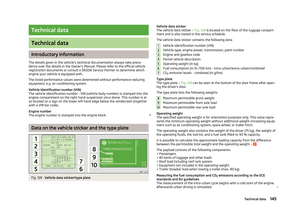 147
147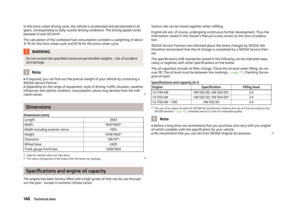 148
148 149
149 150
150 151
151 152
152 153
153 154
154 155
155 156
156