Page 33 of 157

Settings
The positions correspond approximately to the following car load.
Front seats occupied, luggage compartment empty.
All seats occupied, luggage compartment empty.
All seats occupied, luggage compartment loaded.
Driver seat occupied, luggage compartment loaded. CAUTION
Always adjust the headlight range adjustment in such a way that:
■ it does not dazzle other road users, especially oncoming traffic;
■ and the range is sufficient for safe driving. Note
We recommend you adjust the headlight beam when the low beam is switched
on. ÐSwitches for the hazard warning light system
Fig. 24
Dash panel: Switch for hazard
warning lights
First read and observe the introductory information and safety warn-
ings on page 29.
›
Press switch
» Fig. 24 to switch the hazard warning light system on or off.
All the turn signal lights on the vehicle flash at the same time when the hazard
warning light system is switched on. The warning light for the turn signals and
the warning light in the switch also flash at the same time. The hazard warning
light system can also be operated if the ignition is switched off. -
1
2
3
ä The hazard warning light system is switched on automatically if an airbag is de-
ployed in the event of an accident. Note
The hazard warning light system must be switched on if, for example:
■ you encounter a traffic congestion;
■ your vehicle breaks down or an emergency situation occurs. Ð Turn signal and main beam lever
Fig. 25
Turn signal and main beam lever
First read and observe the introductory information and safety warn-
ings on page 29.
The parking light and headlight flasher are also operated with the turn signal and
main beam lever.
Right and left turn signal light
› Push the lever
» Fig. 25 upwards A
or downwards B
.
› If you only wish to flash three times (the "convenience turn signal"), briefly
push the lever to the upper or lower pressure point and release again.
› Turn signal for changing lanes – to only flash briefly, move the lever up or down
to the pressure point and hold it in this position.
Main beam
› Switch on the low beam » page 29.
› Press the lever
» Fig. 25 in the direction of arrow C
.
› The main beam is switched off by pulling the lever into the initial position in the
direction of arrow D
.
£
ä
31
Lights and visibility
Page 34 of 157
 in the di-
rection of arrow D
» Fig. 25 - the main beam and warning light
in the instru-
ment")
Headlight flasher
› Pull the lever towards the steering wheel (spring-tensioned position) in the di-
rection of arrow D
» Fig. 25 - the main beam and warning light
in the instru-
ment cluster come on. CAUTION
Only use the main beam or the headlight flasher if other road users will not be
dazzled. Note
■ The turn signal system only operates when the ignition is switched on. The cor-
responding warning light or in the instrument cluster also flashes.
■ The turn signal is automatically cancelled after negotiating a curve.
■ An acoustic warning signal will sound when the driver's door is opened if the
lever is not in the middle position after removing the ignition key from the igni-
tion lock. The acoustic warning signal will stop just as soon as the driver's door is
closed. ÐInterior light
Interior light - Version 1
Fig. 26
Interior lighting – version 1
Switching on
› Press the switch into position
» Fig. 26.
Switching off
› Press the switch into position
O » Fig. 26. Operating with the door contact switch
› Press the switch into position
» Fig. 26.
If operating lights with the door contact switch is enabled, the light will come on
when:
› the vehicle is unlocked;
› one of the doors is opened;
› or the ignition key is removed.
If operating lights with the door contact switch is enabled, the light will go off
when:
› the vehicle is locked;
› the ignition is switched on;
› a few seconds after all the doors have been closed.
If a door remains open, or if the switch is in the position the interior light goes
out after 10
minutes to prevent the battery from discharging. Ð Interior light - Version 2
Fig. 27
Interior lighting – version 2
Switching on
› Turn the switch A
» Fig. 27
into the position .
Switching off
› Turn the switch A
» Fig. 27
into the 0 position.
Operating with the door contact switch
› Press the switch A
»
Fig. 27 into the middle (horizontal) position
.
Otherwise, the same principles apply as for version 1.
Reading lights
› Press switch B
» Fig. 27 to switch the reading lights on or off.
Ð
32 Using the system
Page 35 of 157

Visibility
Rear window heater
Fig. 28
Switch for rear window heater
› The rear window heater is switched on or off by pressing the switch
» Fig. 28
the warning light in the switch comes on or goes out.
The rear window heater only operates when the engine is running.
The rear window heater switches off automatically after 10 minutes. For the sake of the environment
The heating should be switched off as soon as the window is de-iced or free from
mist. The reduced current consumption will have a favourable effect on fuel econ-
omy. Note
If the on-board voltage drops, the rear window heater switches off automatically,
in order to provide sufficient electrical energy for the engine control »
page 118,
Automatic load deactivation . Ð Sun visors
Fig. 29
Sun visor
Adjustment options of the sun visors for the driver and front passenger
› Fold the sun visor towards the windscreen.
› Pull the sun visor from the holder and swing it towards the door in the direction
of the arrow » Fig. 29.
The front passenger sun visor has a vanity mirror. Ð Windscreen wipers and washers
ä
Introduction
This chapter contains information on the following subjects:
Activating the windscreen wipers and washers 34
Replacing the windscreen wiper blades 35
Replacing the rear window wiper blade 35
The windscreen wipers and the windscreen washer system only operate if the ig-
nition is switched on.
The rear window is wiped once if the windscreen wipers are on when reverse
gear is selected.
Top up with windscreen wiper fluid » page 114. £
33
Lights and visibility
Page 36 of 157

WARNING
■ Properly maintained windscreen wiper blades are essential for clear visibility
and safe driving » page 35.
■ Do not use the windscreen washer system at low temperatures, without
heating the windscreen beforehand. Otherwise the window cleaner could
freeze on the windscreen and restrict the view to the front. CAUTION
■ In cold temperatures and during the winter, check before the journey or before
switching on the ignition that the wiper blades are not frozen to the windscreen.
If the windscreen wipers are switched on when the blades are frozen to the
windscreen, this may damage both the blades and windscreen wiper motor!
■ If the ignition is switched off while the windscreen wipers are switched on, the
windscreen wipers will continue wiping in the same mode after the ignition is
turned back on. The windscreen wipers could freeze up in cold temperatures be-
tween the time the ignition was turned off and when it was turned back on again.
■ Carefully detach frozen wiper blades from the front or rear window.
■ Remove snow and ice from the windscreen wipers before driving.
■ If the windscreen wipers are handled carelessly, there is a risk of damage to the
windscreen.
■ Replace the windscreen wiper blades once or twice a year for safety reasons.
These can be purchased from a ŠKODA Service Partner.
■ The ignition must not be switched on if the front windscreen wiper arms are fol-
ded out. The wiper blades would move back into their rest position and while do-
ing so damage the paintwork of the bonnet. Note
■ Periodic wiping is dependent on the driving speed. The faster the driver is go-
ing, the more frequent the wiper action. ■ If there is an obstacle on the windscreen, the wiper will try to push away the
obstacle. If the wiper is blocked by an obstruction, the wiper will remain station-
ary. Remove the the obstacle and switch the wiper on again. ■ The capacity of the windscreen washer fluid reservoir is approximately 3 litres.
■ The wiper blades should be cleaned on a regular basis with a windscreen clean-
er to avoid any smears. The wiper blades should be cleaned with a sponge or
cloth if they are heavily soiled by insect residues, for example. Ð Activating the windscreen wipers and washers
Fig. 30
Activating the windscreen wipers/rear window wiper
First read and observe the introductory information and safety warn-
ings on page 33.
Flick wipe
›
If you only wish to wipe the windscreen
briefly, push the lever into the spring-
tensioned position 4
» Fig. 30.
Periodic wiping
› Position the lever upwards into position 1
» Fig. 30.
Slow wipe
› Position the lever upwards into position 2
» Fig. 30.
Fast wipe
› Position the lever upwards into position 3
» Fig. 30.
Automatic wipe/wash for windscreen
› Pull the lever towards the steering wheel into the spring-tensioned position 5
» Fig. 30, the wash system and the windscreen wipers will operate.
› Release the lever. The windscreen wash system stops and the wiper continues
for another 1-3 wiper strokes (depending on the period of spraying of the wind-
screen).
Wiping the rear window pane
› Push the lever away from the steering wheel into position 6
» Fig. 30 and the
windscreen wiper will operate every 6
seconds.
Automatic wipe/wash for the rear window
› Push the lever away from the steering wheel into the spring-tensioned position 7
» Fig. 30, the windscreen wiper and wash system will operate.
£
ä
34 Using the system
Page 37 of 157
. The
lever will stay in position after rele")
›
Release the lever. The washer system stops and the wiper continues for anoth-
er 1-3 wiper strokes (depending on the duration of the spraying process). The
lever will stay in position after releasing it 6
.
Switching windscreen wipers off
› Move the lever back into the home position 0
» Fig. 30.
ÐReplacing the windscreen wiper blades
Fig. 31
Windscreen wiper blade
First read and observe the introductory information and safety warn-
ings on page 33.
Before replacing the windscreen wiper blade, put the windscreen wiper arms into
the service position.
Service position for changing wiper blades
›
Closing the bonnet.
› Switch the ignition off and on again.
› Press the windscreen wiper lever into position 4
» Fig. 30 on page 34, the
windscreen wiper arms will move into the service position.
Removing the wiper blade
› Raise the windscreen wiper arm from the rear window and slightly tilt the
windscreen wiper blade towards the wiper arm, arrow A
»
Fig. 31.
› Hold the windscreen wiper arm at the top end.
› Unlock the locking button 1
and remove the wiper blade in the direction of ar-
row B
.
Attaching the wiper blade
› Push the windscreen wiper blade until the stop and it locks in place.
› Check that the wiper blade is correctly attached.
› Fold the wiper arm back to the windscreen.
ä ›
Turn on the ignition and press the windscreen wiper lever into position 4
» Fig. 30 on page 34, the windscreen wiper arms move to the home position.
Ð Replacing the rear window wiper blade
Fig. 32
Rear window wiper blade
First read and observe the introductory information and safety warn-
ings on page 33.
Removing the wiper blade
›
Raise the windscreen wiper arm from the rear window and slightly tilt the
windscreen wiper blade towards the wiper arm, arrow A
»
Fig. 32.
› Hold the windscreen wiper arm at the top end.
› Unlock the locking button 1
and remove the wiper blade in the direction of ar-
row B
.
Attaching the wiper blade
› Push the windscreen wiper blade until the stop and it locks in place.
› Check that the wiper blade is correctly attached.
› Fold the wiper arm back to the windscreen. Ð Rear window
Interior mirror
Basic setting
› Pull the lever on the bottom edge of the mirror forward.
Dimming mirror
› Push the lever on the bottom edge of the mirror backwards. Ð
ä
35
Lights and visibility
Page 38 of 157

Additional rear-view mirror
Fig. 33
Additional interior mirror
The additional interior mirror allows the driver a wider field of view of the rear
seats.
Adjusting the angle › Adjust the mirror in direction of arrow to the desired position. WARNING
Concentrate fully at all times on your driving! As the driver you are fully re-
sponsible for the operation of your vehicle. Use the additional interior mirror
only to such an extent that you are in full control of your vehicle at any time. ÐExterior mirror
Fig. 34
in the door, control knob/rotary knob: for the mechanical exterior
mirror/electrical exterior mirrors Adjust the rear mirror before commencing to drive so that there is a clear view to
the rear.
Mechanically-adjustable mirrors
› Use the control knob to adjust the surface of the mirror into the desired posi-
tion » Fig. 34 - . The movement of the mirror surface is identical to the move-
ment of the control knob.
Heating of the external mirror
› Place the rotary knob into the position
» Fig. 34 - .
The exterior mirror heater only operates when the engine is running and up to an
outside temperature of +20 °C.
Adjusting the left-hand exterior mirror
› Place the rotary knob into the position
» Fig. 34 - . The movement of the
mirror surface is identical to the movement of the rotary knob.
Adjusting the right-hand exterior mirror
› Place the rotary knob into the position
. The movement of the mirror surface is
identical to the movement of the rotary knob.
Switching off operating control
› Place the rotary knob into the position
.
Folding in the exterior mirrors
› Carefully fold in the entire body of the exterior mirror toward the side window,
fold it back from the side window until it audibly latches. WARNING
■ Convex (curved outward) or a spherical exterior mirrors increase the vision
field. They do, however, make objects appear smaller in the mirror. These mir-
rors are therefore only of limited use for estimating distances to the following
vehicles.
■ Whenever possible use the interior mirror for estimating the distances to
the following vehicles. £
36 Using the system
Page 39 of 157
Note
■ Do not touch the surface of the exterior mirrors if the exterior mirror heater is
switched on. ■ If the power setting function fails at any time, the exterior mirrors can be set by
hand by pressing on the edge of the mirror surface.
■ Contact your ŠKODA specialist garage if there is a fault with the power setting
of the exterior mirrors. Ð 37
Lights and visibility
Page 40 of 157

Seats and Stowage
Front seats
ä
Introduction
This chapter contains information on the following subjects:
Adjusting the front seats 38
Front seat heating 39
The driver's seat should be adjusted in such a way that the pedals can be fully
pressed to the floor with slightly bent legs.
The seat backrest on the driver's seat should be adjusted in such a way that the
upper point of the steering wheel can be easily reached with slightly bent arms.
Correct adjustment of the seats is particularly important for:
› safely and quickly reaching the controls;
› a relaxed, fatigue-free body position;
› achieving the maximum protection offered by the seat belts and the airbag
system. WARNING
■ Only adjust the driver's seat when the vehicle is stationary – risk of accident!
■ Caution when adjusting the seat! You may suffer injuries or bruises as a re-
sult of adjusting the seat without paying proper attention.
■ The seat backrests must not be angled too far back when driving otherwise
this will affect proper operation of the seat belts and of the airbag system –
risk of injury!
■ Never carry more people than the number of seats in the vehicle.
■ Each occupant must correctly fasten the seat belt belonging to the seat.
Children must be fastened » page 87, Transporting children safely with a
suitable restraint system.
■ The front seats and rear head restraints must always be adjusted to match
the body size, in order to offer an optimal protection for you and your occu-
pants. WARNING (Continued)
■ Always keep your feet in the footwell when the car is being driven – never
place your feet on the instrument panel, out of the window or on the surfaces
of the seats. This is particularly important for the front seat passenger. You
will be exposed to increased risk of injury if it becomes necessary to apply the
brake or in the event of an accident. If an airbag is deployed, you may suffer
fatal injuries when adopting an incorrect seated position!
■ It is important for the driver and front passenger to maintain a distance of at
least 25 cm from the steering wheel or dash panel. Not maintaining this mini-
mum distance will mean that the airbag system will not be able to properly
protect you – hazard!
■ Ensure that there are no objects in the driver's footwell as they may get
caught behind the pedals when driving or applying the braking. You would
then no longer be able to operate the clutch, brake or accelerate.
■ Do not transport any objects on the front passenger seat except objects
(e.g. child safety seat) provided for this purpose – risk of accident! Note
After a certain time, play can develop within the adjustment mechanism of the
backrest angle. Ð Adjusting the front seats
Fig. 35
Control elements at the seat
First read and observe the introductory information and safety warn-
ings on page 38.
Adjusting a seat in a forward/back direction
› Pull the lever 1
» Fig. 35 up and push the seat into the desired position.
› Release the lever 1
and push the seat until the lock clicks into place.
£
ä
38 Using the system
 1
1 2
2 3
3 4
4 5
5 6
6 7
7 8
8 9
9 10
10 11
11 12
12 13
13 14
14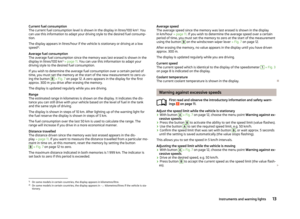 15
15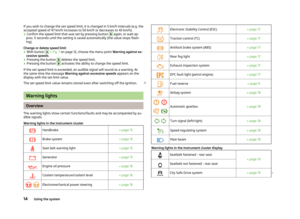 16
16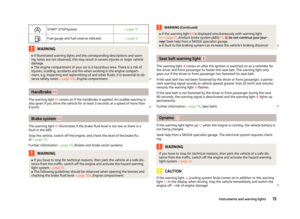 17
17 18
18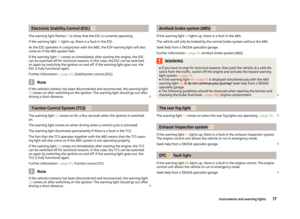 19
19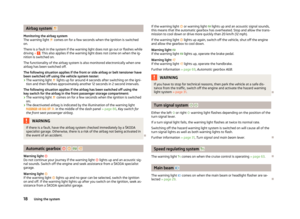 20
20 21
21 22
22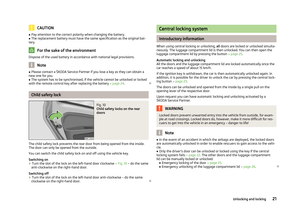 23
23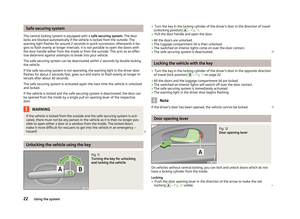 24
24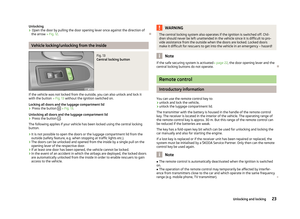 25
25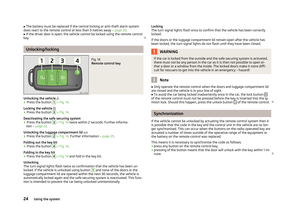 26
26 27
27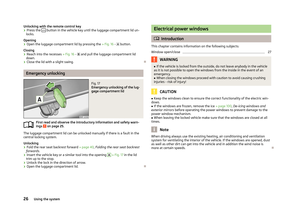 28
28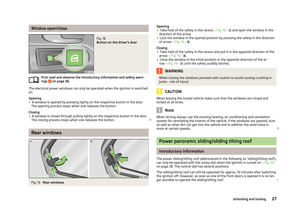 29
29 30
30 31
31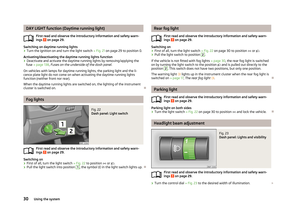 32
32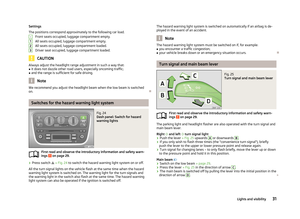 33
33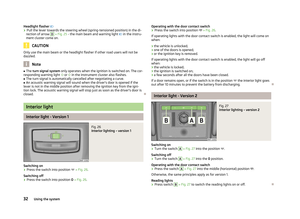 34
34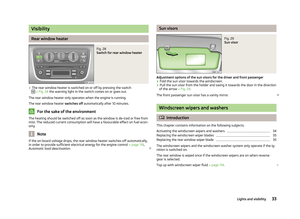 35
35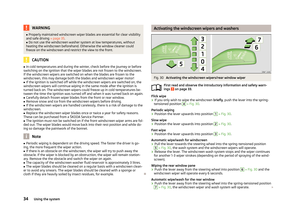 36
36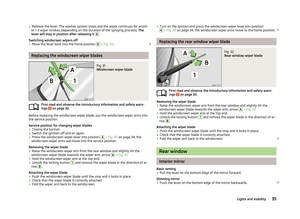 37
37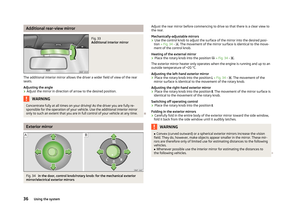 38
38 39
39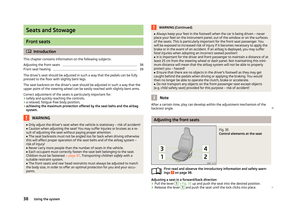 40
40 41
41 42
42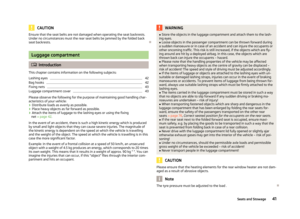 43
43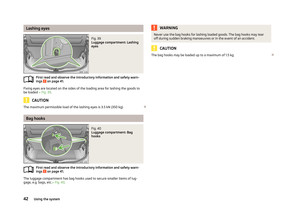 44
44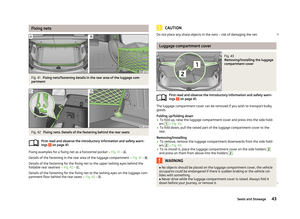 45
45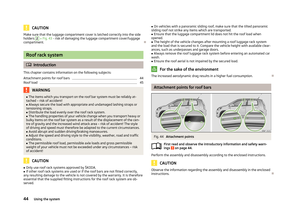 46
46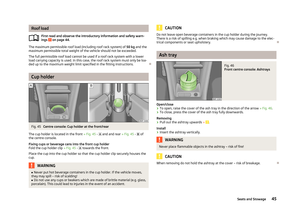 47
47 48
48 49
49 50
50 51
51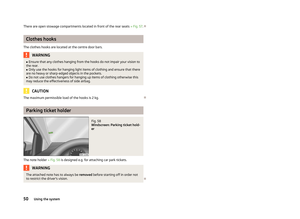 52
52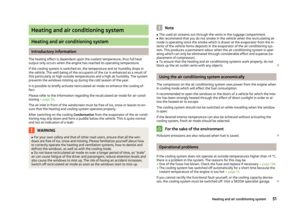 53
53 54
54 55
55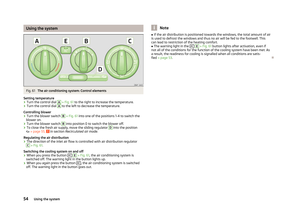 56
56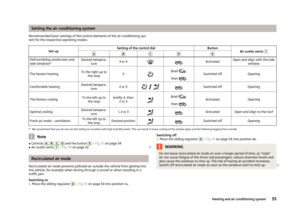 57
57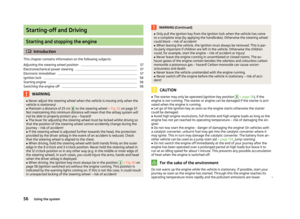 58
58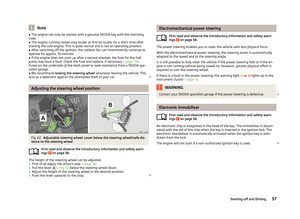 59
59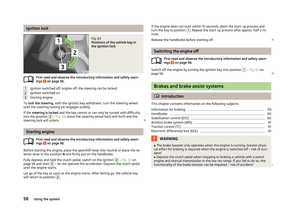 60
60 61
61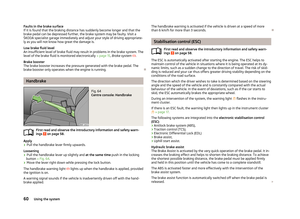 62
62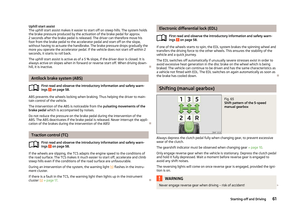 63
63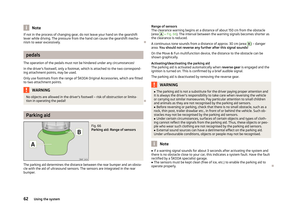 64
64 65
65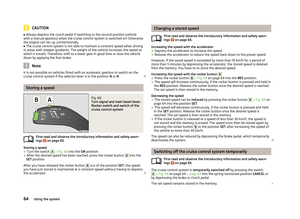 66
66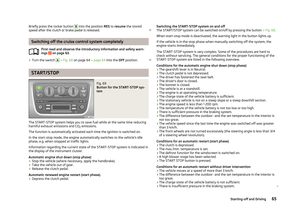 67
67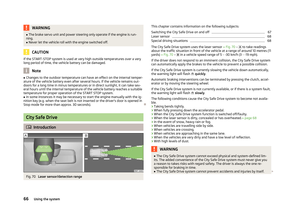 68
68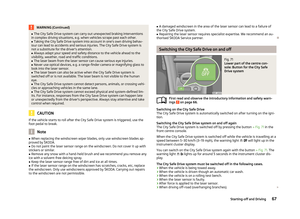 69
69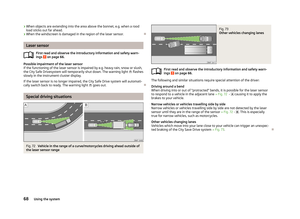 70
70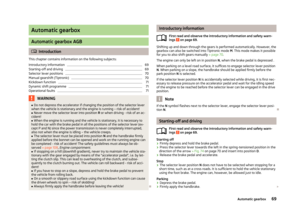 71
71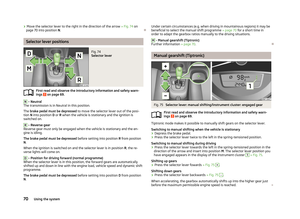 72
72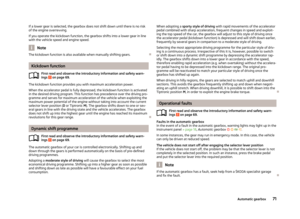 73
73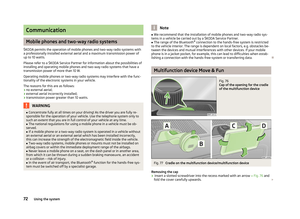 74
74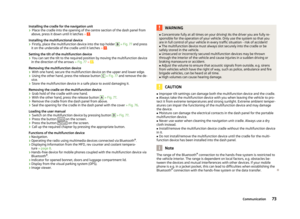 75
75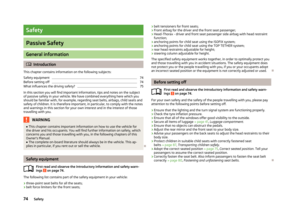 76
76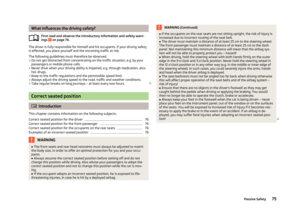 77
77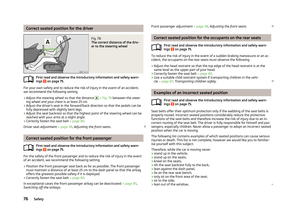 78
78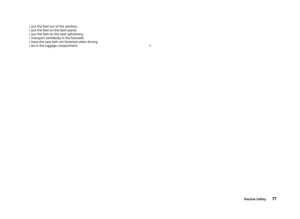 79
79 80
80 81
81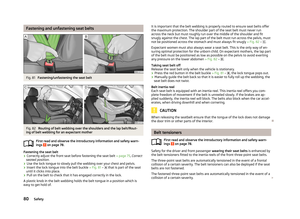 82
82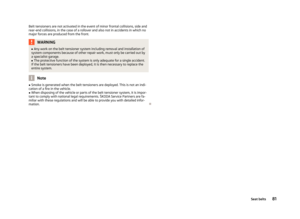 83
83 84
84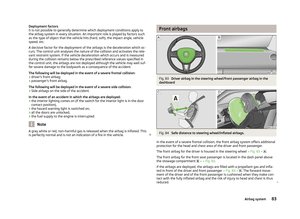 85
85 86
86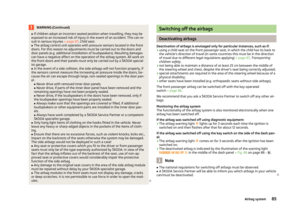 87
87 88
88 89
89 90
90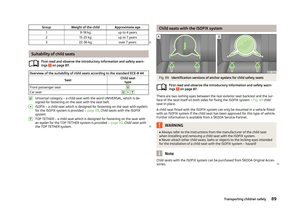 91
91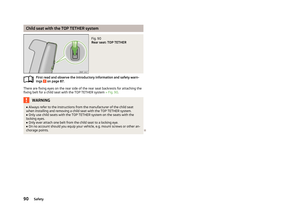 92
92 93
93 94
94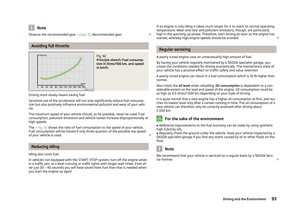 95
95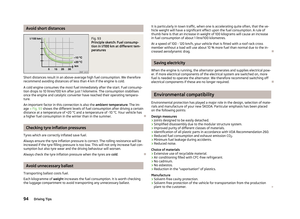 96
96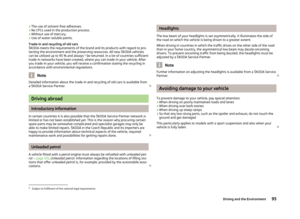 97
97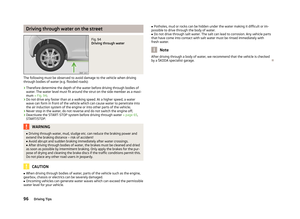 98
98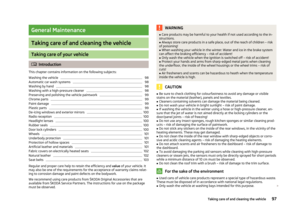 99
99 100
100 101
101 102
102 103
103 104
104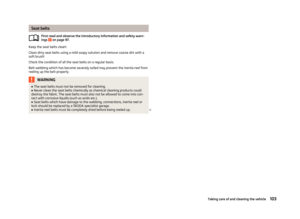 105
105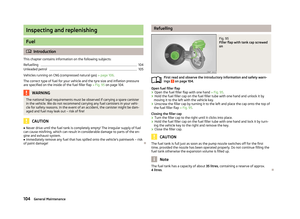 106
106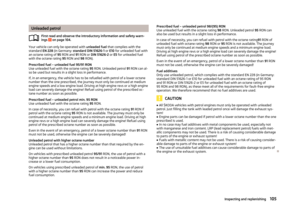 107
107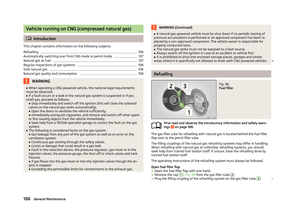 108
108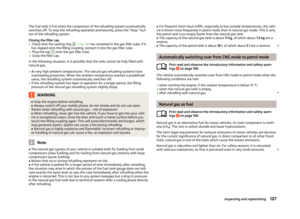 109
109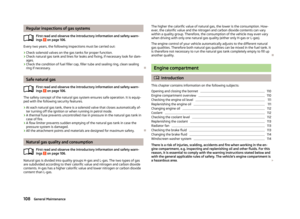 110
110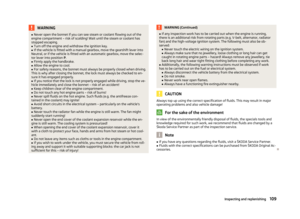 111
111 112
112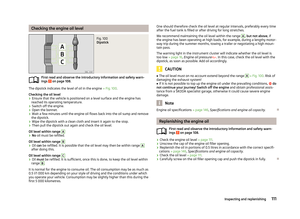 113
113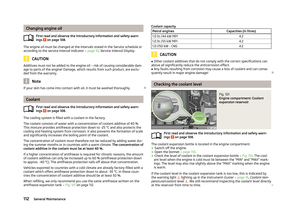 114
114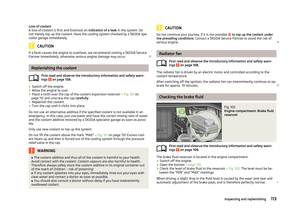 115
115 116
116 117
117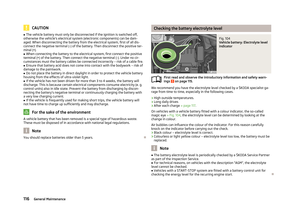 118
118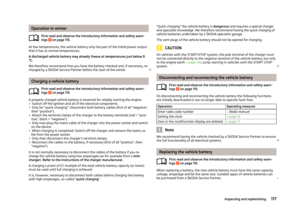 119
119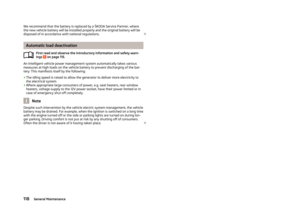 120
120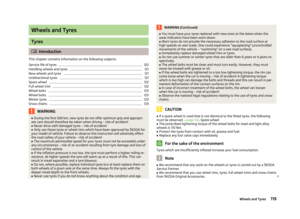 121
121 122
122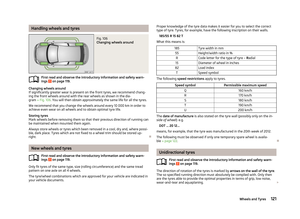 123
123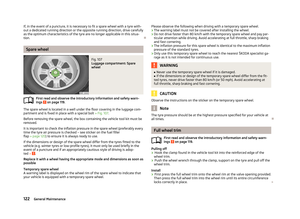 124
124 125
125 126
126 127
127 128
128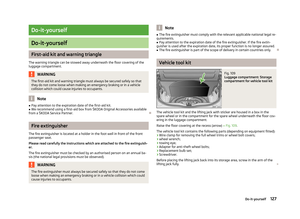 129
129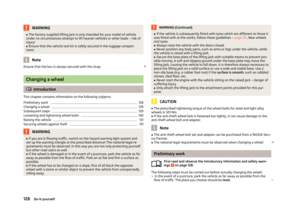 130
130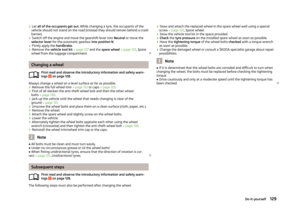 131
131 132
132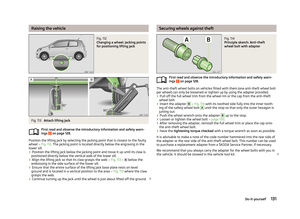 133
133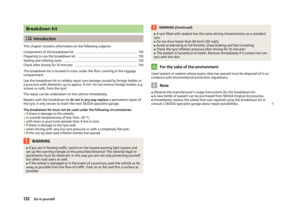 134
134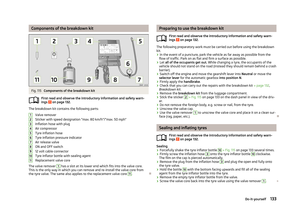 135
135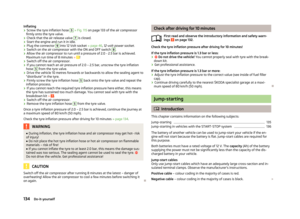 136
136 137
137 138
138 139
139 140
140 141
141 142
142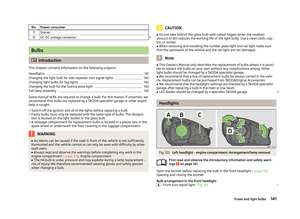 143
143 144
144 145
145 146
146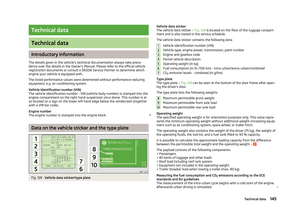 147
147 148
148 149
149 150
150 151
151 152
152 153
153 154
154 155
155 156
156