2012 MERCEDES-BENZ SL ROADSTER change time
[x] Cancel search: change timePage 450 of 637
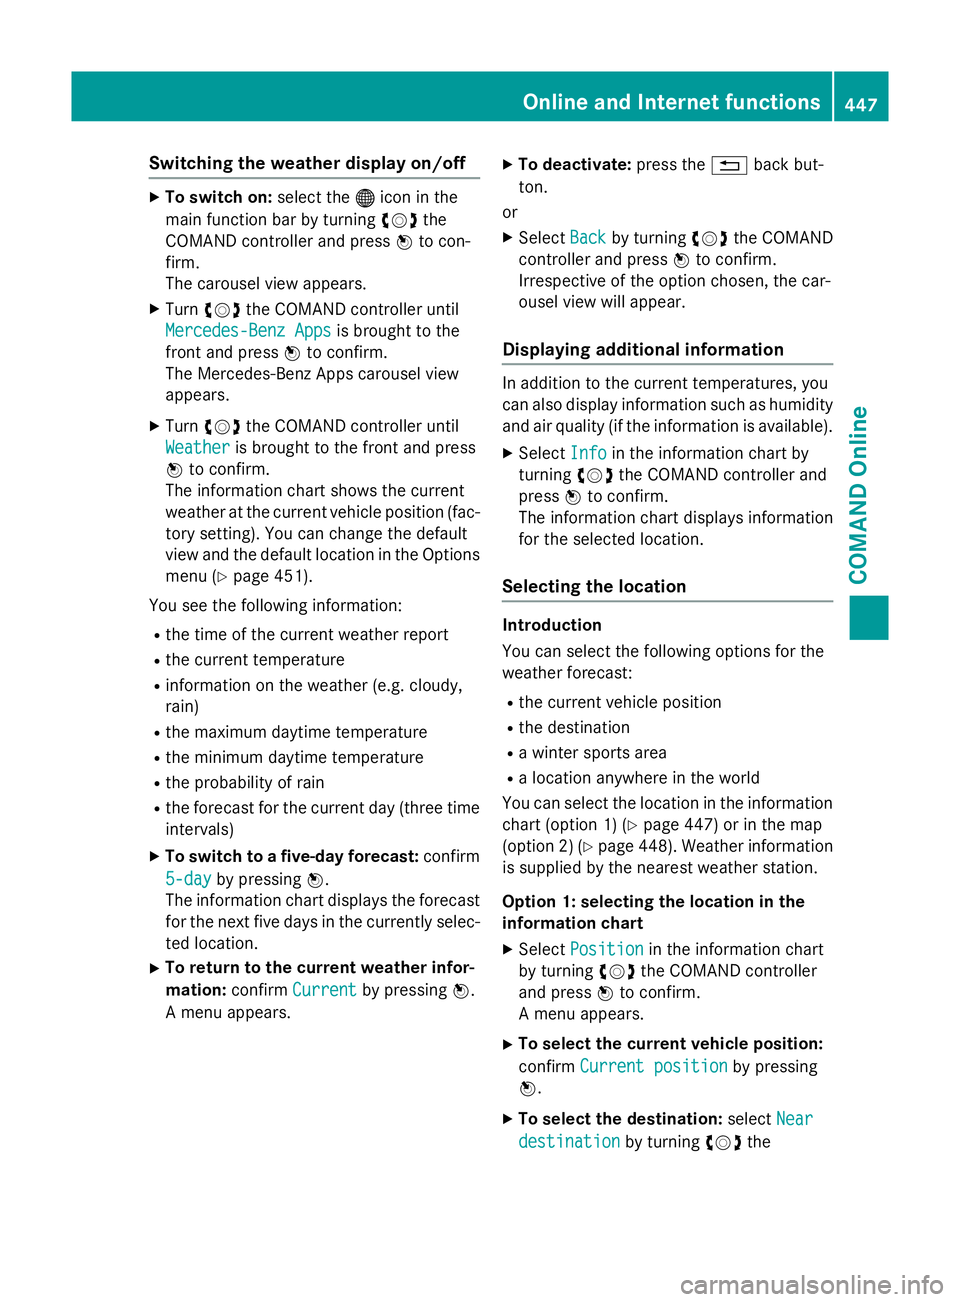
Switching the weather display on/off
X
To switch on: select the®icon in the
main function bar by turning cVdthe
COMAND controller and press Wto con-
firm.
The carousel view appears.
X Turn cVd the COMAND controller until
Mercedes-Benz Apps
Mercedes-Benz Apps is brought to the
front and press Wto confirm.
The Mercedes-Benz Apps carousel view
appears.
X Turn cVd the COMAND controller until
Weather
Weather is brought to the front and press
W to confirm.
The information chart shows the current
weather at the current vehicle position (fac- tory setting). You can change the default
view and the default location in the Options
menu (Y page 451).
You see the following information:
R the time of the current weather report
R the current temperature
R information on the weather (e.g. cloudy,
rain)
R the maximum daytime temperature
R the minimum daytime temperature
R the probability of rain
R the forecast for the current day (three time
intervals)
X To switch to a five-day forecast: confirm
5-day
5-day by pressing W.
The information chart displays the forecast for the next five days in the currently selec-
ted location.
X To return to the current weather infor-
mation: confirmCurrent
Current by pressing W.
A menu appears. X
To deactivate: press the%back but-
ton.
or
X Select Back Backby turning cVdthe COMAND
controller and press Wto confirm.
Irrespective of the option chosen, the car-
ousel view will appear.
Displaying additional information In addition to the current temperatures, you
can also display information such as humidity
and air quality (if the information is available).
X Select Info Infoin the information chart by
turning cVdthe COMAND controller and
press Wto confirm.
The information chart displays information
for the selected location.
Selecting the location Introduction
You can select the following options for the
weather forecast:
R the current vehicle position
R the destination
R a winter sports area
R a location anywhere in the world
You can select the location in the information
chart (option 1) (Y page 447) or in the map
(option 2) (Y page 448). Weather information
is supplied by the nearest weather station.
Option 1: selecting the location in the
information chart
X Select Position
Position in the information chart
by turning cVdthe COMAND controller
and press Wto confirm.
A menu appears.
X To select the current vehicle position:
confirm Current position Current position by pressing
W.
X To select the destination: selectNear
Near
destination
destination by turningcVdthe Online and Internet functions
447COMAND Online Z
Page 452 of 637
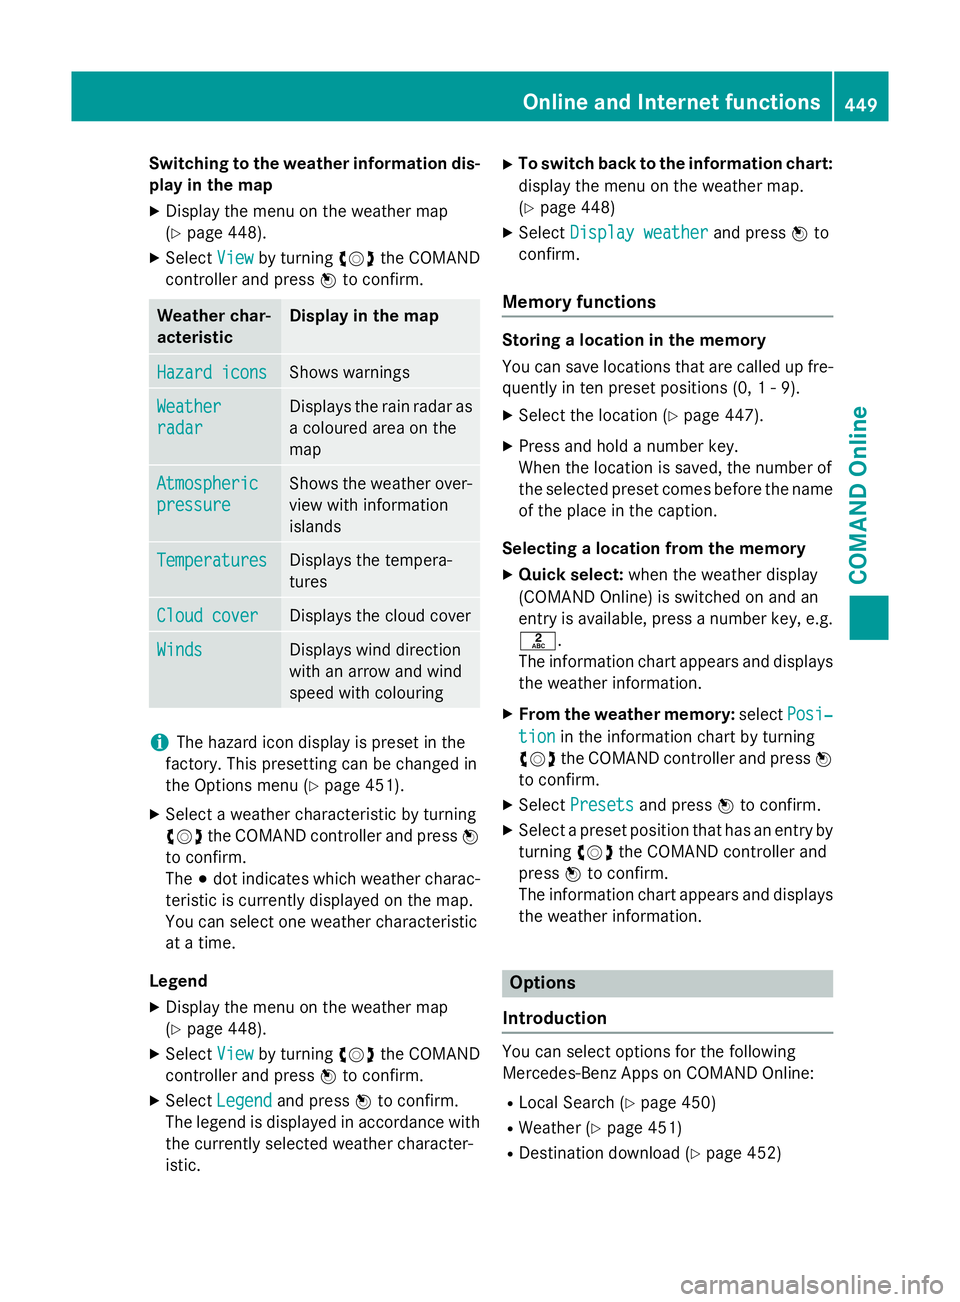
Switching to the weather information dis-
play in the map
X Display the menu on the weather map
(Y page 448).
X Select View Viewby turning cVdthe COMAND
controller and press Wto confirm. Weather char-
acteristic Display in the map
Hazard icons Hazard icons Shows warnings
Weather
Weather
radar radar Displays the rain radar as
a coloured area on the
map Atmospheric Atmospheric
pressure pressure Shows the weather over-
view with information
islands Temperatures Temperatures Displays the tempera-
tures
Cloud cover Cloud cover Displays the cloud cover
Winds
Winds Displays wind direction
with an arrow and wind
speed with colouring
i
The hazard icon display is preset in the
factory. This presetting can be changed in
the Options menu (Y page 451).
X Select a weather characteristic by turning
cVd the COMAND controller and press W
to confirm.
The #dot indicates which weather charac-
teristic is currently displayed on the map.
You can select one weather characteristic
at a time.
Legend
X Display the menu on the weather map
(Y page 448).
X Select View
View by turning cVdthe COMAND
controller and press Wto confirm.
X Select Legend Legend and press Wto confirm.
The legend is displayed in accordance with
the currently selected weather character-
istic. X
To switch back to the information chart:
display the menu on the weather map.
(Y page 448)
X Select Display weather
Display weather and pressWto
confirm.
Memory functions Storing a location in the memory
You can save locations that are called up fre-
quently in ten preset positions (0, 1 - 9).
X Select the location (Y page 447).
X Press and hold a number key.
When the location is saved, the number of
the selected preset comes before the name
of the place in the caption.
Selecting a location from the memory X Quick select: when the weather display
(COMAND Online) is switched on and an
entry is available, press a number key, e.g.
l.
The information chart appears and displays the weather information.
X From the weather memory: selectPosi‐
Posi‐
tion tion in the information chart by turning
cVd the COMAND controller and press W
to confirm.
X Select Presets
Presets and press Wto confirm.
X Select a preset position that has an entry by
turning cVdthe COMAND controller and
press Wto confirm.
The information chart appears and displays
the weather information. Options
Introduction You can select options for the following
Mercedes-Benz Apps on COMAND Online:
R Local Search (Y page 450)
R Weather (Y page 451)
R Destination download (Y page 452) Online and Internet functions
449COMAND Online Z
Page 464 of 637
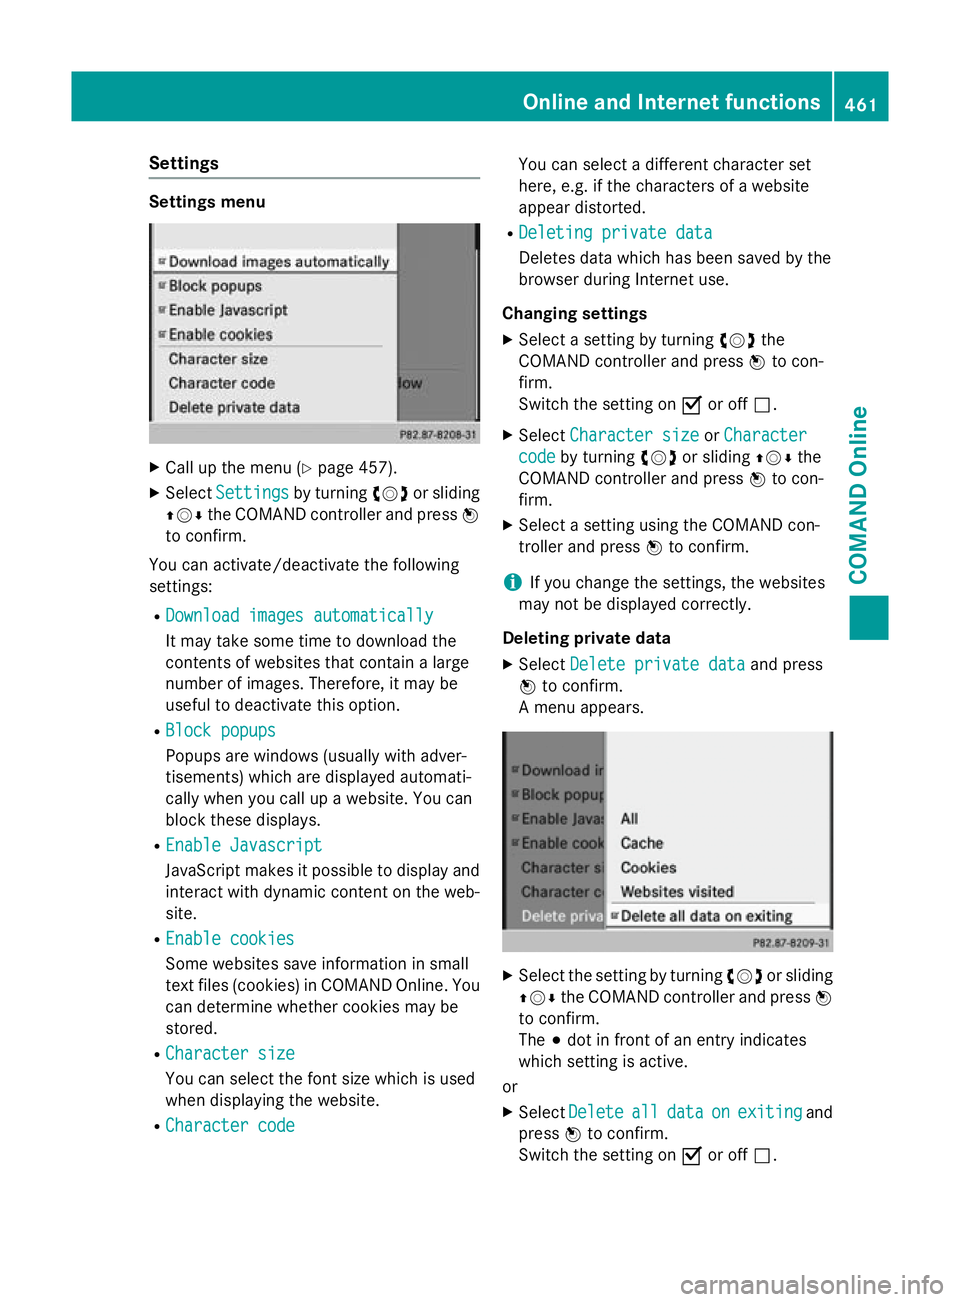
Settings
Settings menu
X
Call up the menu (Y page 457).
X Select Settings
Settings by turningcVdor sliding
ZVÆ the COMAND controller and press W
to confirm.
You can activate/deactivate the following
settings:
R Download images automatically
Download images automatically
It may take some time to download the
contents of websites that contain a large
number of images. Therefore, it may be
useful to deactivate this option.
R Block popups Block popups
Popups are windows (usually with adver-
tisements) which are displayed automati-
cally when you call up a website. You can
block these displays.
R Enable Javascript Enable Javascript
JavaScript makes it possible to display and
interact with dynamic content on the web-
site.
R Enable cookies
Enable cookies
Some websites save information in small
text files (cookies) in COMAND Online. You
can determine whether cookies may be
stored.
R Character size Character size
You can select the font size which is used
when displaying the website.
R Character code Character code You can select a different character set
here, e.g. if the characters of a website
appear distorted.
R Deleting private data Deleting private data
Deletes data which has been saved by the
browser during Internet use.
Changing settings
X Select a setting by turning cVdthe
COMAND controller and press Wto con-
firm.
Switch the setting on Oor off ª.
X Select Character size Character size orCharacter
Character
code
code by turning cVdor sliding ZVÆthe
COMAND controller and press Wto con-
firm.
X Select a setting using the COMAND con-
troller and press Wto confirm.
i If you change the settings, the websites
may not be displayed correctly.
Deleting private data X Select Delete private data Delete private data and press
W to confirm.
A menu appears. X
Select the setting by turning cVdor sliding
ZVÆ the COMAND controller and press W
to confirm.
The #dot in front of an entry indicates
which setting is active.
or
X Select Delete
Delete all alldata
data on
onexiting
exiting and
press Wto confirm.
Switch the setting on Oor off ª. Online and Internet functions
461COMAND Online Z
Page 468 of 637
selection window for the radio display is
active.
or
X Press the EorF button.
The needle jumps to the left or right.
X To make a selection in the station list:
select Radio
Radio by sliding VÆand turning
cVd the COMAND controller and press W
to confirm.
X Confirm Station list Station list by pressingW.
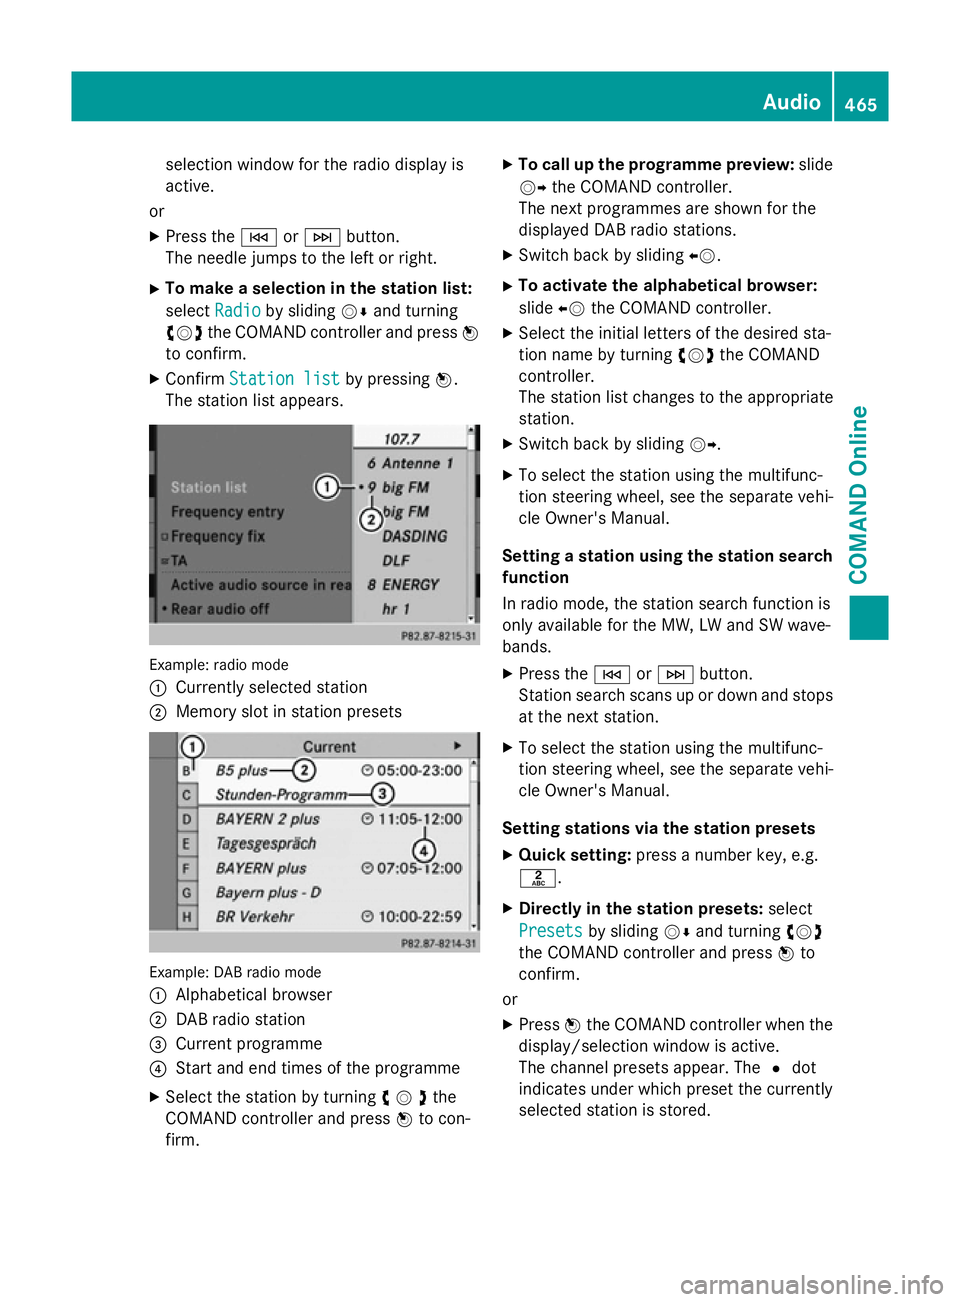
The station list appears. Example: radio mode
:
Currently selected station
; Memory slot in station presets Example: DAB radio mode
:
Alphabetical browser
; DAB radio station
= Current programme
? Start and end times of the programme
X Select the station by turning cVdthe
COMAND controller and press Wto con-
firm. X
To call up the programme preview: slide
VY the COMAND controller.
The next programmes are shown for the
displayed DAB radio stations.
X Switch back by sliding XV.
X To activate the alphabetical browser:
slide XVthe COMAND controller.
X Select the initial letters of the desired sta-
tion name by turning cVdthe COMAND
controller.
The station list changes to the appropriate
station.
X Switch back by sliding VY.
X To select the station using the multifunc-
tion steering wheel, see the separate vehi-
cle Owner's Manual.
Setting a station using the station search function
In radio mode, the station search function is
only available for the MW, LW and SW wave-
bands.
X Press the EorF button.
Station search scans up or down and stops
at the next station.
X To select the station using the multifunc-
tion steering wheel, see the separate vehi-
cle Owner's Manual.
Setting stations via the station presets X Quick setting: press a number key, e.g.
l.
X Directly in the station presets: select
Presets
Presets by sliding VÆand turning cVd
the COMAND controller and press Wto
confirm.
or X Press Wthe COMAND controller when the
display/selection window is active.
The channel presets appear. The #dot
indicates under which preset the currently
selected station is stored. Audio
465COMAND Online Z
Page 472 of 637
G
WARNING
Handling discs while driving will distract you
from traffic conditions. You could then lose
control of the vehicle. There is a risk of an
accident.
Handle discs only when the vehicle is station- ary.
Bear in mind that, at a speed of only 50 km/h, your vehicle is already covering a distance of
14 m per second. G
WARNING
SD memory cards are small parts. They can be swallowed and cause asphyxiation. This
poses an increased risk of injury or even fatal injury.
Keep SD memory cards out of the reach of
children. If an SD memory card is swallowed,
seek immediate medical attention.
Inserting/ejecting CDs/DVDs Notes
If the CD/DVD has a printed side, this must
face upwards when the CD/DVD is inserted.
If neither side is printed, the side to be played
should face downwards. CDs/DVDs with
copy protection may not be able to be played
by the system.
i If a medium contains other files in addi-
tion to music files, the loading time before
the first track starts to play may be longer.
Inserting a disc into the single DVD drive
X Press the 8button.
If there is a disc already inserted, it will be
ejected.
X Take the disc out of the slot.
X Insert a disc into the slot.
The disc is drawn in and playback starts if
the disc has been inserted correctly and it
is a permissible type. Ejecting a disc from the single DVD drive
X Press the 8button.
X Take the disc out of the slot.
If you do not take the disc out of the slot, it
is drawn in again automatically after a short
while and reloaded.
Inserting discs into the DVD changer
The DVD changer has a fixed magazine with
six trays. X To insert a CD/DVD into the magazine
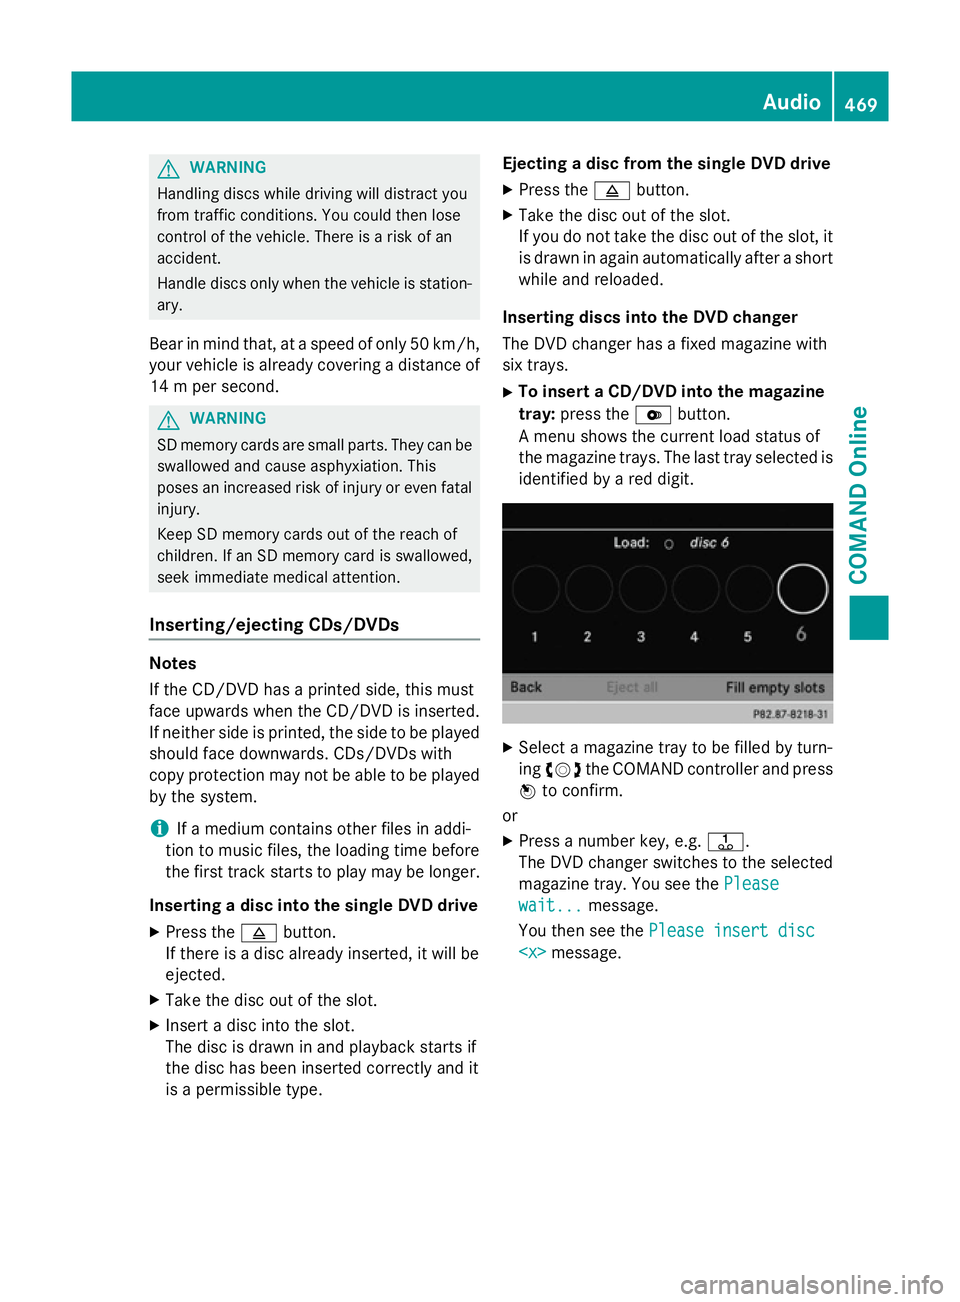
tray: press the Vbutton.
A menu shows the current load status of
the magazine trays. The last tray selected is identified by a red digit. X
Select a magazine tray to be filled by turn-
ing cVd the COMAND controller and press
W to confirm.
or
X Press a number key, e.g. j.
The DVD changer switches to the selected
magazine tray. You see the Please Please
wait...
wait... message.
You then see the Please insert disc Please insert disc
469COMAND Online Z
Page 473 of 637
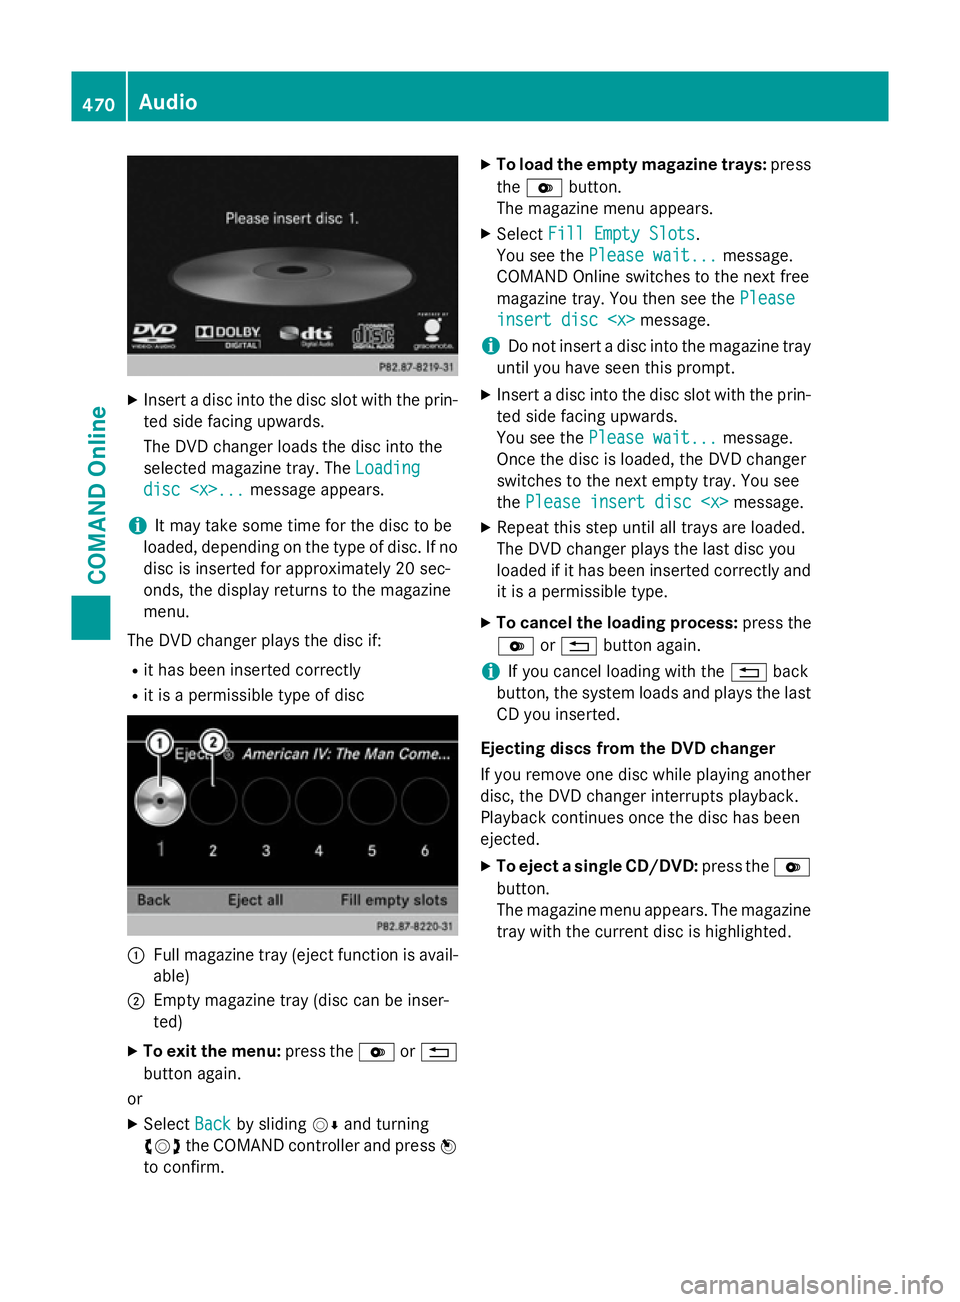
X
Insert a disc into the disc slot with the prin-
ted side facing upwards.
The DVD changer loads the disc into the
selected magazine tray. The Loading Loading
disc
disc
i It may take some time for the disc to be
loaded, depending on the type of disc. If no
disc is inserted for approximately 20 sec-
onds, the display returns to the magazine
menu.
The DVD changer plays the disc if: R it has been inserted correctly
R it is a permissible type of disc :
Full magazine tray (eject function is avail-
able)
; Empty magazine tray (disc can be inser-
ted)
X To exit the menu: press theVor%
button again.
or
X Select Back Backby sliding VÆand turning
cVd the COMAND controller and press W
to confirm. X
To load the empty magazine trays: press
the V button.
The magazine menu appears.
X Select Fill Empty Slots Fill Empty Slots.
You see the Please wait...
Please wait... message.
COMAND Online switches to the next free
magazine tray. You then see the Please Please
insert disc
insert disc
i Do not insert a disc into the magazine tray
until you have seen this prompt.
X Insert a disc into the disc slot with the prin-
ted side facing upwards.
You see the Please wait... Please wait... message.
Once the disc is loaded, the DVD changer
switches to the next empty tray. You see
the Please insert disc
X Repeat this step until all trays are loaded.
The DVD changer plays the last disc you
loaded if it has been inserted correctly and it is a permissible type.
X To cancel the loading process: press the
V or% button again.
i If you cancel loading with the
%back
button, the system loads and plays the last
CD you inserted.
Ejecting discs from the DVD changer
If you remove one disc while playing another
disc, the DVD changer interrupts playback.
Playback continues once the disc has been
ejected. X To eject a single CD/DVD: press theV
button.
The magazine menu appears. The magazine tray with the current disc is highlighted. 470
AudioCOMAND Online
Page 475 of 637
i
Not all memory cards available on the
market are designed for the temperatures
which may be reached in the vehicle.
If the SD memory card is no longer in use,
you should remove it from
COMAND Online. High temperatures can
damage the card.
Due to the wide range of SD memory cards
available on the market, playback cannot
be guaranteed for all brands of SD memory card.
The readable storage capacity depends on
the memory card used. You can obtain fur-
ther information at any Mercedes-Benz
Service Centre.
Inserting an SD memory card X Insert the memory card into the slot on the
control panel until it engages in place. The
side with the contacts must face down-
wards and point towards the slot.
If no MP3 tracks can be found, you will see
a message to this effect.
The first 100 MP3 tracks are loaded. The
first MP3 track is then played. An hourglass symbol indicates that further tracks are
being loaded in the background.
Ejecting an SD memory card
X Press the memory card.
The memory card is ejected.
X Remove the memory card from the slot.
Connecting a USB device The USB port is located in the stowage com-
partment in the centre console.
Electrical consumption at this connection
must not exceed a continuous current of
500 mA. If the electrical consumption is
higher, use a separate source to provide
power for the USB device (e.g.
12 V power supply).
X Connect the USB device (e.g. USB stick) to
the USB port.
If no MP3 tracks can be found, you will seea message to this effect. The first 100 MP3 tracks are loaded. The
first MP3 track is then played. An hourglass
symbol indicates that further tracks are
being loaded in the background.
i Due to the wide range of USB devices
available on the market, playback cannot
be guaranteed for all brands of USB device.
Information about suitable USB devices
can be obtained from a Mercedes-Benz
Service Centre.
MP3 players must support Media Transfer
Protocol (MTP). The MTP mode must be
active.
Switching to audio CD/audio DVD or
MP3 mode Inserting or connecting a data medium
X Insert CDs/DVDs (Y page 469)
or
X Inserting an SD memory card
(Y page 472)
or
X Connect a USB device (Y page 472).
COMAND loads the medium inserted and
starts to play it.
Switching on using the button X Press the hfunction button one or more
times.
By pressing the function button repeatedly,
you can change the operating mode in the
following order: R audio CD/DVD/video DVD/MP3 CD/MP3
DVD in the DVD changer or single DVD
drive (disc mode)
R memory card mode
R MUSIC REGISTER
R USB memory
R Media Interface or audio AUX mode
R operation with Bluetooth ®
audio
X Select an audio medium from the media list
(Y page 474). 472
AudioCOMAND Online
Page 476 of 637
Switching on with the audio menu
X Select Audio
Audioin the main function bar by
sliding ZVand turning cVdthe COMAND
controller and press Wto confirm.
The last active audio source is now activa-
ted.
You can activate a different audio source
using the audio menu.
X Select Audio Audioby sliding ZVand turning
cVdthe COMAND controller and press W
to confirm.
The audio menu appears.
X Select Disc
Disc, Memory Memory card
card,Music
Music Regis‐
Regis‐
ter
ter ,USB storage
USB storage orMedia Interface
Media Interface
and press Wto confirm.
This switches to the desired audio source.
X Select an audio medium from the media list
(Y page 474).
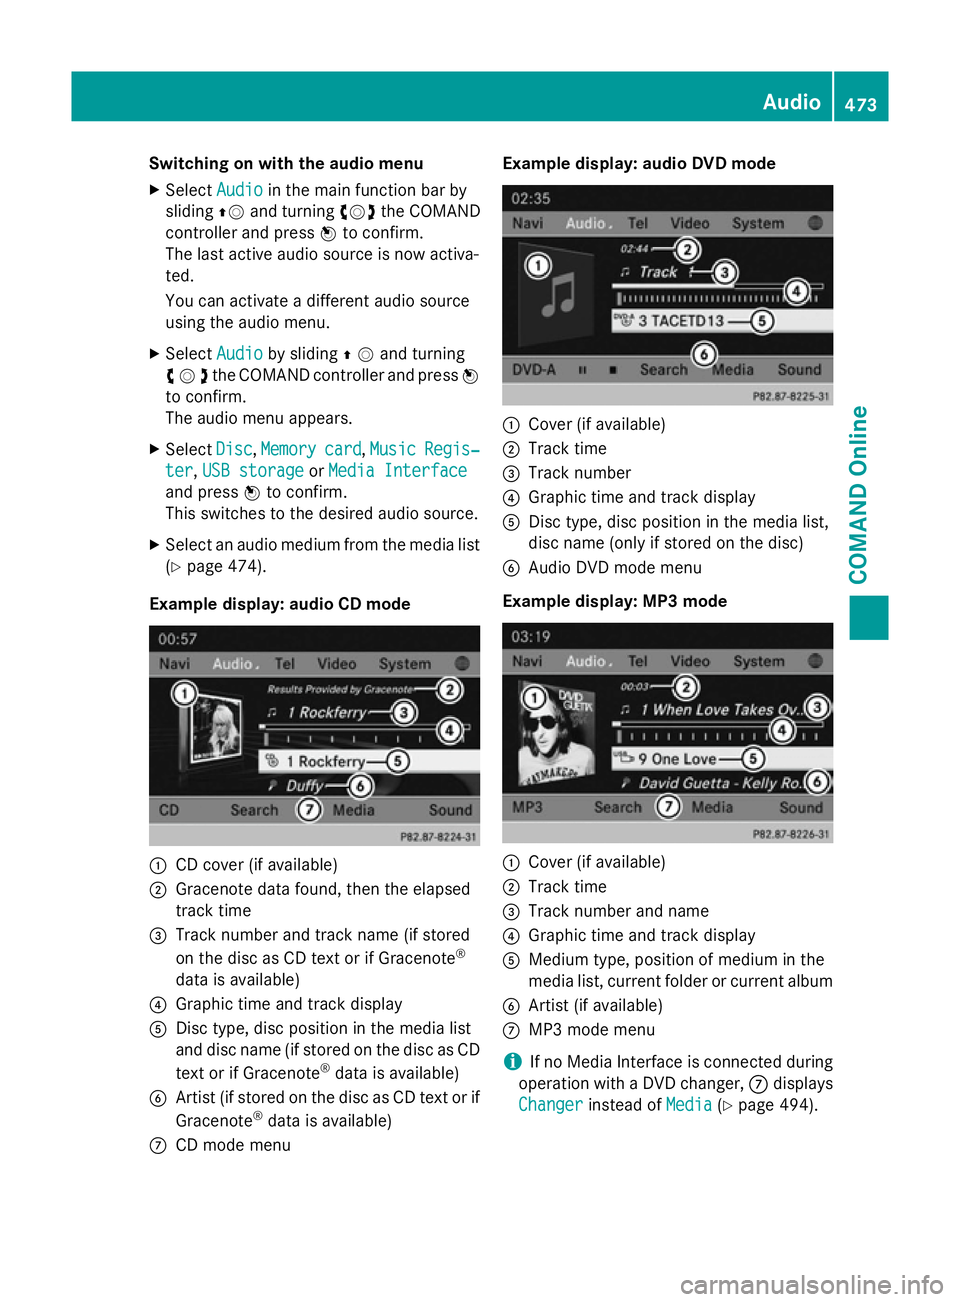
Example display: audio CD mode :
CD cover (if available)
; Gracenote data found, then the elapsed
track time
= Track number and track name (if stored
on the disc as CD text or if Gracenote ®
data is available)
? Graphic time and track display
A Disc type, disc position in the media list
and disc name (if stored on the disc as CD
text or if Gracenote ®
data is available)
B Artist (if stored on the disc as CD text or if
Gracenote ®
data is available)
C CD mode menu Example display: audio DVD mode
:
Cover (if available)
; Track time
= Track number
? Graphic time and track display
A Disc type, disc position in the media list,
disc name (only if stored on the disc)
B Audio DVD mode menu
Example display: MP3 mode :
Cover (if available)
; Track time
= Track number and name
? Graphic time and track display
A Medium type, position of medium in the
media list, current folder or current album
B Artist (if available)
C MP3 mode menu
i If no Media Interface is connected during
operation with a DVD changer, Cdisplays
Changer Changer instead of Media
Media(Ypage 494). Audio
473COMAND Online Z