2012 MERCEDES-BENZ SL ROADSTER ECO mode
[x] Cancel search: ECO modePage 69 of 637
Weight cat-
egories Front-
passenger
front air-
bag is not
disabled Front-
passenger
front air-
bag is disa-
bled
Category 0:
up to 10 kg X U, L
Category
0+: up to
13 kg
X U, L
Category I:
9 to 18 kg
UF, L U, L
Category II:
15 to 25 kg UF, L U, L
Category
III: 22 to
36 kg
UF, L U, L
Vehicles with automatic child seat recog-
nition in the front-passenger seat: a "Uni-
versal" category child restraint system with a
transponder for automatic child seat recog-
nition must be fitted when the front-
passenger front airbag is disabled. The
PASSENGER AIRBAG OFF indicator lamp
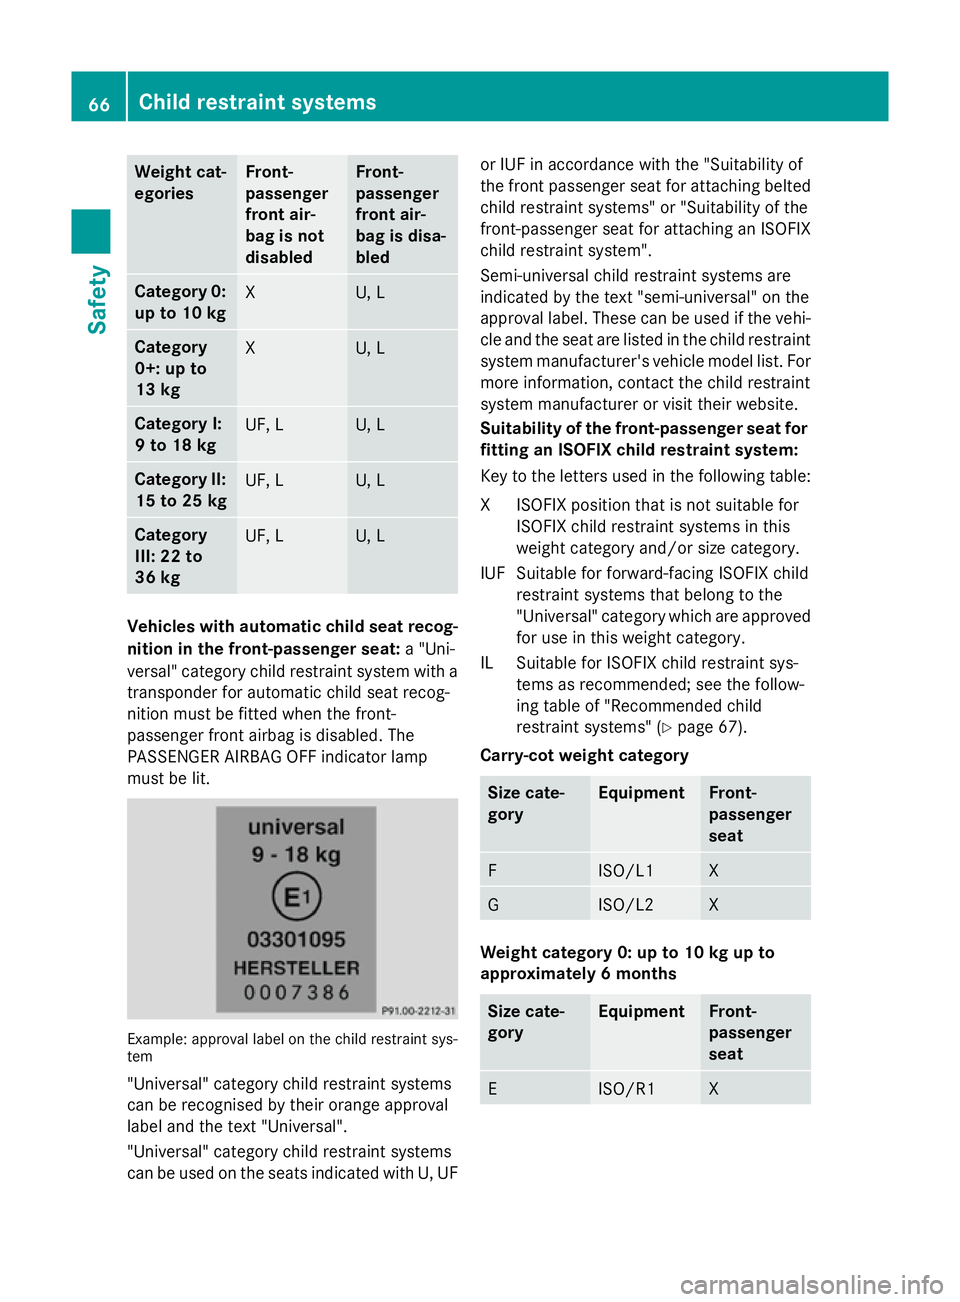
must be lit. Example: approval label on the child restraint sys-
tem
"Universal" category child restraint systems
can be recognised by their orange approval
label and the text "Universal".
"Universal" category child restraint systems
can be used on the seats indicated with U, UF or IUF in accordance with the "Suitability of
the front passenger seat for attaching belted
child restraint systems" or "Suitability of the
front-passenger seat for attaching an ISOFIX
child restraint system".
Semi-universal child restraint systems are
indicated by the text "semi-universal" on the
approval label. These can be used if the vehi-
cle and the seat are listed in the child restraint system manufacturer's vehicle model list. For
more information, contact the child restraint
system manufacturer or visit their website.
Suitability of the front-passenger seat for fitting an ISOFIX child restraint system:
Key to the letters used in the following table:
XI SOFIX position that is not suitable for
ISOFIX child restraint systems in this
weight category and/or size category.
IUF Suitable for forward-facing ISOFIX child restraint systems that belong to the
"Universal" category which are approvedfor use in this weight category.
IL Suitable for ISOFIX child restraint sys- tems as recommended; see the follow-
ing table of "Recommended child
restraint systems" (Y page 67).
Carry-cot weight category Size cate-
gory Equipment Front-
passenger
seat
F ISO/L1 X
G ISO/L2 X
Weight category 0: up to 10 kg up to
approximately 6 months
Size cate-
gory Equipment Front-
passenger
seat
E ISO/R1 X66
Child restraint systemsSafety
Page 129 of 637
Useful information
i This Owner's Manual describes all mod-
els, series and optional equipment for your
vehicle that were available at the time of
going to press. National variations are pos- sible. Note that your vehicle may not be
equipped with all of the functions descri-
bed. This is also the case for systems and
functions relevant to safety.
i Read the information on qualified special-
ist workshops: (Y page 34). Exterior lighting
General notes
For reasons of safety, Mercedes-Benz recom- mends that you drive with the lights switched
on even during the daytime. In some coun-
tries, operation of the headlamps varies due
to legal requirements and self-imposed obli-
gations. Driving abroad
Symmetrical dipped-beam headlamps If your journey takes you to countries where
vehicles are driven on the opposite side of the road to the country in which the vehicle is
registered, your headlamps must be switched
to symmetrical dipped beam. This prevents
oncoming traffic from being dazzled. Sym-
metrical lights do not illuminate as large an
area of the edge of the carriageway.
Convert the headlamps as close to the border as possible before driving in these countries
(Y page 240).
Asymmetrical dipped-beam headlamps Convert the headlamps back to asymmetrical
dipped beam as soon as possible after cross-
ing the border (Y page 240).
If the headlamps are converted to symmetri-
cal dipped beam, the "motorway mode" and "extended range foglamps" functions (Intelli-
gent Light System) are not available. Setting the exterior lighting
Setting options Exterior lighting can be set by:
R using the light switch
R using the combination switch
(Y page 129)
R using the on-board computer
(Y page 239)
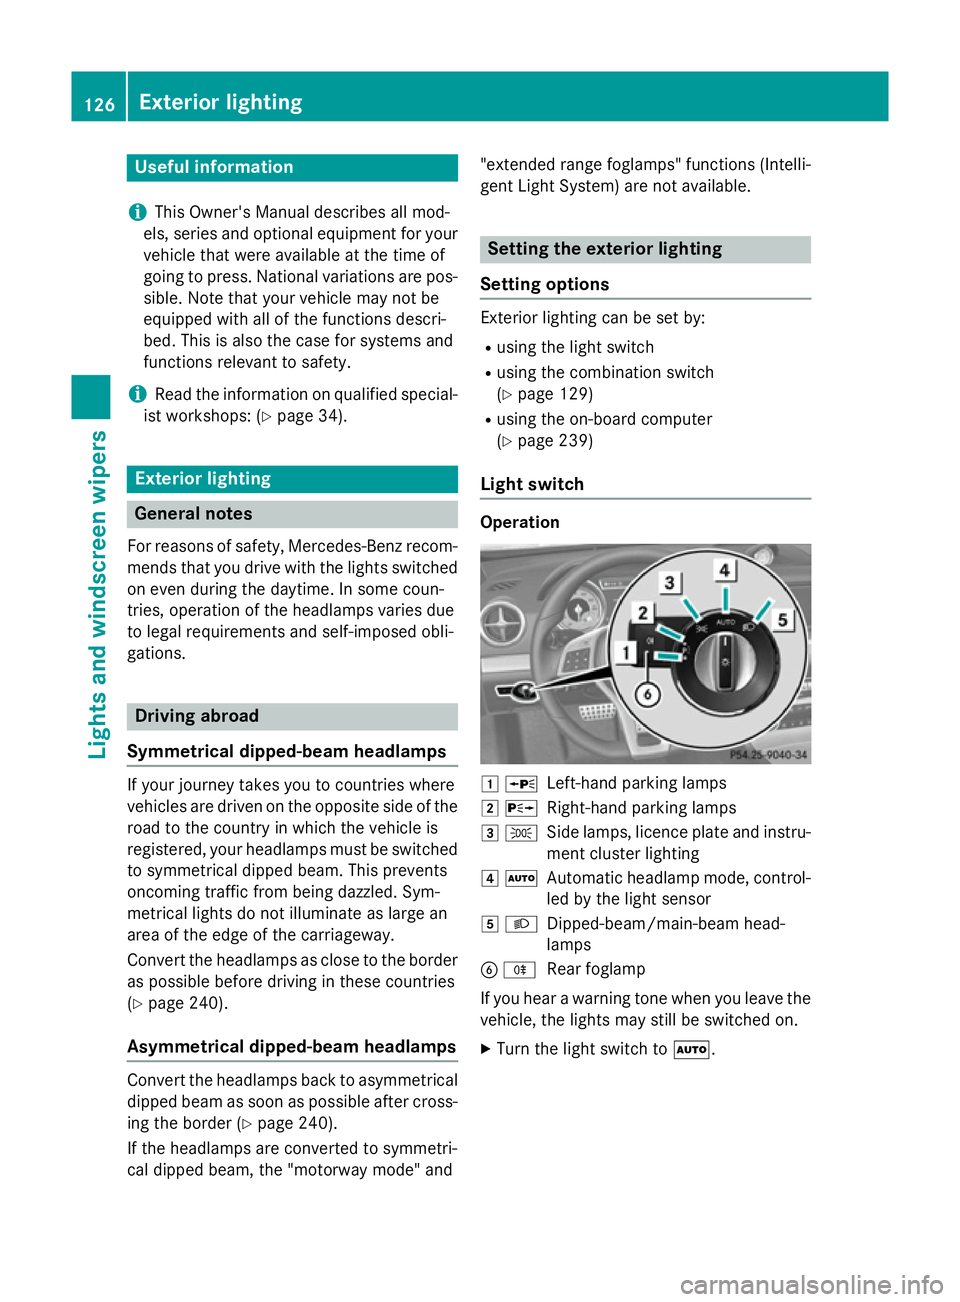
Light switch Operation
1
W
Left-hand parking lamps
2 X
Right-hand parking lamps
3 T
Side lamps, licence plate and instru-
ment cluster lighting
4 Ã
Automatic headlamp mode, control-
led by the light sensor
5 L
Dipped-beam/main-beam head-
lamps
B R
Rear foglamp
If you hear a warning tone when you leave the
vehicle, the lights may still be switched on.
X Turn the light switch to Ã.126
Exterior lightingLights and windscreen wipers
Page 134 of 637
The hazard warning lamps switch on auto-
matically if:
R an airbag is deployed or
R the vehicle decelerates rapidly from a
speed of above 70 km/h and comes to a
standstill
The hazard warning lamps switch off auto-
matically if the vehicle reaches a speed of
above 10 km/ha gain after a full brake appli-
cation.
i The hazard warning lamps continue to
operate even if the ignition is switched off. Headlamp cleaning system
The headlamps are cleaned automatically if
the "Wipe with washer fluid" function is oper-
ated five times (Y page 135) while the lights
are on and the engine is running. When you
switch off the ignition, the automatic head-
lamp cleaning system is reset and counting is
resumed from 0. Intelligent Light System
General notes The Intelligent Light System is a system that
adjusts the headlamps automatically to suit
the prevailing driving and weather conditions. It offers advanced functions for improved illu-
mination of the road surface, e.g. depending
on the vehicle speed or weather conditions.
The system includes the active light function, cornering light function, motorway mode and
extended range foglamps. The system is only
active when it is dark.
You can activate or deactivate the "Intelligent Light System" using the on-board computer
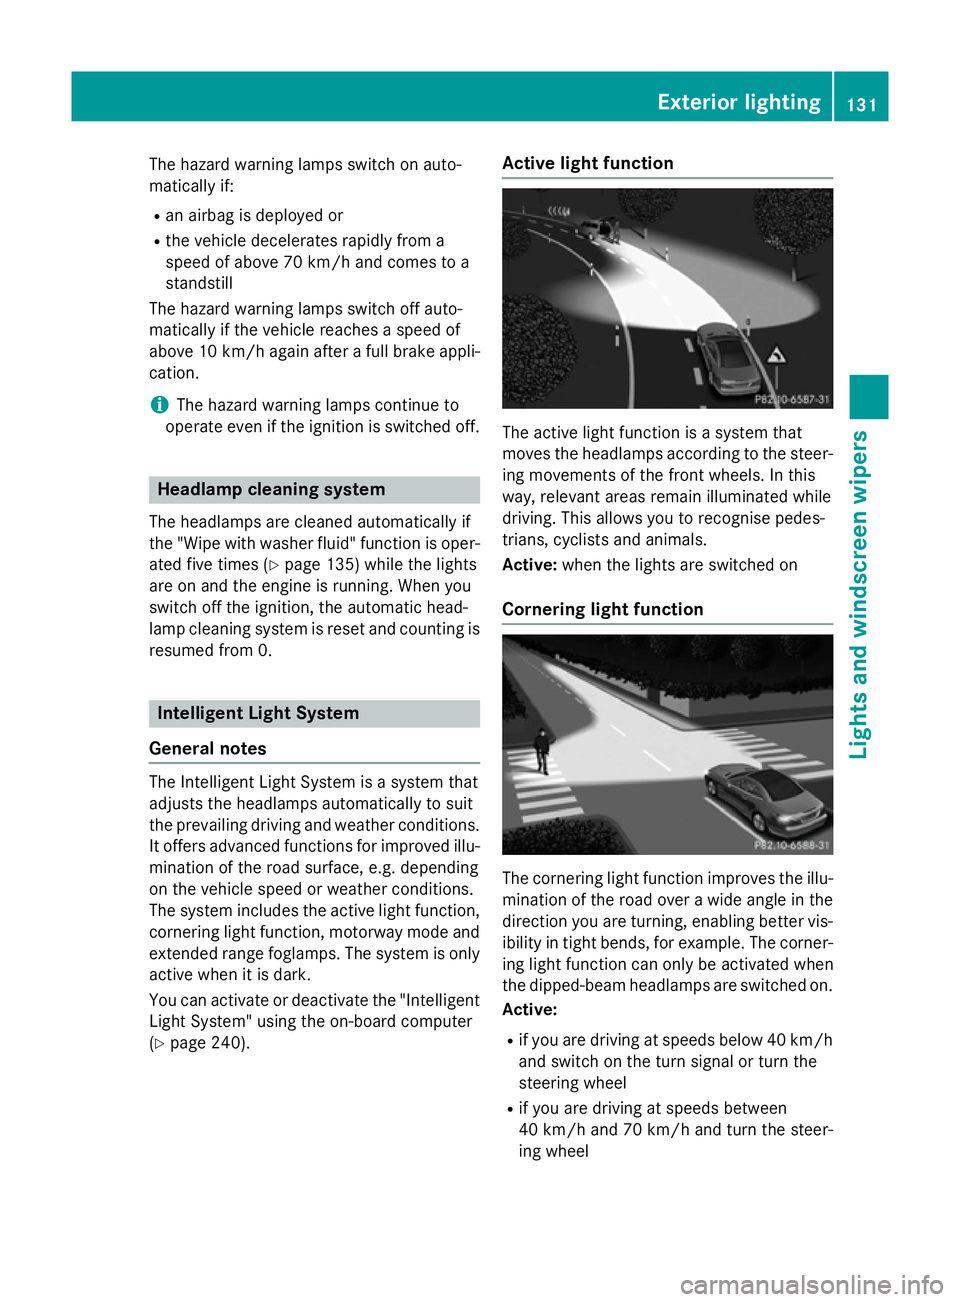
(Y page 240). Active light function
The active light function is a system that
moves the headlamps according to the steer-
ing movements of the front wheels. In this
way, relevant areas remain illuminated while
driving. This allows you to recognise pedes-
trians, cyclists and animals.
Active: when the lights are switched on
Cornering light function The cornering light function improves the illu-
mination of the road over a wide angle in the direction you are turning, enabling better vis-
ibility in tight bends, for example. The corner- ing light function can only be activated when
the dipped-beam headlamps are switched on.
Active:
R if you are driving at speeds below 40 km/h
and switch on the turn signal or turn the
steering wheel
R if you are driving at speeds between
40 km/ha nd 70 km/h and turn the steer-
ing wheel Exterior lighting
131Lights andwindscreen wipers Z
Page 135 of 637
Not active:
if you are driving at speeds above
40 km/h or switch off the turn signal or turn
the steering wheel to the straight-ahead posi- tion
The cornering lamp may remain lit for a short
time, but is automatically switched off after
no more than three minutes.
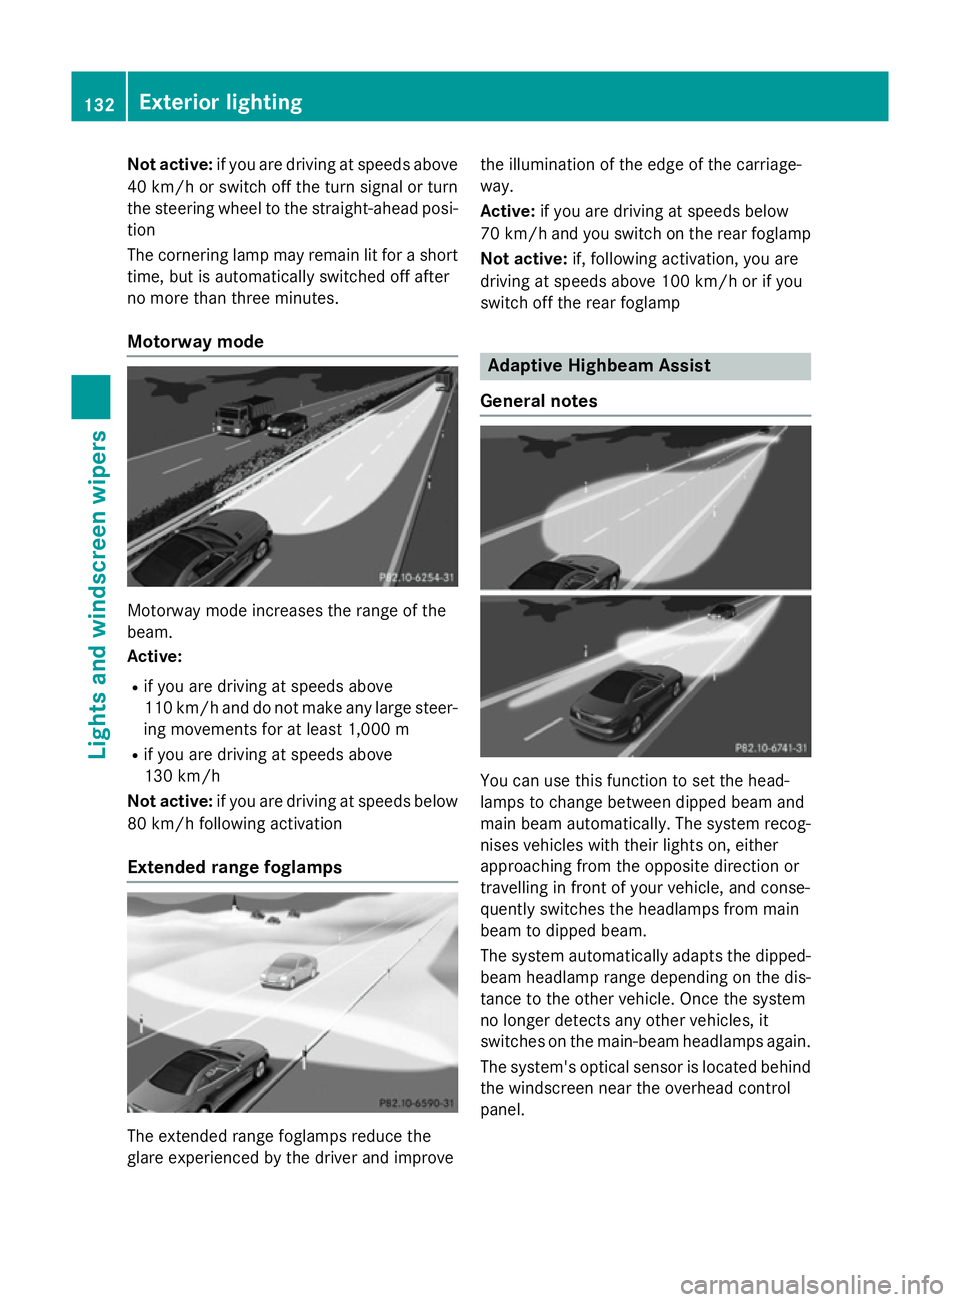
Motorway mode Motorway mode increases the range of the
beam.
Active:
R if you are driving at speeds above
110 km/h and do not make any large steer-
ing movements for at least 1,000 m
R if you are driving at speeds above
130 km/h
Not active: if you are driving at speeds below
80 km/h following activation
Extended range foglamps The extended range foglamps reduce the
glare experienced by the driver and improve the illumination of the edge of the carriage-
way.
Active:
if you are driving at speeds below
70 km/h and you switch on the rear foglamp
Not active: if, following activation, you are
driving at speeds above 100 km/h or if you
switch off the rear foglamp Adaptive Highbeam Assist
General notes You can use this function to set the head-
lamps to change between dipped beam and
main beam automatically. The system recog-
nises vehicles with their lights on, either
approaching from the opposite direction or
travelling in front of your vehicle, and conse-
quently switches the headlamps from main
beam to dipped beam.
The system automatically adapts the dipped-
beam headlamp range depending on the dis-
tance to the other vehicle. Once the system
no longer detects any other vehicles, it
switches on the main-beam headlamps again.
The system's optical sensor is located behind
the windscreen near the overhead control
panel. 132
Exterior lightingLights and
windscreen wipers
Page 143 of 637
Useful information
i This Owner's Manual describes all mod-
els, series and optional equipment for your
vehicle that were available at the time of
going to press. National variations are pos- sible. Note that your vehicle may not be
equipped with all of the functions descri-
bed. This is also the case for systems and
functions relevant to safety.
i Read the information on qualified special-
ist workshops: (Y page 34). Overview of climate control systems
Important safety notes
Observe the settings recommended on the
following pages. The windows could other-
wise mist up.
To prevent the windows from misting up:
R switch off climate control only briefly
R switch on air-recirculation mode only
briefly
R switch on the cooling with air dehumidifi-
cation function
R switch on the "demist windscreen" function
briefly, if required
Climate control regulates the temperature
and the humidity in the vehicle interior and
filters undesirable substances out of the air.
Climate control is only operational when the
engine is running. Optimum operation is only achieved when the side windows and the roof
are closed.
The residual heat function can only be acti-
vated or deactivated with the ignition
switched off (Y page 149).
i Ventilate the vehicle for a brief period
during warm weather. This will speed up the cooling process, and the desired vehicle
interior temperature will be reached more
quickly. i
An hour after the key has been removed,
it is possible that the residual heat function may be activated automatically in order to
dry the air-conditioning system. The vehicleis then ventilated for 30 minutes to dry the air-conditioning system. 140
Overview of climate control systemsClimate control
Page 144 of 637
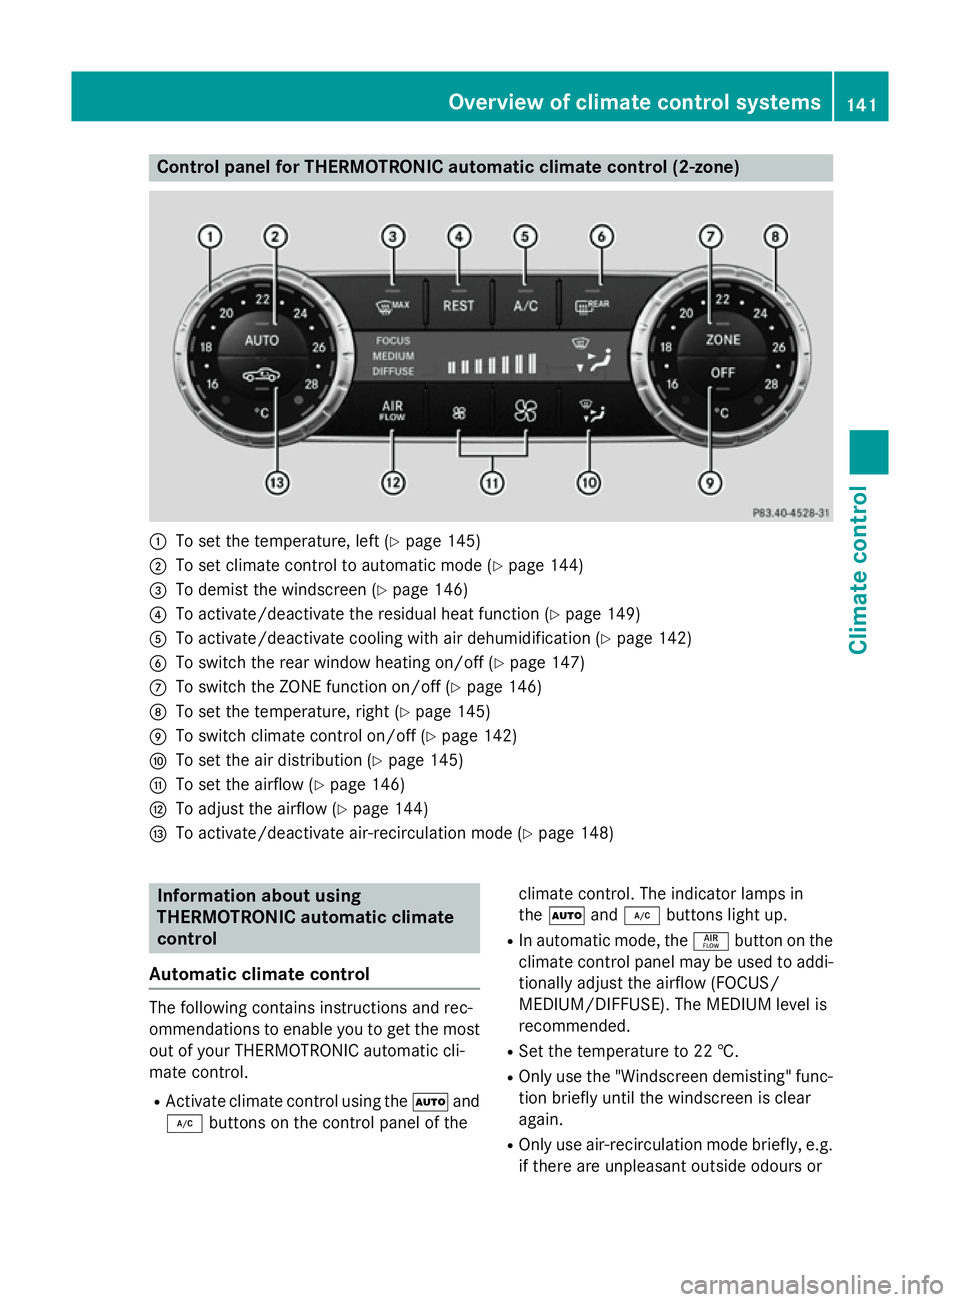
Control panel for THERMOTRONIC automatic climate control (2-zone)
:
To set the temperature, left (Y page 145)
; To set climate control to automatic mode (Y page 144)
= To demist the windscreen (Y page 146)
? To activate/deactivate the residual heat function (Y page 149)
A To activate/deactivate cooling with air dehumidification (Y page 142)
B To switch the rear window heating on/off (Y page 147)
C To switch the ZONE function on/off (Y page 146)
D To set the temperature, right (Y page 145)
E To switch climate control on/off (Y page 142)
F To set the air distribution (Y page 145)
G To set the airflow (Y page 146)
H To adjust the airflow (Y page 144)
I To activate/deactivate air-recirculation mode (Y page 148)Information about using
THERMOTRONIC automatic climate
control
Automatic climate control The following contains instructions and rec-
ommendations to enable you to get the most
out of your THERMOTRONIC automatic cli-
mate control.
R Activate climate control using the Ãand
¿ buttons on the control panel of the climate control. The indicator lamps in
the
à and¿ buttons light up.
R In automatic mode, the ñbutton on the
climate control panel may be used to addi- tionally adjust the airflow (FOCUS/
MEDIUM/DIFFUSE). The MEDIUM level is
recommended.
R Set the temperature to 22 †.
R Only use the "Windscreen demisting" func-
tion briefly until the windscreen is clear
again.
R Only use air-recirculation mode briefly, e.g.
if there are unpleasant outside odours or Overview of climate control systems
141Climate control
Page 145 of 637
when in a tunnel. The windows could oth-
erwise mist up, as no fresh air is drawn into
the vehicle in air-recirculation mode.
R Use the ZONE function to adopt the tem-
perature settings on the driver's side for
the front-passenger side as well. The indi-
cator lamp in the ábutton goes out.
R Use the residual heat function if you want to
heat or ventilate the vehicle interior when
the ignition is switched off. The residual
heat function can only be activated or deac- tivated with the ignition switched off.
R Vehicles with COMAND Online: if you
change the settings of the climate control
system, the climate status display appears for three seconds at the bottom of the
screen in the COMAND display. See also
the separate COMAND Online operating
instructions. You will see the current set-
tings of the various climate control func-
tions.
ECO start/stop function During automatic engine switch-off, the cli-
mate control only operates at a reduced capa- city. If you require full climate control capa-
city, the ECO start/stop function can be
deactivated by pressing the ECO button
(Y page 160). Operating the climate control system
Switching climate control on/off
General notes When the climate control is switched off, the
air supply and air circulation are also
switched off. The windows could mist up.
Therefore, only switch off climate control
briefly.
i Activate climate control primarily using
the à button (Y page 144). Activating/deactivating X
Turn the key to position 2in the ignition
lock (Y page 155).
X To switch on: press theÃbutton on
the control panel for the climate control.
The indicator lamp in the Ãbutton lights
up. Airflow and air distribution are set to
automatic mode.
or
X Press the ^button on the control panel
for the climate control.
The indicator lamp in the ^button goes
out. The previous settings are reactivated.
X To switch off: press the^button.
The indicator lamp in the ^button lights
up. Activating/deactivating the cooling
with air dehumidification function
General notes If you deactivate the "Cooling with air-dehu-
midification" function, the air inside the vehi-
cle will not be cooled. The air inside the vehi-
cle will also not be dehumidified. The win-
dows can mist up more quickly. Therefore,
only switch off cooling with air dehumidifica-
tion for a short period.
The "Cooling with air dehumidification" func-
tion is only available when the engine is run-
ning. The air inside the vehicle is cooled and
dehumidified according to the temperature
selected.
Condensation may drip from the underside of the vehicle when cooling mode is active. Thisis normal and not a sign that there is a mal-
function. 142
Operating the climate control systemClimate control
Page 151 of 637
Problems with the rear window heating
Problem
Possible causes/consequences and
M
MSolutions The rear window heat-
ing has switched off
prematurely or cannot
be activated. The on-board voltage is too low because too many electrical con-
sumers are switched on.
X Switch off any consumers that are not required, e.g. reading
lamps, interior lighting or the seat heating.
When the battery is sufficiently charged, the rear window heat-
ing can be activated again. Activating/deactivating air-recircula-
tion mode
General notes If you switch on air-recirculation mode, the
windows can mist up more quickly, in partic-
ular at low temperatures. Only use air-recir-
culation mode briefly to prevent the windows
misting up.
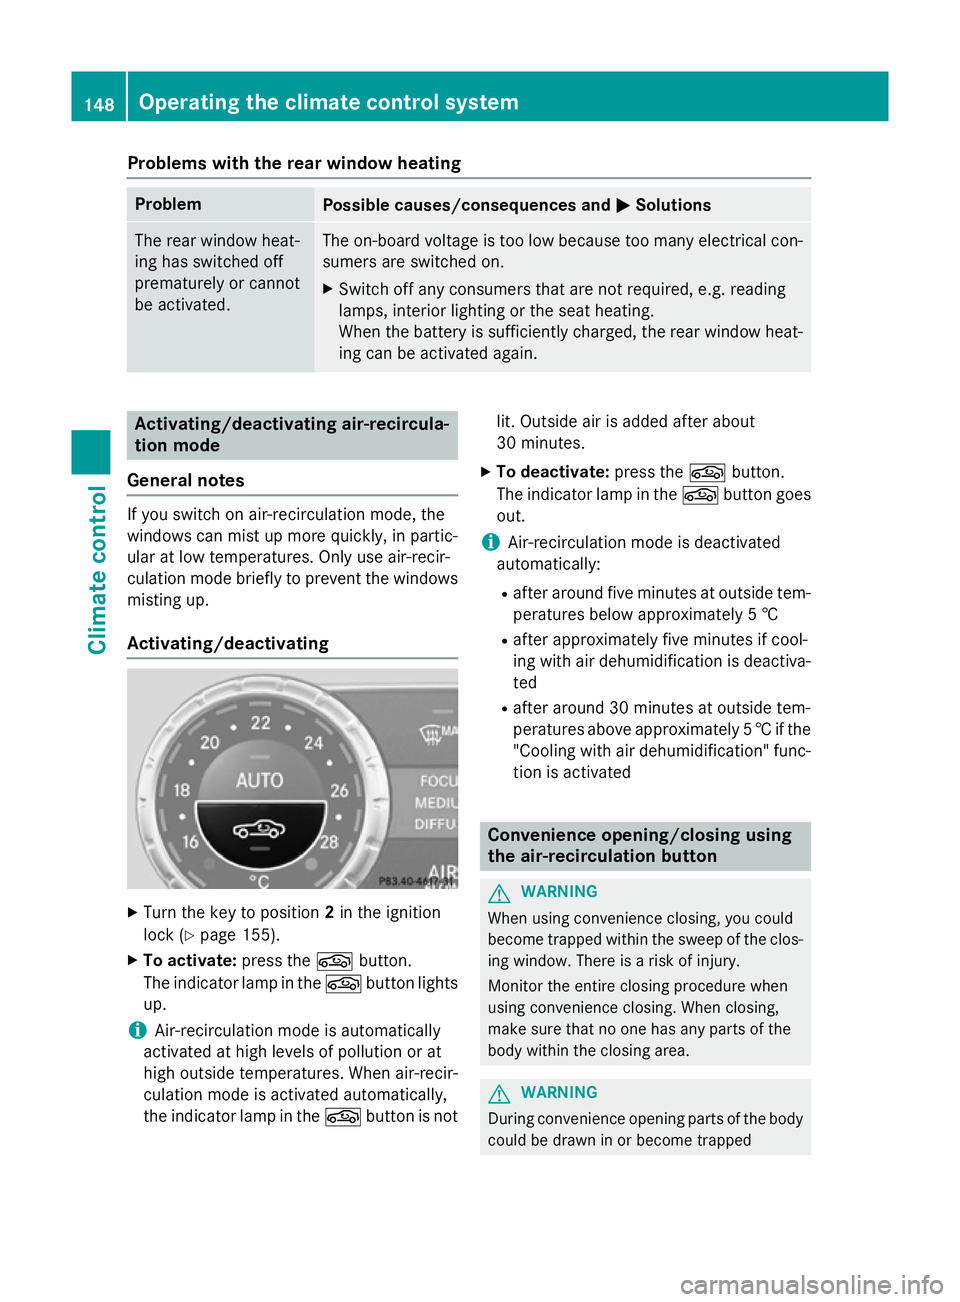
Activating/deactivating X
Turn the key to position 2in the ignition
lock (Y page 155).
X To activate: press thegbutton.
The indicator lamp in the gbutton lights
up.
i Air-recirculation mode is automatically
activated at high levels of pollution or at
high outside temperatures. When air-recir-
culation mode is activated automatically,
the indicator lamp in the gbutton is not lit. Outside air is added after about
30 minutes.
X To deactivate: press thegbutton.
The indicator lamp in the gbutton goes
out.
i Air-recirculation mode is deactivated
automatically:
R after around five minutes at outside tem-
peratures below approximately 5 †
R after approximately five minutes if cool-
ing with air dehumidification is deactiva- ted
R after around 30 minutes at outside tem-
peratures above approximately 5 †if the
"Cooling with air dehumidification" func- tion is activated Convenience opening/closing using
the air-recirculation button
G
WARNING
When using convenience closing, you could
become trapped within the sweep of the clos- ing window. There is a risk of injury.
Monitor the entire closing procedure when
using convenience closing. When closing,
make sure that no one has any parts of the
body within the closing area. G
WARNING
During convenience opening parts of the body could be drawn in or become trapped 148
Operating the climate control systemClimate control