2012 MERCEDES-BENZ SL ROADSTER fuses
[x] Cancel search: fusesPage 15 of 637
SPEEDTRONIC ............................... 193
Driving tips
AMG ceramic brakes ..................... 180
Aquaplaning ................................... 181
Automatic transmission ................. 167
Brakes ........................................... 179
DISTRONIC PLUS ........................... 192
Downhill gradient ........................... 179
Driving abroad ............................... 126
Driving in winter ............................. 181
Driving on flooded roads ................ 181
Driving on wet roads ...................... 181
Fuel ................................................ 178
General .......................................... 178
Icy road surfaces ........................... 181
Limited braking efficiency on sal-
ted roads ....................................... 180
New brake pads/linings ................ 180
Running-in tips ............................... 154
Snow chains .................................. 599
Symmetrical dipped beam ............. 126
Wet road surface ........................... 180
DTMF tone transmission .................. 398
DVD
Copy protection ............................. 480
Fast forward/fast rewind ............... 476
Inserting ........................................ 469
Inserting/loading (Rear Seat
Entertainment System) .................. 528
Notes on discs ............................... 480
Removing/ejecting (Rear Seat
Entertainment System) .................. 528
Selecting a media type .................. 474
Selecting a track ............................ 475
Sound settings (balance, bass,
treble) ............................................ 299
DVD audio
Operating (on-board computer) ..... 234
DVD video
Operating (on-board computer) ..... 235
Rear Seat Entertainment System ... 535
Dynamic route guidance/TMC
Displaying traffic reports ............... 365
Displays on the map ...................... 365
Introduction ................................... 364
Switching on/of f........................... 364 E
EASY-ENTRY feature Activating/deactivating ................. 243
Function/note s............................. 118
EASY-EXIT feature
Crash-responsive ........................... 119
Function/note s............................. 118
Switching on/of f........................... 243
EBD (electronic brake force distri-
bution)
Display message ............................ 250
Function/note s................................ 76
ECO display
Function/note s............................. 178
On-board computer ....................... 232
ECO start/stop function
Automatic engine start .................. 159
Automatic engine switch-off .......... 159
Deactivating/activating ................. 160
General information ....................... 159
Important safety notes .................. 158
Introduction ................................... 158
Electrical fuses
see Fuses
Electromagnetic compatibility
Declaration of conformity ................ 33
Electronic Stability Program
see ESP® (Electronic Stability Program)
Emergency call 999 or 112 .............. 389
Emergency key
Unlocking the driver's door .............. 93
Emergency key element
Function/note s................................ 86
Locking vehicle ................................ 93
Emergency release
Driver's door .................................... 93
Emergency spare wheel
General notes ................................ 614
Important safety notes .................. 614
Inflating the collapsible spare
wheel ............................................. 615
Removing ....................................... 615
Technical data ............................... 617
Emergency unlocking
Vehicle ............................................. 93
Engine
Display message ............................ 258 12
Index
Page 17 of 637
Preparing the vehicle ..................... 606
Raising the vehicle .........................6 07
Removing a wheel .......................... 608
Securing the vehicle against roll-
ing away ........................................ 606
Flat tyre
MOExtended tyres ......................... 578
Preparing the vehicle ..................... 578
TIREFIT kit ...................................... 579
see Emergency spare wheel
Floormat ............................................. 558
Foglamps
Extended range .............................. 132
Frequencies
Garage door opene r....................... 555
Mobile phone ................................. 620
Two-way radio ................................ 620
Frequency
Adjusting for radio stations ............ 466
Front-passenger seat
Adjusting from the driver's seat ..... 114
Fuel
Additives ........................................ 625
Consumption information .............. 625
Consumption statistics .................. 231
Displaying consumption ................. 317
Displaying the current consump-
tion ................................................ 232
Displaying the range ...................... 232
Driving tips .................................... 178
E10 ................................................ 624
Fuel gaug e....................................... 40
Grade (petrol) ................................ 624
Important safety notes .................. 623
Notes for AMG vehicles ................. 624
Problem (malfunction) ................... 175
Refuelling ....................................... 173
Tank content/reserve fue l............. 623
Fuel filler flap
Opening ......................................... 174
Fuel level
Calling up the range (on-board
computer) ...................................... 232
Gaug e.............................................. 40
Fuel reserve
see Fuel
Fuel tank
Capacity ........................................ 623 Problem (malfunction) ................... 175
Fuse allocation chart (vehicle tool
kit) ...................................................... 577
Fuses
Allocation chart ............................. 592
Before changing ............................. 592
Dashboard fuse box ....................... 592
Fuse box in the engine compart-
ment .............................................. 593
Fuse box in the rear compartment .. 593
Important safety notes .................. 592 G
Garage door opener Clearing the memory ..................... 555
Frequencies ................................... 555
General notes ................................ 553
Important safety notes .................. 553
Opening/closing the garage doo r..5 55
Programming (button in the rear-
view mirror) ................................... 553
Gear indicator (on-board com-
puter) ................................................. .244
Gearshift program
SETUP (on-board computer) .......... 244
Genuine Mercedes-Benz parts ........... 31
Glass roof (sunblind) ......................... 109
Glove compartment .......................... 544
Google™ local search
Importing a destination/route ....... 443
Popular searches ........................... 444
Search .......................................... .442
Search history ............................... 444
Selecting a search position ............ 442
Using as the destination ................ 443
GPS reception ................................... .323
Gracenote® Media Database ........... 476 H
Handbrake see Parking brake
HANDS-FREE ACCESS .......................... 96
Hands-free microphone, switching
on/off ................................................. 398 14
Index
Page 192 of 637
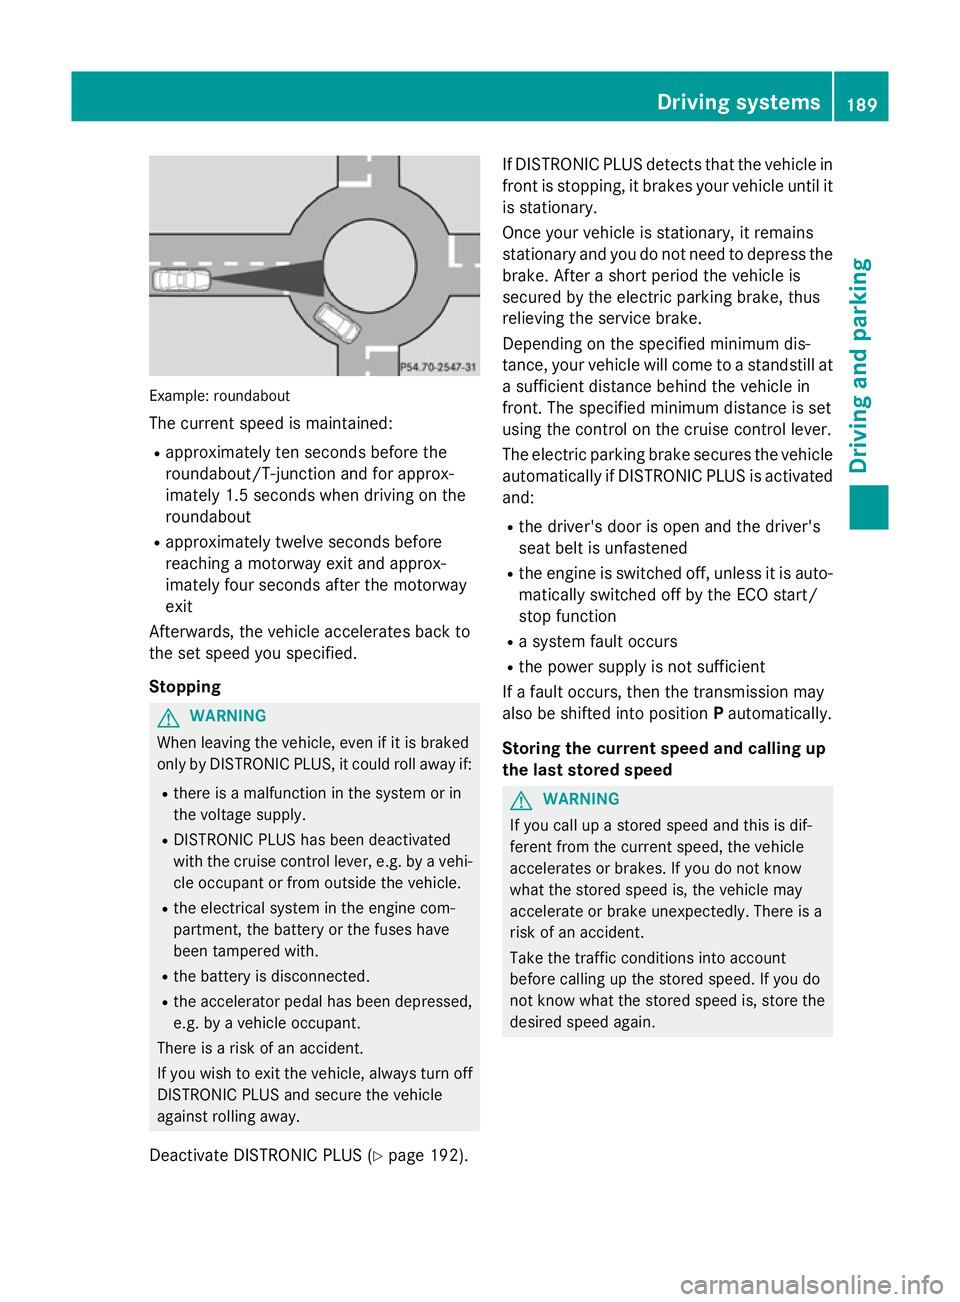
Example: roundabout
The current speed is maintained:
R approximately ten seconds before the
roundabout/T-junction and for approx-
imately 1.5 second s when driving onthe
roundabout
R approximately twelve seconds before
reaching a motorway exit and approx-
imately four seconds after the motorway
exit
Afterwards, the vehicle accelerates back to
the set speed you specified.
Stopping G
WARNING
When leaving the vehicle, even if it is braked
only by DISTRONIC PLUS, it could roll away if:
R there is a malfunction in the system or in
the voltage supply.
R DISTRONIC PLUS has been deactivated
with the cruise control lever, e.g. by a vehi-
cle occupant or from outside the vehicle.
R the electrical system in the engine com-
partment, the battery or the fuses have
been tampered with.
R the battery is disconnected.
R the accelerator pedal has been depressed,
e.g. by a vehicle occupant.
There is a risk of an accident.
If you wish to exit the vehicle, always turn off
DISTRONIC PLUS and secure the vehicle
against rolling away.
Deactivate DISTRONIC PLUS (Y page 192).If DISTRONIC PLUS detects that the vehicle in
front is stopping, it brakes your vehicle until it
is stationary.
Once your vehicle is stationary, it remains
stationary and you do not need to depress the
brake. After a short period the vehicle is
secured by the electric parking brake, thus
relieving the service brake.
Depending on the specified minimum dis-
tance, your vehicle will come to a standstill at a sufficient distance behind the vehicle in
front. The specified minimum distance is set
using the control on the cruise control lever.
The electric parking brake secures the vehicle
automatically if DISTRONIC PLUS is activated
and:
R the driver's door is open and the driver's
seat belt is unfastened
R the engine is switched off, unless it is auto-
matically switched off by the ECO start/
stop function
R a system fault occurs
R the power supply is not sufficient
If a fault occurs, then the transmission may
also be shifted into position Pautomatically.
Storing the current speed and calling up
the last stored speed G
WARNING
If you call up a stored speed and this is dif-
ferent from the current speed, the vehicle
accelerates or brakes. If you do not know
what the stored speed is, the vehicle may
accelerate or brake unexpectedly. There is a
risk of an accident.
Take the traffic conditions into account
before calling up the stored speed. If you do
not know what the stored speed is, store the
desired speed again. Driving systems
189Driving and parking Z
Page 200 of 637
Important safety notes
G
WARNING
When leaving the vehicle, it can still roll away despite being braked by the HOLD function if:
R there is a malfunction in the system or in
the voltage supply
R the HOLD function is deactivated by the
accelerator pedal being depressed, e.g. by
a vehicle occupant
R the electrical system in the engine com-
partment, the battery or the fuses are tam-
pered with
R the battery is disconnected
There is a risk of an accident.
Before leaving the vehicle, always deactivate
the HOLD function and secure the vehicle
from rolling away.
! If DISTRONIC PLUS or the HOLD function
is activated, the vehicle brakes automati-
cally in certain situations. To prevent dam-
age to the vehicle, deactivate DISTRONIC
PLUS and the HOLD function in the follow-
ing or other similar situations:
R when towing the vehicle
R in the car wash
Deactivate the HOLD function (Y page 197).
Activation conditions You can activate the HOLD function if:
R
the vehicle is stationary
R the engine is running or if it has been auto-
matically switched off by the ECO start/
stop function
R the driver's door is closed or if your seat
belt is fastened
R the electric parking brake is released
R the transmission is in position D,Ror N
R DISTRONIC PLUS is deactivated Activating the HOLD function X
Make sure that the activation conditions
are met.
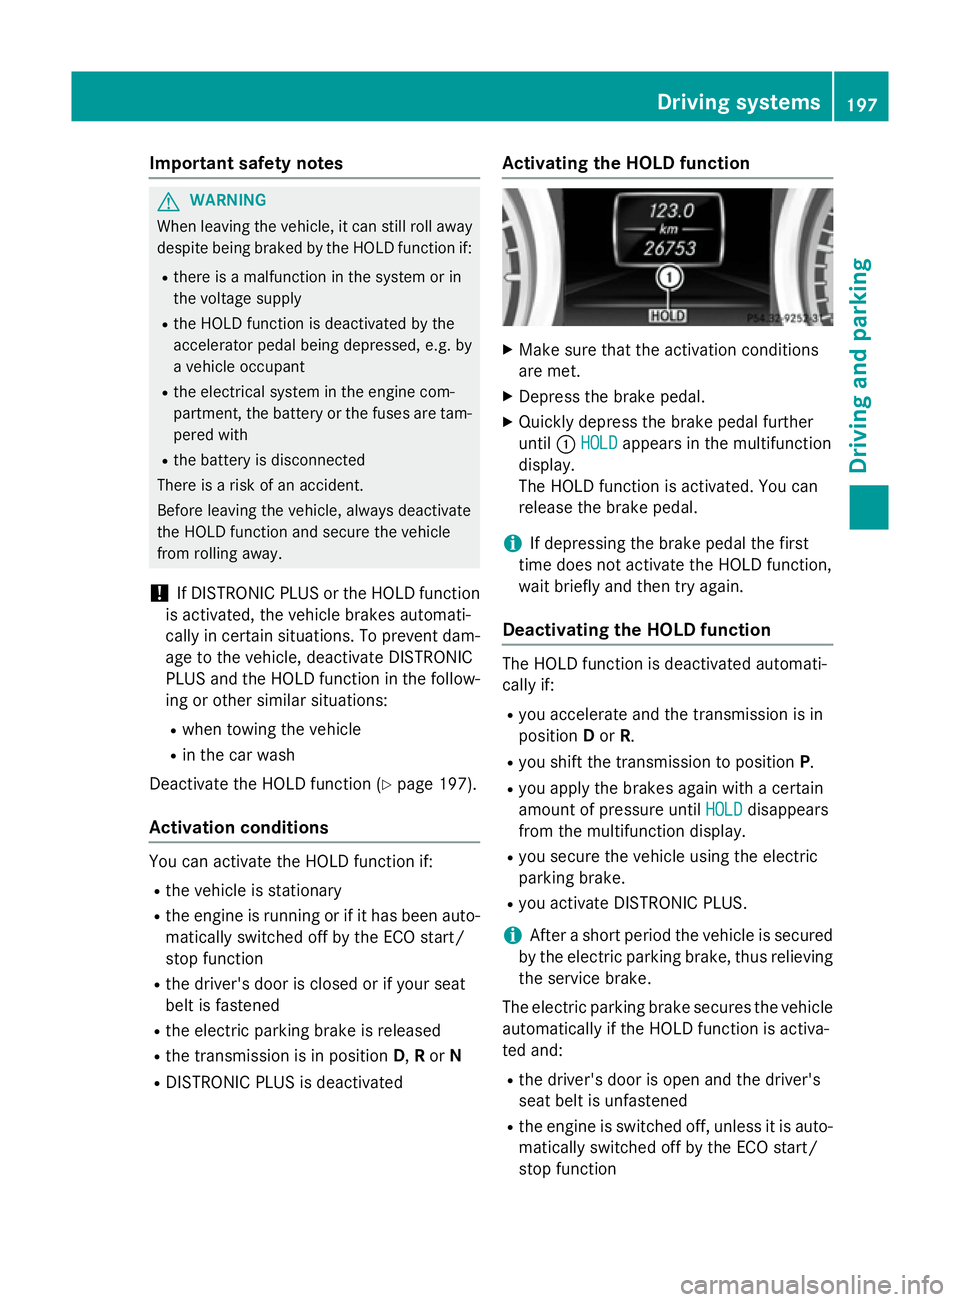
X Depress the brake pedal.
X Quickly depress the brake pedal further
until :HOLD HOLD appears in the multifunction
display.
The HOLD function is activated. You can
release the brake pedal.
i If depressing the brake pedal the first
time does not activate the HOLD function,
wait briefly and then try again.
Deactivating the HOLD function The HOLD function is deactivated automati-
cally if:
R you accelerate and the transmission is in
position Dor R.
R you shift the transmission to position P.
R you apply the brakes again with a certain
amount of pressure until HOLD HOLDdisappears
from the multifunction display.
R you secure the vehicle using the electric
parking brake.
R you activate DISTRONIC PLUS.
i After a short period the vehicle is secured
by the electric parking brake, thus relieving
the service brake.
The electric parking brake secures the vehicle
automatically if the HOLD function is activa-
ted and:
R the driver's door is open and the driver's
seat belt is unfastened
R the engine is switched off, unless it is auto-
matically switched off by the ECO start/
stop function Driving systems
197Driving and parking Z
Page 578 of 637
Useful information
............................576
Where will I find...? ...........................576
Flat tyre ............................................. 578
Battery (vehicle) ................................ 582
Jump-starting .................................... 586
Towing and tow-starting ..................588
Electrical fuses ................................. 592 575Breakdown assistance
Page 595 of 637
i
You can find information on "Jump-start-
ing" under (Y page 586). Electrical fuses
Important safety notes
G
WARNING
If you manipulate, bridge or replace a faulty
fuse with a fuse of a higher amperage, the
electric cables could be overloaded. This may result in a fire. There is a risk of an accident
and injury.
Always replace faulty fuses with specified new fuses of the correct amperage.
! Only use fuses that have been approved
for Mercedes-Benz vehicles and which
have the correct fuse rating for the system concerned. Otherwise, components or sys-
tems could be damaged.
The fuses in your vehicle serve to disconnect
faulty circuits. If a fuse blows, all the compo- nents on the circuit and their functions will
fail.
Blown fuses must be replaced with fuses of
the same rating, which you can recognise by
the colour and fuse rating. The fuse ratings
are listed in the fuse allocation chart.
If the newly inserted fuse also blows, have the
cause traced and rectified at a qualified spe-
cialist workshop, e.g. a Mercedes-Benz Ser-
vice Centre. Before replacing a fuse
X Secure the vehicle against rolling away
(Y page 175).
X Switch off all electrical consumers.
X Turn the key to position 0in the ignition
lock and remove it (Y page 155).
or
X On vehicles with KEYLESS-GO, make sure
the ignition is switched off (Y page 155).All indicator lamps in the instrument cluster
must be off.
The fuses are located in various fuse boxes:
R fuse box in the engine compartment on the
right-hand side of the vehicle, when viewed
in the direction of travel
R dashboard fuse box
R fuse box in the rear compartment on the
right-hand side of the vehicle, when viewed
in the direction of travel
The fuse allocation chart is located in the
vehicle tool kit in the stowage compartment
under the boot floor (Y page 577). Dashboard fuse box
i Observe the "Important safety notes" sec-
tion (Y page 592).
! Do not use a pointed object such as a
screwdriver to open the cover in the dash-
board. You could damage the dashboard or
the cover.
! Make sure that no moisture can enter the
fuse box when the cover is open.
! When closing the cover, make sure that it
is lying correctly on the fuse box. Moisture
seeping in or dirt could otherwise impair
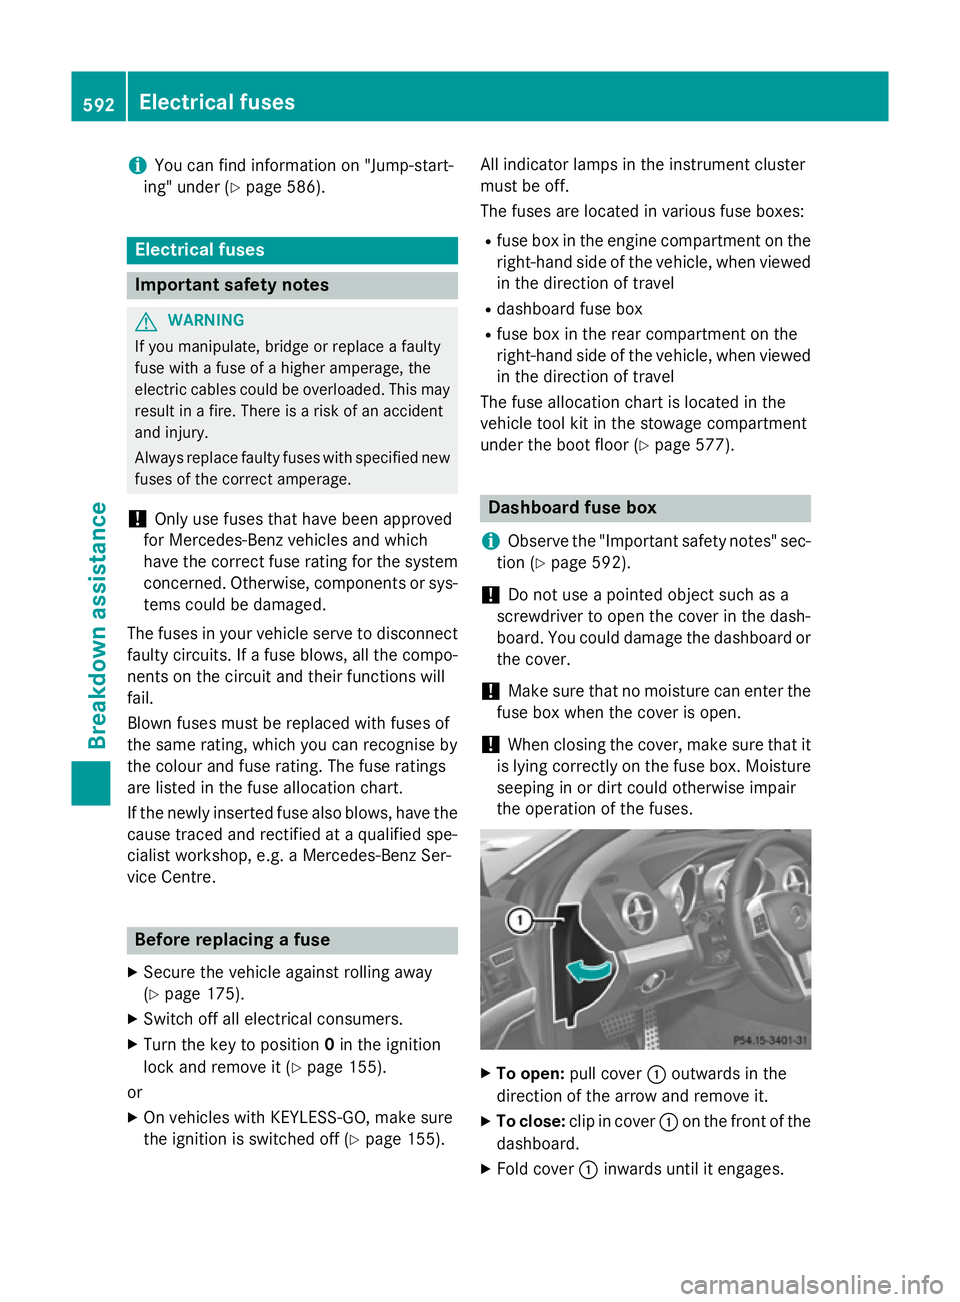
the operation of the fuses. X
To open: pull cover :outwards in the
direction of the arrow and remove it.
X To close: clip in cover :on the front of the
dashboard.
X Fold cover :inwards until it engages. 592
Electrical fusesBreakdown assistance
Page 596 of 637
Fuse box in the engine compartment
i Observe the "Important safety notes" sec-
tion (Y page 592). G
WARNING
When the bonnet is open, and the windscreen wipers are set in motion, you can be injured by
the wiper linkage. There is a risk of injury.
Always switch off the windscreen wipers and
the ignition before opening the bonnet.
! Make sure that no moisture can enter the
fuse box when the cover is open.
! When closing the cover, make sure that it
is lying correctly on the fuse box. Moisture
seeping in or dirt could otherwise impair
the operation of the fuses.
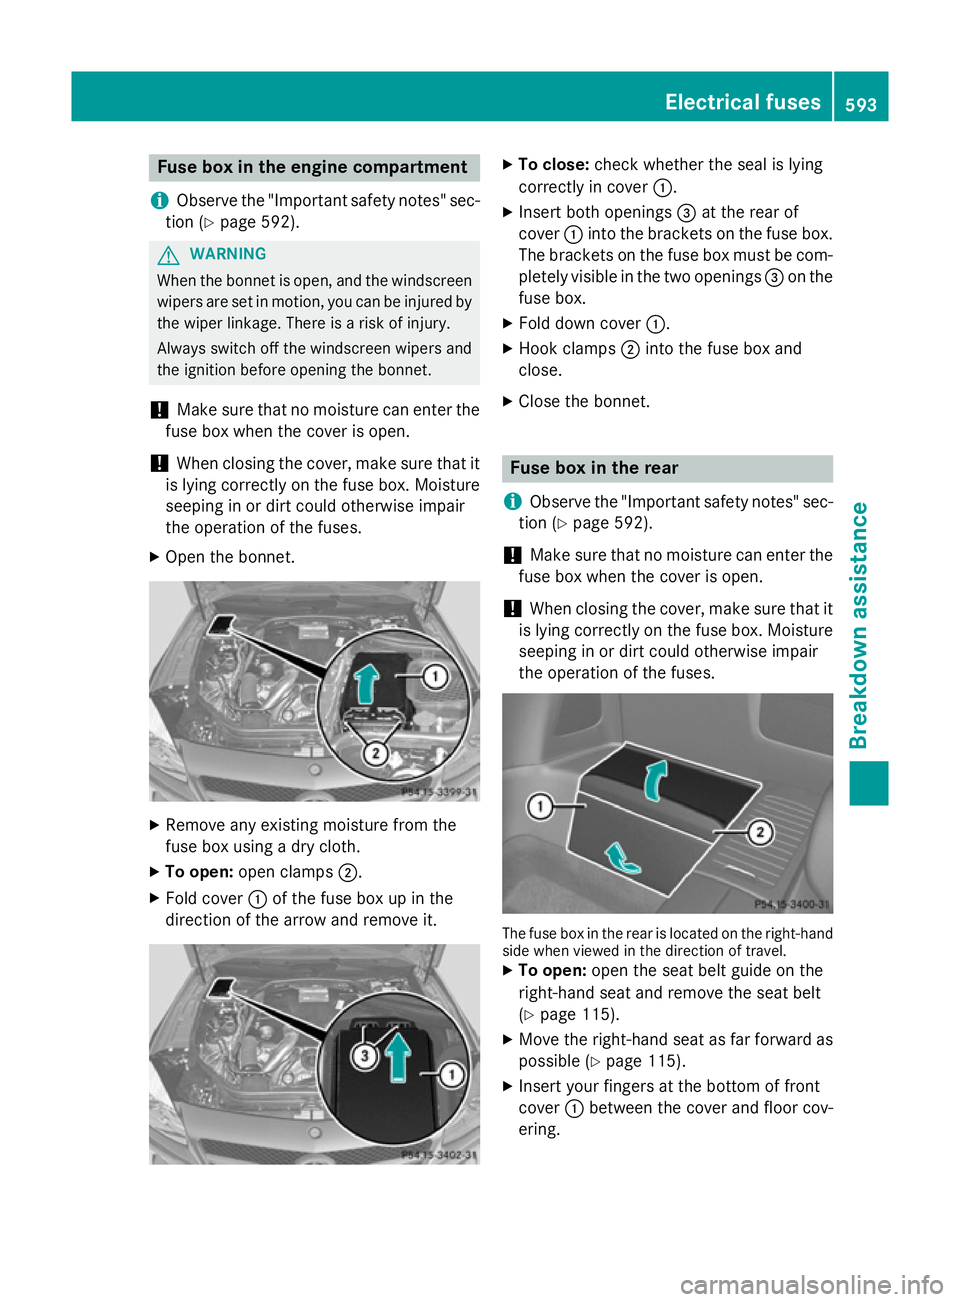
X Open the bonnet. X
Remove any existing moisture from the
fuse box using a dry cloth.
X To open: open clamps ;.
X Fold cover :of the fuse box up in the
direction of the arrow and remove it. X
To close: check whether the seal is lying
correctly in cover :.
X Insert both openings =at the rear of
cover :into the brackets on the fuse box.
The brackets on the fuse box must be com-
pletely visible in the two openings =on the
fuse box.
X Fold down cover :.
X Hook clamps ;into the fuse box and
close.
X Close the bonnet. Fuse box in the rear
i Observe the "Important safety notes" sec-
tion (Y page 592).
! Make sure that no moisture can enter the
fuse box when the cover is open.
! When closing the cover, make sure that it
is lying correctly on the fuse box. Moisture seeping in or dirt could otherwise impair
the operation of the fuses. The fuse box in the rear is located on the right-hand
side when viewed in the direction of travel.
X To open: open the seat belt guide on the
right-hand seat and remove the seat belt
(Y page 115).
X Move the right-hand seat as far forward as
possible (Y page 115).
X Insert your fingers at the bottom of front
cover :between the cover and floor cov-
ering. Electrical fuses
593Breakdown assistance Z
Page 597 of 637
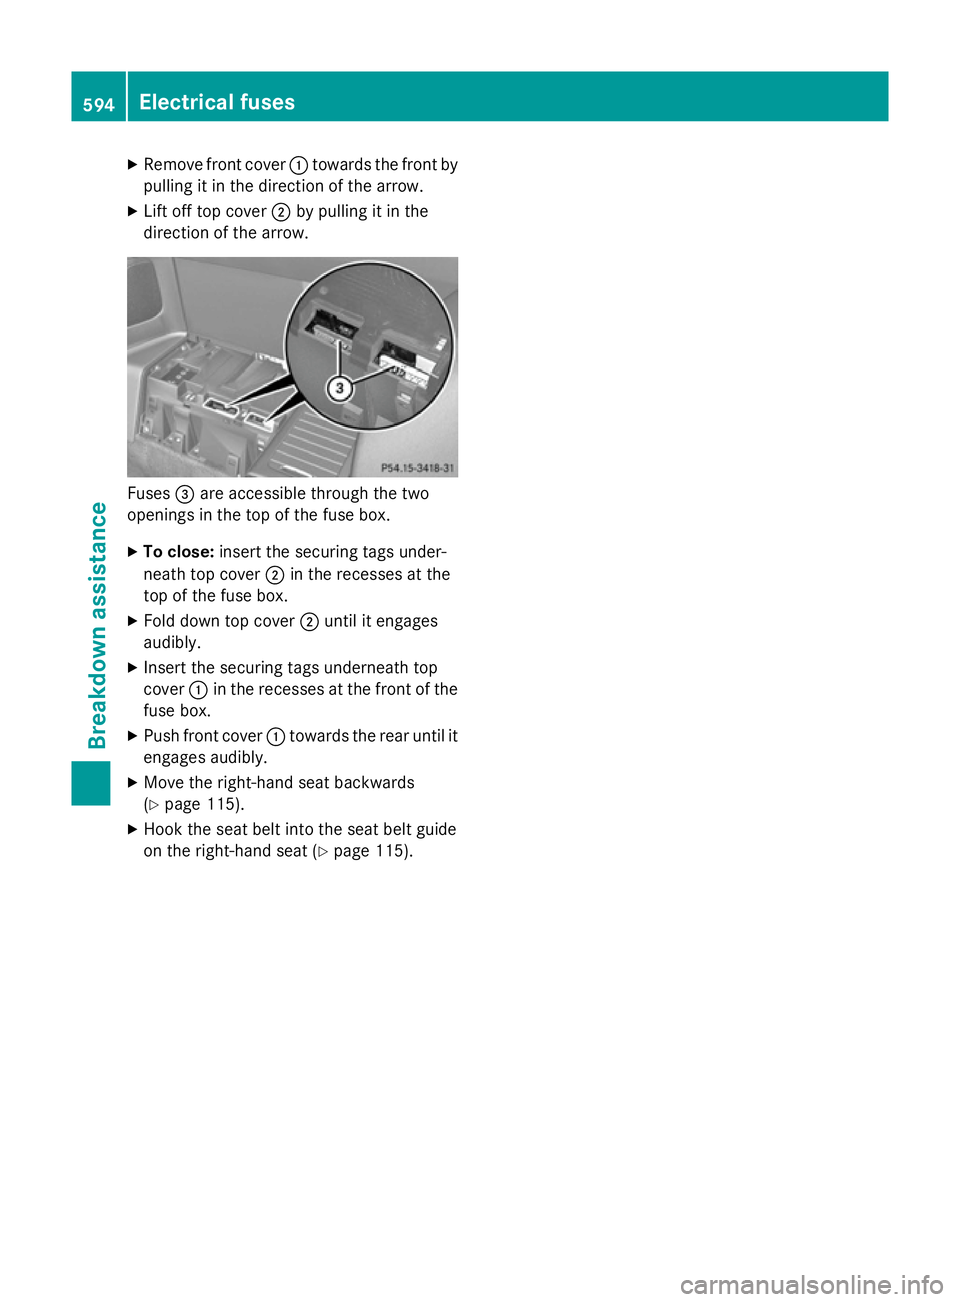
X
Remove front cover :towards the front by
pulling it in the direction of the arrow.
X Lift off top cover ;by pulling it in the
direction of the arrow. Fuses
=are accessible through the two
openings in the top of the fuse box.
X To close: insert the securing tags under-
neath top cover ;in the recesses at the
top of the fuse box.
X Fold down top cover ;until it engages
audibly.
X Insert the securing tags underneath top
cover :in the recesses at the front of the
fuse box.
X Push front cover :towards the rear until it
engages audibly.
X Move the right-hand seat backwards
(Y page 115).
X Hook the seat belt into the seat belt guide
on the right-hand seat (Y page 115).594
Elect
rical fusesBreakdo wn assis tance