Page 297 of 449

REARVIEW CAMERA SYSTEM (IF EQUIPPED)
The rear video camera system,
located on the liftgate above the
license plate, provides a video image
of the area behind the vehicle. It
adds assistance to the driver while
reversing or reverse parking the
vehicle. To use the rear video
camera system, place the
transmission in R (Reverse). An
image will display on the
touchscreen display. The area
displayed on the screen may vary according to the vehicle orientation
and/or road condition.
The rear video camera includes the following features that will assist the
driver in reverse driving.
Active guidelines (if equipped) and fixed guidelines
The active guidelines show the path of intended motion of the vehicle
while reversing. The fixed guidelines assist a driver with backing into a
parking space or aligning with an object behind the vehicle.
To turn this feature on or off when the vehicle is not in R (Reverse), do
the following on the touchscreen:
1. Select Menu
2. Select Vehicle
3. Select Rear View Camera
The fixed guideline options are ON and OFF. The active guideline
options are ACTIVE + FIXED, FIXED and OFF.
•(1) Rear bumper
•(2) Red zone
•(3) Yellow zone
•(4) Green zone
•(5) Active guidelines (if
equipped)
Active guidelines (5) will only be shown with fixed guidelines (2), (3)
and (4).
Zoom
1
5432
Driving
296
2011 Explorer(exp)
Owners Guide, 1st Printing
USA(fus)
Page 298 of 449

To use active guidelines, turn the steering wheel and point the active
guidelines towards an intended path. If the steering wheel position is
changed while reversing, the vehicle might deviate from the original
intended path.
Active guidelines project the intended path of the vehicle. Fixed
guidelines show the actual direction the vehicle is moving. The fixed and
active guidelines will fade in and out depending on the steering wheel
position. When the steering wheel position is straight, the active
guidelines will not be shown.
Always use caution while backing. Objects in the red zone (2) are closest
to your vehicle and objects in the green zone (4) are further away. Objects
are getting closer to your vehicle as they move from the green zone (4) to
the yellow (3) or red zones (2). Use the side mirrors and rearview mirror
to get better coverage on both sides and rear of the vehicle.
Visual park aid alert (if equipped)
Visual park aid alert allows the driver to see the area that is causing the
reverse sensing system to beep. The visual alerts are red, yellow or green
highlights which appear on top of the video image when an object is
detected by the reverse sensing system. The visual alert will highlight
the closest object detected by the reverse sensing system. The reverse
sensing alert can be disabled and if visual park aid alert is enabled,
highlighted areas will still be displayed.
To turn this feature on or off when the vehicle is not in R (Reverse), do
the following on the touchscreen:
1. Select Menu
2. Select Vehicle
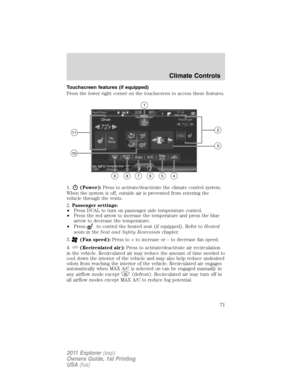
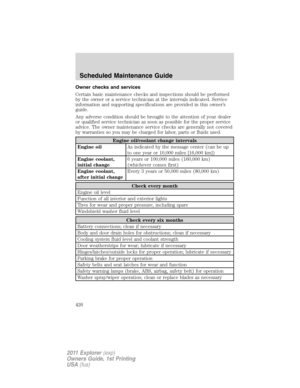
3. Select Rear View Camera
The visual park aid alert options are ON and OFF.
Note:The reverse sensing system is not effective at speeds above 3 mph
(5 km/h) and may not detect certain angular or moving objects.
Manual zoom
The manual zoom feature assists drivers with connecting their vehicle to
a trailer for the purpose of towing. It allows the driver to manually zoom
closer to an object behind the vehicle. The zoomed image keeps the
bumper in the image to provide a reference.
Press
(+) or(-) to manually adjust the zoom levels. You can
choose from OFF, Level 1, Level 2 and Level 3. The selected level will
appear between the buttons (i.e. Level 1). When activating manual zoom
mode, the system always starts from OFF.
Driving
297
2011 Explorer(exp)
Owners Guide, 1st Printing
USA(fus)
Page 299 of 449

When enabled, Level 1, Level 2, or Level 3 will only be active while the
vehicle is in R (Reverse). The feature disables outside of R (Reverse)
and must be re-enabled the next time the vehicle shifts into R (Reverse).
When manual zoom is enabled, only
the centerline will be shown.
Rear camera delay
After shifting out of R (Reverse) and into any gear other than P (Park),
the image will remain until the vehicle speed reaches five mph (8 km/h).
This will only occur if the rear camera delay feature is on, or until any
radio button is selected.
The default setting for the rear camera delay is ON. To turn this feature
on or off when the vehicle is not in R (Reverse), do the following:
1. Select Menu
2. Select Vehicle
3. Select Rear View Camera
The rear camera delay options are ON and OFF.
The camera lens for the reverse camera system is located on the liftgate.
Keep the lens clean so the video image remains clear and undistorted.
Clean the lens with a soft, lint-free cloth and non-abrasive cleaner.
When towing, the reverse camera system will only see what is being
towed behind the vehicle. This might not provide adequate coverage as it
usually provides in normal operation and some objects might not be
seen.
Active guidelines, fixed guidelines, visual park aid alert and manual zoom
features are only available when the vehicle is in R (Reverse).
If the vehicle is in R (Reverse) and the liftgate is ajar, no rear video
camera features will be displayed. A message will be displayed on the
touchscreen if the liftgate is ajar.
Zoom
{zoom
level}
Driving
298
2011 Explorer(exp)
Owners Guide, 1st Printing
USA(fus)
Page 300 of 449

After activating or deactivating a rear video camera feature, the
touchscreen will show a preview of the feature(s) selected.
Note:If the camera system image is not clear or seems distorted, it may
be covered with water droplets, snow, mud or any other substance. If
this occurs, clean the camera lens before using the camera system.
WARNING:The rearview camera system is a reverse aid
supplement device that still requires the driver to use it in
conjunction with the rearview mirror and the side mirrors for
maximum coverage.
WARNING:Objects that are close to either corner of the
bumper or under the bumper, might not be seen on the screen
due to the limited coverage of the camera system.
WARNING:Backup as slow as possible since higher speeds
might limit your reaction time to stop the vehicle.
WARNING:When manual zoom is enabled (Level 1, Level 2 or
Level 3), the full area behind the vehicle will not be shown. Be
aware of your surroundings when using the manual zoom feature.
WARNING:Use caution when using the rear video camera and
the liftgate is ajar. If the liftgate is ajar, the camera will be out of
position and the video image may be incorrect. All guidelines (if
enabled) have been removed when the liftgate is ajar.
WARNING:Use caution when turning ON or OFF camera
features while in R (Reverse). Make sure the vehicle is not
moving.
If the back end of the vehicle is hit or damaged, then check with your
authorized dealer to have your rear video system checked for proper
coverage and operation.
Driving
299
2011 Explorer(exp)
Owners Guide, 1st Printing
USA(fus)
Page 301 of 449

Night time and dark area use
At night time or in dark areas, the camera system relies on the reverse
lamp lighting to produce an image. Therefore, it is necessary that both
reverse lamps are operating in order to get a clear image in the dark. If
either of the lamps are not operating, stop using the camera system, at
least in the dark, until the lamp(s) are replaced and functioning.
Servicing
•If the image comes on while the vehicle is not in R (Reverse), have
the system inspected by your authorized dealer.
•If the image is not clear, check if anything is covering the lens such as
dirt, mud, ice, snow, etc. If the image is still not clear after cleaning,
have your system inspected by your authorized dealer.
COLLISION WARNING SYSTEM (IF EQUIPPED)
The collision warning with brake support, is designed to alert the driver
of certain collision risks with a red warning light located above the
dashboard and an audible warning chime. The brake support assists the
driver in reducing the collision speed, by pre-charging the brakes.
WARNING:This system is designed to be a supplementary
driving aid. It is not intended to replace the driver’s attention,
and judgment, or the need to apply the brakes. This system does NOT
activate the brakes automatically. Failure to press the brake pedal to
activate the brakes may result in a collision.
WARNING:The collision warning system with brake support
cannot help prevent all collisions. Do not rely on this system to
replace driver judgment and the need to maintain distance and speed.
Note:The collision warning with brake support will not detect, warn, or
respond to potential collisions with vehicles to the rear or sides of the
vehicle.
Driving
300
2011 Explorer(exp)
Owners Guide, 1st Printing
USA(fus)
Page 302 of 449

Operation
The radar sensor detects vehicles
ahead that are moving in the same
direction as your vehicle.
If the radar detects that your
vehicle is rapidly closing on another
vehicle a red warning light will
illuminate and an audible warning
chime will sound.
After that, if the risk of collision
further increases after the warning
light, the brake support prepares
the brake system for rapid braking.
This may be apparent to the driver.
However, the system will not
automatically activate the brakes.
The vehicle will not stop unless the driver presses the brake pedal. If the
brake pedal is pressed then braking is implemented with full brake
function, even if the force on the brake pedal is light.
The collision warning system is active at speeds above approximately
5 mph (8 km/h).
Collision warning system limitations
Due to the nature of radar technology, there may be certain instances
where vehicles will not provide a collision warning. These include:
•Stationary or slow moving vehicles below 6 mph (10 km/h).
•Pedestrians or objects in the roadway.
•Oncoming vehicles in the same lane.
•Severe weather conditions (see also blocked sensor section).
•Debris build-up on the grille near the headlamps (see block sensor
section).
•Small distance to vehicle ahead.
•
Steering wheel and pedal movements are large (very active driving style).
•High interior temperatures, which may deactivate the illumination or
the warning lamps until the interior temperature reduces (audible
warning will alert the driver).
In addition, sun load and sunglasses may reduce the visibility of the warning
lamps. Therefore, it is recommended to keep the audible warning on.
Driving
301
2011 Explorer(exp)
Owners Guide, 1st Printing
USA(fus)
Page 303 of 449

WARNING:The collision warning system’s brake support can
only help reduce the speed at which a collision occurs if the
driver applies the vehicle’s brakes. The brake pedal must be pressed
just like for any typical braking situation.
Blocked sensor
If a message regarding a blocked
sensor is displayed, the radar signals
from the sensor, located behind a
fascia cover near the driver side of
the lower grille, have been
obstructed. When the radar signals
are obstructed, a vehicle ahead
cannot be detected and the collision
warning system will not function.
The following table lists possible
causes and actions for this message being displayed.
Cause Action
The surface of the radar in the
grille is dirty or obstructed in
some wayClean the grille surface in front of
the radar or remove the object
causing the obstruction
The surface of the radar in the
grille is clean but the message
remains in the displayWait a short time. It may take
several minutes for the radar to
detect that it is no longer
obstructed
Heavy rain, spray, snow, or fog is
interfering with the radar signalsThe collision warning system is
temporarily disabled. Collision
warning should automatically
reactivate a short time after the
weather conditions improve.
Swirling water, or snow or ice on
the surface of the road may
interfere with the radar signalsThe collision warning system is
temporarily disabled. Collision
warning should automatically
reactivate a short time after the
weather conditions improve.
Driving
302
2011 Explorer(exp)
Owners Guide, 1st Printing
USA(fus)
Page 304 of 449

Activating/deactivating collision warning system
To turn the warning system and/or chime on or off and set the warning
sensitivity <– –>, refer toMessage centerin theInstrument Cluster
chapter.
Note:If the system cannot be turned off in a MyKey™ equipped vehicle,
refer toMyKey™in theLocks and Securitychapter for more
information.
Note:If collision warnings are perceived as being too frequent or
disturbing then the warning sensitivity can be reduced, though the
manufacturer recommends using the highest sensitivity setting where
possible. Setting lower sensitivity would lead to fewer and later system
warnings. Refer to theMessage centerin theInstrument Cluster
chapter for instructions on reducing the sensitivity.
ACTIVE PARK ASSIST (APA) (IF EQUIPPED)
Active park assist (APA) will detect an available parallel parking space
and automatically steer the vehicle into the space (hands-free) while you
control the accelerator, gearshift and brakes. The system will visually
and/or audibly instruct the driver to park the vehicle.
WARNING:This system is designed to be a supplementary park
aid. It may not work in all conditions and is not intended to
replace the driver’s attention and judgment. The driver is responsible
for avoiding hazards and maintaining a safe distance and speed, even
when the APA is in use.
Conditions in which the system may not work:
•Something passes between the front bumper and the space such as a
pedestrian or cyclist
•The edge of the neighboring parked vehicle is high from the ground
such as a bus, tow truck or flatbed truck
Driving
303
2011 Explorer(exp)
Owners Guide, 1st Printing
USA(fus)