2010 CHEVROLET CORVETTE light
[x] Cancel search: lightPage 7 of 472

Section 1 In Brief
Instrument Panel. . . . . . . . . . . . . . . . . . . . . . . . . . . . . . . . . . . 1-2
Initial Drive Information . . . . . . . . . . . . . . . . . . . . . . . . . . . 1-4
Remote Keyless Entry (RKE) System . . . . . . . . . . . 1-4
Door Locks . . . . . . . . . . . . . . . . . . . . . . . . . . . . . . . . . . . . . 1-5
Trunk Release . . . . . . . . . . . . . . . . . . . . . . . . . . . . . . . . . . 1-6
Windows . . . . . . . . . . . . . . . . . . . . . . . . . . . . . . . . . . . . . . . . 1-6
Seat Adjustment . . . . . . . . . . . . . . . . . . . . . . . . . . . . . . . . 1-7
Safety Belt . . . . . . . . . . . . . . . . . . . . . . . . . . . . . . . . . . . . . . 1-9
Sensing System for Passenger Airbag . . . . . . . . . 1-10
Mirror Adjustment . . . . . . . . . . . . . . . . . . . . . . . . . . . . . . 1-11
Steering Wheel Adjustment . . . . . . . . . . . . . . . . . . . . 1-12
Interior Lighting . . . . . . . . . . . . . . . . . . . . . . . . . . . . . . . . 1-13
Exterior Lighting . . . . . . . . . . . . . . . . . . . . . . . . . . . . . . . 1-13
Windshield Wiper/Washer . . . . . . . . . . . . . . . . . . . . . . 1-14
Climate Controls . . . . . . . . . . . . . . . . . . . . . . . . . . . . . . . 1-15
Transmission . . . . . . . . . . . . . . . . . . . . . . . . . . . . . . . . . . 1-15
Vehicle Features . . . . . . . . . . . . . . . . . . . . . . . . . . . . . . . . . . 1-16
Radio(s) . . . . . . . . . . . . . . . . . . . . . . . . . . . . . . . . . . . . . . . 1-16
Satellite Radio . . . . . . . . . . . . . . . . . . . . . . . . . . . . . . . . . 1-17 Portable Audio Devices . . . . . . . . . . . . . . . . . . . . . . . . 1-18
Steering Wheel Controls . . . . . . . . . . . . . . . . . . . . . . . 1-18
Bluetooth
®. . . . . . . . . . . . . . . . . . . . . . . . . . . . . . . . . . . . . 1-18
Navigation System . . . . . . . . . . . . . . . . . . . . . . . . . . . . . 1-19
Driver Information Center (DIC) . . . . . . . . . . . . . . . . 1-19
Cruise Control . . . . . . . . . . . . . . . . . . . . . . . . . . . . . . . . . 1-20
Power Outlets . . . . . . . . . . . . . . . . . . . . . . . . . . . . . . . . . 1-21
Roof Panel . . . . . . . . . . . . . . . . . . . . . . . . . . . . . . . . . . . . 1-21
Convertible . . . . . . . . . . . . . . . . . . . . . . . . . . . . . . . . . . . . 1-21
Performance and Maintenance . . . . . . . . . . . . . . . . . . 1-21
Traction Control System (TCS) . . . . . . . . . . . . . . . . 1-21
Towing . . . . . . . . . . . . . . . . . . . . . . . . . . . . . . . . . . . . . . . . . 1-22
Tire Pressure Monitor . . . . . . . . . . . . . . . . . . . . . . . . . . 1-22
Z06, Z16, and ZR1 Features . . . . . . . . . . . . . . . . . . . 1-23
Engine Oil Life System . . . . . . . . . . . . . . . . . . . . . . . . 1-24
Driving for Better Fuel Economy . . . . . . . . . . . . . . . 1-24
Battery . . . . . . . . . . . . . . . . . . . . . . . . . . . . . . . . . . . . . . . . . 1-24
Roadside Assistance Program . . . . . . . . . . . . . . . . . 1-25
OnStar
®. . . . . . . . . . . . . . . . . . . . . . . . . . . . . . . . . . . . . . . 1-25
1-1
Page 9 of 472

A.Outlet Adjustment on page 4‑27.
B. Head-Up Display (HUD)
on page 4‑16(If Equipped).
C. Turn Signal/Multifunction Lever
on page 4‑4.
Cruise Controlon page 4‑7. Fog Lampson
page 4‑13. Exterior Lamps on page 4‑11.
D. Manual Shift Paddles (If Equipped). See Automatic
Transmission Operation on page 3‑26.
E. Driver Information Center (DIC) on page 4‑47.
F. Instrument Panel Cluster on page 4‑30.
G. Windshield Wipers
on page 4‑6and Windshield
Washer on page 4‑6.
H. DIC Operation and Displays on page 4‑47.
I. Hazard Warning Flashers on page 4‑3.
J. Audio System(s) on page 4‑80.
K. Dual Automatic Climate Control System
on
page 4‑22.
L. Fuel Door Release Button. See Filling the
Tank
on page 6‑9. Hatch/Trunk Release Button.
See “Hatch/Trunk Lid Release” underHatchon
page 3‑14.
M. Instrument Panel Brightness on page 4‑15.
N. Power Folding Top Switch (If Equipped). See Convertible Top (Manual)
on page 3‑59orConvertible Top (Power) on page 3‑66. O.
Bluetooth
®on page 4‑96(If Equipped).
Audio Steering Wheel Controlson page 4‑107(If Equipped).
P. Tilt Wheel on page 4‑3.
Q. Horn on page 4‑3.
R. Telescopic Wheel Button (If Equipped). See Tilt Wheel on page 4‑3.
S. Ignition Positions on page 3‑23.
T. Heated Seats
on page 2‑4(If Equipped).
U. Shift Lever (Automatic Shown). See Automatic
Transmission Operation
on page 3‑26or Manual
Transmission Operation on page 3‑32.
V. Active Handling System on page 5‑8.
W. Accessory Power Outlet(s) on page 4‑20.
X. Selective Ride Control on page 5‑14.
Y. Cupholders on page 3‑50.
Z. Ashtray(s) and Cigarette Lighter on page 4‑21.
AA. Parking Brake on page 3‑34.
AB. Glove Box on page 3‑50.
AC. Instrument Panel Fuse Block on page 6‑101.
1-3
Page 19 of 472

Interior Lighting
Courtesy Lamps
When any door or the hatch/trunk lid is opened, the
interior lamps will go on, unless it is bright outside.
The courtesy lamps can also be turned on and off by
pressing the instrument panel brightness knob.
Reading Lamps
The inside rearview mirror includes two reading lamps.
The lamps go on when a door is opened. When the
doors are closed, press the lamp buttons to turn on
each lamp.
Interior Light Control
To adjust the brightness of the interior lights, turn and
hold the instrument panel brightness control knob
located on the left side of the instrument panel.
Push the knob in to turn the lights on or off.
For more information on interior lighting, see:
.Instrument Panel Brightness on page 4‑15.
.Entry/Exit Lighting on page 4‑15.
Exterior Lighting
Exterior Lamps
The exterior lamp control is located to the left of the
steering wheel, on the multifunction lever.
O :Turn the band with this symbol on it to operate the
exterior lamps.
O :Turns off all lamps.
AUTO : Sets the exterior lamps to automatic mode.
AUTO mode turns the exterior lamps on and off
depending on how much light is available outside
the vehicle.
1-13
Page 22 of 472

The Manual Paddle Shift system can be deactivated
by moving the shifter from S (Sport Mode) back to
D (Drive), or by holding the up‐shift button for more
than one second.
The Manual Paddle Shift system will not allow either an
up-shift or a down-shift, if the vehicle speed is too fast
or too slow, nor will it allow a start from 4 (Fourth) or
higher gear
See Automatic Transmission Operation on page 3‑26.
One to Four Shift Light
(Manual Transmission)
On vehicles with a manual
transmission, when this
light comes on, you can
only shift from 1 (First)
to 4 (Fourth) instead of
1 (First) to 2 (Second).
For more information about shifting for the best fuel
economy, see Manual Transmission Operation
on
page 3‑32.
Vehicle Features
Radio(s)
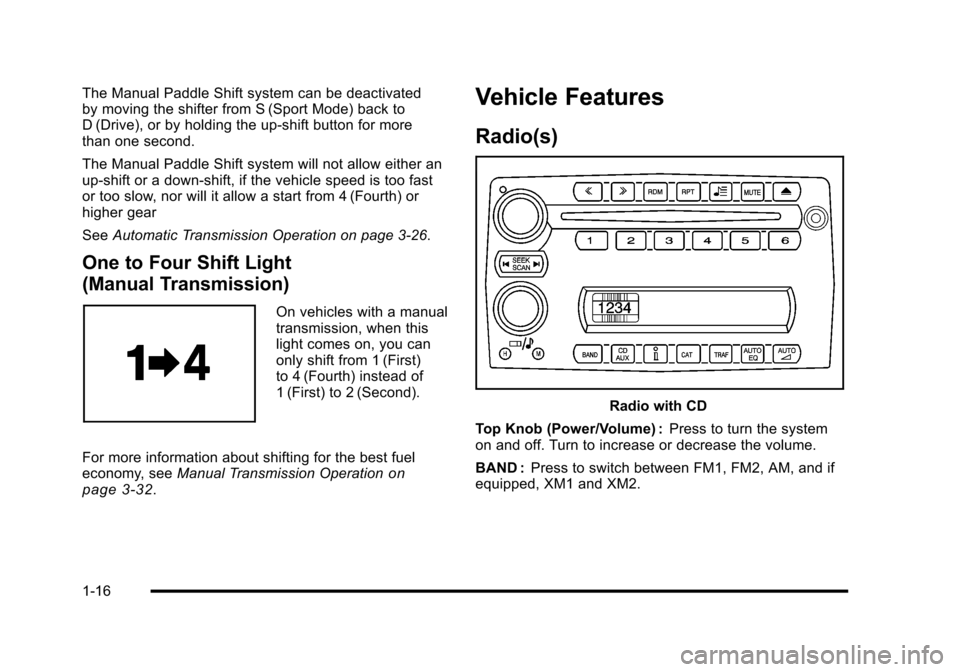
Radio with CD
Top Knob (Power/Volume) : Press to turn the system
on and off. Turn to increase or decrease the volume.
BAND : Press to switch between FM1, FM2, AM, and if
equipped, XM1 and XM2.
1-16
Page 26 of 472

TRIP :Press to display your total and trip distance
driven, the elapsed time function, your average speed,
and the engine oil life.
OPTION : Press to choose personal options that are
available on your vehicle, depending on the options
your vehicle is equipped with, such as door locks, easy
entry seats, and language.
RESET : Press, along with the other buttons, to reset
system functions, select personal options, and turn off
or acknowledge messages on the DIC.
For more information, see Driver Information Center
(DIC) on page 4‑47.
Vehicle Personalization
Some vehicle features can be programmed by using
the DIC buttons on the left side of the steering wheel.
The features that can be programmed include:
.Units
.Memory Features
.Lighting Features
.Lock and Unlock Feedback
.Door Lock and Unlock Settings
.Language
.Personalization Name
See DIC Vehicle Personalization on page 4‑71.
Cruise Control
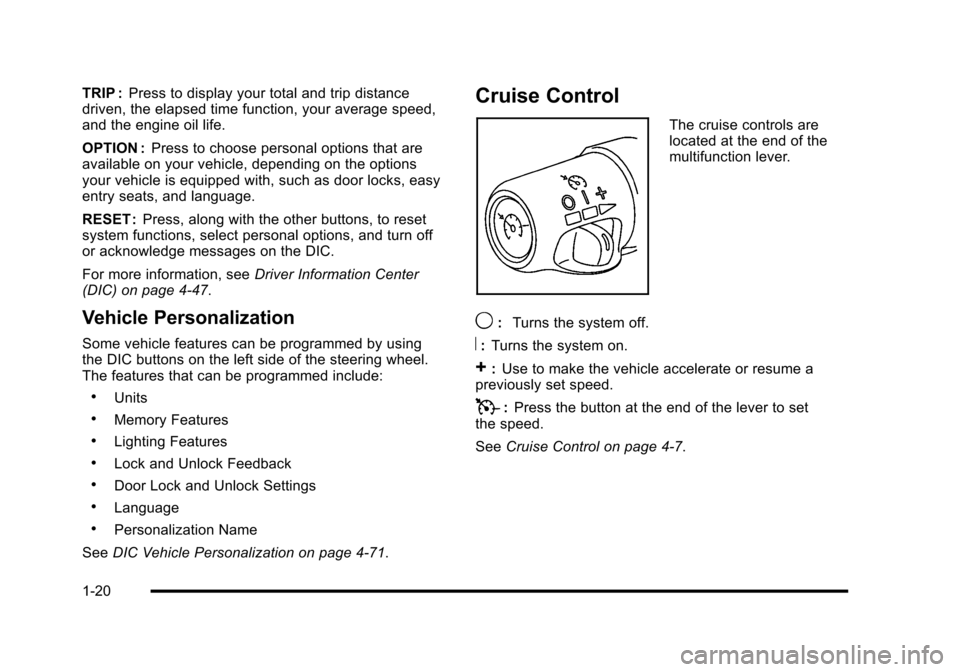
The cruise controls are
located at the end of the
multifunction lever.
9: Turns the system off.
R:Turns the system on.
+:Use to make the vehicle accelerate or resume a
previously set speed.
T: Press the button at the end of the lever to set
the speed.
See Cruise Control on page 4‑7.
1-20
Page 28 of 472

The vehicle may have Competitive Driving Mode
(except ZR1), Performance Traction Management
(ZR1), and Launch Control systems designed to
allow increased performance while accelerating and
cornering. See Competitive Driving Mode on page 5‑9.
Towing
The vehicle was neither designed nor intended to be
towed with any of its wheels on the ground.
See Towing Your Vehicle
on page 5‑33and
Recreational Vehicle Towing on page 5‑33.
Tire Pressure Monitor
This vehicle may have a Tire Pressure Monitor
System (TPMS).
The Tire Pressure Monitor
alerts you when a
significant reduction in
pressure occurs in one or
more of the vehicle’s tires
by illuminating the low tire
pressure warning light on
the instrument cluster. The warning light will remain on until the tire pressure is
corrected. The proper tire pressures for your vehicle are
listed on the Tire and Loading Information label located
on the driver side center pillar (B pillar). See
Loading
the Vehicle
on page 5‑28.
You may notice during cooler conditions that the low tire
pressure warning light will appear when the vehicle is
first started and then turn off as you drive. This may be
an early indicator that your tire pressures are getting
low and the tires need to be inflated to the proper
pressure.
Note: The Tire Pressure Monitor can alert you about
low tire pressure, but it does not replace normal monthly
tire maintenance. It is the driver ’s responsibility to
maintain correct tire pressures.
See Tire Pressure Monitor System
on page 6‑72and
Tire Pressure Monitor Operation on page 6‑74.
1-22
Page 33 of 472

Location information about the vehicle is only available
if the GPS satellite signals are unobstructed and
available.
The vehicle must have a working electrical system,
including adequate battery power, for the OnStar
equipment to operate. There are other problems OnStar
cannot control that may prevent OnStar from providing
OnStar service at any particular time or place. Some
examples are damage to important parts of the vehicle
in a crash, hills, tall buildings, tunnels, weather or
wireless phone network congestion.
OnStar Steering Wheel Controls
This vehicle may have a Talk/Mute button that can
be used to interact with OnStar hands-free calling.
See Audio Steering Wheel Controls
on page 4‑107for
more information.
On some vehicles, the mute button can be used to dial
numbers into voice mail systems, or to dial phone
extensions. See the OnStar Owner's Guide for more
information.
Your Responsibility
Increase the volume of the radio if the OnStar advisor
cannot be heard.
If the light next to the OnStar buttons is red, the system
may not be functioning properly. Press
Qand request a
vehicle diagnostic. If the light appears clear (no light is
appearing), your OnStar subscription has expired and
all services have been deactivated. Press
Qto confirm
that the OnStar equipment is active.
1-27
Page 57 of 472

Lap-Shoulder Belt
All seating positions in the vehicle have a
lap-shoulder belt.
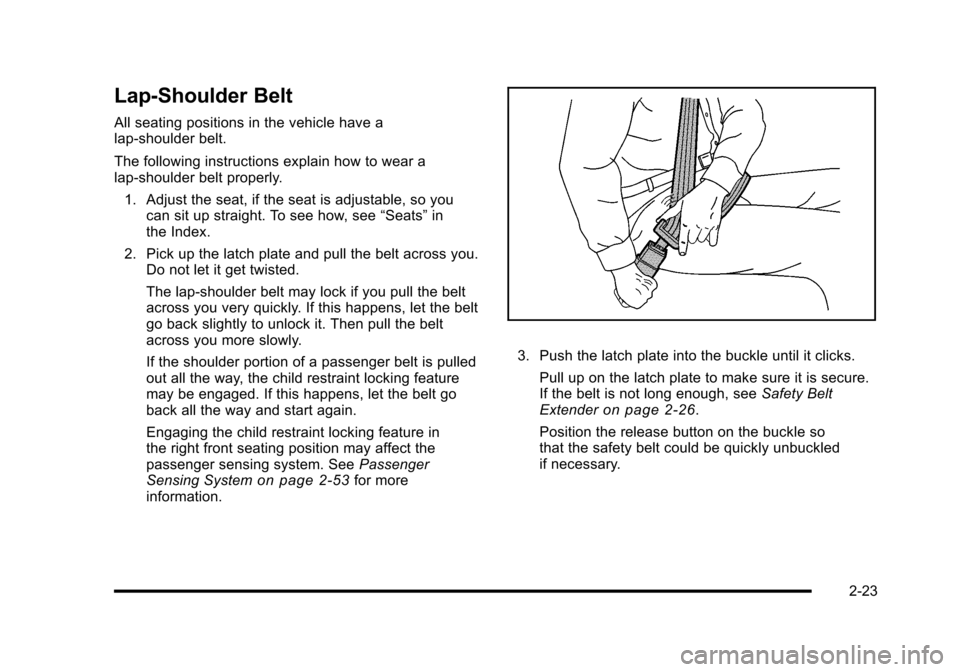
The following instructions explain how to wear a
lap-shoulder belt properly. 1. Adjust the seat, if the seat is adjustable, so you can sit up straight. To see how, see “Seats”in
the Index.
2. Pick up the latch plate and pull the belt across you. Do not let it get twisted.
The lap-shoulder belt may lock if you pull the belt
across you very quickly. If this happens, let the belt
go back slightly to unlock it. Then pull the belt
across you more slowly.
If the shoulder portion of a passenger belt is pulled
out all the way, the child restraint locking feature
may be engaged. If this happens, let the belt go
back all the way and start again.
Engaging the child restraint locking feature in
the right front seating position may affect the
passenger sensing system. See Passenger
Sensing System
on page 2‑53for more
information.
3. Push the latch plate into the buckle until it clicks.
Pull up on the latch plate to make sure it is secure.
If the belt is not long enough, see Safety Belt
Extender
on page 2‑26.
Position the release button on the buckle so
that the safety belt could be quickly unbuckled
if necessary.
2-23