2010 CHEVROLET CORVETTE reset
[x] Cancel search: resetPage 23 of 472

Oe:Turn to select radio stations.
tSEEKu:Press to seek stations.
tSCANu: Press and hold to scan stations.
4:Press to change the information that shows on
the display while listening to the radio.
For more information about these and other radio
features, see Audio System(s)
on page 4‑80and
Radio(s) on page 4‑81.
Setting Preset Stations
Up to 30 stations (six FM1, six FM2, and six AM, and if
equipped, six XM1, and six XM2) can be programmed.
To program presets:
1. Turn the radio on.
2. Press BAND to select FM1, FM2, AM, or XM1 or XM2.
3. Tune in the desired station.
4. Press AUTO EQ to select the equalization.
5. Press and hold one of the six numbered pushbuttons until the radio beeps once.
6. Repeat the steps for each pushbutton.
See Radio(s) on page 4‑81.
Setting the Clock
To set the clock:
1. Press and hold H until the correct hour displays.
2. Press and hold M until the correct minute displays.
See Setting the Clock on page 4‑80.
Satellite Radio
XM is a satellite radio service that is based in the
48 contiguous United States and 10 Canadian
provinces. XM satellite radio has a wide variety
of programming and commercial-free music,
coast-to-coast, and in digital-quality sound.
A fee is required to receive the XM service.
For more information, refer to:
.www.xmradio.com or call 1-800-929-2100 (U.S.)
.www.xmradio.ca or call 1-877-438-9677 (Canada)
See “XM Satellite Radio Service” underRadio(s)
on
page 4‑81.
1-17
Page 24 of 472
Portable Audio Devices
This vehicle may have an auxiliary input jack, located
on the audio faceplate. External devices such as iPod®,
MP3 players, etc. can be connected to the auxiliary
input jack using a 3.5 mm (1/8 in) input jack cable.
See “Using the Auxiliary Input Jack” underRadio(s)
on
page 4‑81.
Steering Wheel Controls
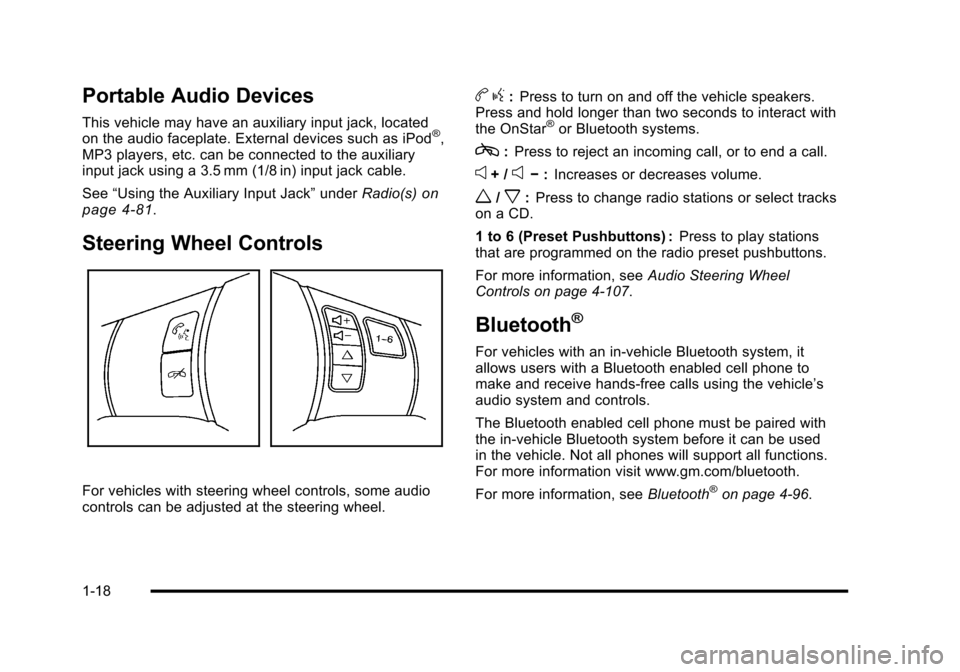
For vehicles with steering wheel controls, some audio
controls can be adjusted at the steering wheel.
b g:Press to turn on and off the vehicle speakers.
Press and hold longer than two seconds to interact with
the OnStar
®or Bluetooth systems.
c: Press to reject an incoming call, or to end a call.
e+ /e− :Increases or decreases volume.
w/x:Press to change radio stations or select tracks
on a CD.
1 to 6 (Preset Pushbuttons) : Press to play stations
that are programmed on the radio preset pushbuttons.
For more information, see Audio Steering Wheel
Controls on page 4‑107.
Bluetooth®
For vehicles with an in-vehicle Bluetooth system, it
allows users with a Bluetooth enabled cell phone to
make and receive hands-free calls using the vehicle’s
audio system and controls.
The Bluetooth enabled cell phone must be paired with
the in-vehicle Bluetooth system before it can be used
in the vehicle. Not all phones will support all functions.
For more information visit www.gm.com/bluetooth.
For more information, see Bluetooth
®on page 4‑96.
1-18
Page 26 of 472
TRIP :Press to display your total and trip distance
driven, the elapsed time function, your average speed,
and the engine oil life.
OPTION : Press to choose personal options that are
available on your vehicle, depending on the options
your vehicle is equipped with, such as door locks, easy
entry seats, and language.
RESET : Press, along with the other buttons, to reset
system functions, select personal options, and turn off
or acknowledge messages on the DIC.
For more information, see Driver Information Center
(DIC) on page 4‑47.
Vehicle Personalization
Some vehicle features can be programmed by using
the DIC buttons on the left side of the steering wheel.
The features that can be programmed include:
.Units
.Memory Features
.Lighting Features
.Lock and Unlock Feedback
.Door Lock and Unlock Settings
.Language
.Personalization Name
See DIC Vehicle Personalization on page 4‑71.
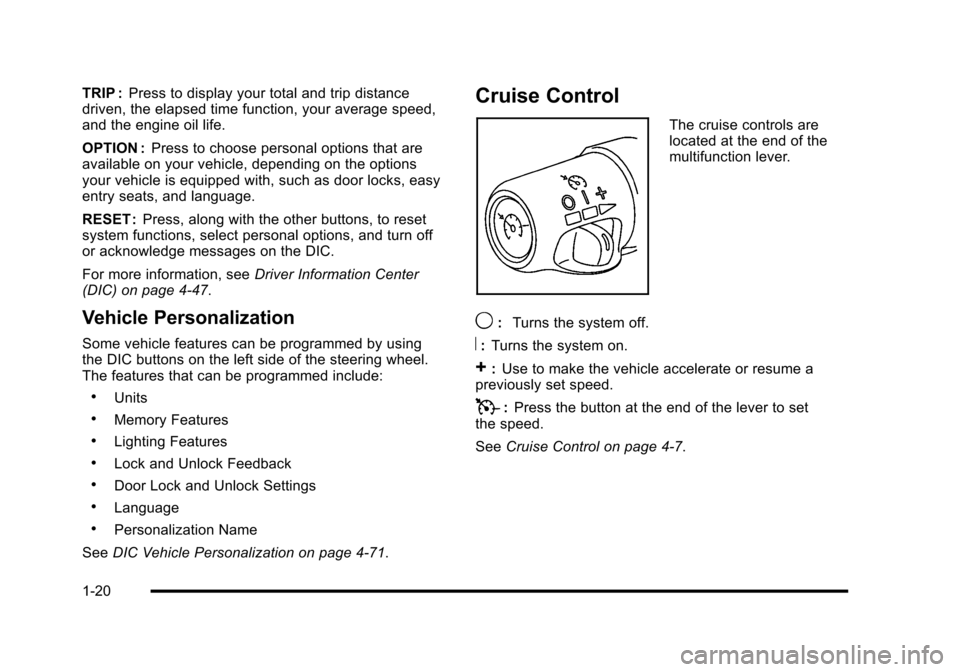
Cruise Control
The cruise controls are
located at the end of the
multifunction lever.
9: Turns the system off.
R:Turns the system on.
+:Use to make the vehicle accelerate or resume a
previously set speed.
T: Press the button at the end of the lever to set
the speed.
See Cruise Control on page 4‑7.
1-20
Page 30 of 472
Engine Oil Life System
The engine oil life system calculates engine oil life
based on vehicle use and displays a DIC message
when it is necessary to change the engine oil and filter.
The oil life system should be reset to 100% only
following an oil change.
Resetting the Oil Life System
1. Press the TRIP button so the OIL LIFE percentageis displayed.
2. Press RESET and hold for two seconds. OIL LIFE REMAINING 100% will appear.
See Engine Oil Life System on page 6‑25.
Driving for Better Fuel Economy
Driving habits can affect fuel mileage. Here are some
driving tips to get the best fuel economy possible.
.Avoid fast starts and accelerate smoothly.
.Brake gradually and avoid abrupt stops.
.Avoid idling the engine for long periods of time.
.When road and weather conditions are
appropriate, use cruise control, if equipped.
.Always follow posted speed limits or drive more
slowly when conditions require.
.Keep vehicle tires properly inflated.
.Combine several trips into a single trip.
.Replace the vehicle's tires with the same
TPC Spec number molded into the tire's
sidewall near the size.
.Follow recommended scheduled maintenance.
Premium Fuel
This vehicle's engine was designed to use premium
unleaded gasoline. See Gasoline Octane on page 6‑7.
Battery
This vehicle has a maintenance free battery. See
Batteryon page 6‑49and Jump Starting on page 6‑50.
For ZO6, ZR1, and Grand Sport models the battery is
located in the rear hatch/trunk area. Access to the
battery is not necessary to jump start the vehicle.
There are positive (+) and negative (−) terminals in
the engine compartment.
1-24
Page 174 of 472
Windshield Wipers
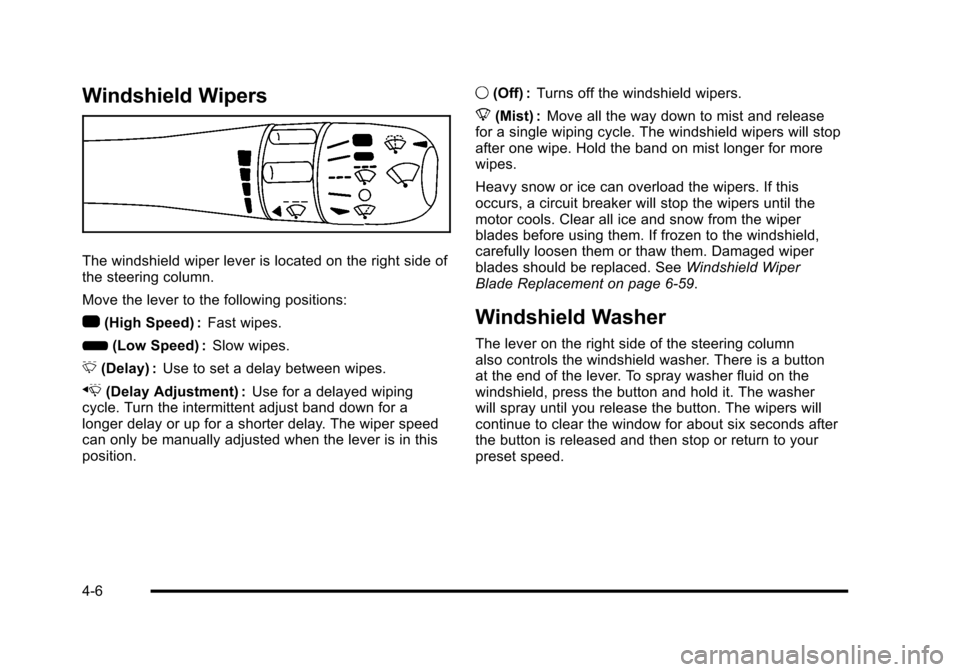
The windshield wiper lever is located on the right side of
the steering column.
Move the lever to the following positions:
1 (High Speed) : Fast wipes.
6 (Low Speed) : Slow wipes.
& (Delay) : Use to set a delay between wipes.
x (Delay Adjustment) : Use for a delayed wiping
cycle. Turn the intermittent adjust band down for a
longer delay or up for a shorter delay. The wiper speed
can only be manually adjusted when the lever is in this
position. 9
(Off) : Turns off the windshield wipers.
8 (Mist) : Move all the way down to mist and release
for a single wiping cycle. The windshield wipers will stop
after one wipe. Hold the band on mist longer for more
wipes.
Heavy snow or ice can overload the wipers. If this
occurs, a circuit breaker will stop the wipers until the
motor cools. Clear all ice and snow from the wiper
blades before using them. If frozen to the windshield,
carefully loosen them or thaw them. Damaged wiper
blades should be replaced. See Windshield Wiper
Blade Replacement on page 6‑59.
Windshield Washer
The lever on the right side of the steering column
also controls the windshield washer. There is a button
at the end of the lever. To spray washer fluid on the
windshield, press the button and hold it. The washer
will spray until you release the button. The wipers will
continue to clear the window for about six seconds after
the button is released and then stop or return to your
preset speed.
4-6
Page 177 of 472
Resuming a Set Speed
If the cruise control is set at a desired speed and then
the brakes are applied, the cruise control is disengaged.
But it does not need to be reset.
Once the vehicle is going about 40 km/h (25 mph) or
more, you can move the cruise control switch briefly
from
RtoS.
The vehicles goes back up to your chosen speed and
stays there.
If the switch is held at resume/accelerate the vehicle
keeps going faster until the switch is released or the
brake is applied. Do not hold the switch at resume/
accelerate, unless you want the vehicle to go faster.
Increasing Speed While Using Cruise
Control
There are two ways to go to a higher speed:
.Use the accelerator pedal to get to the higher
speed. Press
Jat the end of the lever, then
release the button and the accelerator pedal.
The vehicle now cruises at the higher speed. If the
accelerator pedal is held longer than 60 seconds,
cruise control will turn off.
.Move the cruise switch fromRtoS. Hold it there
until desired speed is reached, and then release
the switch. To increase the vehicle speed in small
amounts, move the switch briefly to
S. Each time
this is done, the vehicle goes about 1.6 km/h
(1 mph) faster.
Reducing Speed While Using Cruise
Control
.Press and hold the set button until the lower speed
desired is reached, then release it.
.To slow down in small amounts, briefly pressJ.
Each time this is done, the vehicle goes about
1.6 km/h (1 mph) slower.
Passing Another Vehicle While Using
Cruise Control
Use the accelerator pedal to increase the vehicle's
speed. When you take your foot off the pedal, the
vehicle slows down to the cruise control speed set
earlier.
4-9
Page 179 of 472
Exterior Lamps
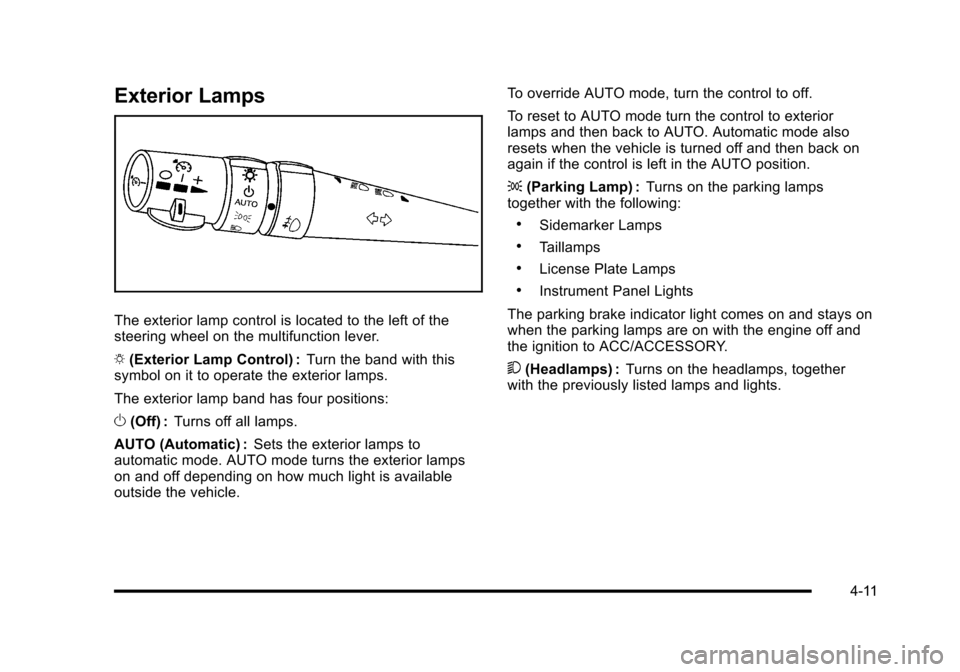
The exterior lamp control is located to the left of the
steering wheel on the multifunction lever.
O (Exterior Lamp Control) : Turn the band with this
symbol on it to operate the exterior lamps.
The exterior lamp band has four positions:
O (Off) : Turns off all lamps.
AUTO (Automatic) : Sets the exterior lamps to
automatic mode. AUTO mode turns the exterior lamps
on and off depending on how much light is available
outside the vehicle. To override AUTO mode, turn the control to off.
To reset to AUTO mode turn the control to exterior
lamps and then back to AUTO. Automatic mode also
resets when the vehicle is turned off and then back on
again if the control is left in the AUTO position.
;
(Parking Lamp) : Turns on the parking lamps
together with the following:
.Sidemarker Lamps
.Taillamps
.License Plate Lamps
.Instrument Panel Lights
The parking brake indicator light comes on and stays on
when the parking lamps are on with the engine off and
the ignition to ACC/ACCESSORY.
5 (Headlamps) : Turns on the headlamps, together
with the previously listed lamps and lights.
4-11
Page 184 of 472

Battery Run-Down Protection
This vehicle has a feature to help prevent the battery
from being drained in case any of the following lamps
are left on; the underhood lamp, if your vehicle has
this feature, vanity mirror lamps, cargo lamps, reading
lamps, console or glove box lamps. If any of these
lamps are left on, they will automatically time-out after
about 10 minutes. To reset it, all of the above lamps
must be turned off or the ignition key on.
Head-Up Display (HUD)
{WARNING:
If the HUD image is too bright, or too high in your
field of view, it may take you more time to see
things you need to see when it is dark outside.
Be sure to keep the HUD image dim and placed
low in your field of view.
For vehicles with the Head-Up Display (HUD), you can
see some of the driver information that appears on the
instrument panel cluster. The information may be displayed in English or metric
units and appears as an image focused out toward the
front of the vehicle. The HUD consists of the following
information:
.Speedometer
.Turn Signal Indicators
.High-Beam Indicator Symbol
.Tachometer
.Manual Paddle Shift Gear Indicator (If Equipped)
These displays on the HUD are for use when
using the manual paddle shift controls to shift
the transmission. See
“Manual Paddle Shift”in
Automatic Transmission Operation on page 3‑26.
.Shift Light
This light is used for performance driving to
indicate that the vehicle's best performance level
has been reached to shift the transmission into the
next higher gear. An arrow pointing up will light up
on the display just prior to reaching the engine fuel
cut-off mode. This cut-off is about 6,500 RPM for
the LS3 engine, 6,600 RPM for the LS9 & ZR1
engines and 7,000 RPM for the LS7 engine.
.Check Gauges Warning
.Engine Coolant Temperature Gauge
4-16