Page 9 of 472

A.Outlet Adjustment on page 4‑27.
B. Head-Up Display (HUD)
on page 4‑16(If Equipped).
C. Turn Signal/Multifunction Lever
on page 4‑4.
Cruise Controlon page 4‑7. Fog Lampson
page 4‑13. Exterior Lamps on page 4‑11.
D. Manual Shift Paddles (If Equipped). See Automatic
Transmission Operation on page 3‑26.
E. Driver Information Center (DIC) on page 4‑47.
F. Instrument Panel Cluster on page 4‑30.
G. Windshield Wipers
on page 4‑6and Windshield
Washer on page 4‑6.
H. DIC Operation and Displays on page 4‑47.
I. Hazard Warning Flashers on page 4‑3.
J. Audio System(s) on page 4‑80.
K. Dual Automatic Climate Control System
on
page 4‑22.
L. Fuel Door Release Button. See Filling the
Tank
on page 6‑9. Hatch/Trunk Release Button.
See “Hatch/Trunk Lid Release” underHatchon
page 3‑14.
M. Instrument Panel Brightness on page 4‑15.
N. Power Folding Top Switch (If Equipped). See Convertible Top (Manual)
on page 3‑59orConvertible Top (Power) on page 3‑66. O.
Bluetooth
®on page 4‑96(If Equipped).
Audio Steering Wheel Controlson page 4‑107(If Equipped).
P. Tilt Wheel on page 4‑3.
Q. Horn on page 4‑3.
R. Telescopic Wheel Button (If Equipped). See Tilt Wheel on page 4‑3.
S. Ignition Positions on page 3‑23.
T. Heated Seats
on page 2‑4(If Equipped).
U. Shift Lever (Automatic Shown). See Automatic
Transmission Operation
on page 3‑26or Manual
Transmission Operation on page 3‑32.
V. Active Handling System on page 5‑8.
W. Accessory Power Outlet(s) on page 4‑20.
X. Selective Ride Control on page 5‑14.
Y. Cupholders on page 3‑50.
Z. Ashtray(s) and Cigarette Lighter on page 4‑21.
AA. Parking Brake on page 3‑34.
AB. Glove Box on page 3‑50.
AC. Instrument Panel Fuse Block on page 6‑101.
1-3
Page 13 of 472
Seat Adjustment
Manual Seats
1. Lift the bar to unlock the seat.
2. Slide the seat to the desired position and
release the bar.
Try to move the seat to be sure it is locked in place.
See Manual Seats on page 2‑2.
Power Seats
On vehicles with power seats, the control is located
on the outboard side of the seat.
Move the control forward or rearward to adjust the
seat location.
Move the front or rear of the control up or down to
adjust the seat cushion height.
See Power Seats on page 2‑3.
1-7
Page 15 of 472
Heated Seats
On vehicles with heated seats, the buttons are located
on the center console. The ignition must be on for this
feature to work.
L: Press to turn the seat on at the high setting.
Press again to turn it to the low setting
9: Press to turn the system off.
Safety Belt
Refer to the following sections for important information
on how to use safety belts properly.
.Safety Belts: They Are for Everyone on page 2‑9.
.How to Wear Safety Belts Properly on page 2‑14.
.Lap-Shoulder Belt on page 2‑23.
.Lower Anchors and Tethers for Children (LATCH)
(Coupe and Convertible Models Only)on
page 2‑35or Lower Anchors and Tethers for
Children (LATCH) (Z06 and ZR1 Models Only)on
page 2‑36.
1-9
Page 26 of 472

TRIP :Press to display your total and trip distance
driven, the elapsed time function, your average speed,
and the engine oil life.
OPTION : Press to choose personal options that are
available on your vehicle, depending on the options
your vehicle is equipped with, such as door locks, easy
entry seats, and language.
RESET : Press, along with the other buttons, to reset
system functions, select personal options, and turn off
or acknowledge messages on the DIC.
For more information, see Driver Information Center
(DIC) on page 4‑47.
Vehicle Personalization
Some vehicle features can be programmed by using
the DIC buttons on the left side of the steering wheel.
The features that can be programmed include:
.Units
.Memory Features
.Lighting Features
.Lock and Unlock Feedback
.Door Lock and Unlock Settings
.Language
.Personalization Name
See DIC Vehicle Personalization on page 4‑71.
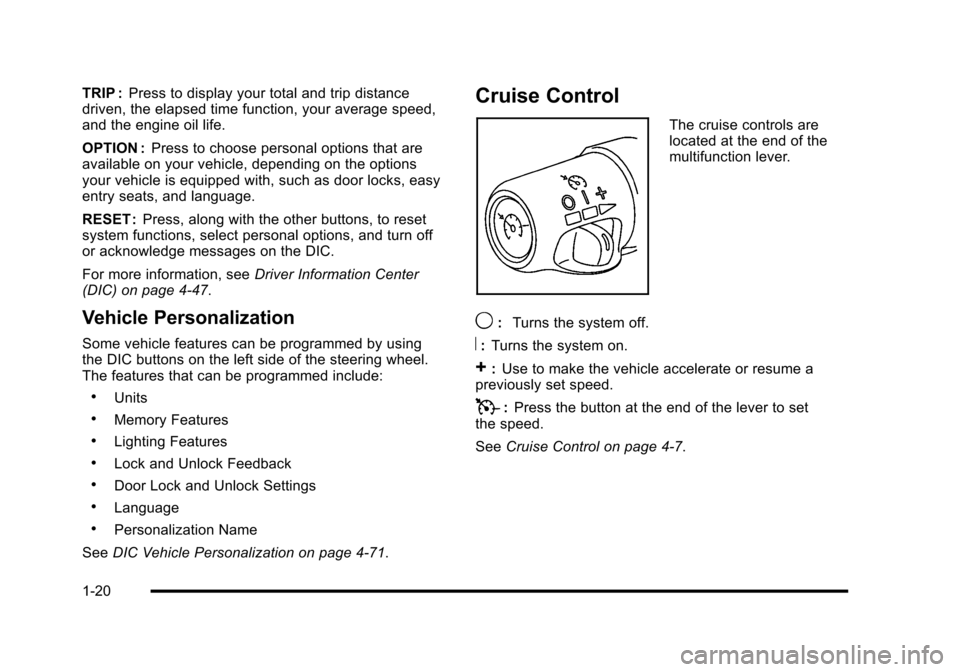
Cruise Control
The cruise controls are
located at the end of the
multifunction lever.
9: Turns the system off.
R:Turns the system on.
+:Use to make the vehicle accelerate or resume a
previously set speed.
T: Press the button at the end of the lever to set
the speed.
See Cruise Control on page 4‑7.
1-20
Page 27 of 472

Power Outlets
The accessory power outlet can be used to connect
electrical equipment, such as a cellular phone.
The accessory power outlet is located inside the center
console storage compartment, on the forward left side.
To use the outlet, remove the tethered cap.
See Accessory Power Outlet(s) on page 4‑20.
Roof Panel
On vehicles with a removable roof panel, there are
three release latches. Two are located on the front of
the roof panel and the other is located on the back of
the roof panel. See Removing the Roof Panel
on
page 3‑54.
Until you are sure you can remove the roof panel by
yourself, have someone help you. Once removed, the
roof panel should always be stored properly in the rear
storage compartment.
For more information, see:
.Storing the Roof Panel on page 3‑56.
.Installing the Roof Panel on page 3‑58.
Convertible
If equipped, the convertible top can be lowered and
stowed under the tonneau cover behind the seats.
For step-by-step instructions, see Convertible Top
(Manual)
on page 3‑59or Convertible Top (Power)on
page 3‑66.
Performance and Maintenance
Traction Control System (TCS)
The traction control system limits wheel spin.
The system turns on automatically every time the
vehicle is started.
.To turn off traction control, press and releasedon
the console.
dilluminates and the appropriate
DIC message displays. See DIC Warnings and
Messages on page 4‑52.
.Press and release the button again to turn on
traction control.
See Traction Control System (TCS) on page 5‑6.
The vehicle has an Active Handling System that helps
maintain directional control of the vehicle in difficult
driving conditions. See Active Handling System
on
page 5‑8.
1-21
Page 35 of 472

Section 2 Seats and Restraint System
Front Seats. . . . . . . . . . . . . . . . . . . . . . . . . . . . . . . . . . . . . . . . . 2-2
Manual Seats . . . . . . . . . . . . . . . . . . . . . . . . . . . . . . . . . . . 2-2
Power Seats . . . . . . . . . . . . . . . . . . . . . . . . . . . . . . . . . . . . 2-3
Power Lumbar and Side Bolsters . . . . . . . . . . . . . . . 2-3
Heated Seats . . . . . . . . . . . . . . . . . . . . . . . . . . . . . . . . . . . 2-4
Memory Seat, Mirrors and Steering Wheel . . . . . . 2-4
Reclining Seatbacks . . . . . . . . . . . . . . . . . . . . . . . . . . . . 2-6
Seatback Latches . . . . . . . . . . . . . . . . . . . . . . . . . . . . . . . 2-8
Safety Belts . . . . . . . . . . . . . . . . . . . . . . . . . . . . . . . . . . . . . . . . 2-9
Safety Belts: They Are for Everyone . . . . . . . . . . . . 2-9
How to Wear Safety Belts Properly . . . . . . . . . . . . 2-14
Lap-Shoulder Belt . . . . . . . . . . . . . . . . . . . . . . . . . . . . . 2-23
Safety Belt Use During Pregnancy . . . . . . . . . . . . . 2-25
Safety Belt Extender . . . . . . . . . . . . . . . . . . . . . . . . . . . 2-26
Child Restraints . . . . . . . . . . . . . . . . . . . . . . . . . . . . . . . . . . 2-26
Older Children . . . . . . . . . . . . . . . . . . . . . . . . . . . . . . . . . 2-26
Infants and Young Children . . . . . . . . . . . . . . . . . . . . 2-29
Child Restraint Systems . . . . . . . . . . . . . . . . . . . . . . . 2-33 Lower Anchors and Tethers for Children
(LATCH) (Coupe and Convertible
Models Only) . . . . . . . . . . . . . . . . . . . . . . . . . . . . . . . . 2-35
Lower Anchors and Tethers for Children (LATCH) (Z06 and ZR1 Models Only) . . . . . . . . 2-36
Securing a Child Restraint in the Right Front Seat Position . . . . . . . . . . . . . . . . . . . . . . . . . . . . . . . . 2-40
Airbag System . . . . . . . . . . . . . . . . . . . . . . . . . . . . . . . . . . . . 2-44
Where Are the Airbags? . . . . . . . . . . . . . . . . . . . . . . . 2-46
When Should an Airbag Inflate? . . . . . . . . . . . . . . . 2-48
What Makes an Airbag Inflate? . . . . . . . . . . . . . . . . 2-50
How Does an Airbag Restrain? . . . . . . . . . . . . . . . . 2-50
What Will You See After an Airbag Inflates? . . . 2-51
Passenger Sensing System . . . . . . . . . . . . . . . . . . . 2-53
Servicing Your Airbag-Equipped Vehicle . . . . . . . 2-58
Adding Equipment to Your Airbag-Equipped Vehicle . . . . . . . . . . . . . . . . . . . . . . . . . . . . . . . . . . . . . . 2-59
Restraint System Check . . . . . . . . . . . . . . . . . . . . . . . . . 2-60
Checking the Restraint Systems . . . . . . . . . . . . . . . 2-60
Replacing Restraint System Parts After a Crash . . . . . . . . . . . . . . . . . . . . . . . . . . . . . . . . . . . . . . . . 2-61
2-1
Page 36 of 472
Front Seats
Manual Seats
{WARNING:
You can lose control of the vehicle if you try to
adjust a manual driver's seat while the vehicle is
moving. The sudden movement could startle and
confuse you, or make you push a pedal when you
do not want to. Adjust the driver's seat only when
the vehicle is not moving. If the vehicle has a manual seat, it can be moved
forward or rearward.
1. Lift the bar to
unlock the seat.
2. Slide the seat to the desired position and
release the bar.
Try to move the seat with your body to be sure the seat
is locked in place.
2-2
Page 37 of 472
Power Seats
On vehicles with power seats:
.Move the control forward or rearward to adjust the
seat location.
.Move the front or rear of the control up or down to
adjust the seat cushion height.
Your seat position can be stored and recalled if you
have the memory option. See Memory Seat, Mirrors and
Steering Wheel on page 2‑4.
Power Lumbar and Side Bolsters
On vehicles with power lumbar and side bolsters:
Move (A) forward or rearward to adjust lumbar support.
Move (B) up or down to adjust the side bolsters.
2-3