2010 CHEVROLET CORVETTE language
[x] Cancel search: languagePage 26 of 472
TRIP :Press to display your total and trip distance
driven, the elapsed time function, your average speed,
and the engine oil life.
OPTION : Press to choose personal options that are
available on your vehicle, depending on the options
your vehicle is equipped with, such as door locks, easy
entry seats, and language.
RESET : Press, along with the other buttons, to reset
system functions, select personal options, and turn off
or acknowledge messages on the DIC.
For more information, see Driver Information Center
(DIC) on page 4‑47.
Vehicle Personalization
Some vehicle features can be programmed by using
the DIC buttons on the left side of the steering wheel.
The features that can be programmed include:
.Units
.Memory Features
.Lighting Features
.Lock and Unlock Feedback
.Door Lock and Unlock Settings
.Language
.Personalization Name
See DIC Vehicle Personalization on page 4‑71.
Cruise Control
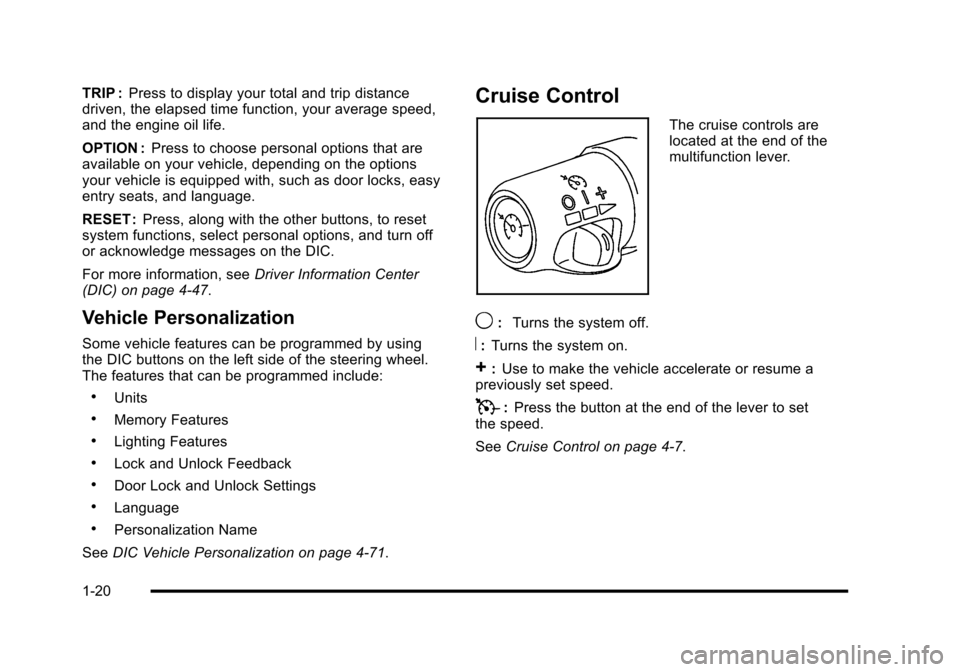
The cruise controls are
located at the end of the
multifunction lever.
9: Turns the system off.
R:Turns the system on.
+:Use to make the vehicle accelerate or resume a
previously set speed.
T: Press the button at the end of the lever to set
the speed.
See Cruise Control on page 4‑7.
1-20
Page 187 of 472
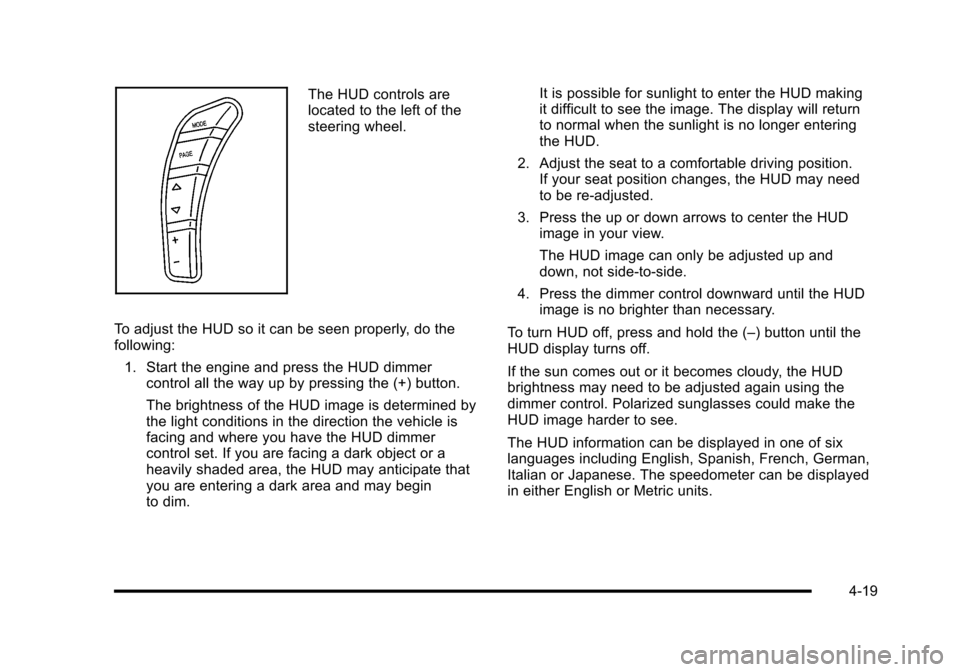
The HUD controls are
located to the left of the
steering wheel.
To adjust the HUD so it can be seen properly, do the
following: 1. Start the engine and press the HUD dimmer control all the way up by pressing the (+) button.
The brightness of the HUD image is determined by
the light conditions in the direction the vehicle is
facing and where you have the HUD dimmer
control set. If you are facing a dark object or a
heavily shaded area, the HUD may anticipate that
you are entering a dark area and may begin
to dim. It is possible for sunlight to enter the HUD making
it difficult to see the image. The display will return
to normal when the sunlight is no longer entering
the HUD.
2. Adjust the seat to a comfortable driving position. If your seat position changes, the HUD may need
to be re-adjusted.
3. Press the up or down arrows to center the HUD image in your view.
The HUD image can only be adjusted up and
down, not side-to-side.
4. Press the dimmer control downward until the HUD image is no brighter than necessary.
To turn HUD off, press and hold the (–) button until the
HUD display turns off.
If the sun comes out or it becomes cloudy, the HUD
brightness may need to be adjusted again using the
dimmer control. Polarized sunglasses could make the
HUD image harder to see.
The HUD information can be displayed in one of six
languages including English, Spanish, French, German,
Italian or Japanese. The speedometer can be displayed
in either English or Metric units.
4-19
Page 188 of 472
To change the language and unit selections, see
“OPTION” underDIC Operation and Displayson
page 4‑47.
Clean the inside of the windshield as needed to remove
any dirt or film that reduces the sharpness or clarity of
the HUD image.
To clean the HUD, spray household glass cleaner on a
soft, clean cloth. Wipe the HUD lens gently, then dry it.
Do not spray cleaner directly on the lens because the
cleaner could leak into the unit.
If the ignition is on and the HUD image cannot be seen,
check to see if:
.Something is covering the HUD unit.
.The HUD dimmer control is adjusted properly.
.The HUD image is adjusted to the proper height.
.Ambient light is low, in the direction the vehicle is
facing.
.A fuse is blown. See Fuses and Circuit Breakerson page 6‑101.
Keep in mind that the windshield is part of the HUD
system. See Windshield Replacement on page 6‑59.
Accessory Power Outlet(s)
The accessory power outlet can be used to connect
electrical equipment, such as a cellular phone.
The accessory power outlet is located inside the center
console storage compartment, on the forward left side.
To use the outlet, remove the tethered cap. When not
using it, always cover the outlet with the protective cap.
Notice: Leaving electrical equipment plugged in for
an extended period of time while the vehicle is off
will drain the battery. Power is always supplied to
the outlets. Always unplug electrical equipment
when not in use and do not plug in equipment that
exceeds the maximum 20 ampere rating.
Certain electrical accessories may not be compatible
with the accessory power outlet and could result in
blown vehicle or adapter fuses. If you experience
a problem, see your dealer/retailer for additional
information on accessory power outlets.
4-20
Page 216 of 472
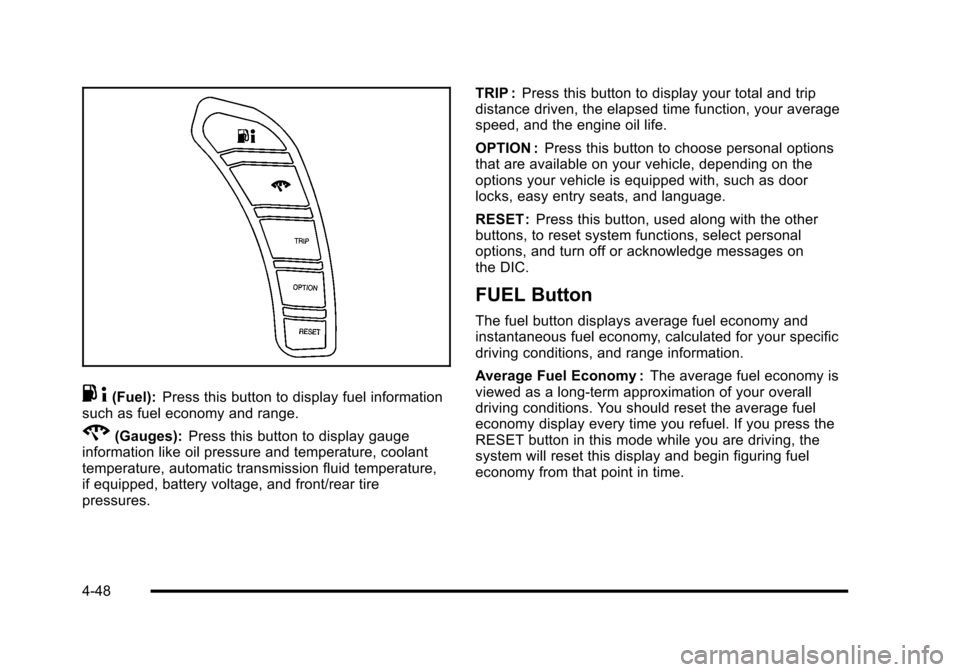
.4(Fuel): Press this button to display fuel information
such as fuel economy and range.
2(Gauges): Press this button to display gauge
information like oil pressure and temperature, coolant
temperature, automatic transmission fluid temperature,
if equipped, battery voltage, and front/rear tire
pressures. TRIP :
Press this button to display your total and trip
distance driven, the elapsed time function, your average
speed, and the engine oil life.
OPTION : Press this button to choose personal options
that are available on your vehicle, depending on the
options your vehicle is equipped with, such as door
locks, easy entry seats, and language.
RESET : Press this button, used along with the other
buttons, to reset system functions, select personal
options, and turn off or acknowledge messages on
the DIC.
FUEL Button
The fuel button displays average fuel economy and
instantaneous fuel economy, calculated for your specific
driving conditions, and range information.
Average Fuel Economy : The average fuel economy is
viewed as a long-term approximation of your overall
driving conditions. You should reset the average fuel
economy display every time you refuel. If you press the
RESET button in this mode while you are driving, the
system will reset this display and begin figuring fuel
economy from that point in time.
4-48
Page 246 of 472
When the mode you want is selected, press the
OPTION button to set your choice and advance to the
next personal option.
Language : This option allows you to select the
language the DIC, the Head-Up Display (HUD), if your
vehicle has this feature, and the radio uses to display
messages. Each language mode will be displayed in its
own language. For example, English will be displayed
as ENGLISH, Spanish as ESPANOL, etc. If your vehicle
has the navigation system, you will not have the
Japanese language mode.
Press the OPTION button until LANGUAGE appears on
the display, then press the RESET button to scroll
through the following modes:
.ENGLISH (default)
.DEUTSCH (German)
.FRANCAIS (French)
.ITALIANO (Italian)
.ESPANOL (Spanish)
If you choose a language that you do not understand,
press the OPTION and RESET buttons for
five seconds. The DIC will begin displaying all of the
various languages one by one for as long as the
buttons are pressed. When the desired language is
displayed, release the buttons and the DIC will set to
this language. When the mode you want is selected, press the
OPTION button to set your choice and advance
to the next personal option.
Personalize Name :
This option allows you to type
in a name or greeting that will appear on the DIC
display whenever the corresponding keyless access
transmitter (1 or 2) is used or one of the memory
buttons (1 or 2) located on the driver's door is pressed.
Press the OPTION button until PERSONALIZE NAME
appears on the display, then press the RESET button to
scroll through the following modes:
.YES
.NO (default)
If you choose YES, you can type in a name that will
appear on the DIC display.
To program a name, use the following procedure: 1. Enter the PERSONAL OPTIONS menu and select the driver number (1 or 2) that you would like to
program by following the instructions listed
previously under “Entering the Personal
Options Menu”.
2. Press the OPTION button until the PERSONALIZE NAME option appears on the display.
3. Select YES under PERSONALIZE NAME by pressing the RESET button.
4-78
Page 263 of 472
XM Radio Messages
XL (Explicit Language Channels) :These
channels, or any others, can be blocked by calling
1-800-852-XMXM (9696).
Updating : The encryption code in the receiver is being
updated, and no action is required. This process should
take no longer than 30 seconds.
No Signal : The system is functioning correctly, but the
vehicle is in a location that is blocking the XM signal.
When the vehicle is moved into an open area, the
signal should return.
Loading XM : The audio system is acquiring and
processing audio and text data. No action is needed.
This message should disappear shortly.
CH Off Air : This channel is not currently in service.
Tune in to another channel.
CH Unauth : This channel is blocked or cannot be
received with your XM Subscription package.
CH Unavail : This previously assigned channel is no
longer assigned. Tune to another station. If this station
was one of the presets, choose another station for that
preset button. No Info :
No artist, song title, category, or text
information is available at this time on this channel.
The system is working properly.
Not Found : There are no channels available for the
selected category. The system is working properly.
XM Locked : The XM receiver in the vehicle may
have previously been in another vehicle. For security
purposes, XM receivers cannot be swapped between
vehicles. If this message is received after having the
vehicle serviced, check with your dealer/retailer.
Radio ID : If tuned to channel 0, this message will
alternate with the XM Radio 8 digit radio ID label.
This label is needed to activate the service.
Unknown : If this message is received when tuned to
channel 0, there may be a receiver fault. Consult with
your dealer/retailer.
Chk XMRcvr : If this message does not clear within a
short period of time, the receiver may have a fault.
Consult with your dealer/retailer.
4-95