2010 CHEVROLET CORVETTE light
[x] Cancel search: lightPage 139 of 472
Universal Home Remote System
Operation
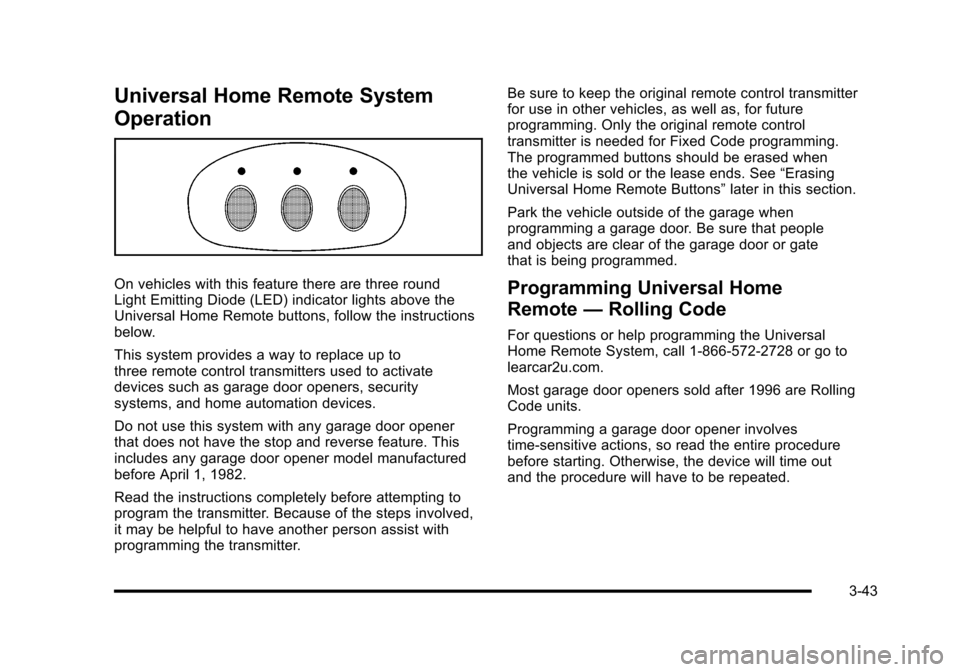
On vehicles with this feature there are three round
Light Emitting Diode (LED) indicator lights above the
Universal Home Remote buttons, follow the instructions
below.
This system provides a way to replace up to
three remote control transmitters used to activate
devices such as garage door openers, security
systems, and home automation devices.
Do not use this system with any garage door opener
that does not have the stop and reverse feature. This
includes any garage door opener model manufactured
before April 1, 1982.
Read the instructions completely before attempting to
program the transmitter. Because of the steps involved,
it may be helpful to have another person assist with
programming the transmitter. Be sure to keep the original remote control transmitter
for use in other vehicles, as well as, for future
programming. Only the original remote control
transmitter is needed for Fixed Code programming.
The programmed buttons should be erased when
the vehicle is sold or the lease ends. See
“Erasing
Universal Home Remote Buttons” later in this section.
Park the vehicle outside of the garage when
programming a garage door. Be sure that people
and objects are clear of the garage door or gate
that is being programmed.Programming Universal Home
Remote —Rolling Code
For questions or help programming the Universal
Home Remote System, call 1-866-572-2728 or go to
learcar2u.com.
Most garage door openers sold after 1996 are Rolling
Code units.
Programming a garage door opener involves
time-sensitive actions, so read the entire procedure
before starting. Otherwise, the device will time out
and the procedure will have to be repeated.
3-43
Page 141 of 472
4. Immediately return to the vehicle. Press and hold the Universal Home Remote button that will be
used to control the garage door until the garage
door moves. The indicator light, above the selected
button, should slowly blink. This button may need
to be held for up to 20 seconds.
5. Immediately, within one second, release the button when the garage door moves. The indicator light
blinks rapidly until programming is complete.
6. Press and release the same button again. The garage door should move, confirming that
programming is successful and complete.
To program another Rolling Code device such as an
additional garage door opener, a security device,
or home automation device, repeat Steps 1-6, choosing
a different function button in Step 4 than what was used
for the garage door opener.
If these instructions do not work, the garage door
opener is probably a Fixed Code unit. Follow the
Programming instructions that follow for a Fixed Code
garage door opener.Programming Universal Home
Remote —Fixed Code
For questions or help programming the Universal
Home Remote System, call 1-866-572-2728 or go to
learcar2u.com.
Most garage door openers sold before 1996 are Fixed
Code units.
Programming a garage door opener involves
time-sensitive actions, so read the entire procedure
before starting. Otherwise, the device will time out and
the procedure will have to be repeated.
To program up to three devices:
1. Press START or put the vehicle in accessory mode. See Ignition Positions
on page 3‑23for
additional information.
Programming can only occur when the vehicle is
running or in accessory mode.
3-45
Page 144 of 472
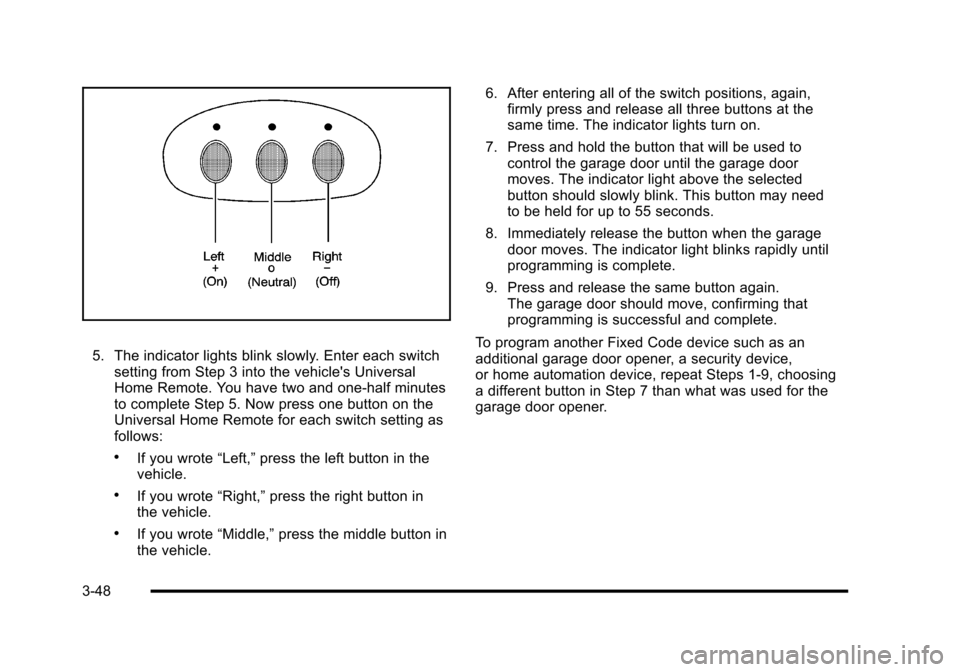
5. The indicator lights blink slowly. Enter each switch setting from Step 3 into the vehicle's Universal
Home Remote. You have two and one-half minutes
to complete Step 5. Now press one button on the
Universal Home Remote for each switch setting as
follows:
.If you wrote “Left,”press the left button in the
vehicle.
.If you wrote “Right,”press the right button in
the vehicle.
.If you wrote “Middle,”press the middle button in
the vehicle. 6. After entering all of the switch positions, again,
firmly press and release all three buttons at the
same time. The indicator lights turn on.
7. Press and hold the button that will be used to control the garage door until the garage door
moves. The indicator light above the selected
button should slowly blink. This button may need
to be held for up to 55 seconds.
8. Immediately release the button when the garage door moves. The indicator light blinks rapidly until
programming is complete.
9. Press and release the same button again. The garage door should move, confirming that
programming is successful and complete.
To program another Fixed Code device such as an
additional garage door opener, a security device,
or home automation device, repeat Steps 1-9, choosing
a different button in Step 7 than what was used for the
garage door opener.
3-48
Page 145 of 472
Using Universal Home Remote
Press and hold the appropriate button for at least
half of a second. The indicator light comes on while
the signal is being transmitted.
Operation can occur:
.If the vehicle is in accessory mode.
.If the vehicle is in running.
.If the vehicle is in Retained Accessory Mode
(RAP). See Retained Accessory Power (RAP)on
page 3‑24for more information.
.Up to an additional 10 minutes after RAP finishes.
.Up to 10 minutes after any door is opened.
Reprogramming Universal Home
Remote Buttons
Any of the three buttons can be reprogrammed by
repeating the instructions.
Erasing Universal Home Remote
Buttons
The programmed buttons should be erased when the
vehicle is sold or the lease ends.
To erase either Rolling Code or Fixed Code on the
Universal Home Remote device:
1. Press and hold the two outside buttons at the same time for approximately 20 seconds, until the
indicator lights, located directly above the buttons,
begin to blink rapidly.
2. Once the indicator lights begin to blink, release both buttons. The codes from all buttons are
erased.
For help or information on the Universal Home Remote
System, call the customer assistance phone number
under Customer Assistance Offices on page 8‑6.
3-49
Page 146 of 472
Storage Areas
Glove Box
Open the glove box by lifting up on the lever. Use the
key to lock and unlock the lighted glove box.
Cupholders
Two cupholders are located on the center console next
to the shift lever. Slide the handle from the left to the
right side to access the lid.
Center Console Storage
To use this storage area, pull the cover up on the
driver side front edge of the console and swing it to
the passenger side.
Floor Mats
The floor mats are specially designed to remain in
position under your feet and out of reach of the
accelerator pedal. The driver's side floor mat is held
in place by two locator hooks and the passenger's
side is held in place by one.
Be sure that the driver's side floor mat is properly
placed on the floor so that it does not block the
movement of the accelerator pedal.
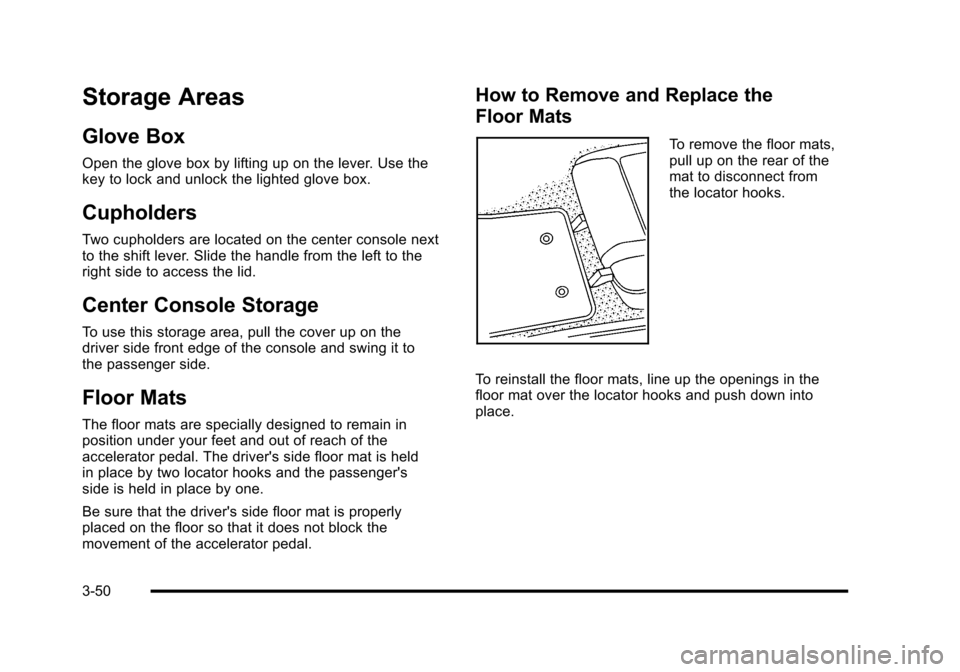
How to Remove and Replace the
Floor Mats
To remove the floor mats,
pull up on the rear of the
mat to disconnect from
the locator hooks.
To reinstall the floor mats, line up the openings in the
floor mat over the locator hooks and push down into
place.
3-50
Page 161 of 472

6. Pull the convertible top up by firmly gripping the front edge (A) near the center and applying a brisk
upward and forward motion to get the top in the
full-up position. 7. Lift the rear edge (B) of the convertible top to its full-up position by first raising the front edge (A).
8. Close the tonneau cover (C) by pushing it down with a swift, firm motion.
9. Lower the rear edge (B) of the convertible top by first slightly pushing the front edge (A) of the
convertible top forward.
10. Push the front edge (A) of the convertible top down from the outside of the vehicle, or pull the front
edge (A) of the convertible top down from the
center pull-down handle located in the inside of
the vehicle.
3-65
Page 169 of 472

Section 4 Instrument Panel
Instrument Panel Overview. . . . . . . . . . . . . . . . . . . . . . . . 4-3
Hazard Warning Flashers . . . . . . . . . . . . . . . . . . . . . . . 4-3
Horn . . . . . . . . . . . . . . . . . . . . . . . . . . . . . . . . . . . . . . . . . . . . 4-3
Tilt Wheel . . . . . . . . . . . . . . . . . . . . . . . . . . . . . . . . . . . . . . . 4-3
Turn Signal/Multifunction Lever . . . . . . . . . . . . . . . . . . 4-4
Turn and Lane-Change Signals (Auto Signal) . . . 4-5
Headlamp High/Low-Beam Changer . . . . . . . . . . . . 4-5
Flash-to-Pass . . . . . . . . . . . . . . . . . . . . . . . . . . . . . . . . . . . 4-5
Windshield Wipers . . . . . . . . . . . . . . . . . . . . . . . . . . . . . . 4-6
Windshield Washer . . . . . . . . . . . . . . . . . . . . . . . . . . . . . 4-6
Cruise Control . . . . . . . . . . . . . . . . . . . . . . . . . . . . . . . . . . 4-7
Exterior Lamps . . . . . . . . . . . . . . . . . . . . . . . . . . . . . . . . . 4-11
Wiper Activated Headlamps . . . . . . . . . . . . . . . . . . . 4-12
Headlamps on Reminder . . . . . . . . . . . . . . . . . . . . . . 4-12
Daytime Running Lamps (DRL) . . . . . . . . . . . . . . . . 4-12
Fog Lamps . . . . . . . . . . . . . . . . . . . . . . . . . . . . . . . . . . . . 4-13
Twilight Sentinel
®. . . . . . . . . . . . . . . . . . . . . . . . . . . . . . 4-14
Exterior Lighting Battery Saver . . . . . . . . . . . . . . . . . 4-15
Instrument Panel Brightness . . . . . . . . . . . . . . . . . . . 4-15
Courtesy Lamps . . . . . . . . . . . . . . . . . . . . . . . . . . . . . . . 4-15
Entry/Exit Lighting . . . . . . . . . . . . . . . . . . . . . . . . . . . . . 4-15
Reading Lamps . . . . . . . . . . . . . . . . . . . . . . . . . . . . . . . . 4-15
Battery Run-Down Protection . . . . . . . . . . . . . . . . . . 4-16
Head-Up Display (HUD) . . . . . . . . . . . . . . . . . . . . . . . 4-16
Accessory Power Outlet(s) . . . . . . . . . . . . . . . . . . . . . 4-20
Ashtray(s) and Cigarette Lighter . . . . . . . . . . . . . . . 4-21 Climate Controls
. . . . . . . . . . . . . . . . . . . . . . . . . . . . . . . . . . 4-22
Dual Automatic Climate Control System . . . . . . . 4-22
Outlet Adjustment . . . . . . . . . . . . . . . . . . . . . . . . . . . . . . 4-27
Passenger Compartment Air Filter . . . . . . . . . . . . . 4-28
Warning Lights, Gauges, and Indicators . . . . . . . . 4-29
Instrument Panel Cluster . . . . . . . . . . . . . . . . . . . . . . . 4-30
Speedometer and Odometer . . . . . . . . . . . . . . . . . . . 4-32
Tachometer . . . . . . . . . . . . . . . . . . . . . . . . . . . . . . . . . . . . 4-32
Safety Belt Reminders . . . . . . . . . . . . . . . . . . . . . . . . . 4-32
Airbag Readiness Light . . . . . . . . . . . . . . . . . . . . . . . . 4-33
Passenger Airbag Status Indicator . . . . . . . . . . . . . 4-34
Voltmeter Gauge . . . . . . . . . . . . . . . . . . . . . . . . . . . . . . . 4-35
One-to-Four Shift Light (Manual Transmission) . . . . . . . . . . . . . . . . . . . . . . . . . . . . . . . 4-36
Brake System Warning Light . . . . . . . . . . . . . . . . . . . 4-36
Antilock Brake System (ABS) Warning Light . . . . . . . . . . . . . . . . . . . . . . . . . . . . . . . 4-37
Traction Control System (TCS) Warning Light . . . . . . . . . . . . . . . . . . . . . . . . . . . . . . . . 4-38
Active Handling System Light . . . . . . . . . . . . . . . . . . 4-39
Engine Coolant Temperature Gauge . . . . . . . . . . . 4-40
Tire Pressure Light . . . . . . . . . . . . . . . . . . . . . . . . . . . . 4-40
Malfunction Indicator Lamp . . . . . . . . . . . . . . . . . . . . 4-41
Engine Oil Pressure Gauge . . . . . . . . . . . . . . . . . . . . 4-44
Security Light . . . . . . . . . . . . . . . . . . . . . . . . . . . . . . . . . . 4-45
4-1
Page 170 of 472

Section 4 Instrument Panel
Fog Lamp Light . . . . . . . . . . . . . . . . . . . . . . . . . . . . . . . . 4-45
Lights On Reminder . . . . . . . . . . . . . . . . . . . . . . . . . . . 4-45
Highbeam On Light . . . . . . . . . . . . . . . . . . . . . . . . . . . . 4-45
Fuel Gauge . . . . . . . . . . . . . . . . . . . . . . . . . . . . . . . . . . . . 4-46
Boost Gauge (ZR1 Only) . . . . . . . . . . . . . . . . . . . . . . 4-47
Driver Information Center (DIC) . . . . . . . . . . . . . . . . . . 4-47
DIC Operation and Displays . . . . . . . . . . . . . . . . . . . 4-47
DIC Warnings and Messages . . . . . . . . . . . . . . . . . . 4-52
Other Messages . . . . . . . . . . . . . . . . . . . . . . . . . . . . . . . 4-70
DIC Vehicle Personalization . . . . . . . . . . . . . . . . . . . 4-71 Audio System(s)
. . . . . . . . . . . . . . . . . . . . . . . . . . . . . . . . . . 4-80
Setting the Clock . . . . . . . . . . . . . . . . . . . . . . . . . . . . . . 4-80
Radio(s) . . . . . . . . . . . . . . . . . . . . . . . . . . . . . . . . . . . . . . . 4-81
Using an MP3 . . . . . . . . . . . . . . . . . . . . . . . . . . . . . . . . . 4-92
XM Radio Messages . . . . . . . . . . . . . . . . . . . . . . . . . . . 4-95
Navigation/Radio System . . . . . . . . . . . . . . . . . . . . . . 4-96
Bluetooth
®. . . . . . . . . . . . . . . . . . . . . . . . . . . . . . . . . . . . . 4-96
Theft-Deterrent Feature . . . . . . . . . . . . . . . . . . . . . . 4-106
Audio Steering Wheel Controls . . . . . . . . . . . . . . . 4-107
Radio Reception . . . . . . . . . . . . . . . . . . . . . . . . . . . . . . 4-108
Diversity Antenna System . . . . . . . . . . . . . . . . . . . . 4-109
XM™ Satellite Radio Antenna System . . . . . . . . 4-109
4-2